
1.Installing the client
For rpm based distributions (Fedora/RedHat) proceed to Step 1. For apt based distributions (Debian/Ubuntu/Mint) proceed to Step 2. Copy and paste the commands highlighted below into a terminal prompt. To access a terminal prompt follow these instructions:
In Fedora/RedHat
-
Click on the Activities menu in the upper-left. Now click on the Terminal icon in the side menu.
In Debian/Mint/Ubuntu
-
Press CTRL + ALT + T simultaneously OR open Applications & select Terminal Emulator.
In Fedora/RedHat using dnf
Step 1: Add the repository
Add the repository once:
sudo dnf config-manager addrepo --from-repofile=https://repo.getflotilla.org/rpm/flotilla.repo
Step 2: Install the package:
Run the command below.
sudo dnf install flotilla-rpm
Client updates will now happen alongside system updates. Proceed to Authorise your Device in Flotilla below.
In Debian/Ubuntu/Mint using APT
Step 1: Prepare apt
Apt needs to be prepared by downloading the GPG key and authorising. Run the command below:
curl -fsSL https://repo.getflotilla.org/flotilla.pubkey | sudo tee /etc/apt/trusted.gpg.d/flotilla.gpg >/dev/null
Step 2: Add the repository
Run the following command to add the Flotilla repository to apt.
echo "deb https://repo.getflotilla.org/apt $(lsb_release -cs) main" | sudo tee /etc/apt/sources.list.d/flotilla.list
Step 4: Install the client
Run the following three commands:
sudo apt update
sudo apt install flotilla-apt
sudo flotilla-apt --setup
Setup will now prompt you asking which server to report to, type the server address eg https://yourdomain created via Cloudformation (Deployment guide, step 4) and press enter.
Authorise your device in Flotilla
Authorise your machine in the Flotilla portal by first running:
flotilla-apt --cron or flotilla-apt -c

Browse to the url above (eg https://yourdomain) to access your Flotilla Management Portal and select your machine in the list of unauthenticated machines. Click on ‘Authenticate Selected’.
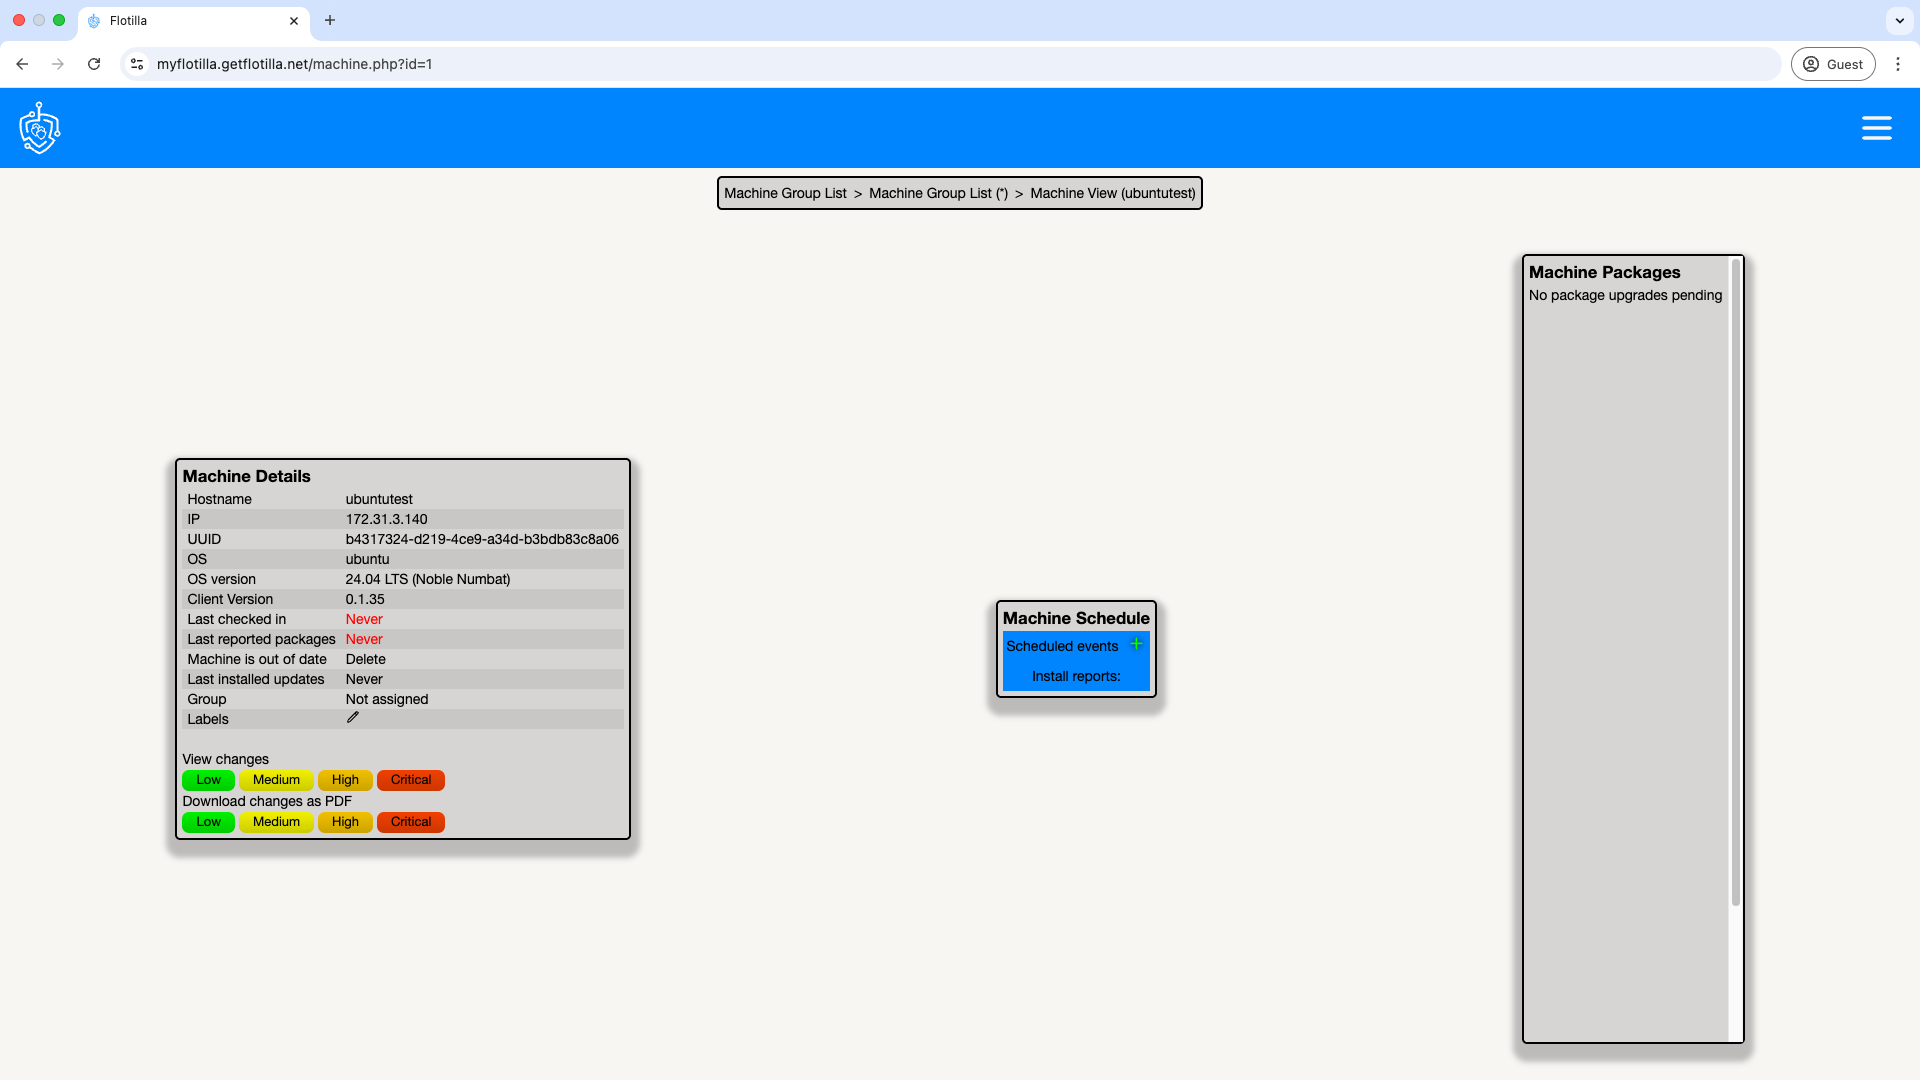
Your device will now appear in Flotilla under the machines tab on the left with the initial status as below:
2.Using the client
Default
By default the client will run every 20 minutes via the scheduling service cron. This will call in to the configured flotilla server to poll for any pending actions.
Manual
The following three command line switches are available to use with the flotilla-apt command in the terminal prompt.
Flotilla-apt
flotilla-apt
This command updates all sources, collates a full list of packages that can be upgraded and sends them to the flotilla server. This does not poll for any new actions and will send the new package data regardless of scheduled events.

Flotilla apt with the dryrun switch
flotilla-apt --dryrun or -d
This will update all sources, collates a full list of packages that can be upgraded but saves the resulting JSON data to /tmp/flotilla-apt-latest and closes. It will not call back to the server at all.

Flotilla apt with the setup switch
flotilla-apt --setup or -s
Will check /etc/apt-diff-client.conf exists and has a server set, if not it will ask the user for it.
Flotilla apt with the cron switch
flotilla-apt --cron or -c
Will call in to the flotilla server and poll for any pending actions. Will immediately action one, if any. If run as an unprivileged user, it may attempt to install packages and fail with a ‘Permission denied’ error. This is expected behaviour.
3.Creating Events
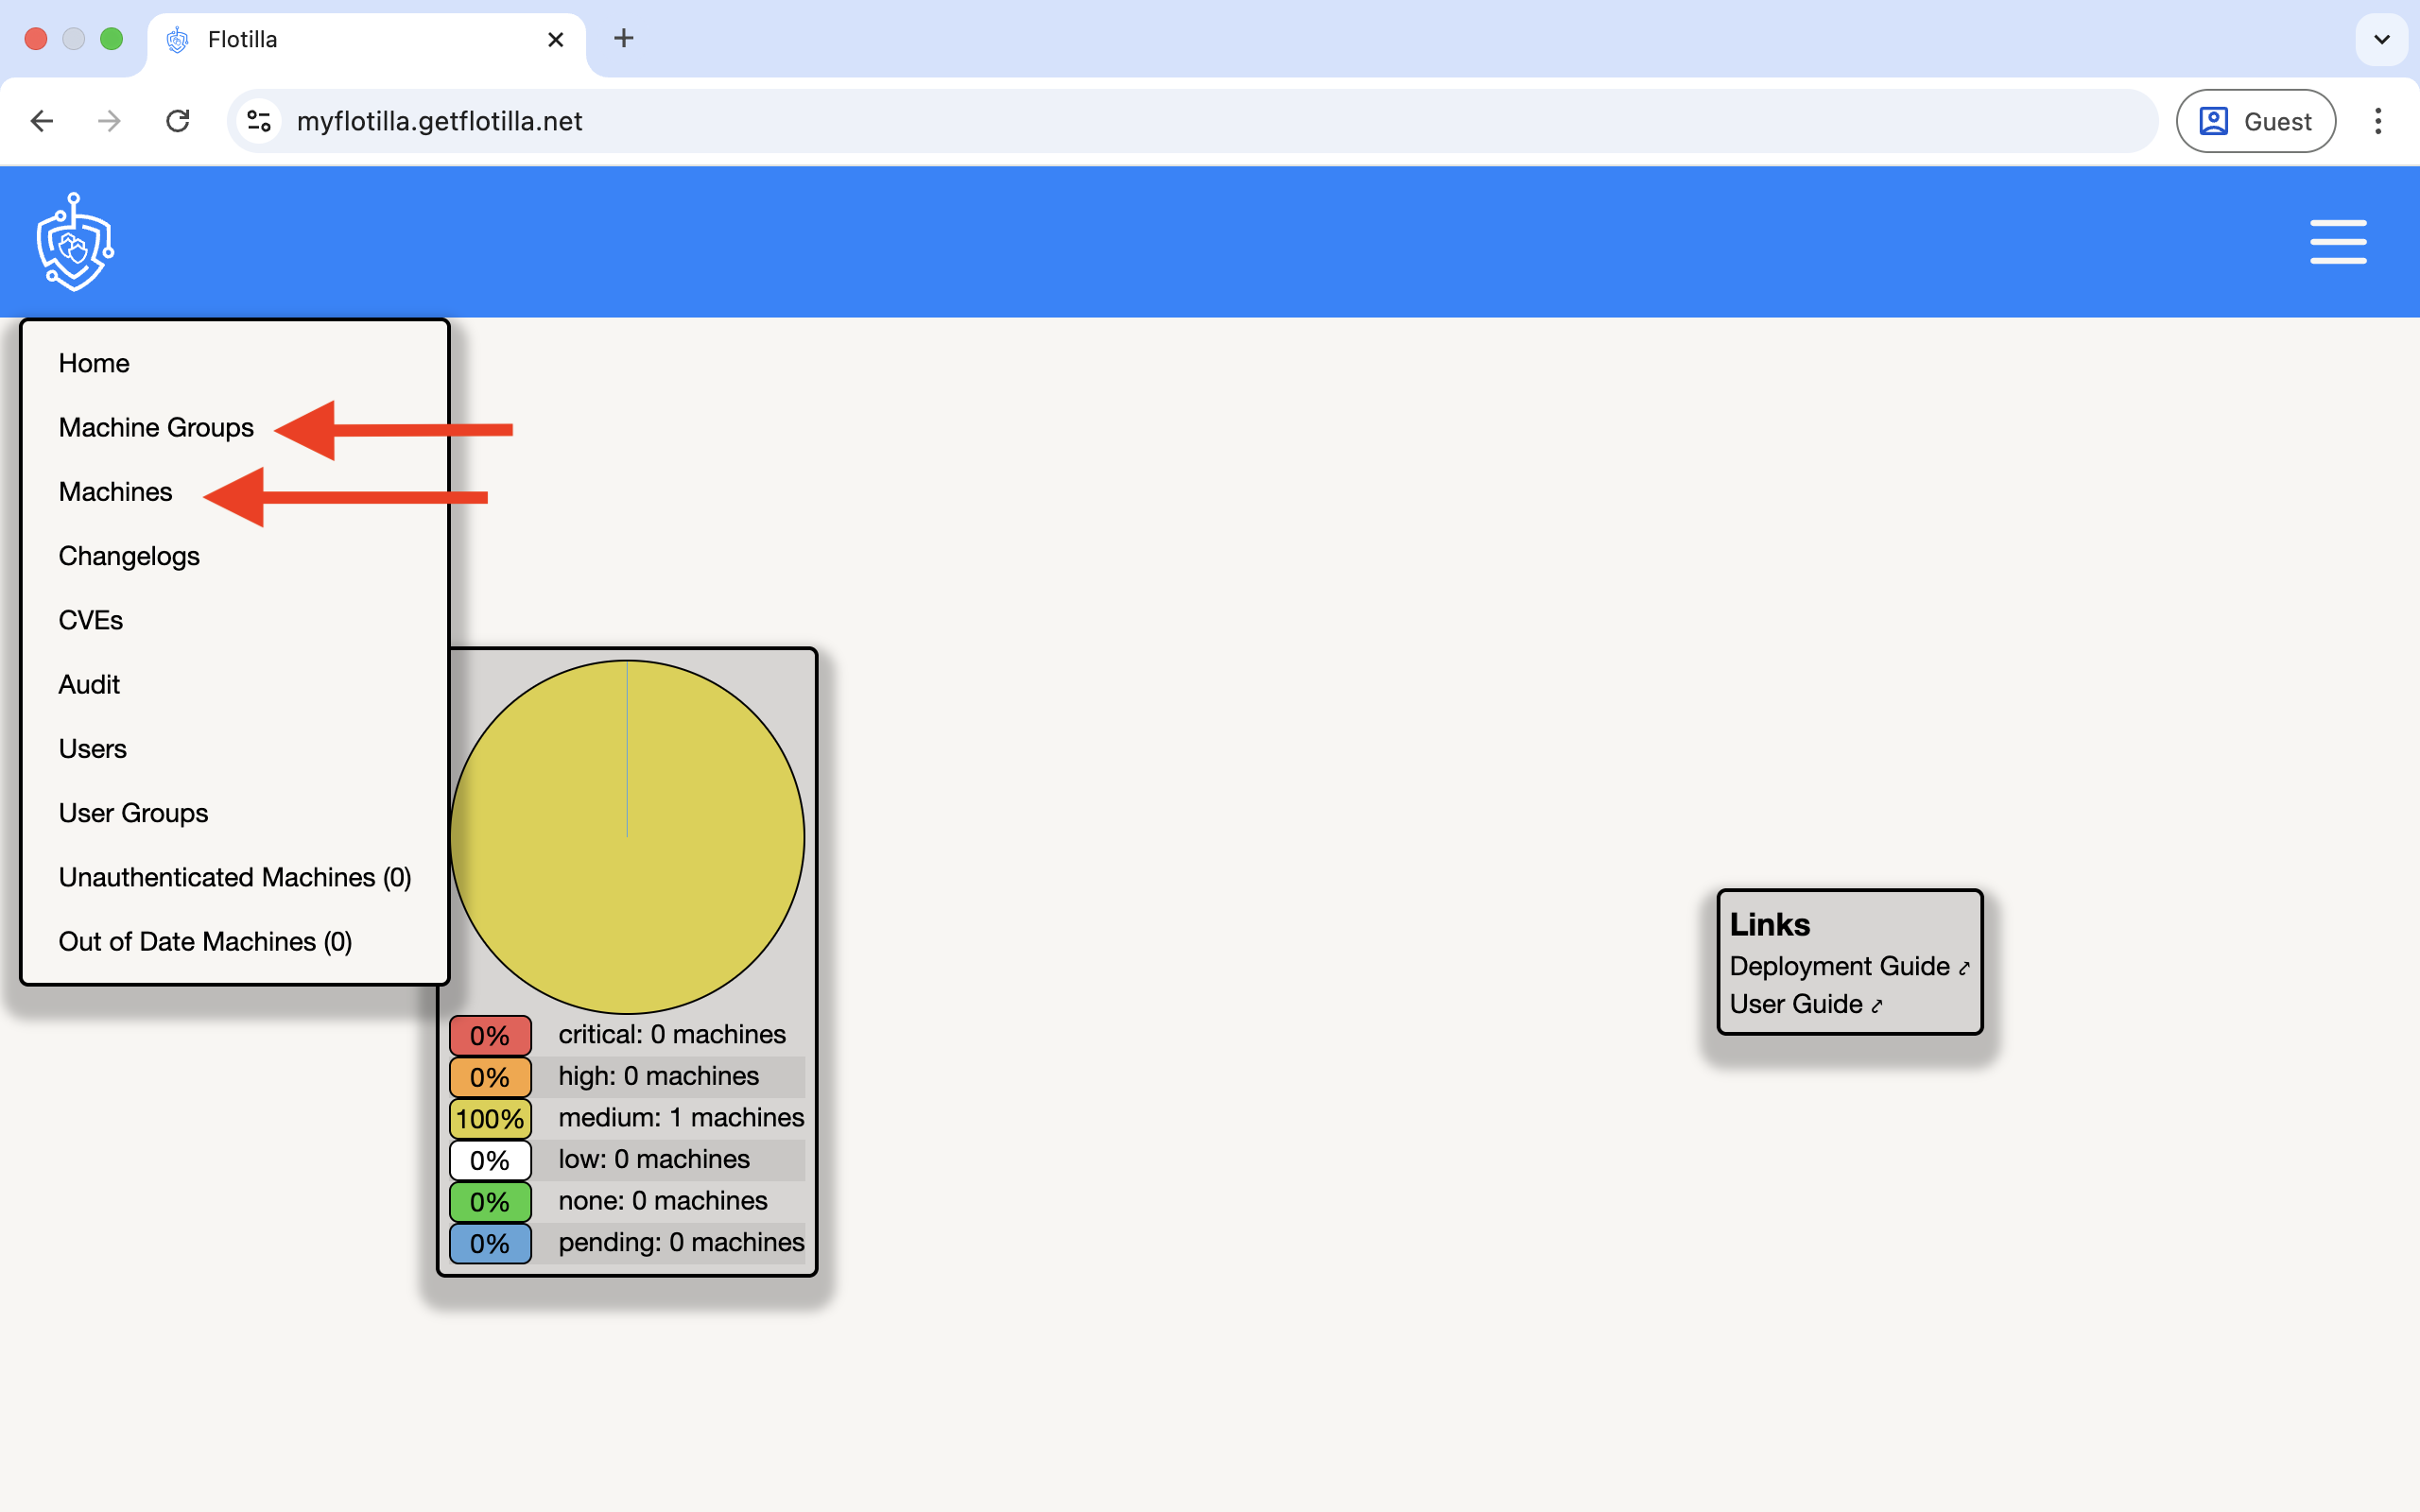
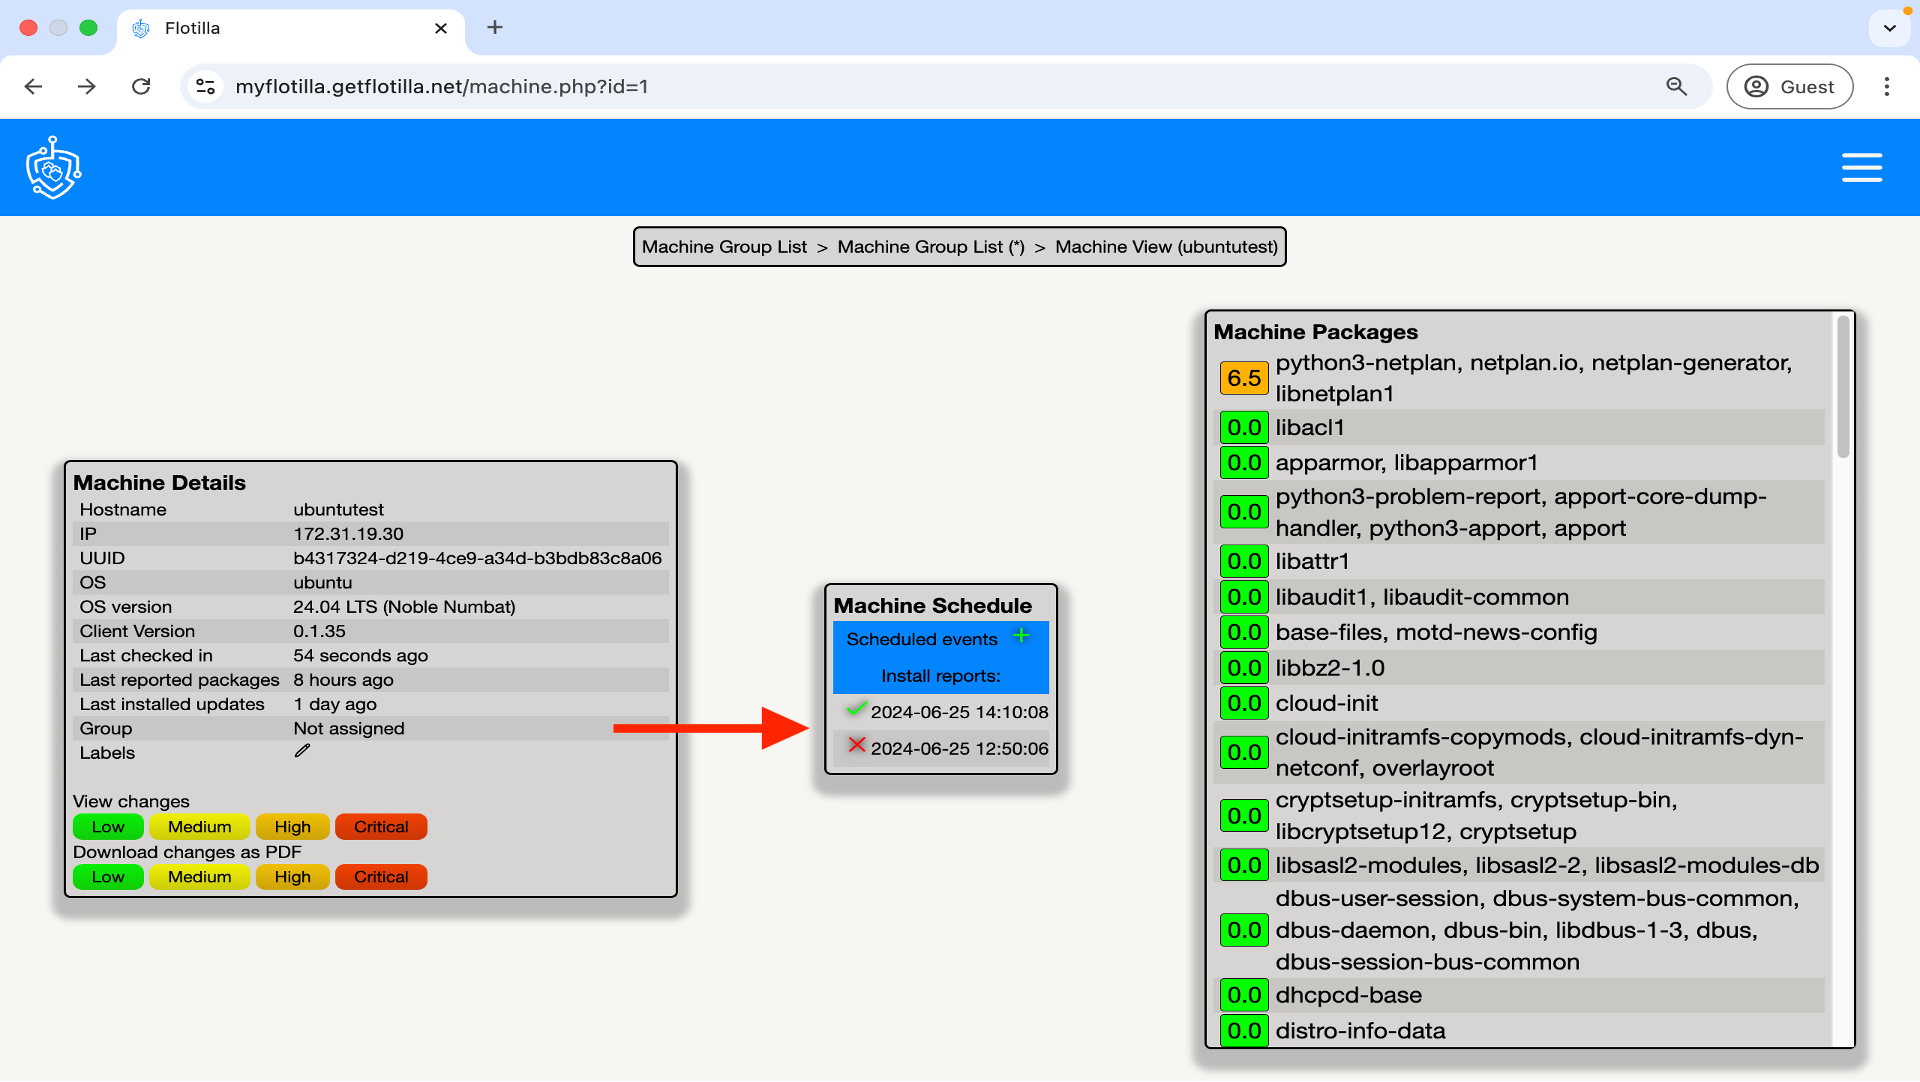
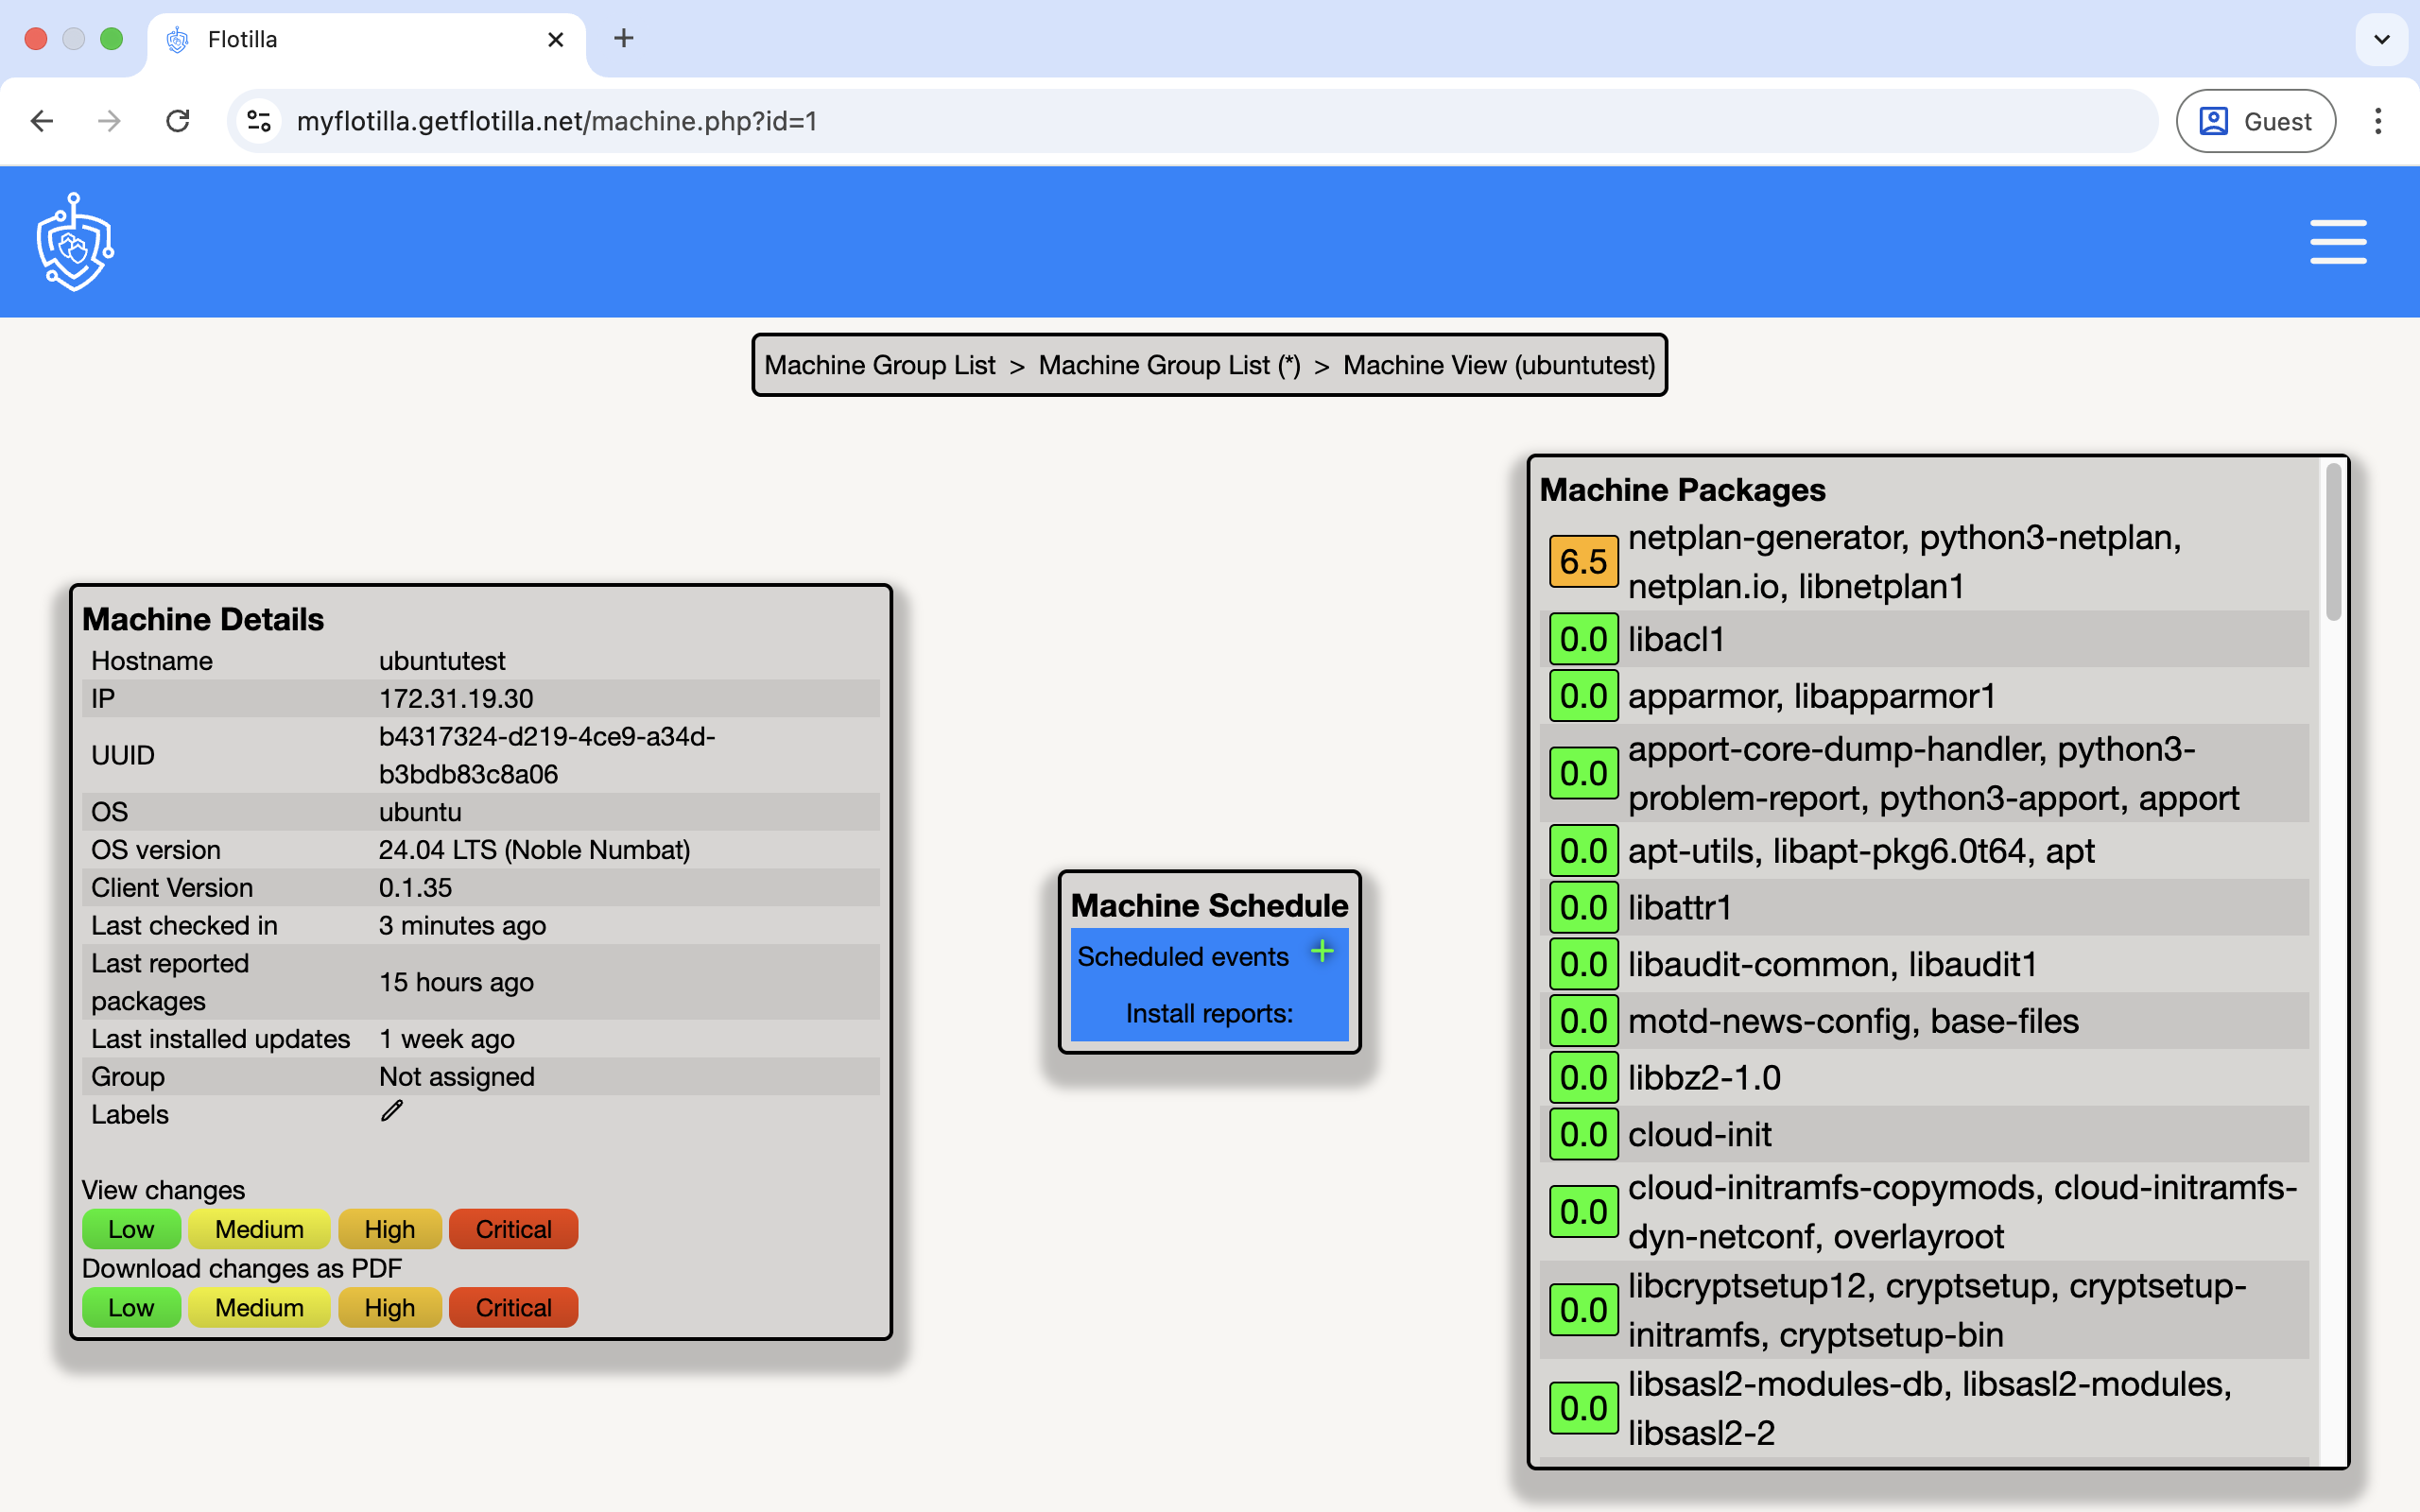
3 types of events can be created: Installs, Updates and Reports. First click on your machine in the Flotilla Management Portal via the Machines option or Machine Groups:
Installs
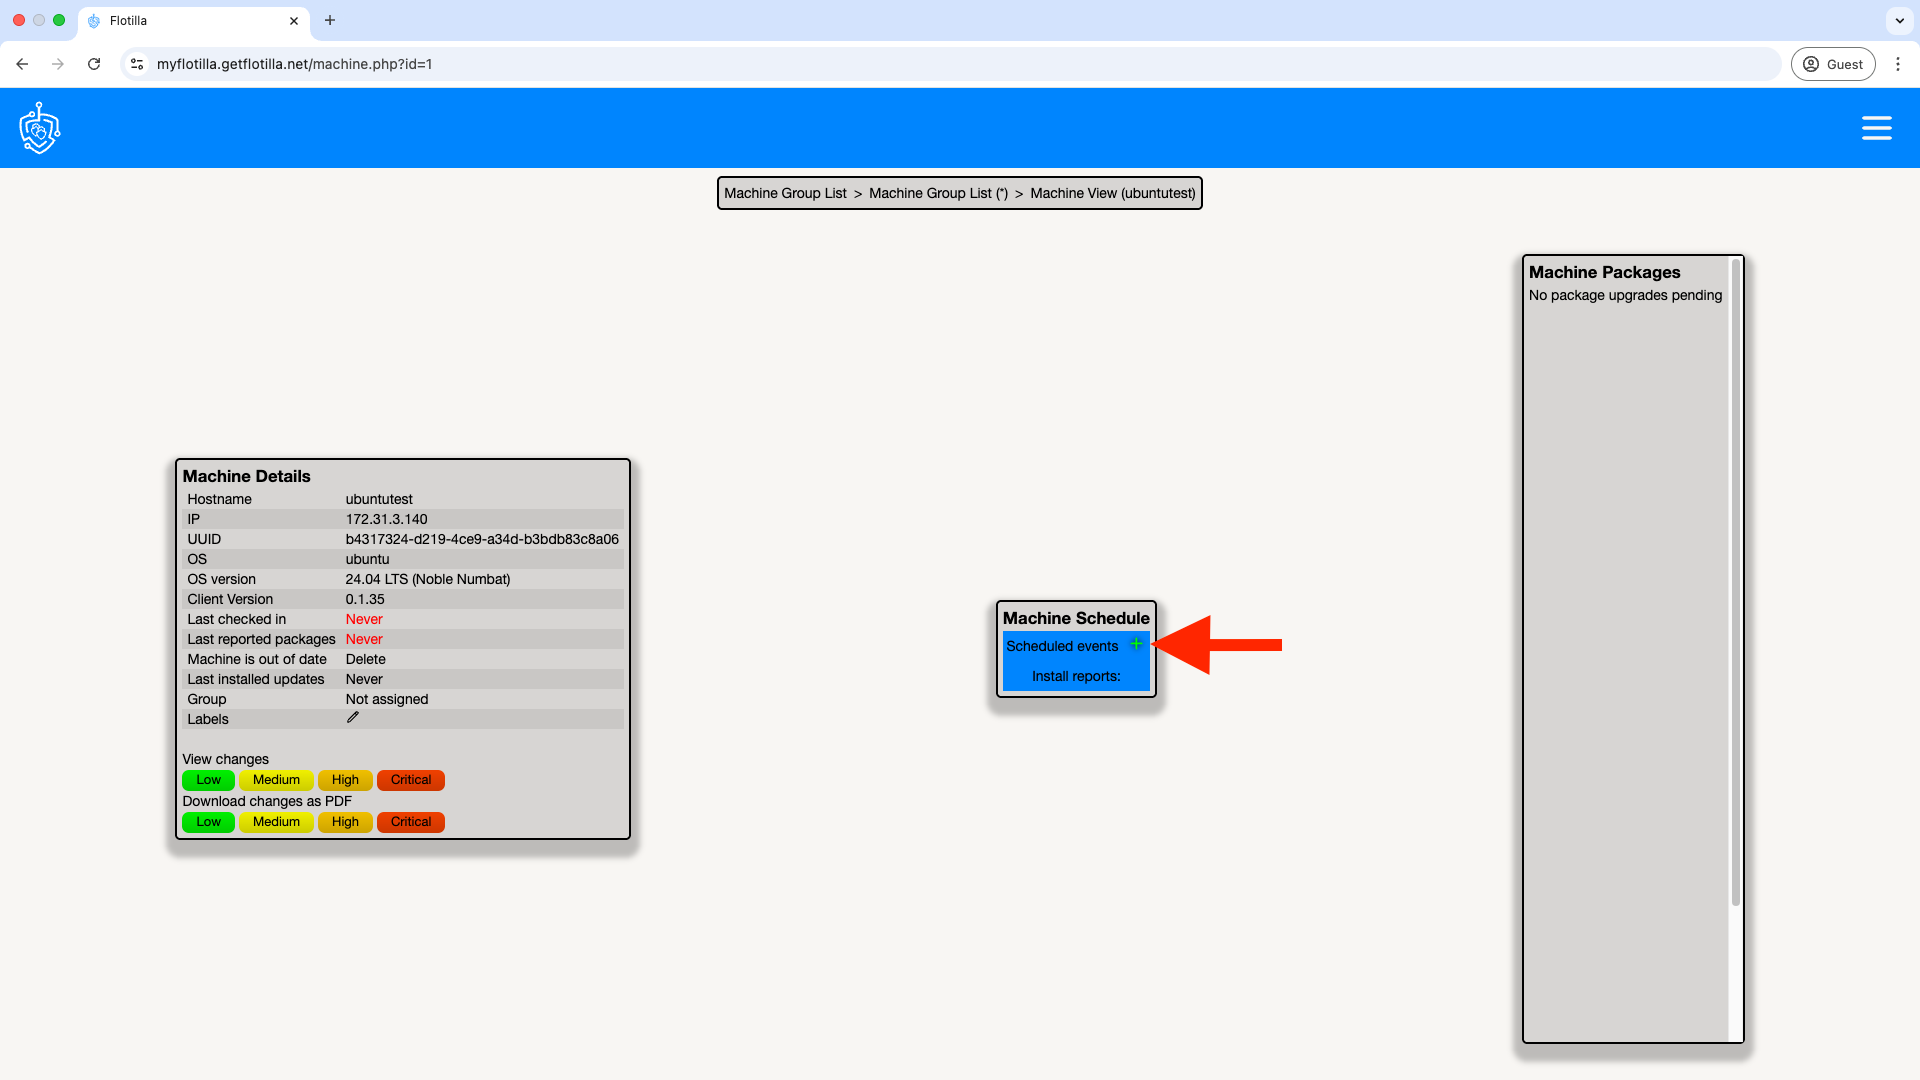
Create an event by clicking on ‘Scheduled Events’ as below:
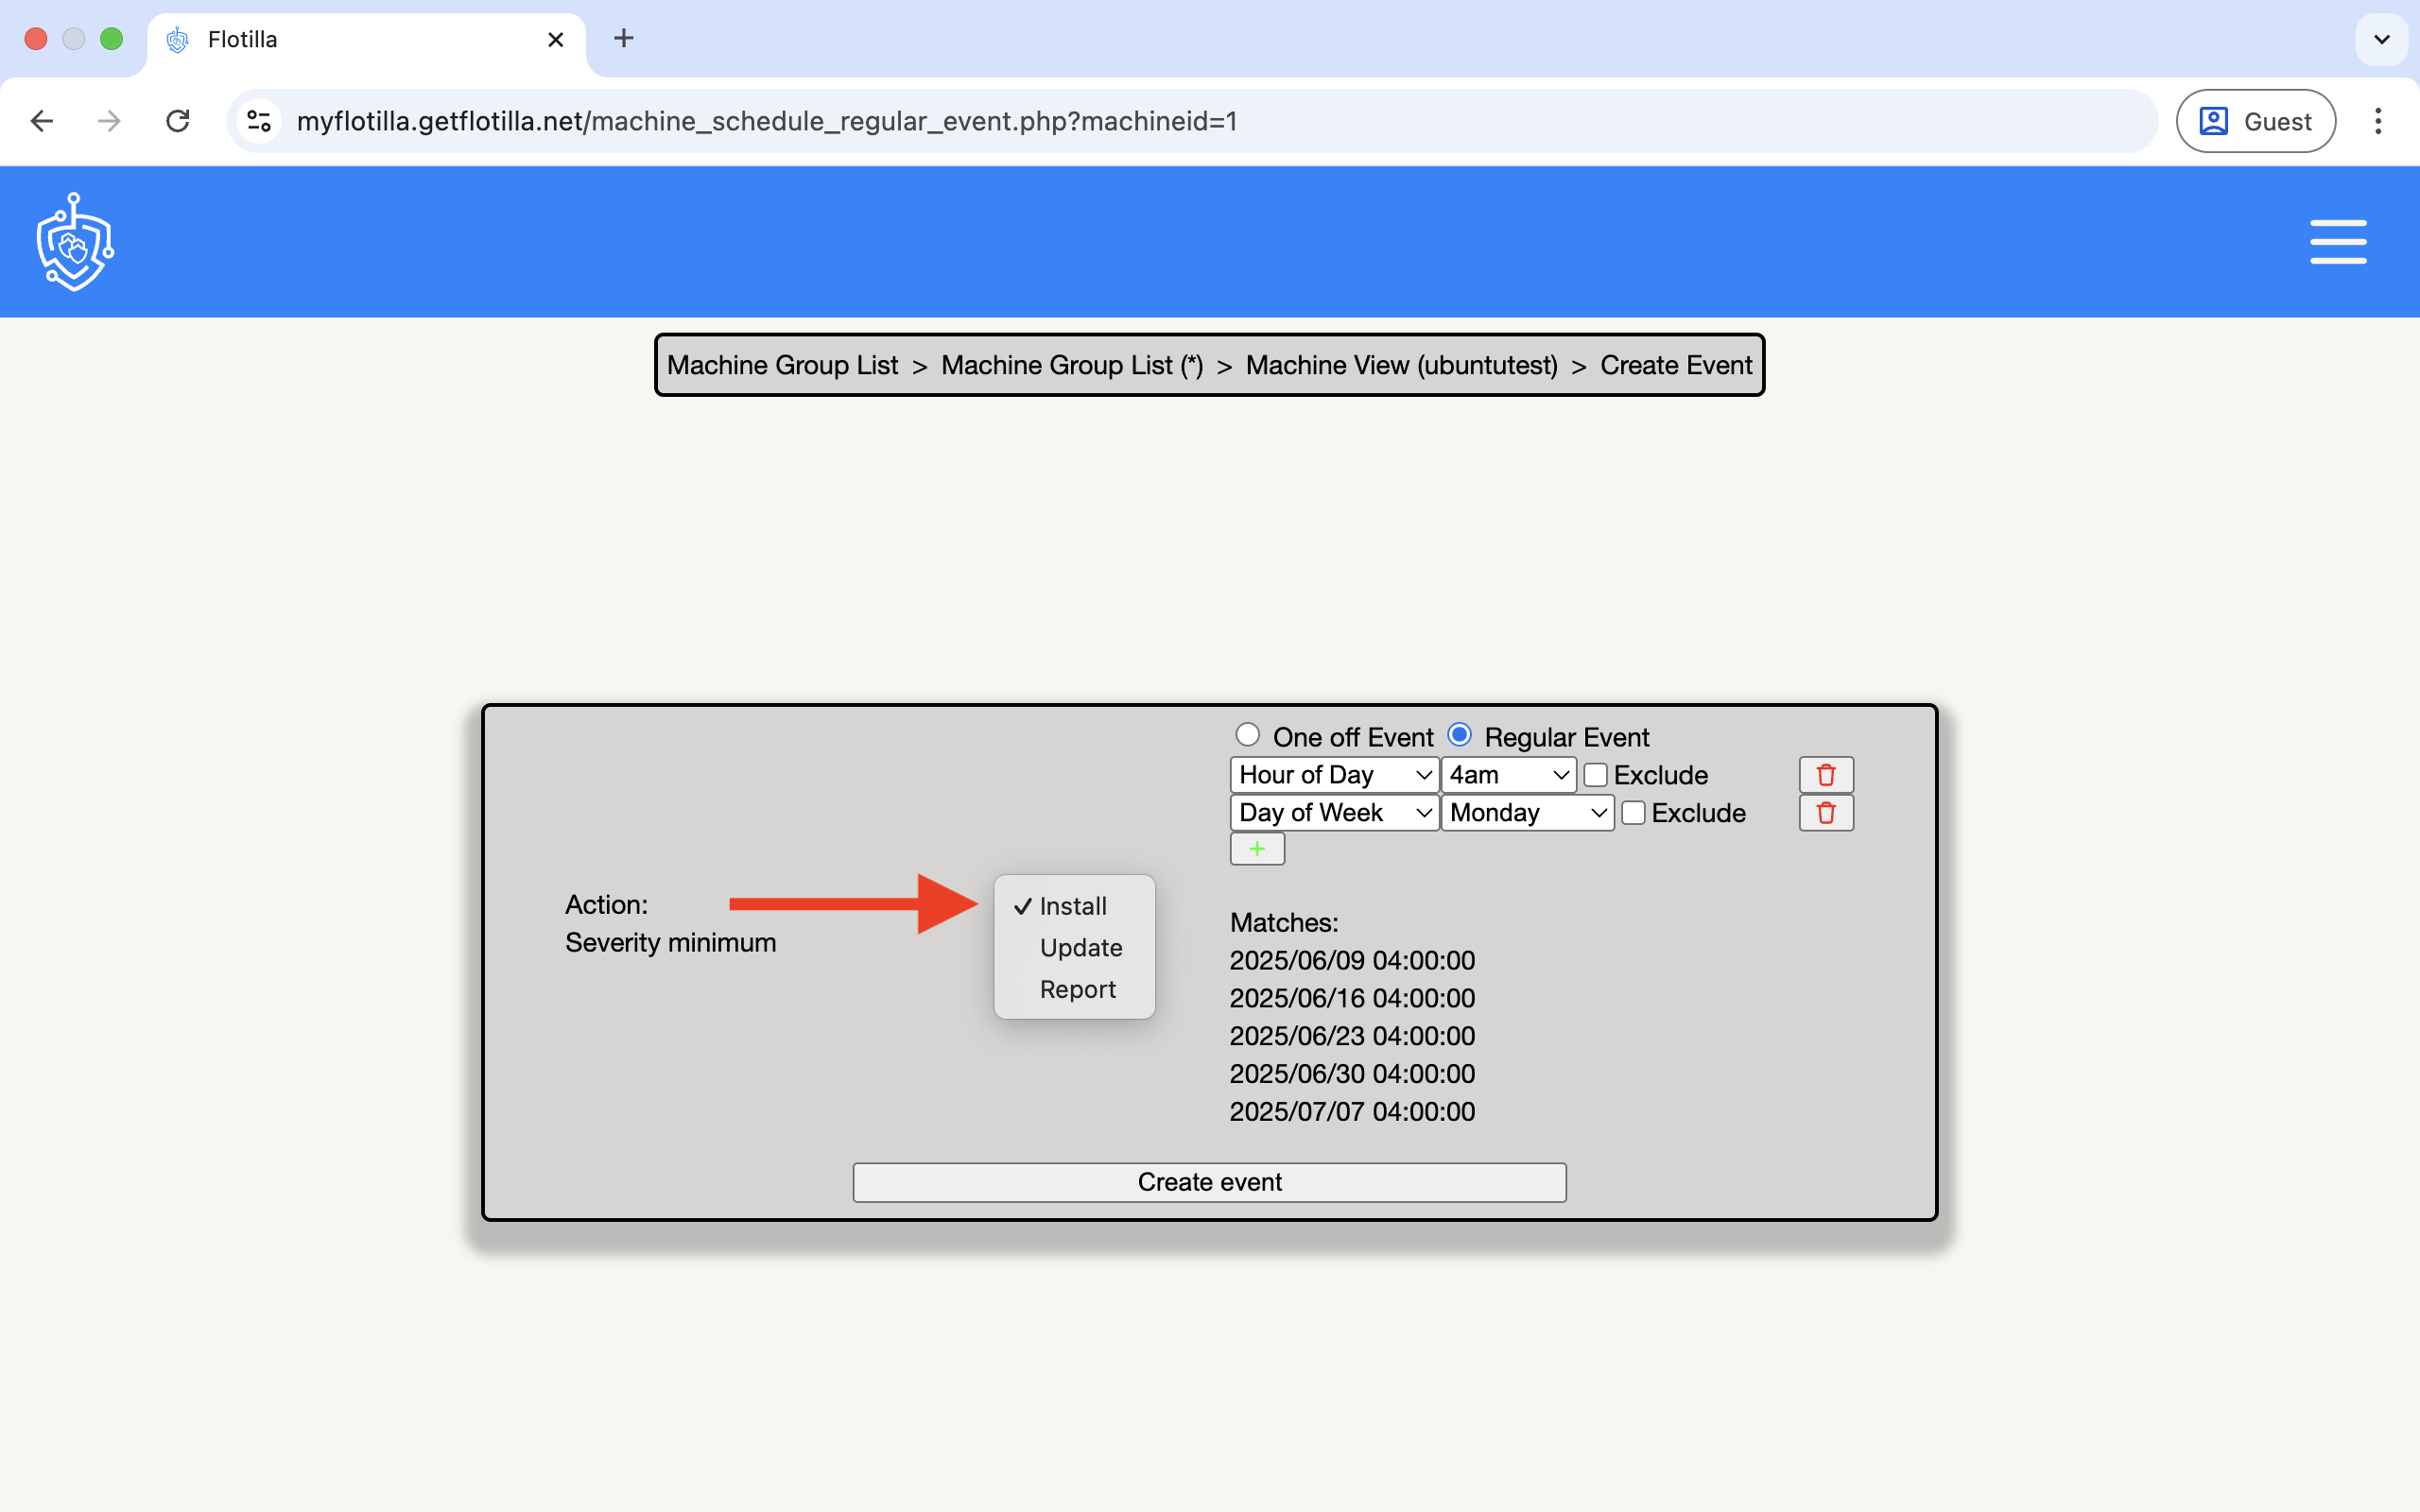
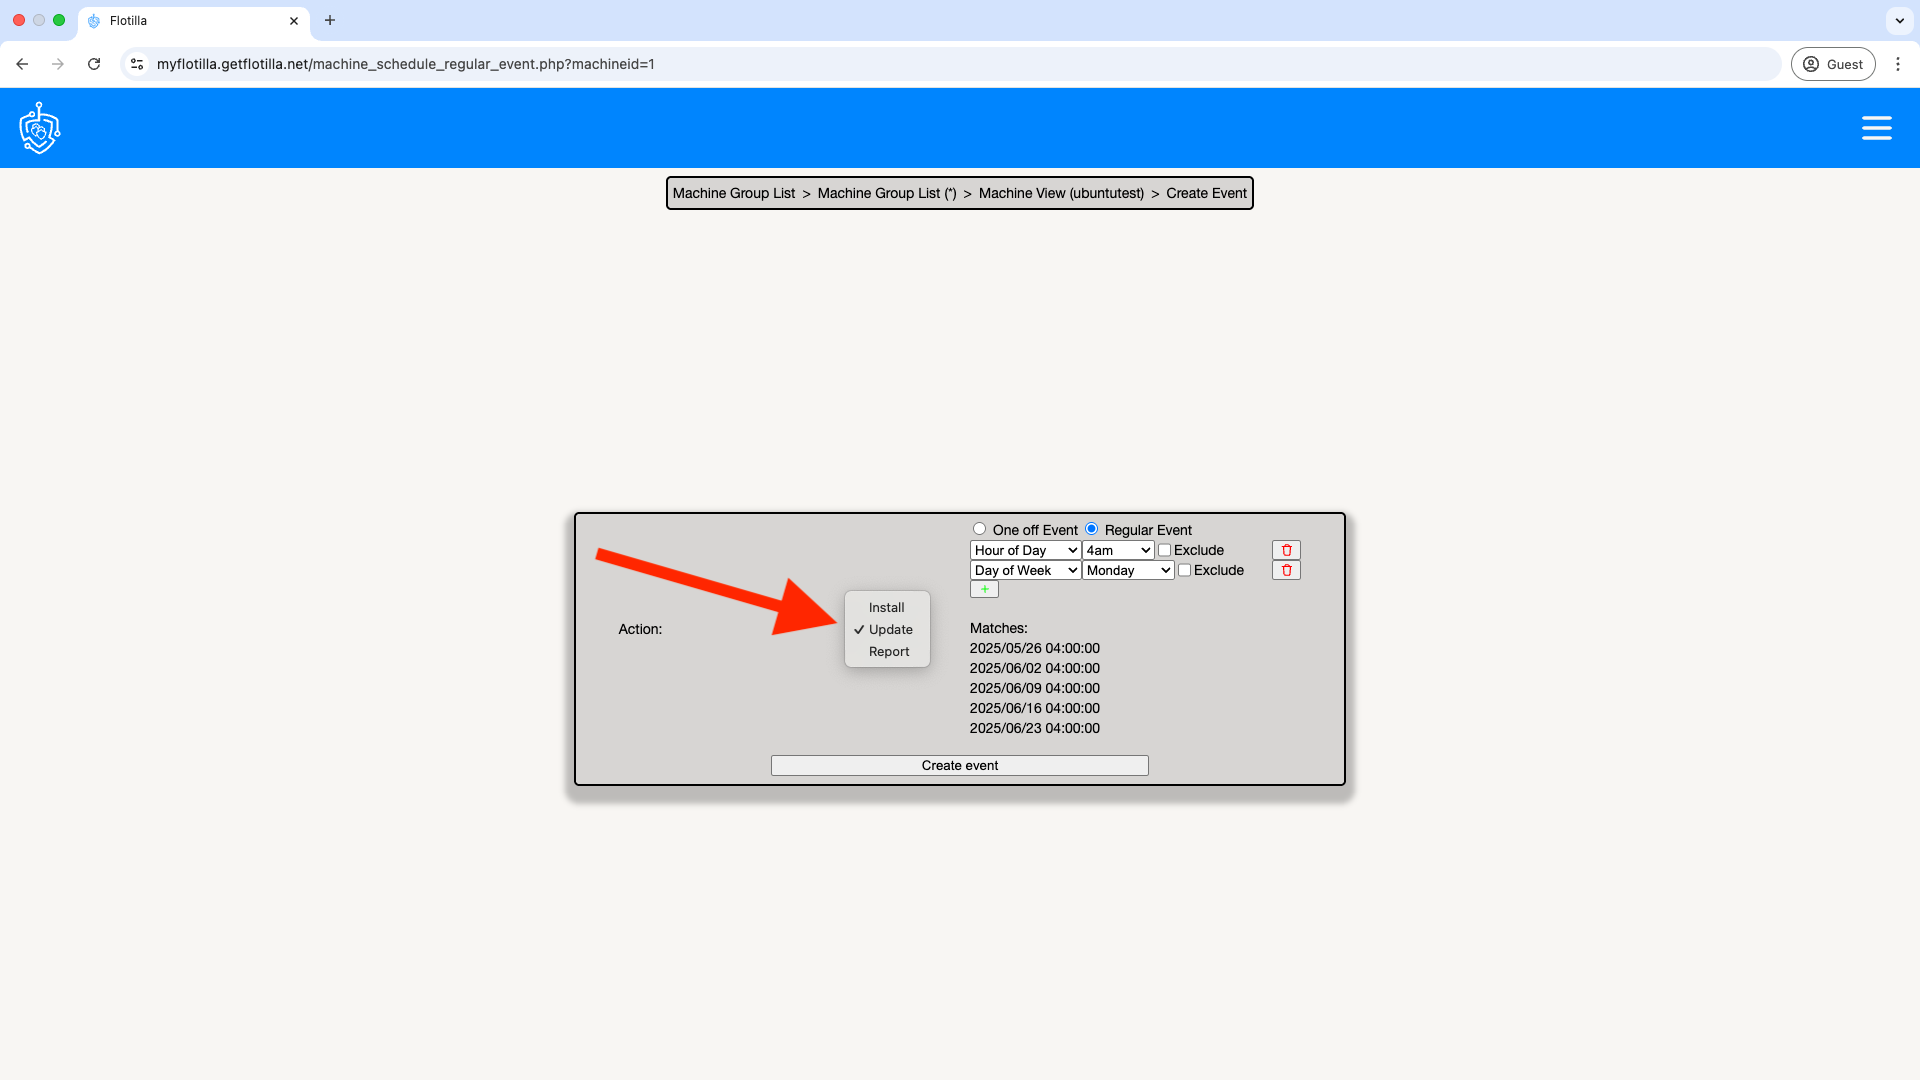
Now from the drop down menu select ‘Install’:
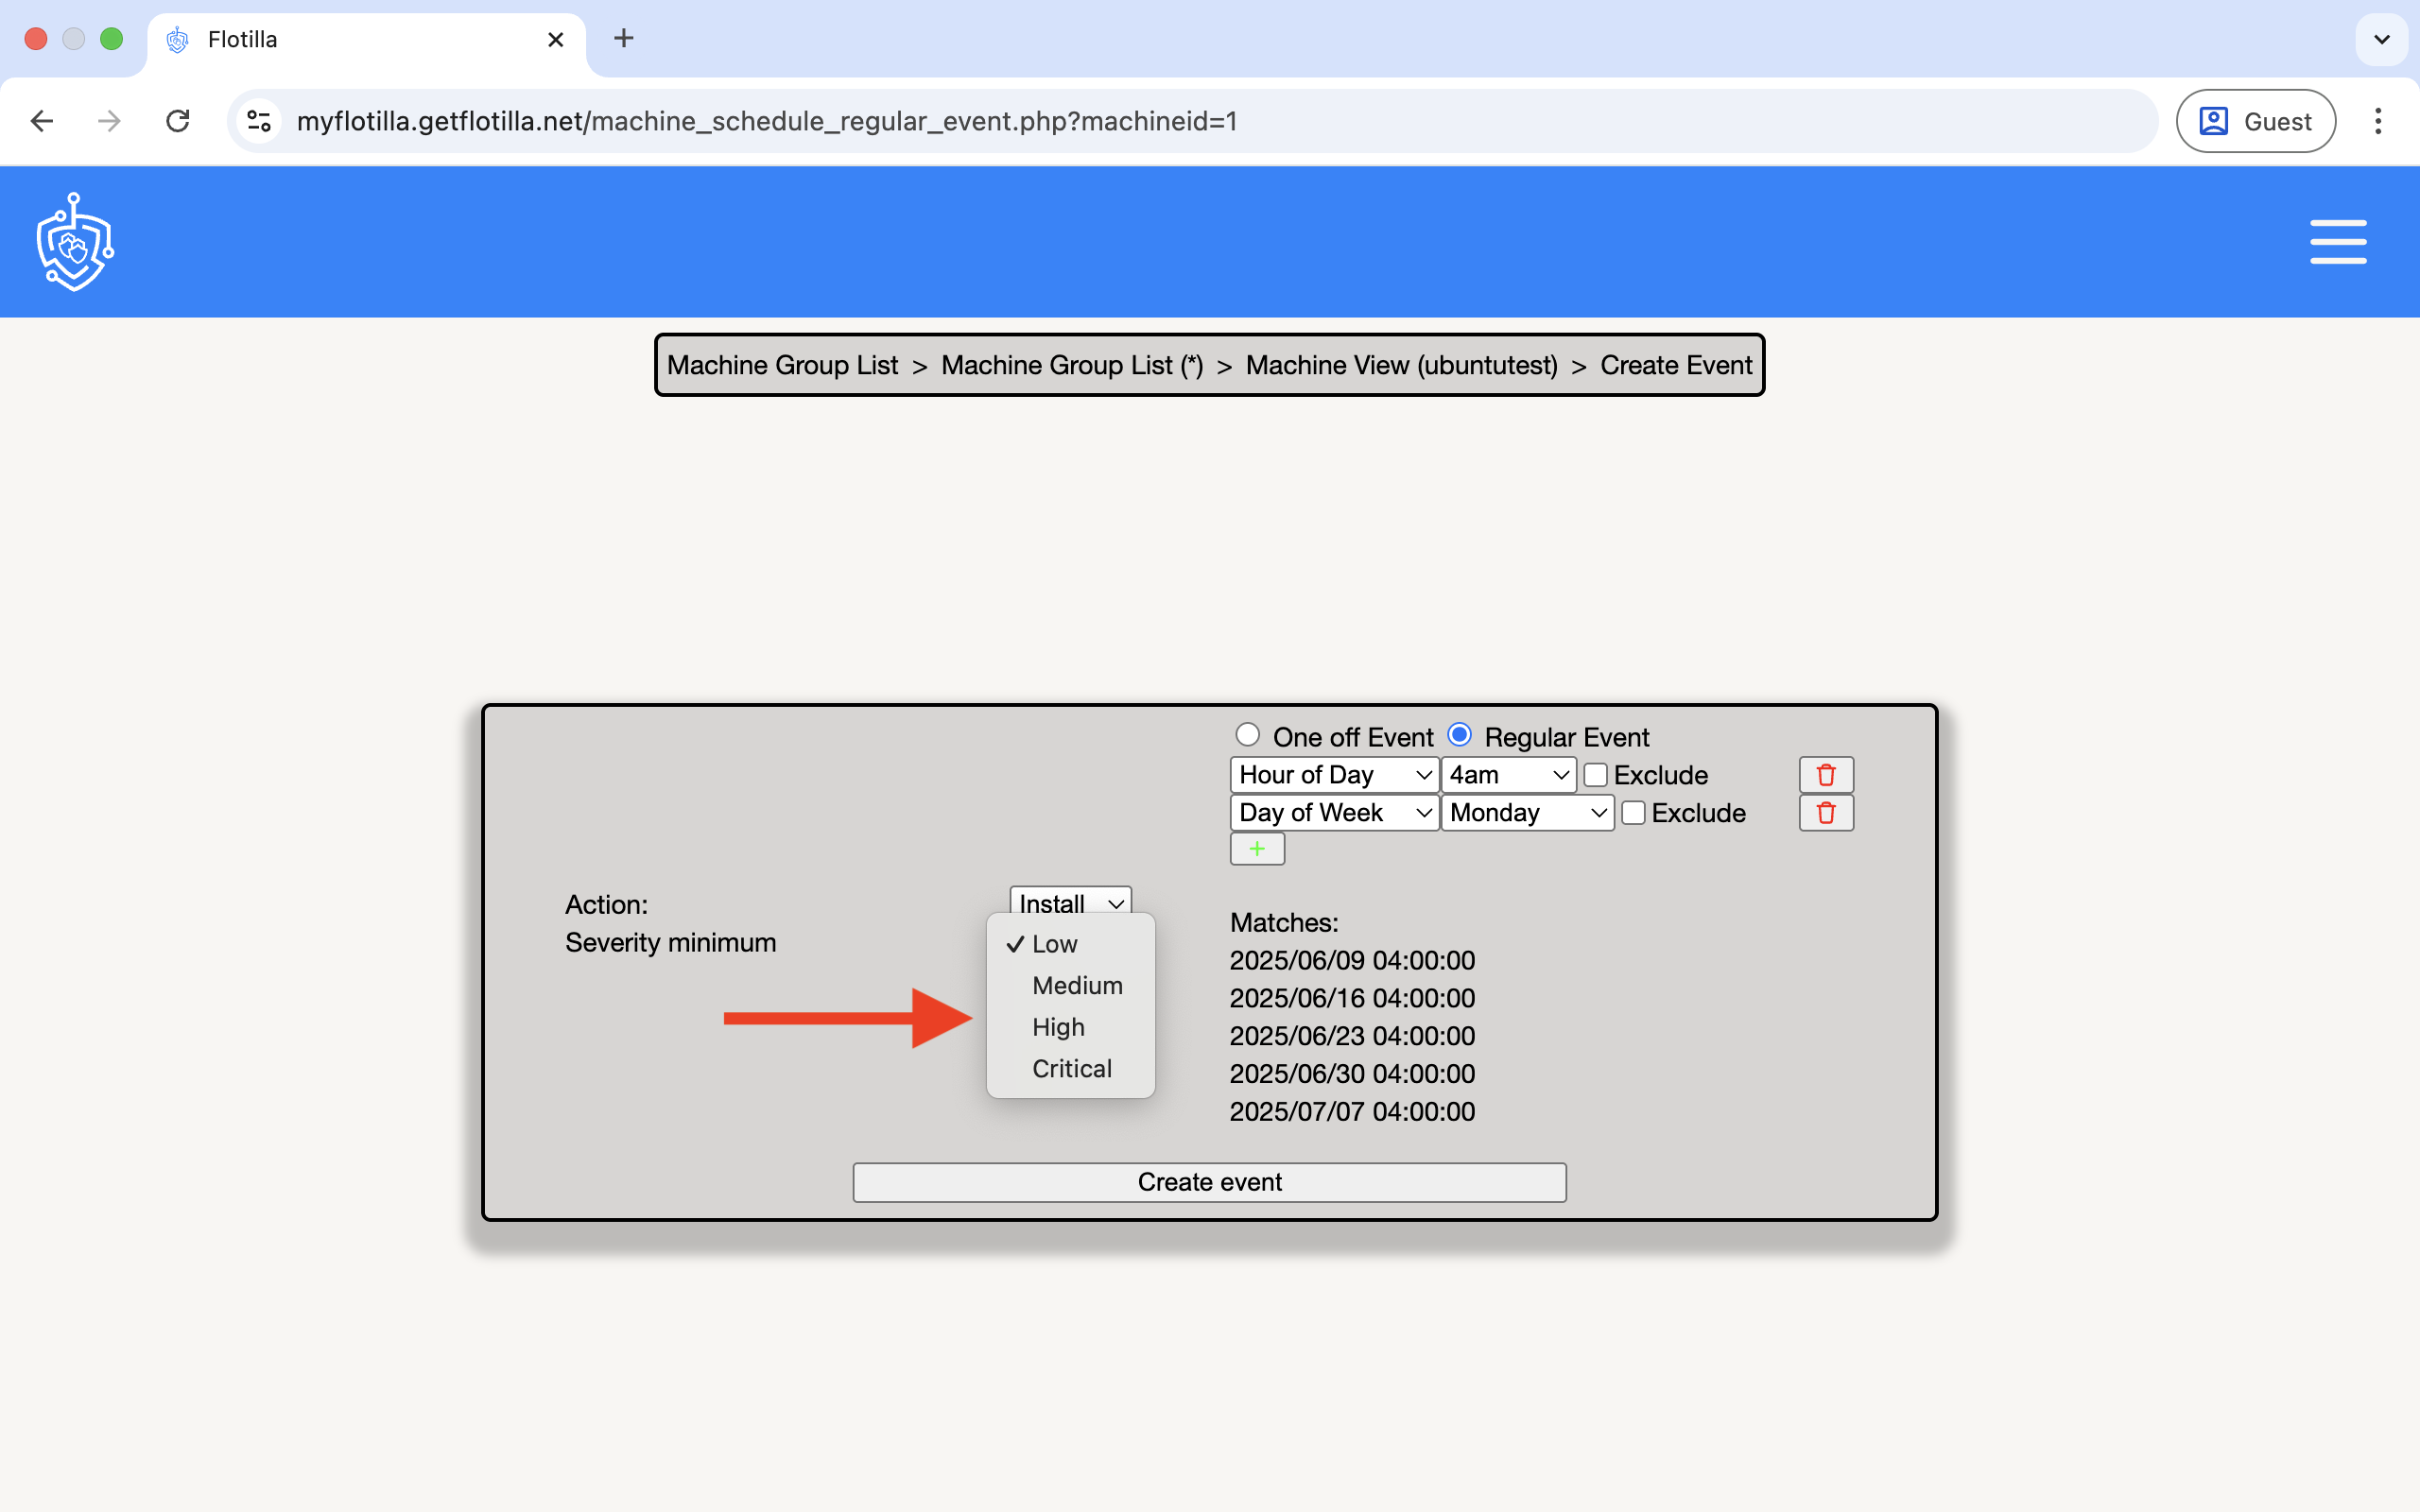
Select the minimum severity level of the packages to be installed, this can be one of 4: low (0.1 and above), medium (4.0 and above), high (7.0 and above) critical (9.0 and above):
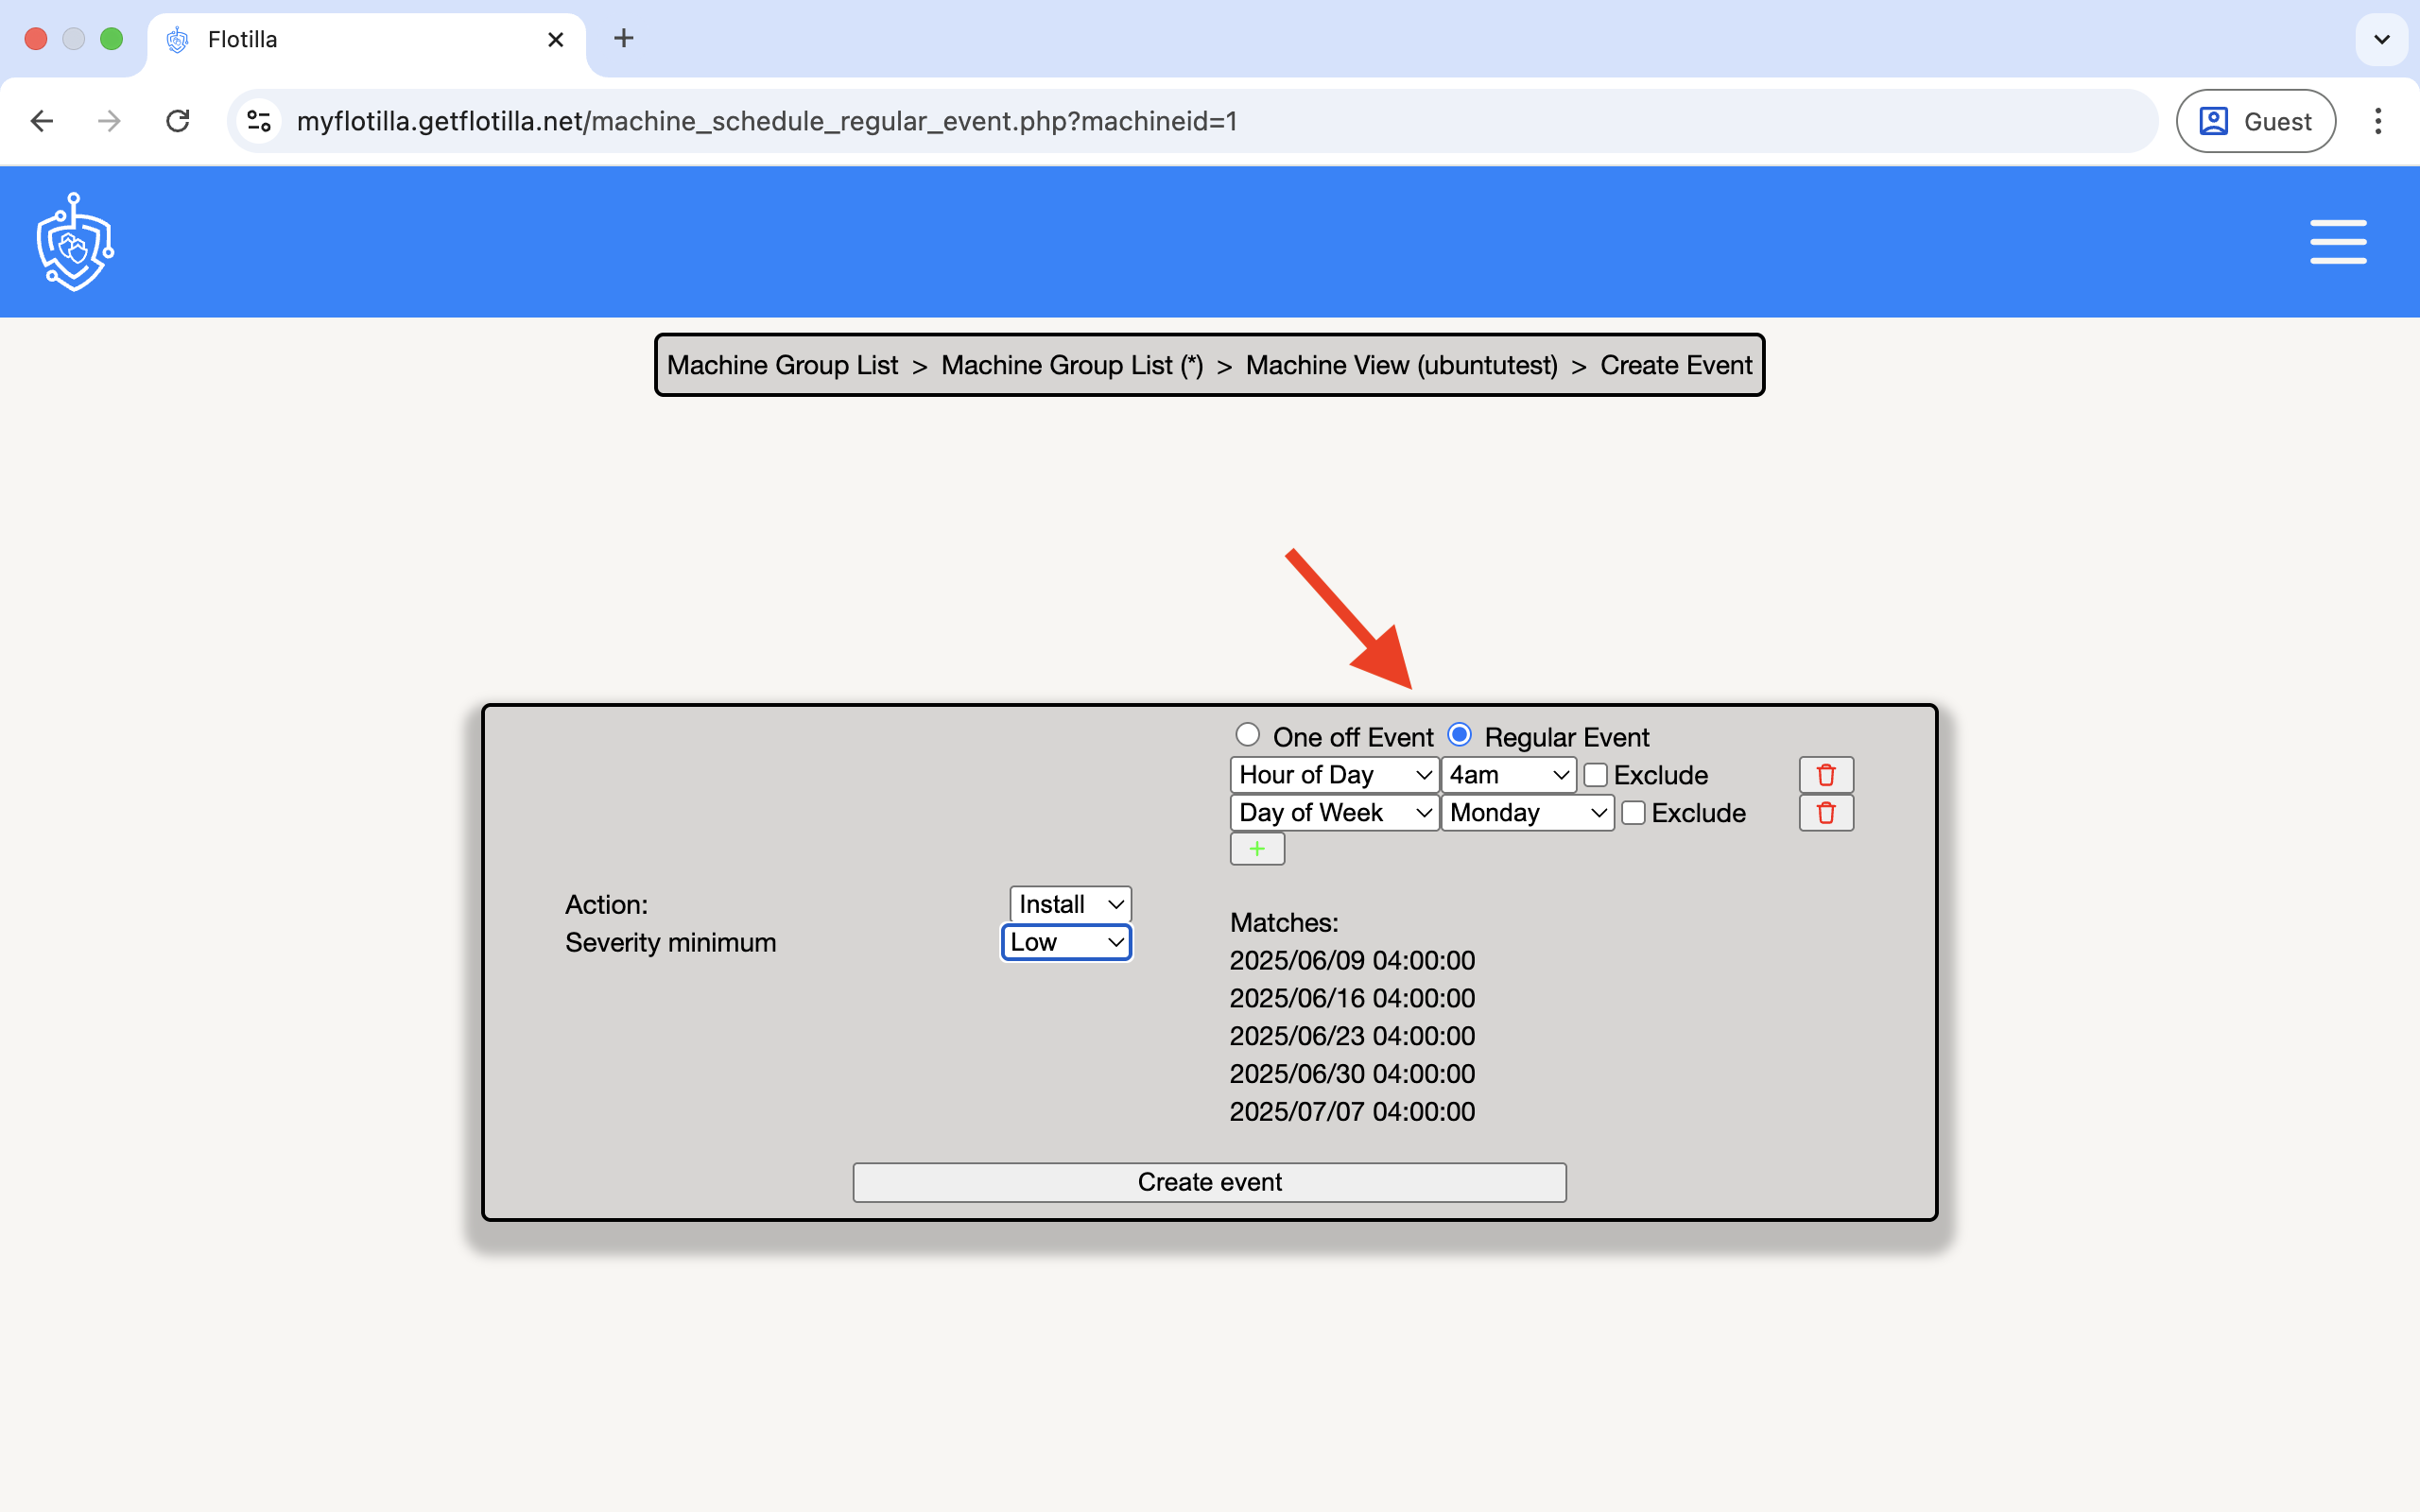
Schedule whether the event will be a one off or regular:
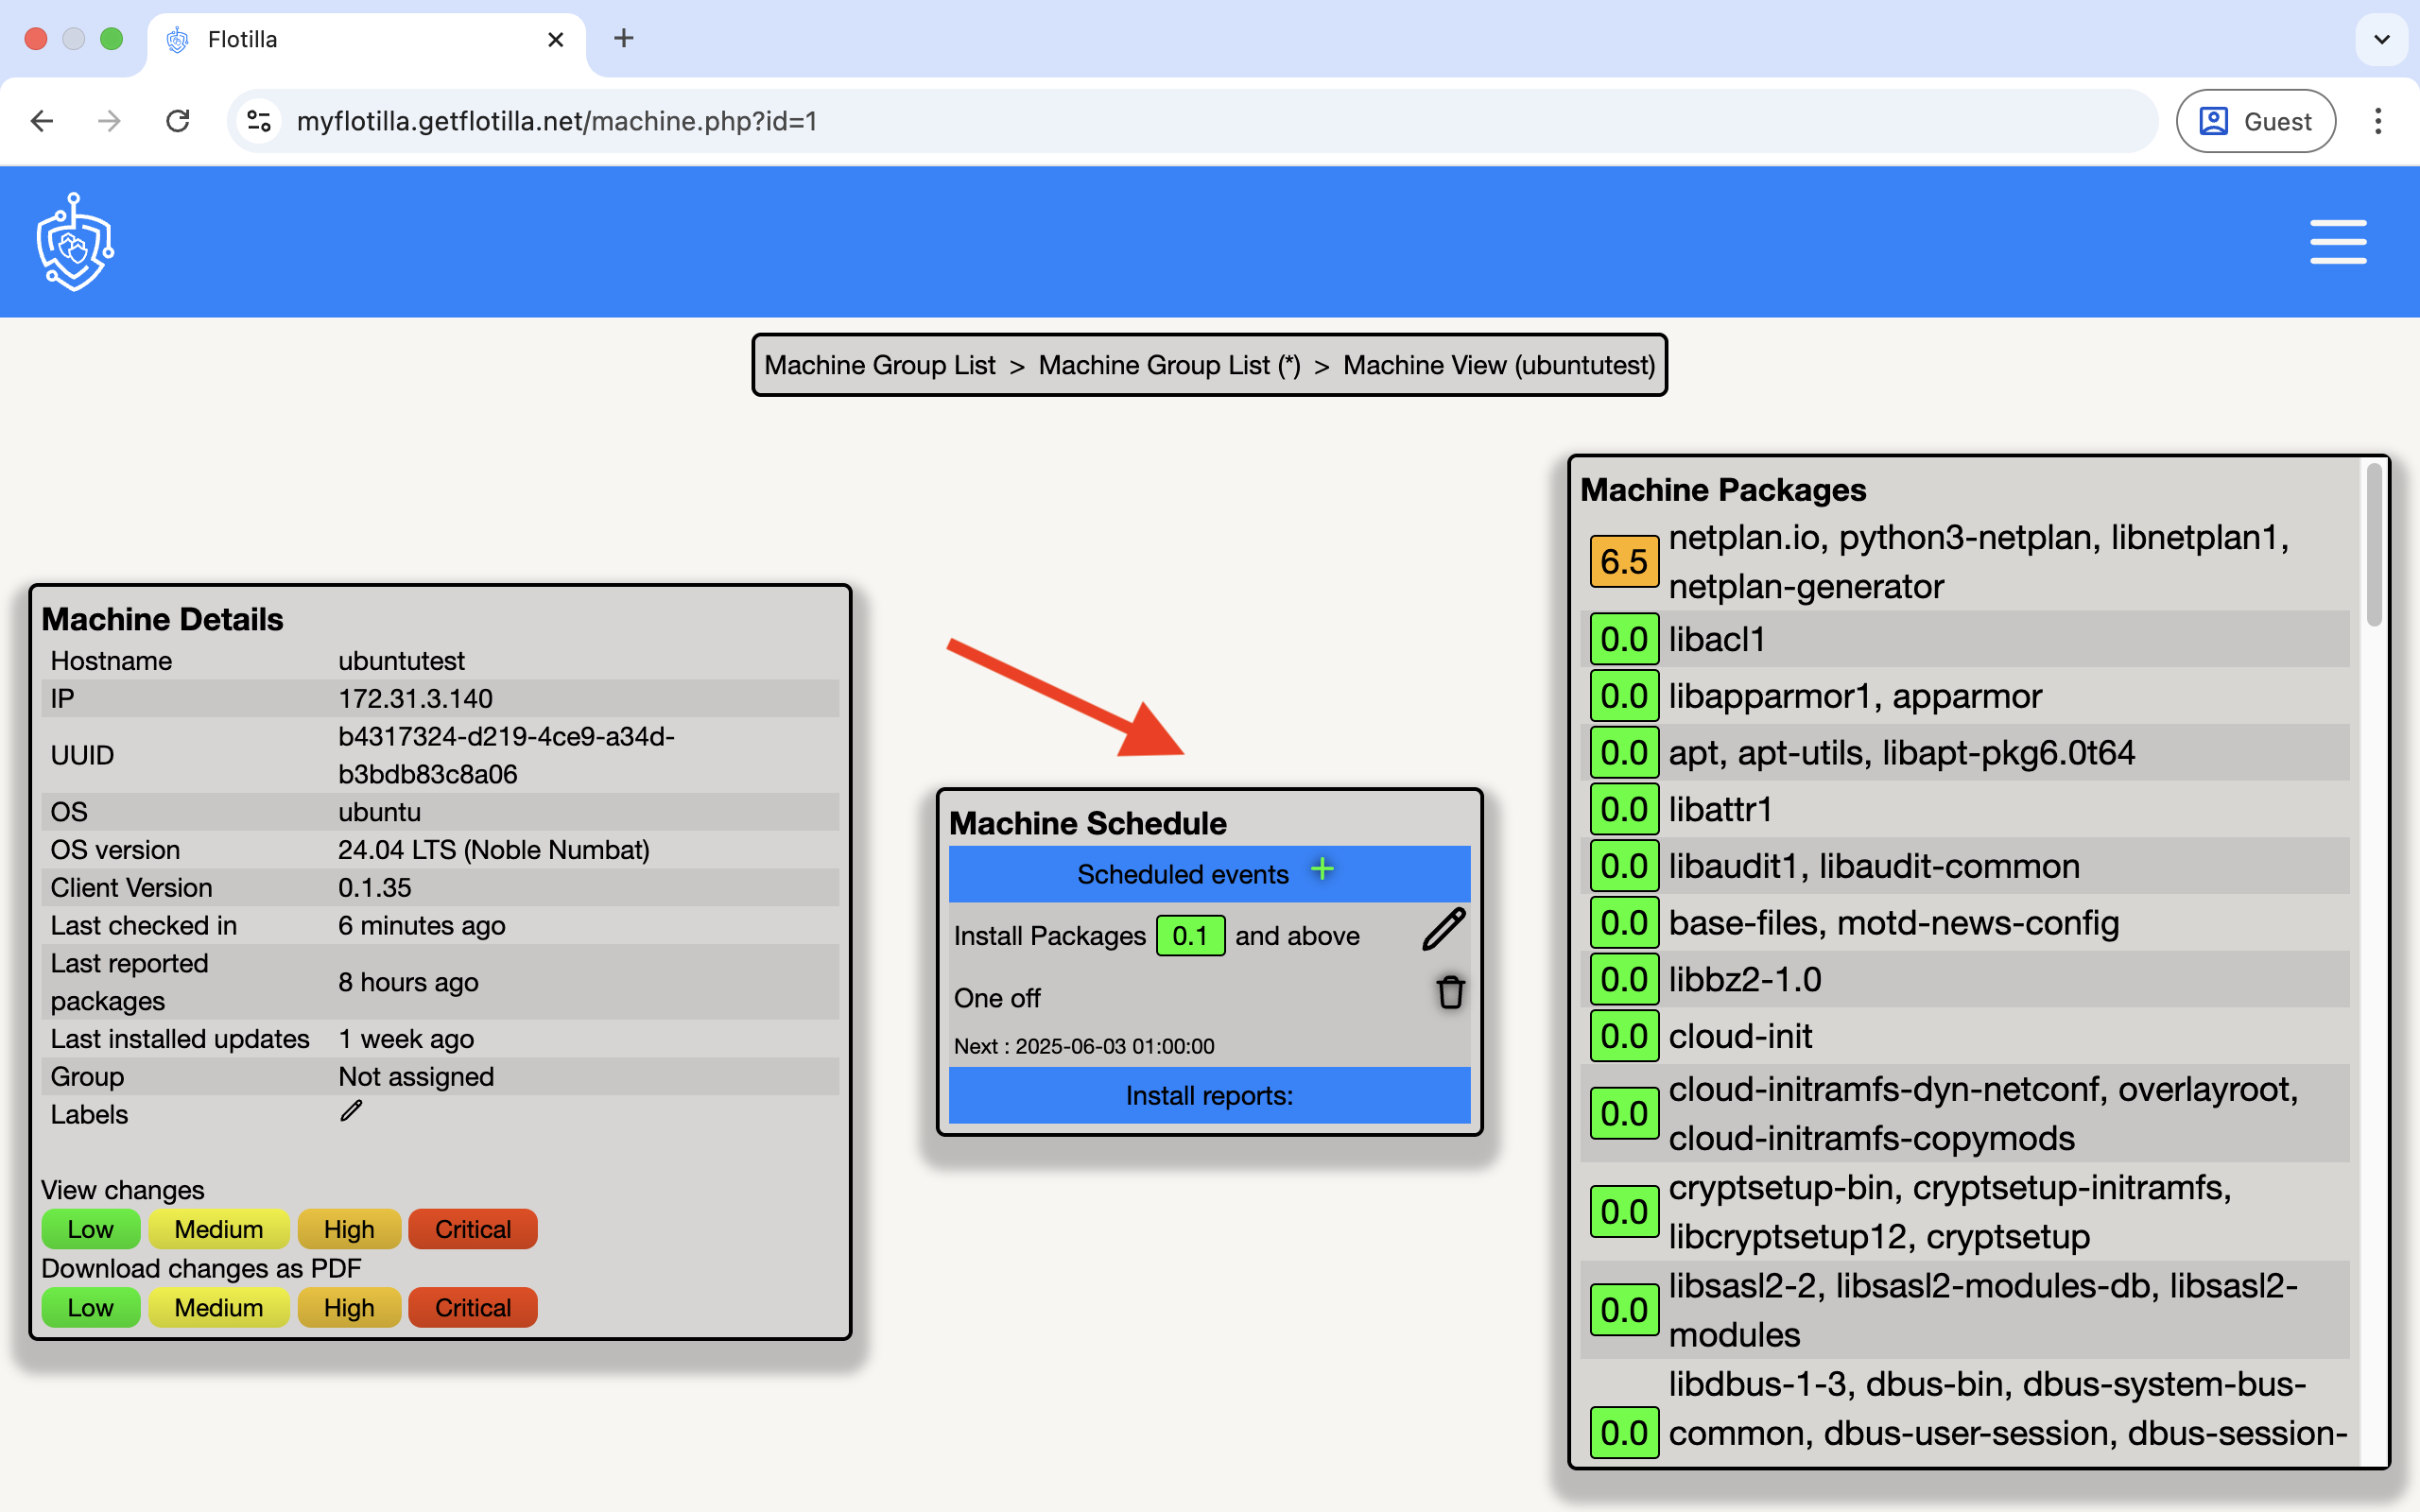
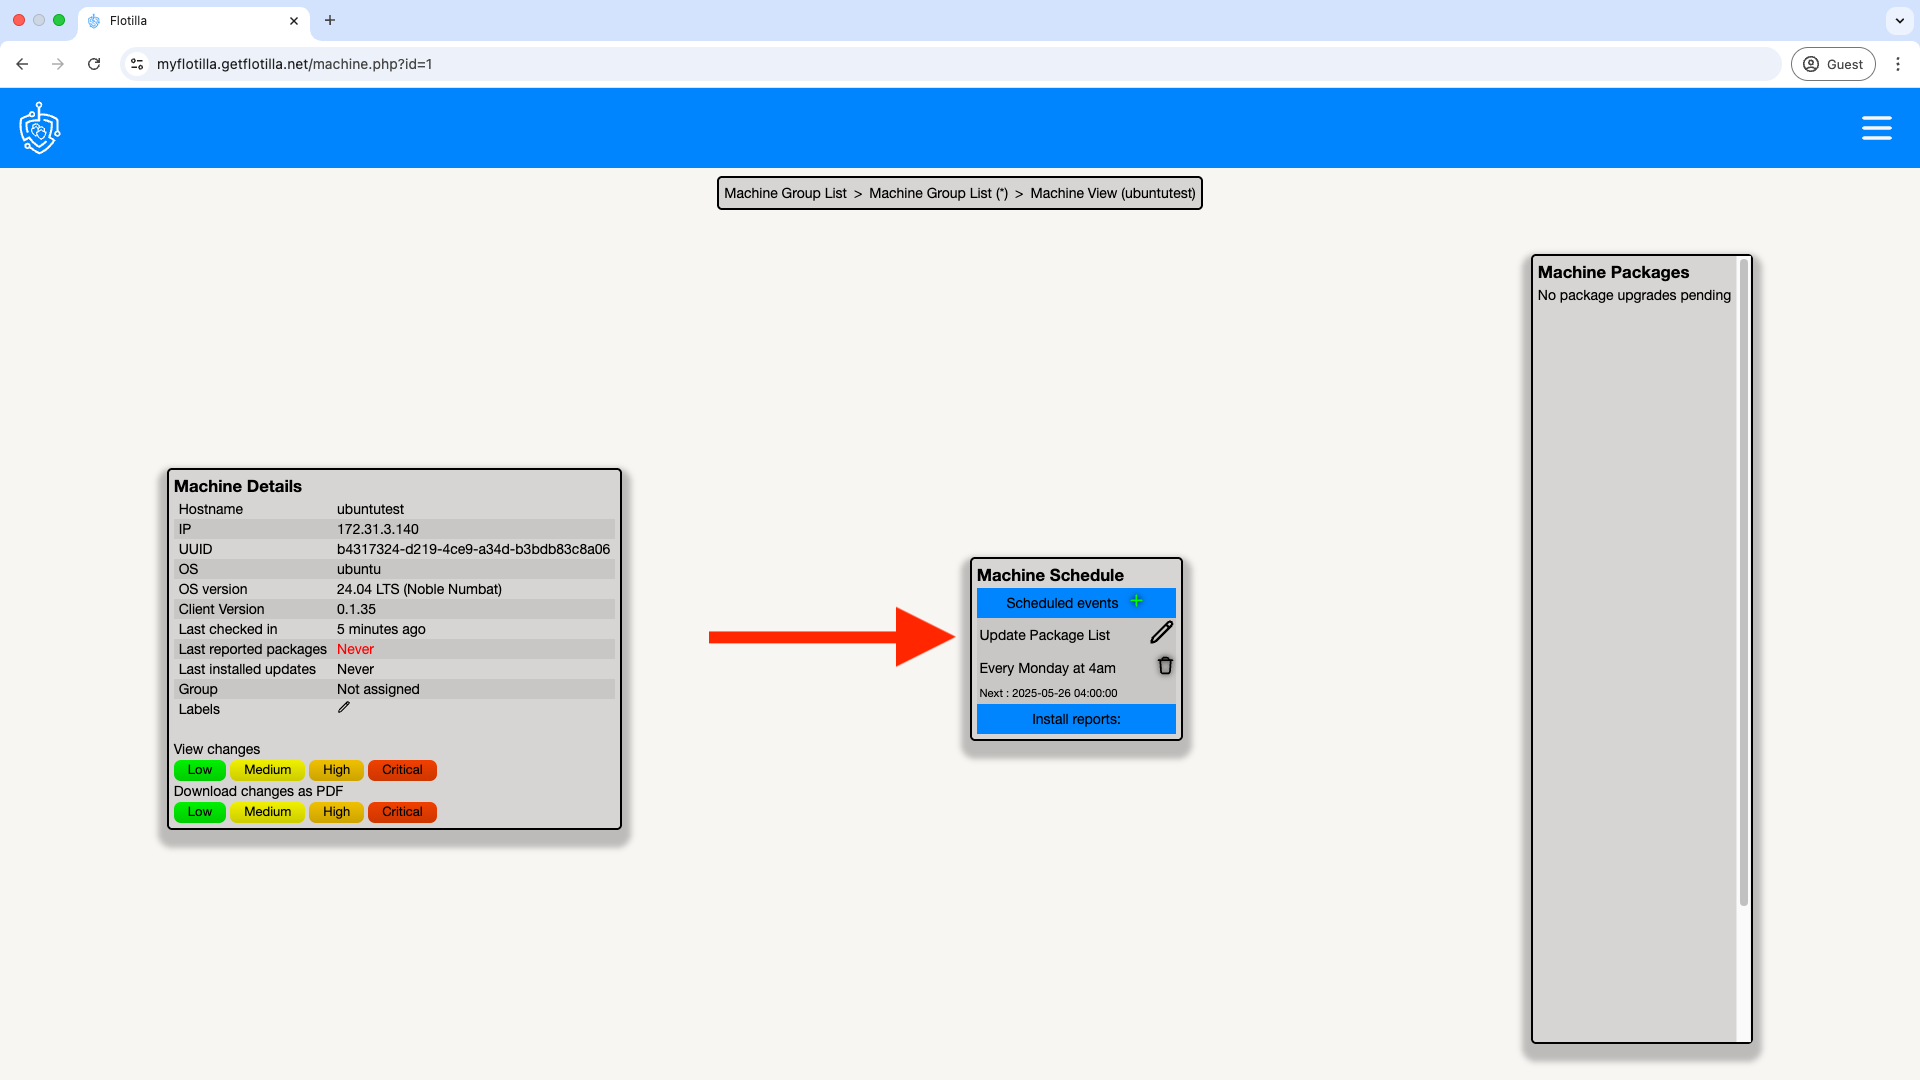
Lastly click on Create event. It will now be listed under the Machine Schedule section:
Once the Install has run, an “Install report” will be available below. A green tick indicates a successful Install whereas a red 'x' indicates problems with the Install, click for more details:
Updates
An update will refresh the package list.
Create an event by clicking on ‘Scheduled Events’ as below:
From the drop down menu select ‘Update’:
Schedule whether the event will be a one off or regular:
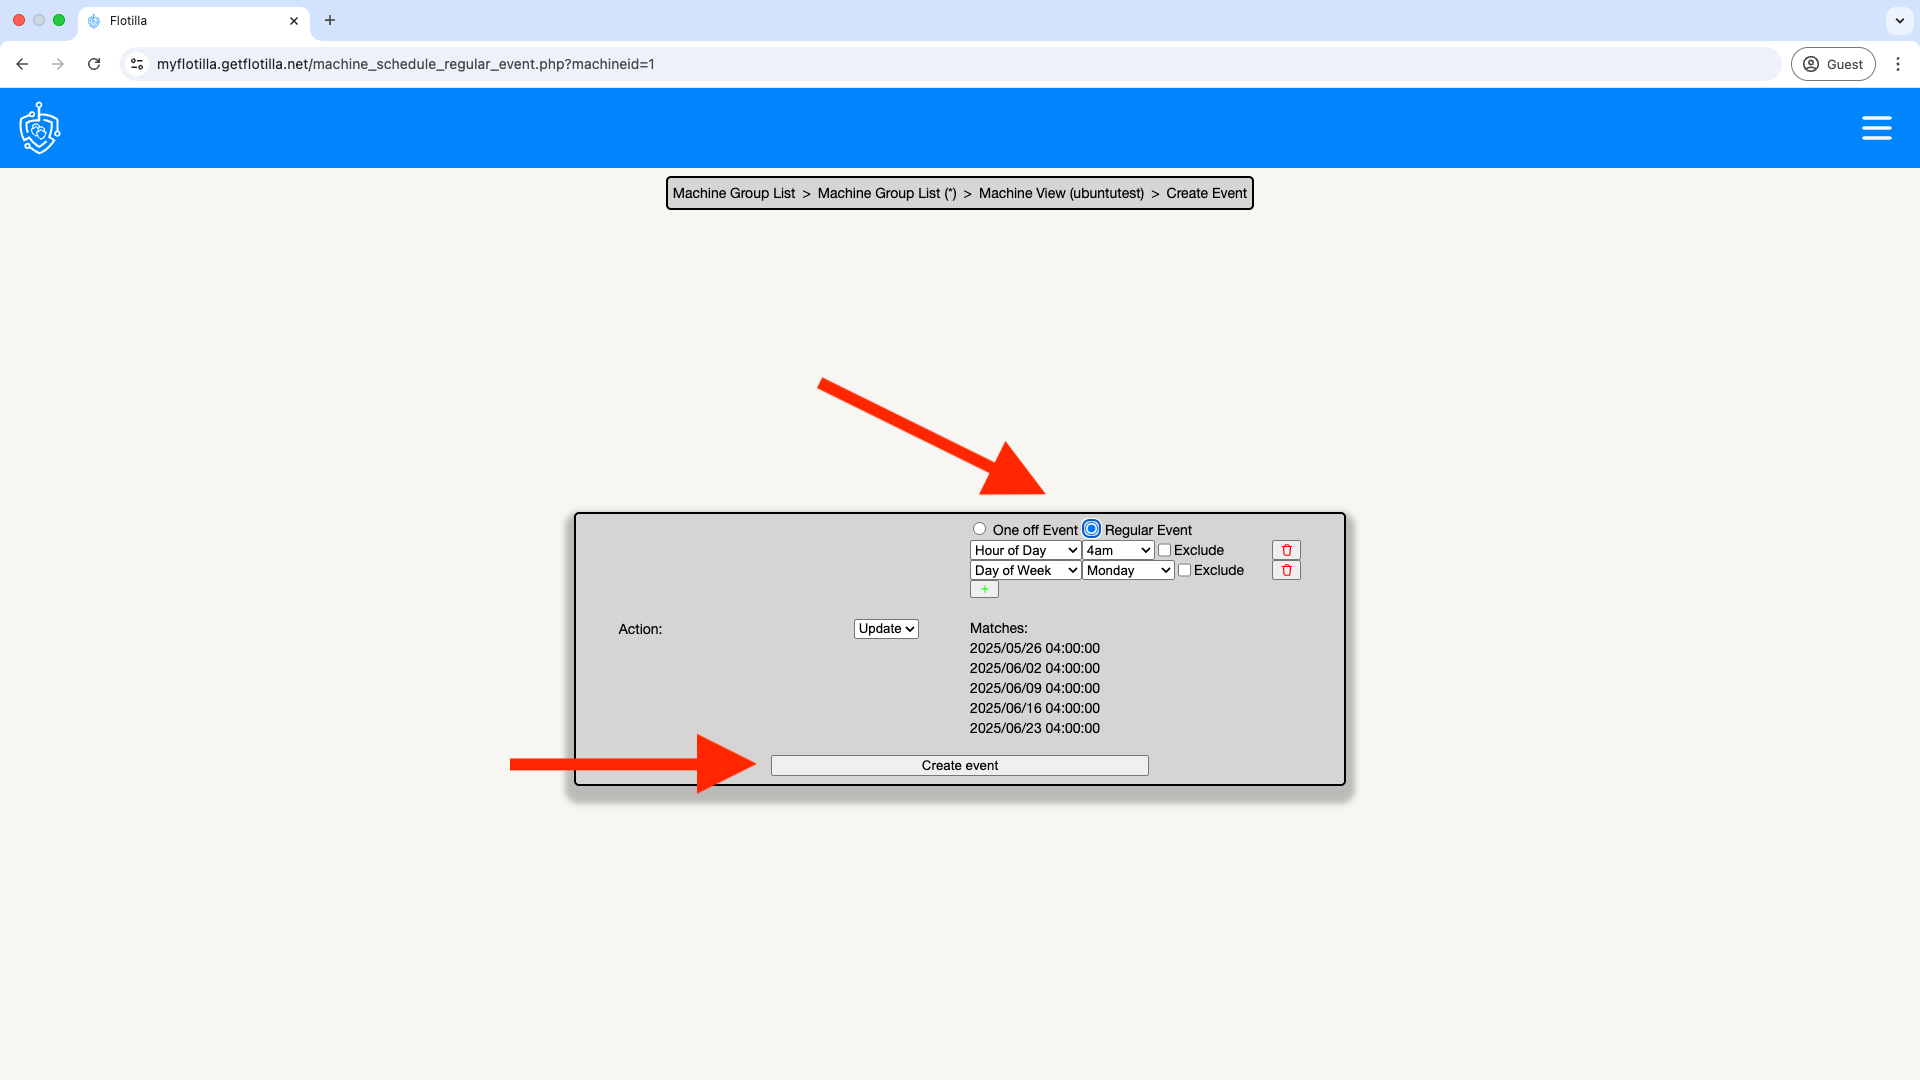
Lastly click on Create event. It will now be listed under the Machine Schedule section:
Reports
A report will email the user a pdf file containing a list of updates that require installing dependant upon their severity level.
Create an event by clicking on ‘Scheduled Events’ as below:
From the drop down menu select ‘Report’:

Schedule whether the report will be a one off or regular:
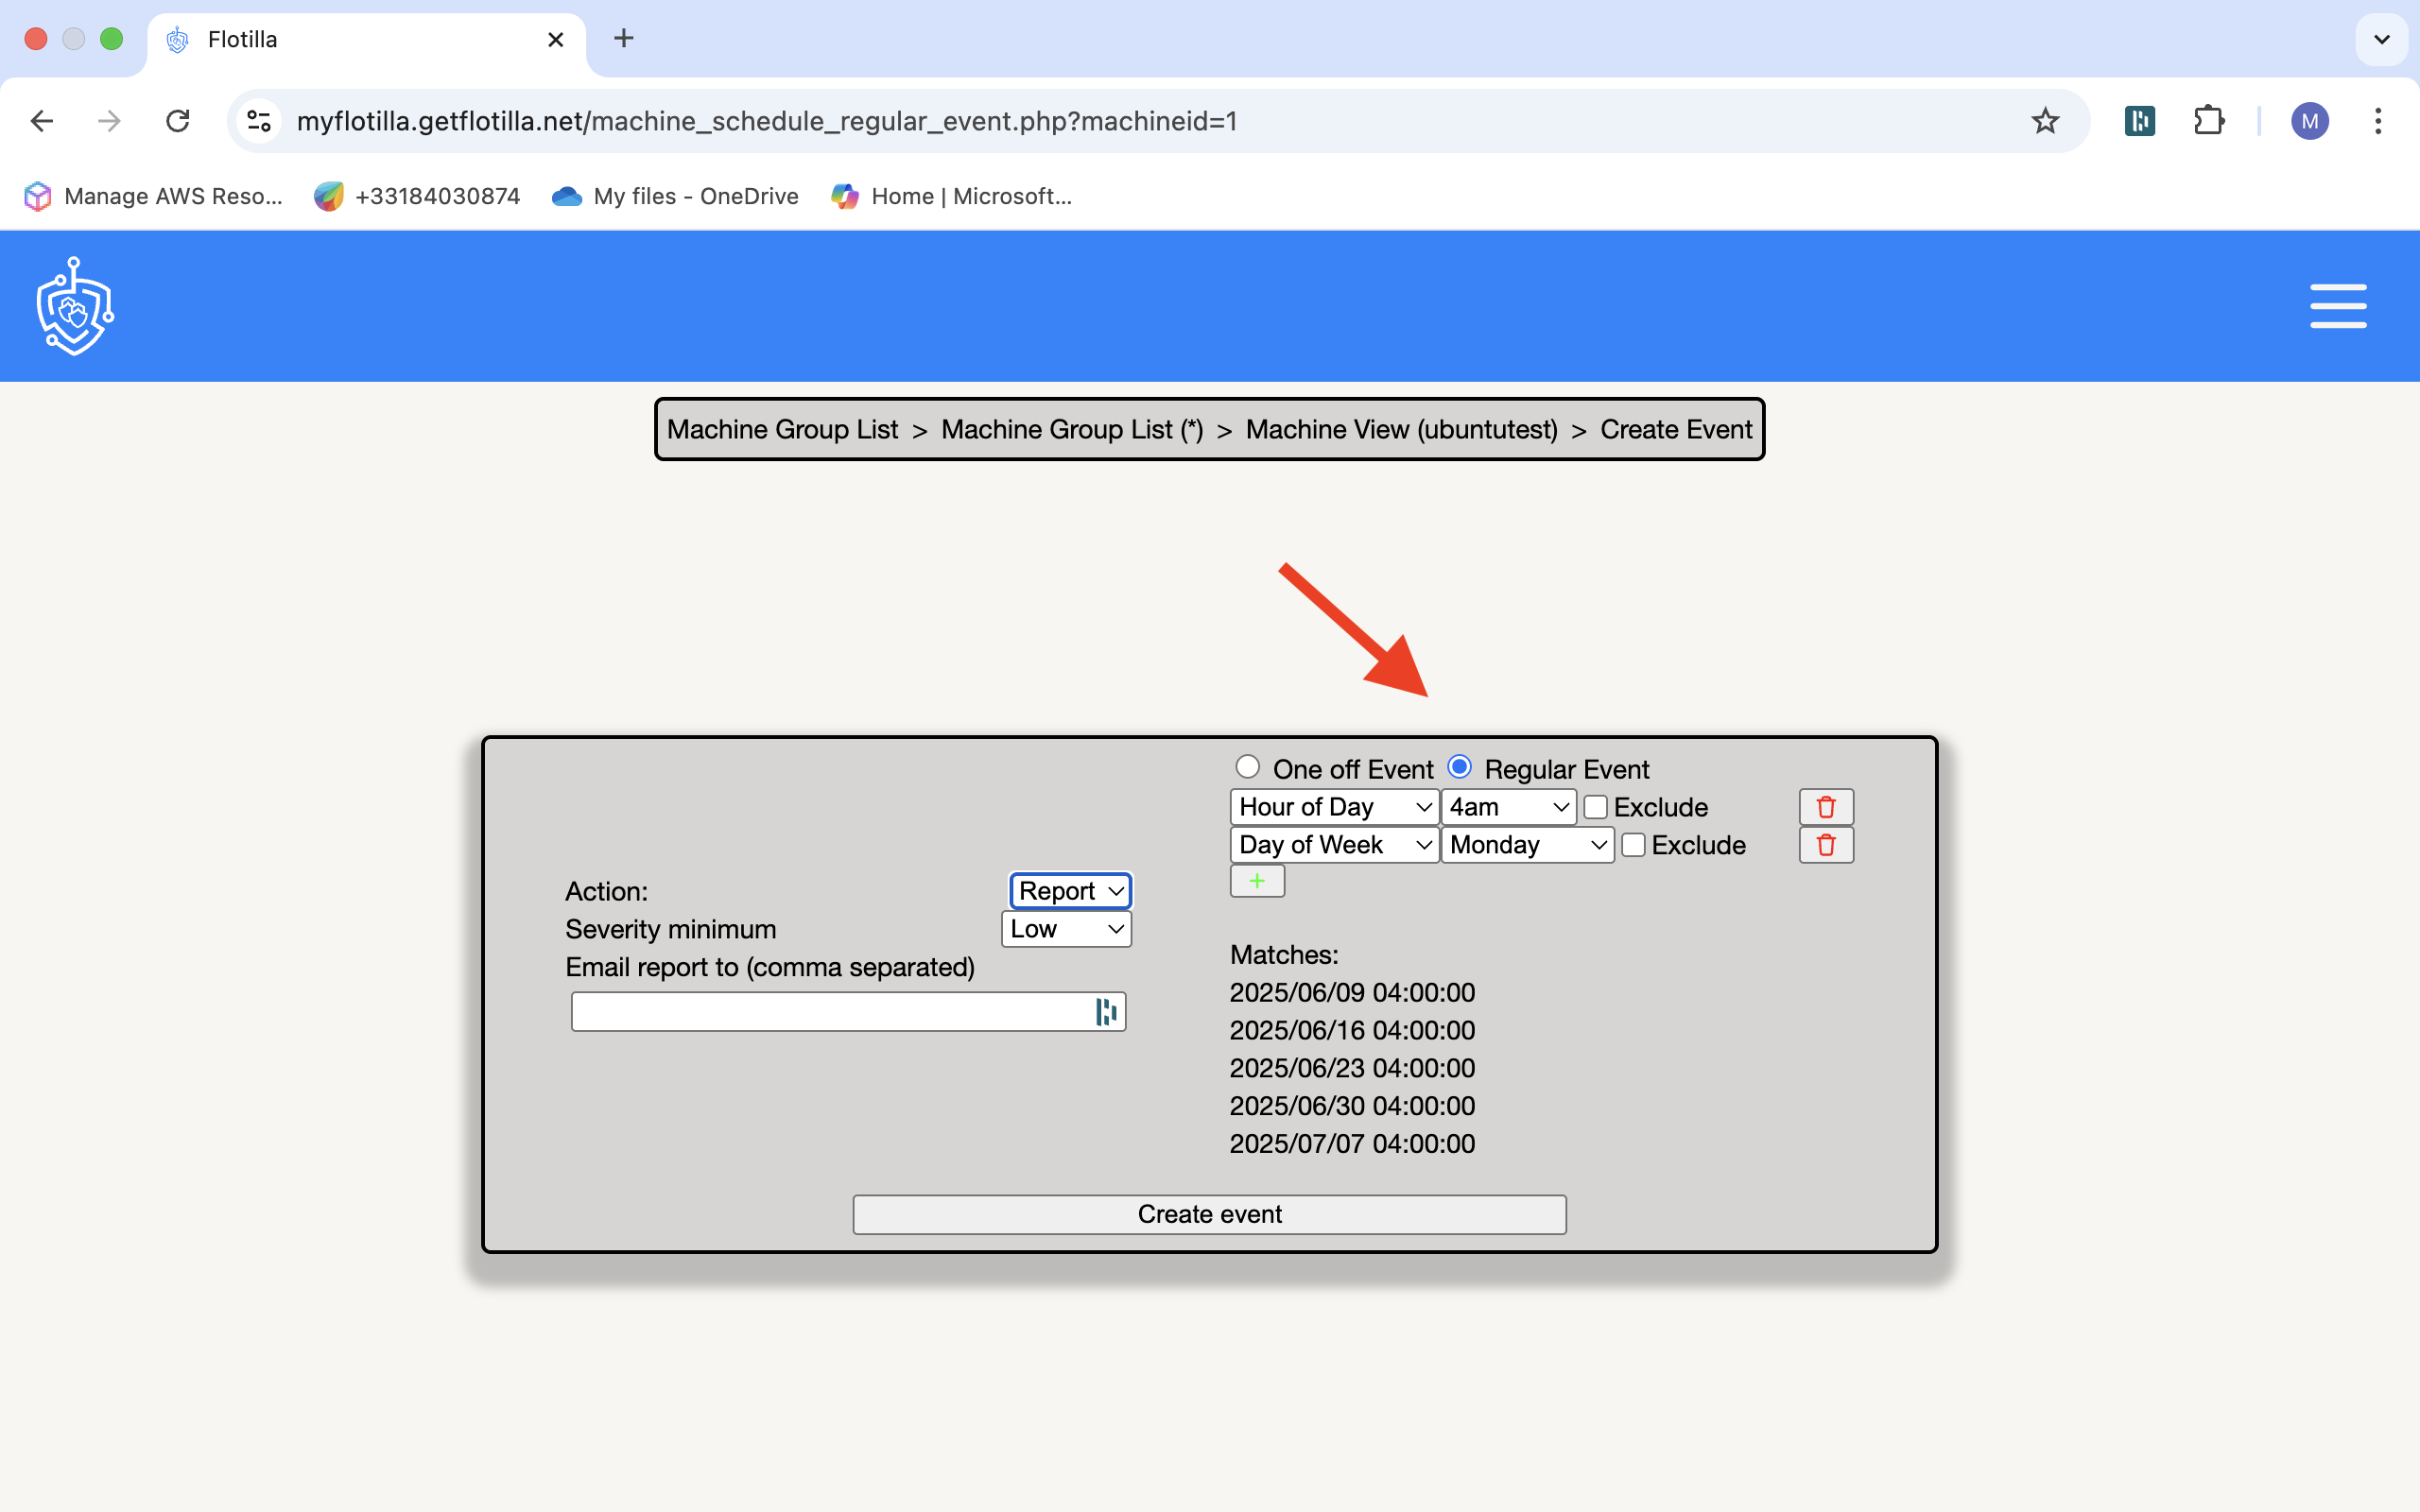
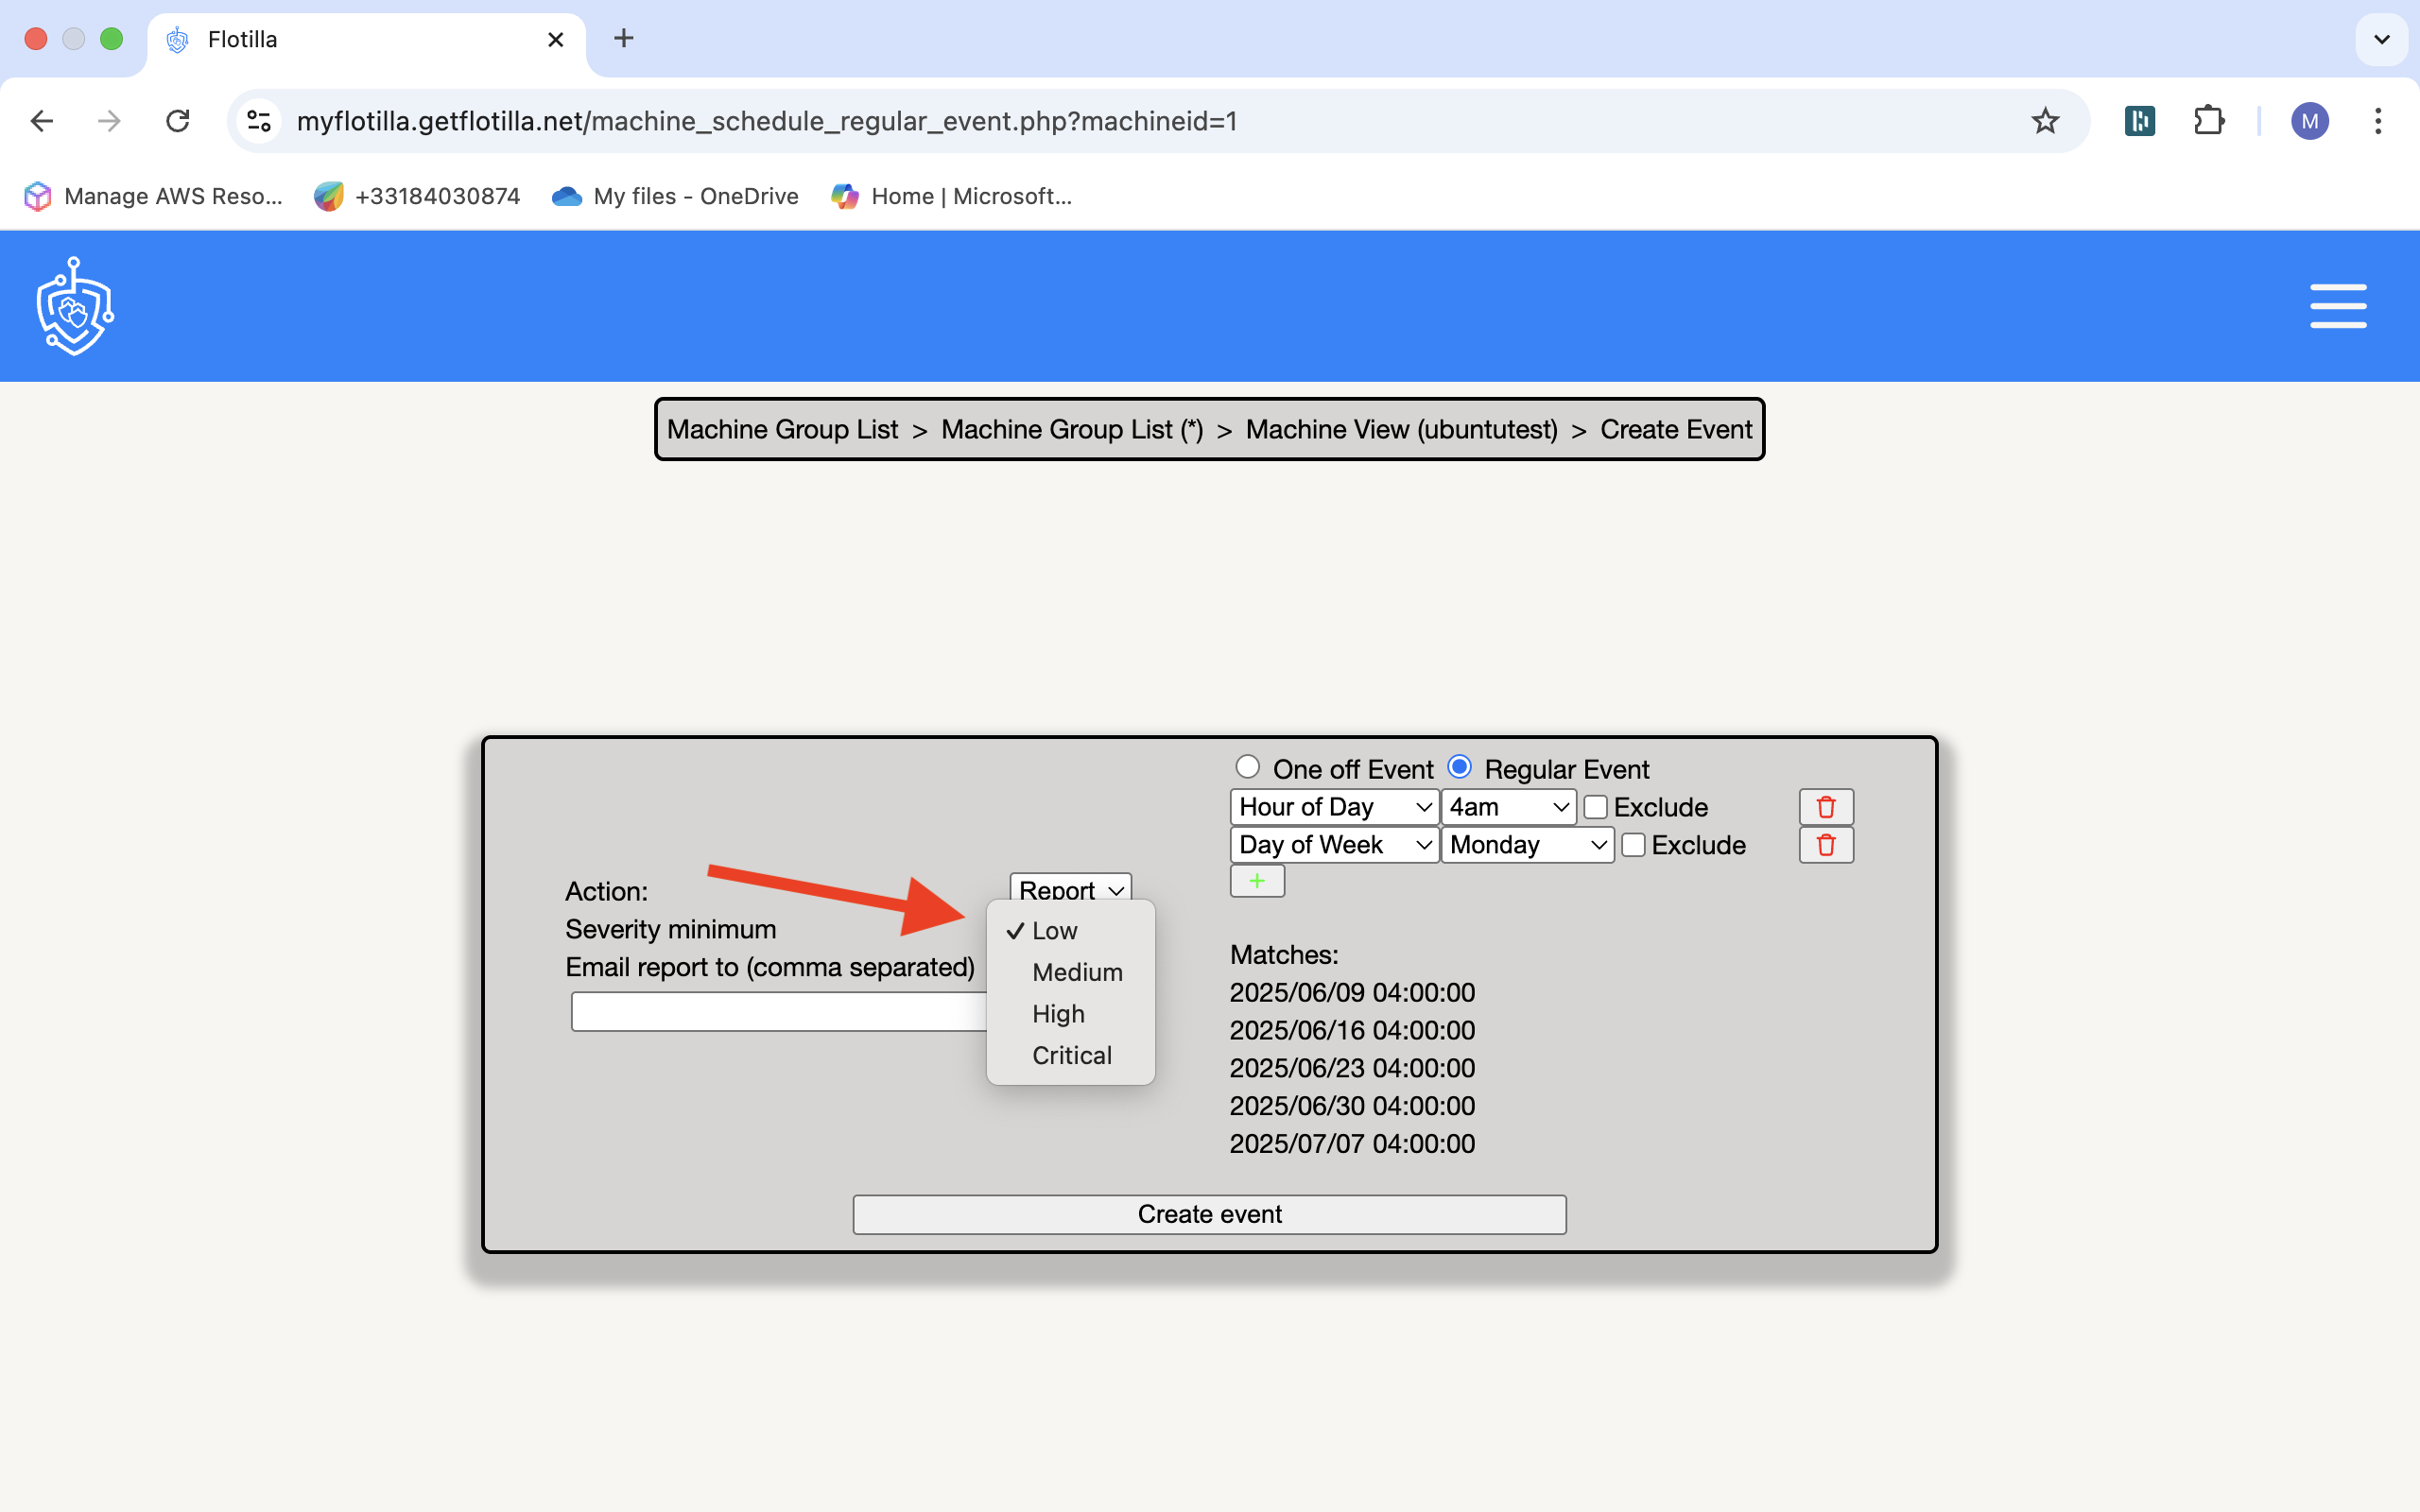
Now select the ‘Severity minimum’ to determine which updates are included in the report (Low, medium, high, critical).
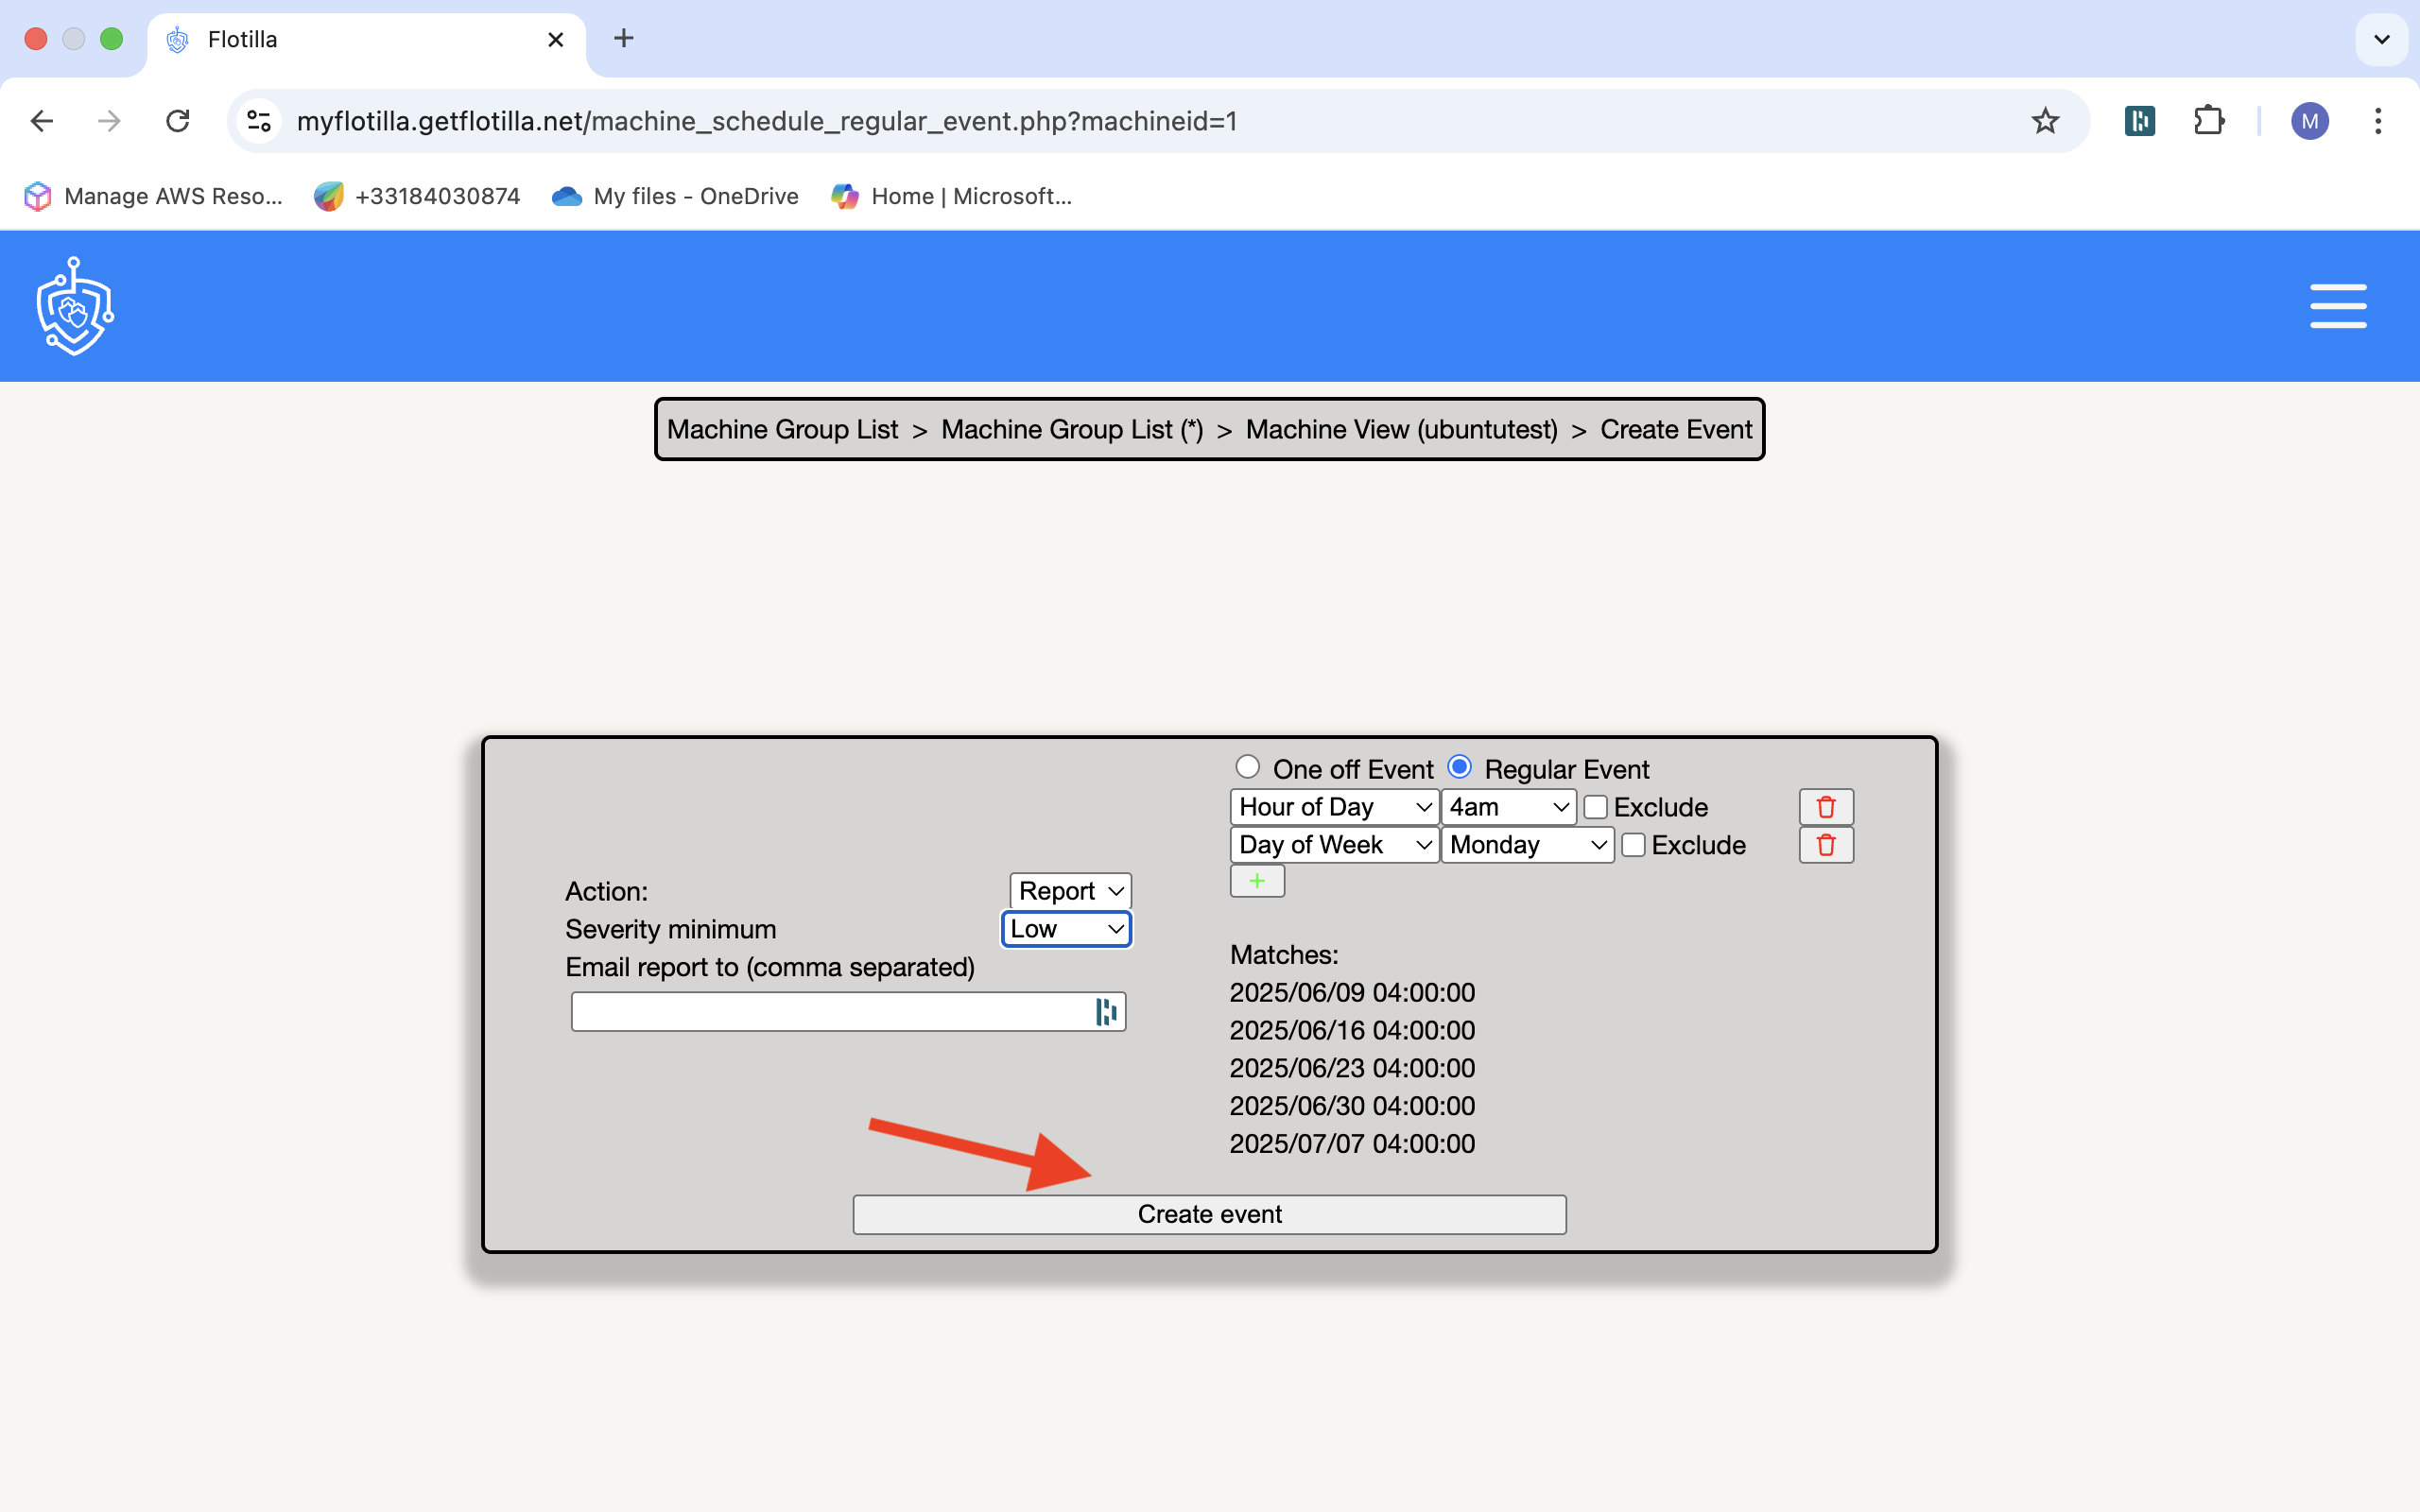
Lastly click on create event.
4.Machine Groups
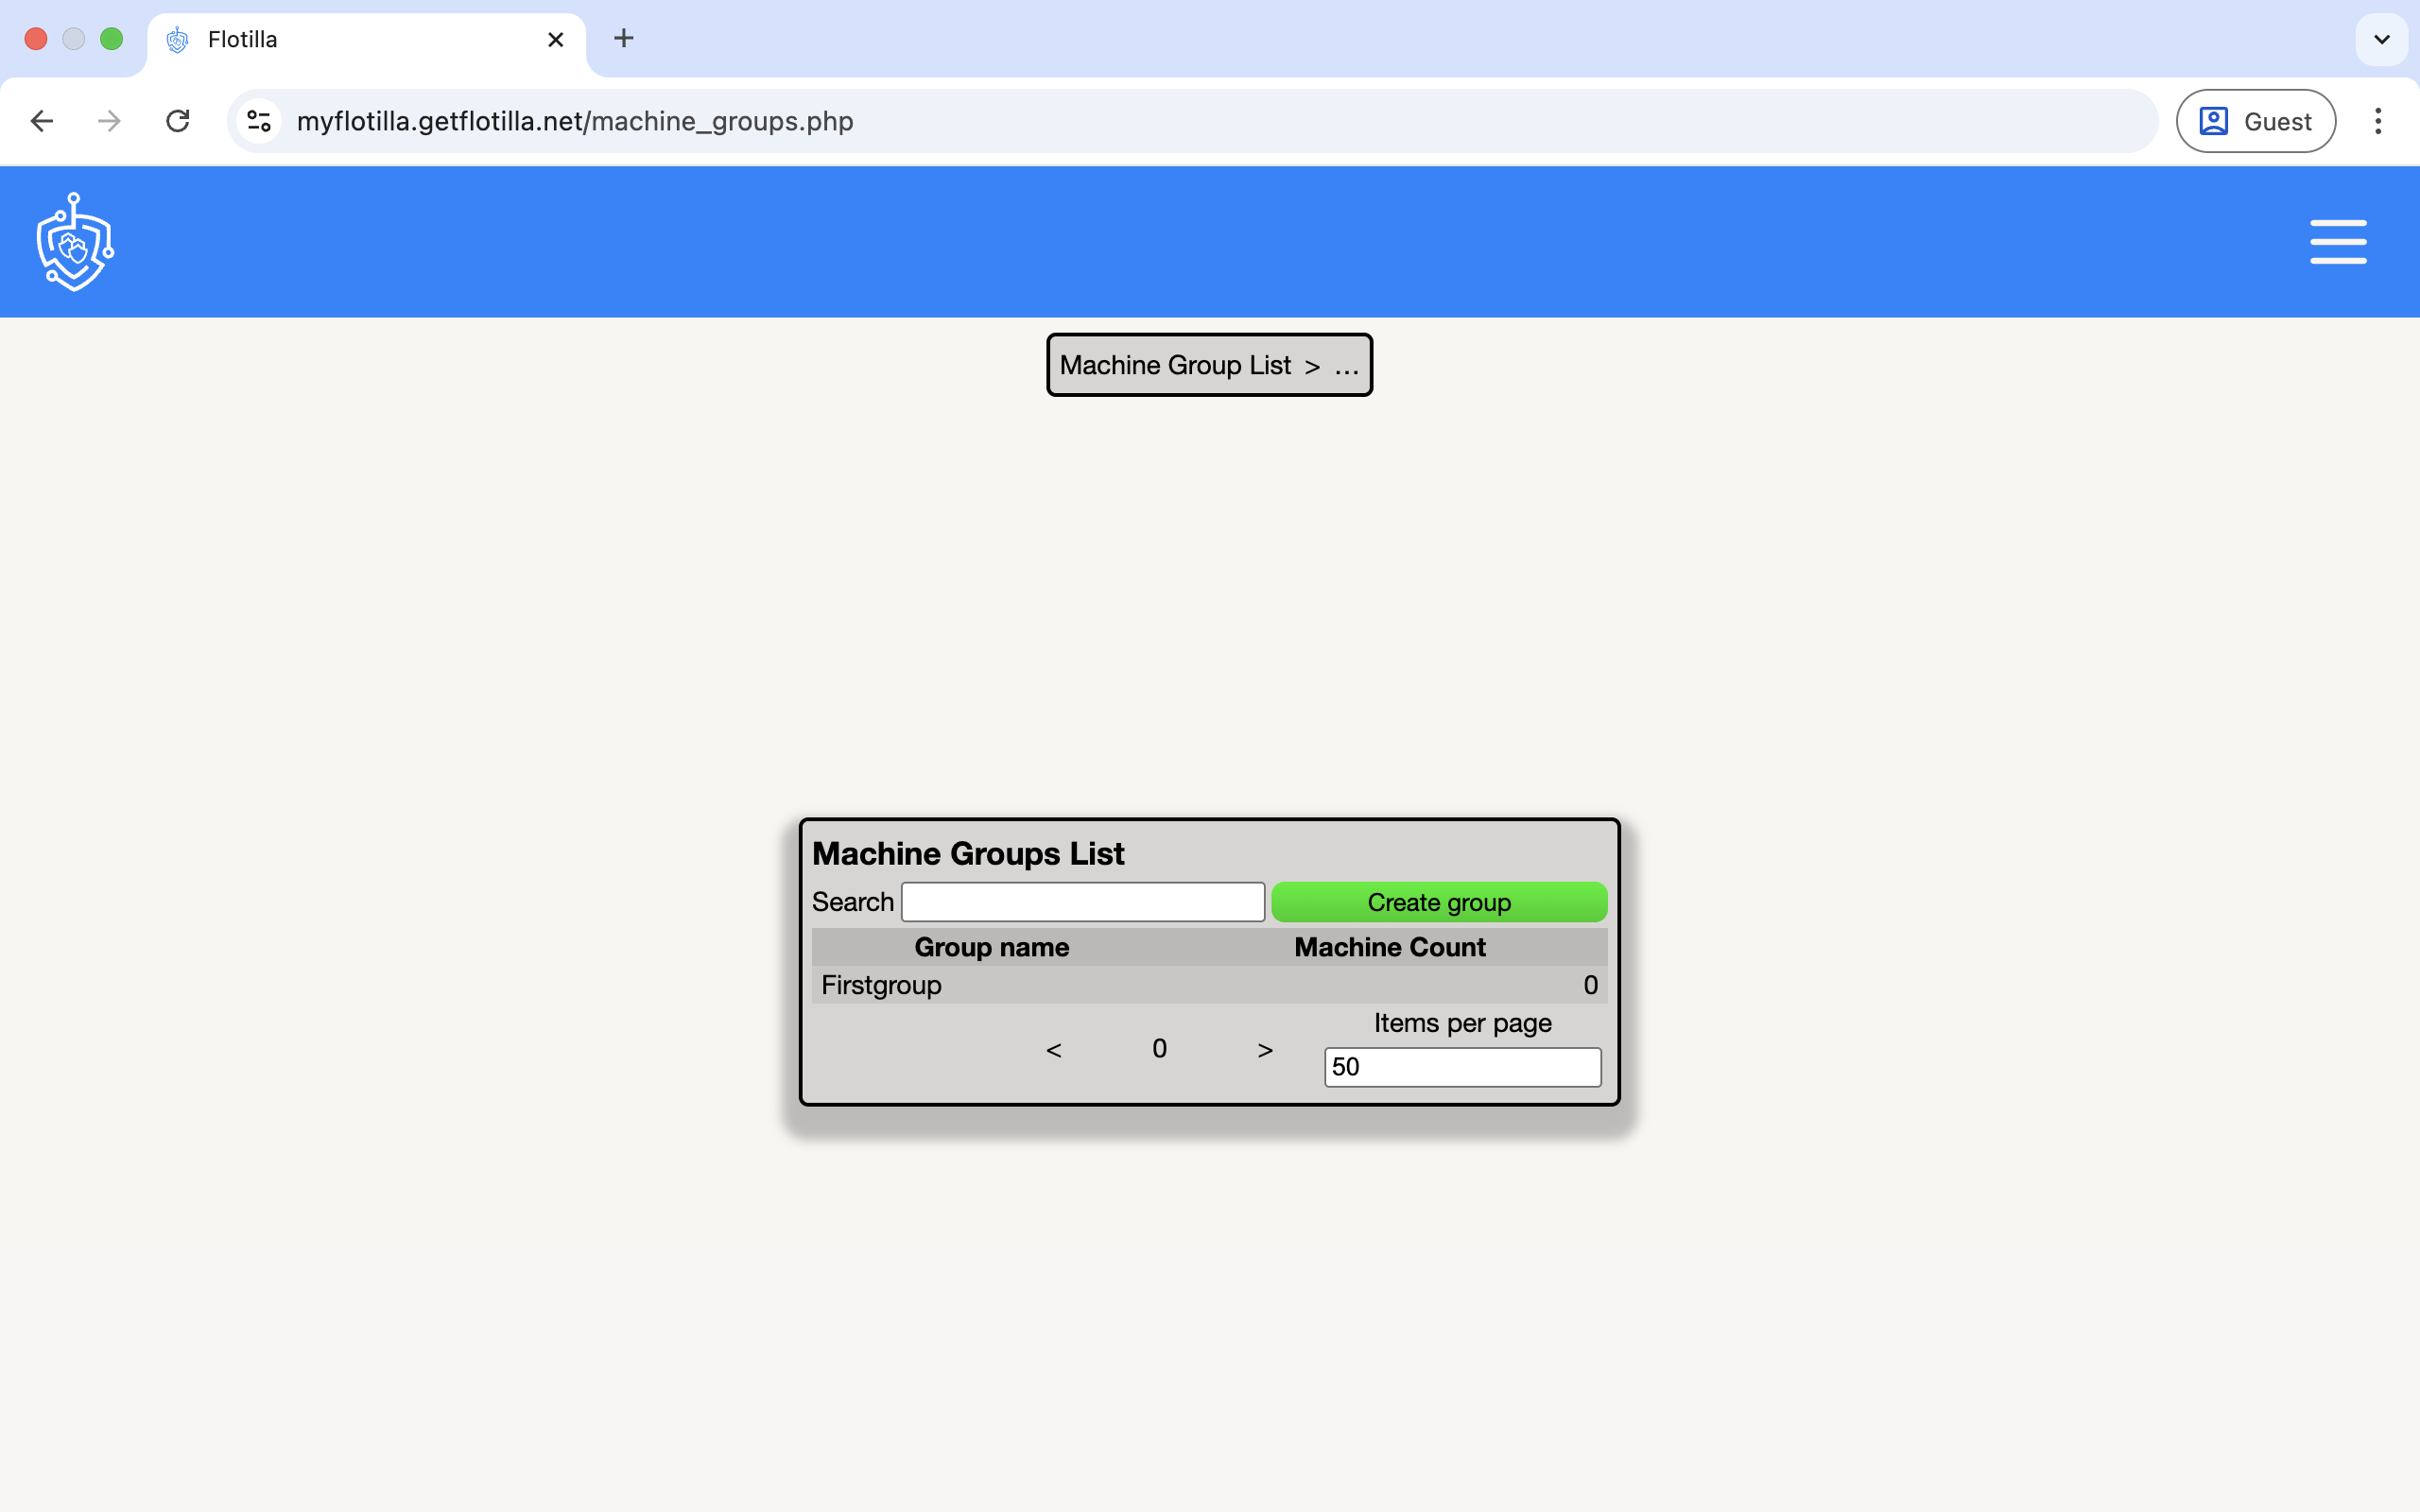
Creating groups of machines enables you to apply events to all machines in the group. To create a group go to the Flotilla Management Portal and select Machine Groups from the menu on the left.

Click on ‘Create Group’.

Name your group and click on ‘Create Group’:
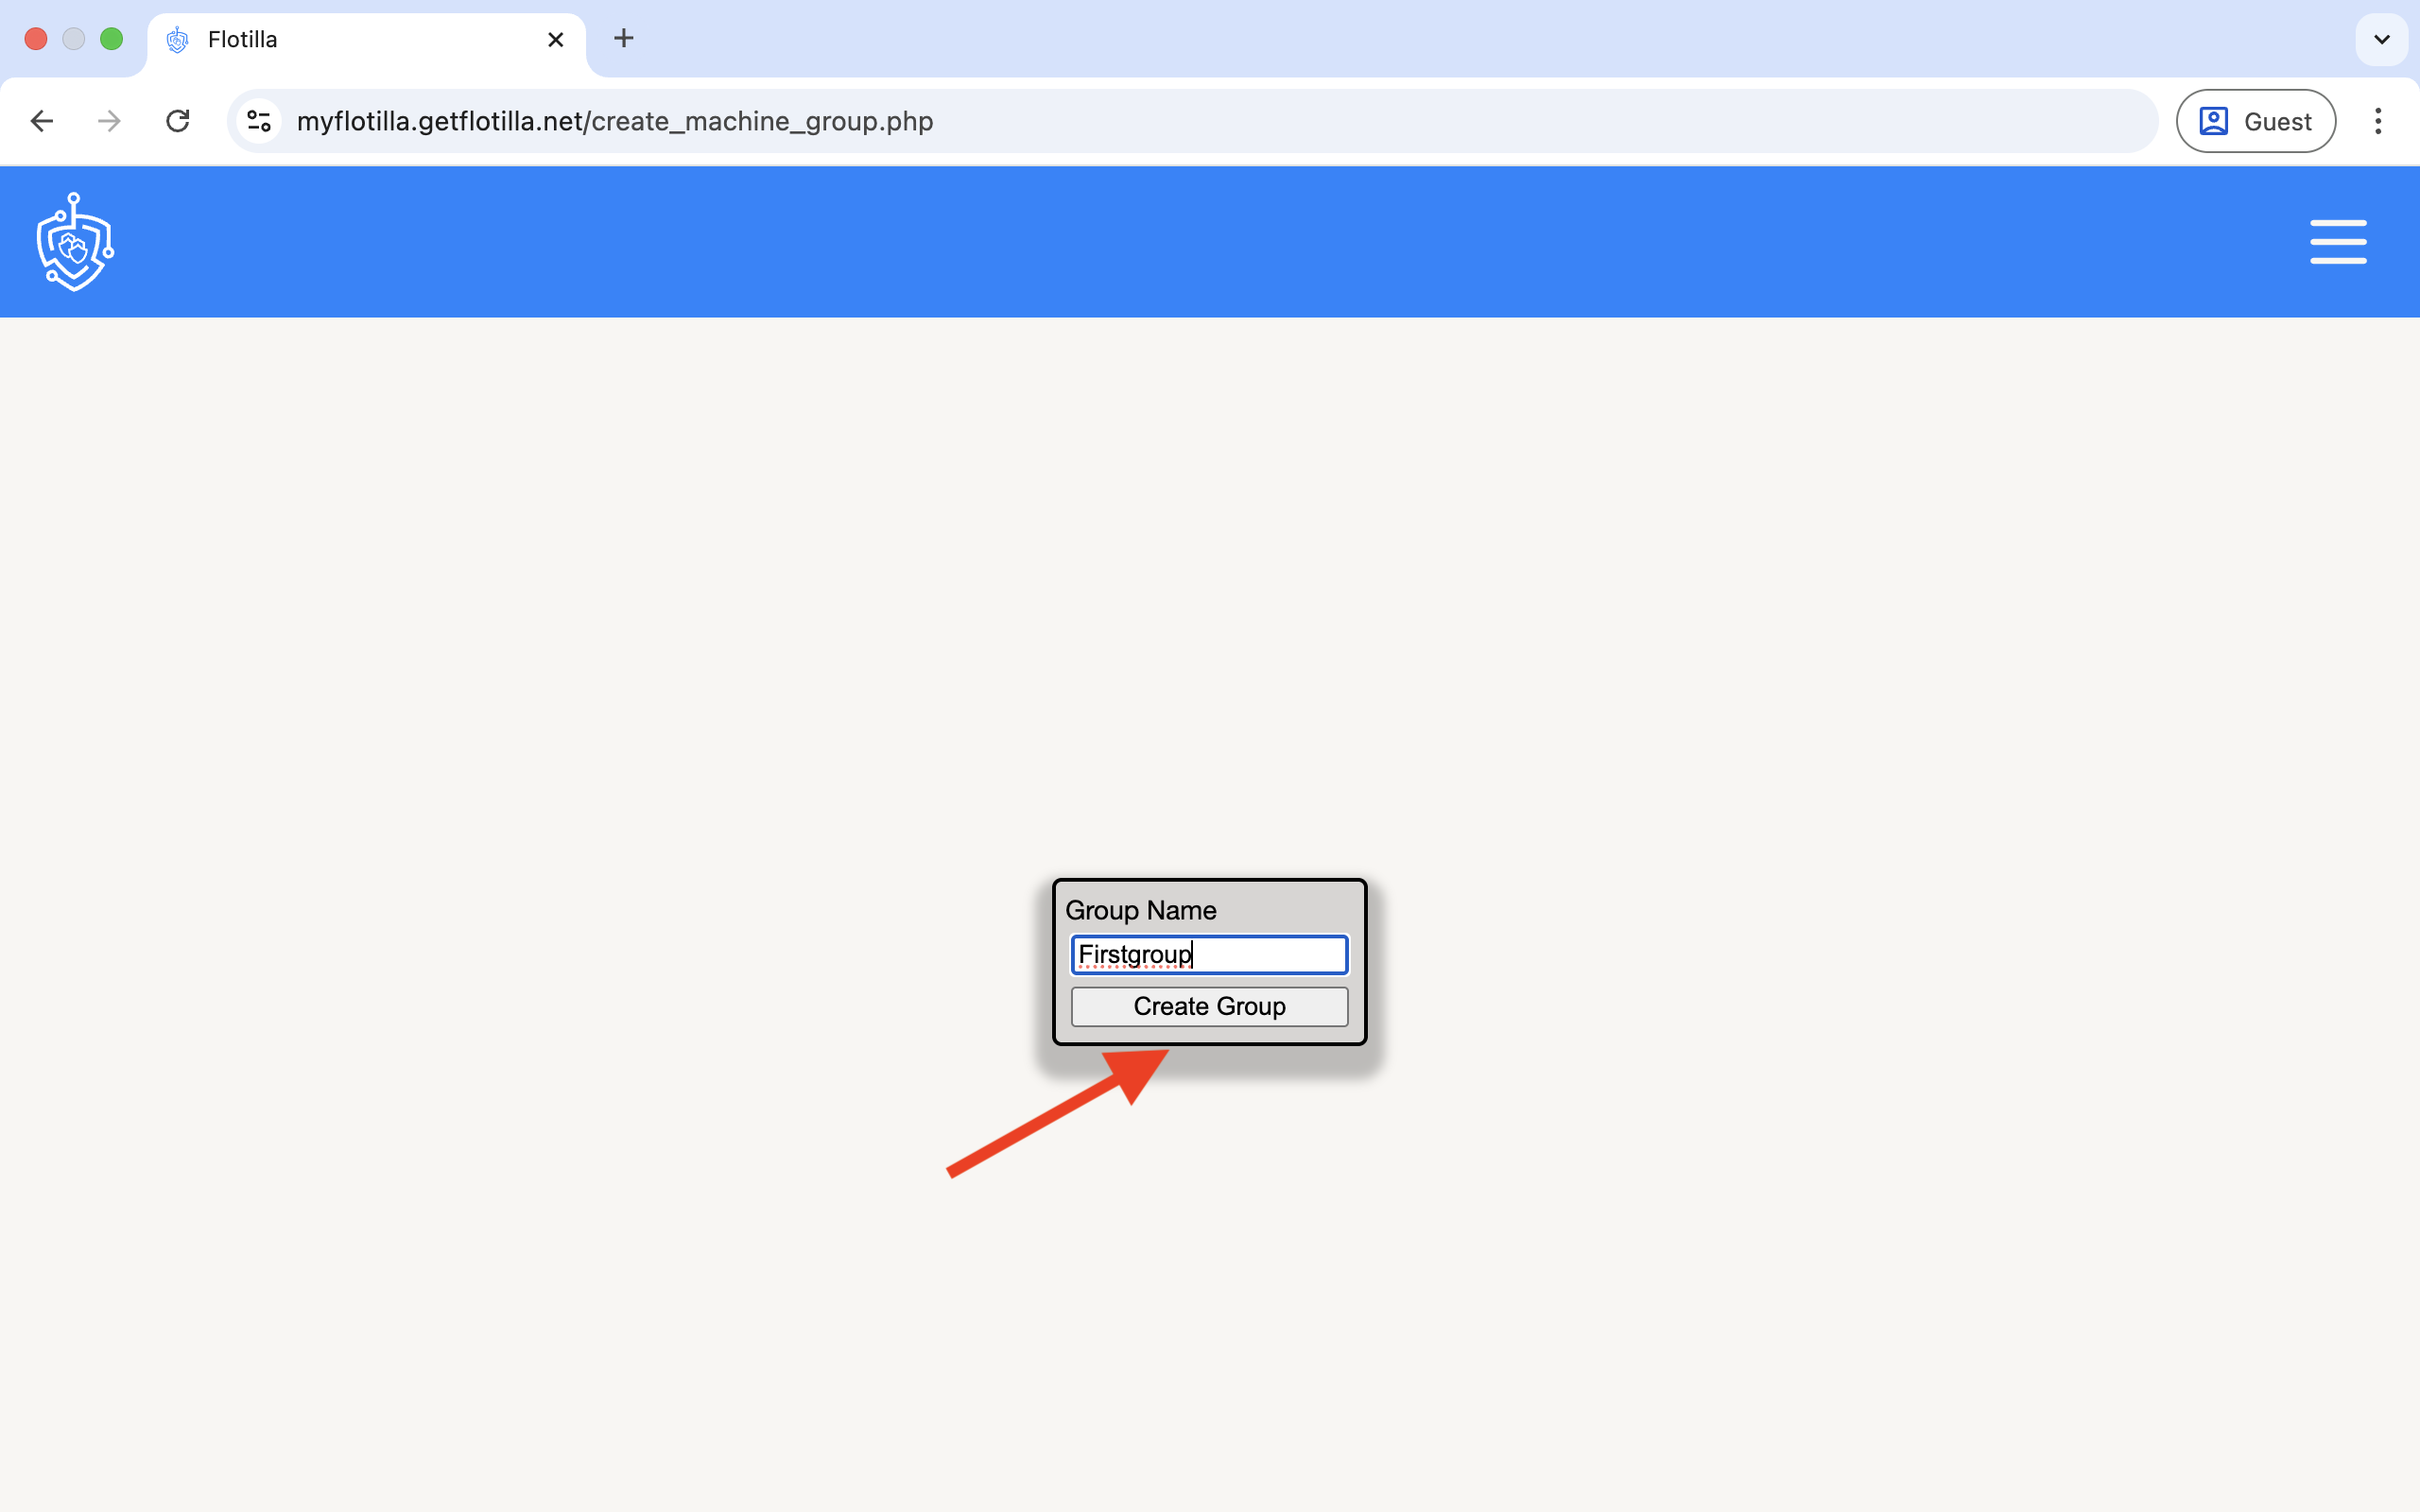
Your group will now appear in the group list.
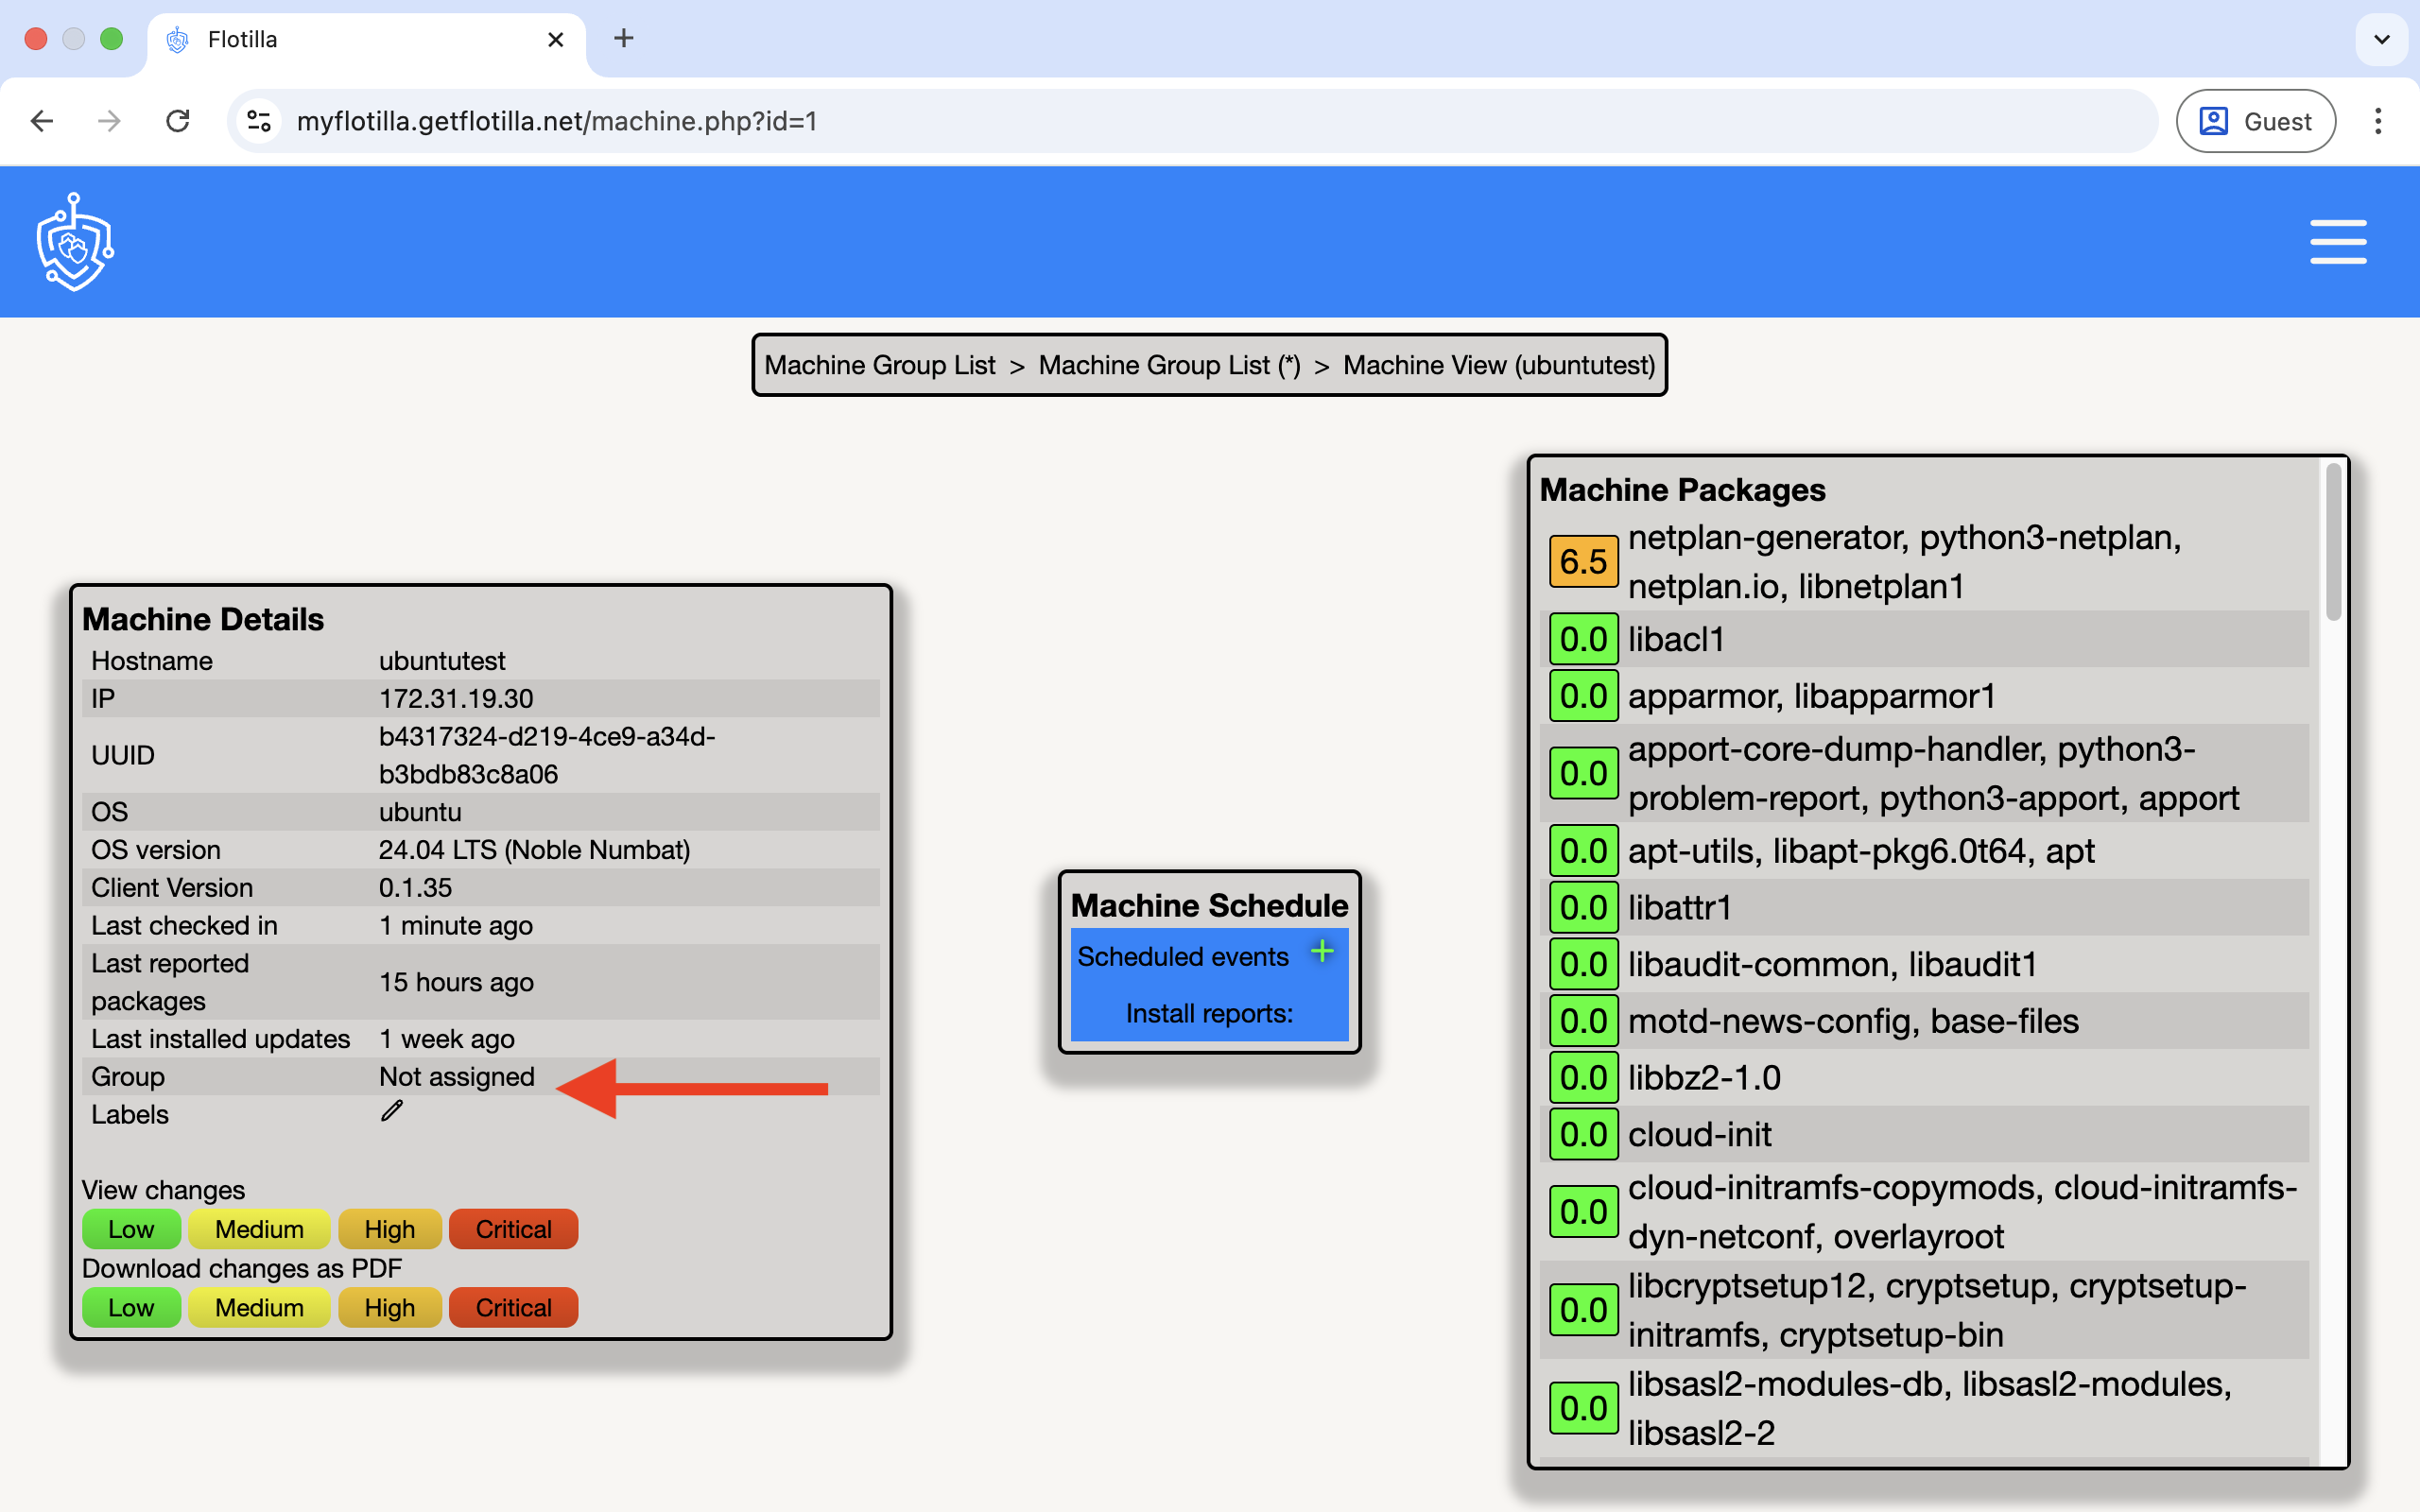
To add machines to the group go to the list of machines and select a machine, then click on 'Not assigned”:
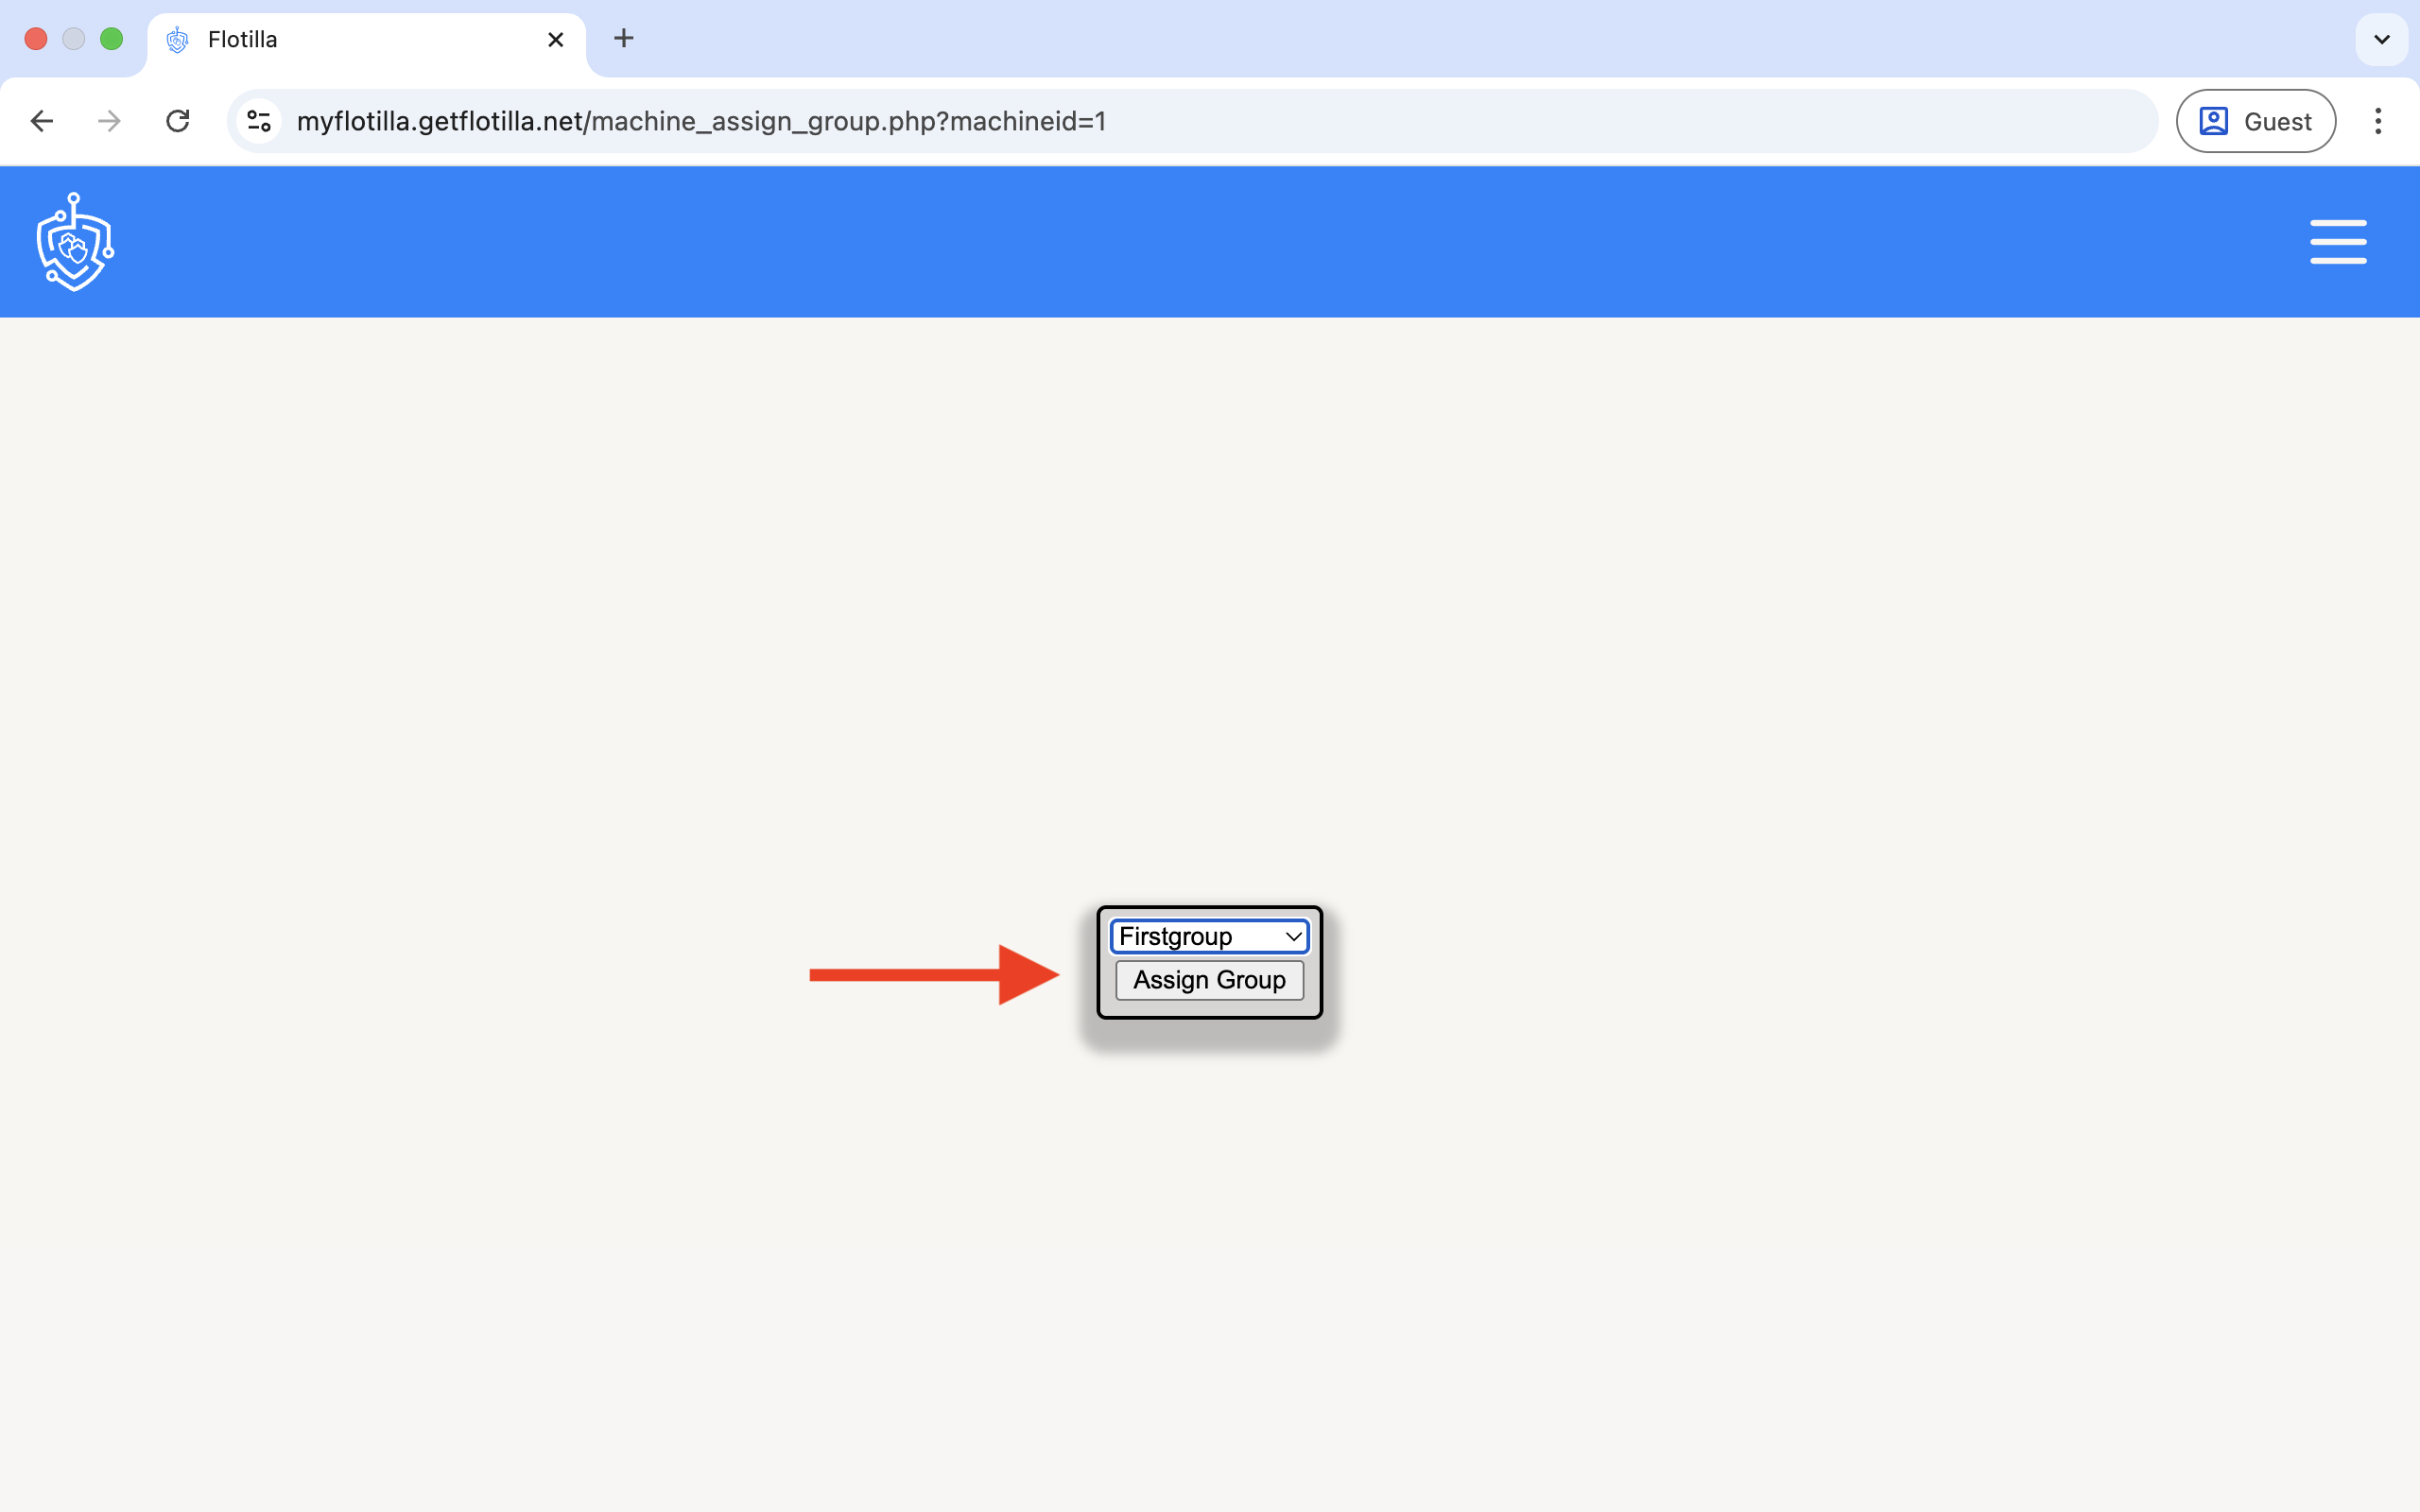
Select a group and then click on “Assign Group”:
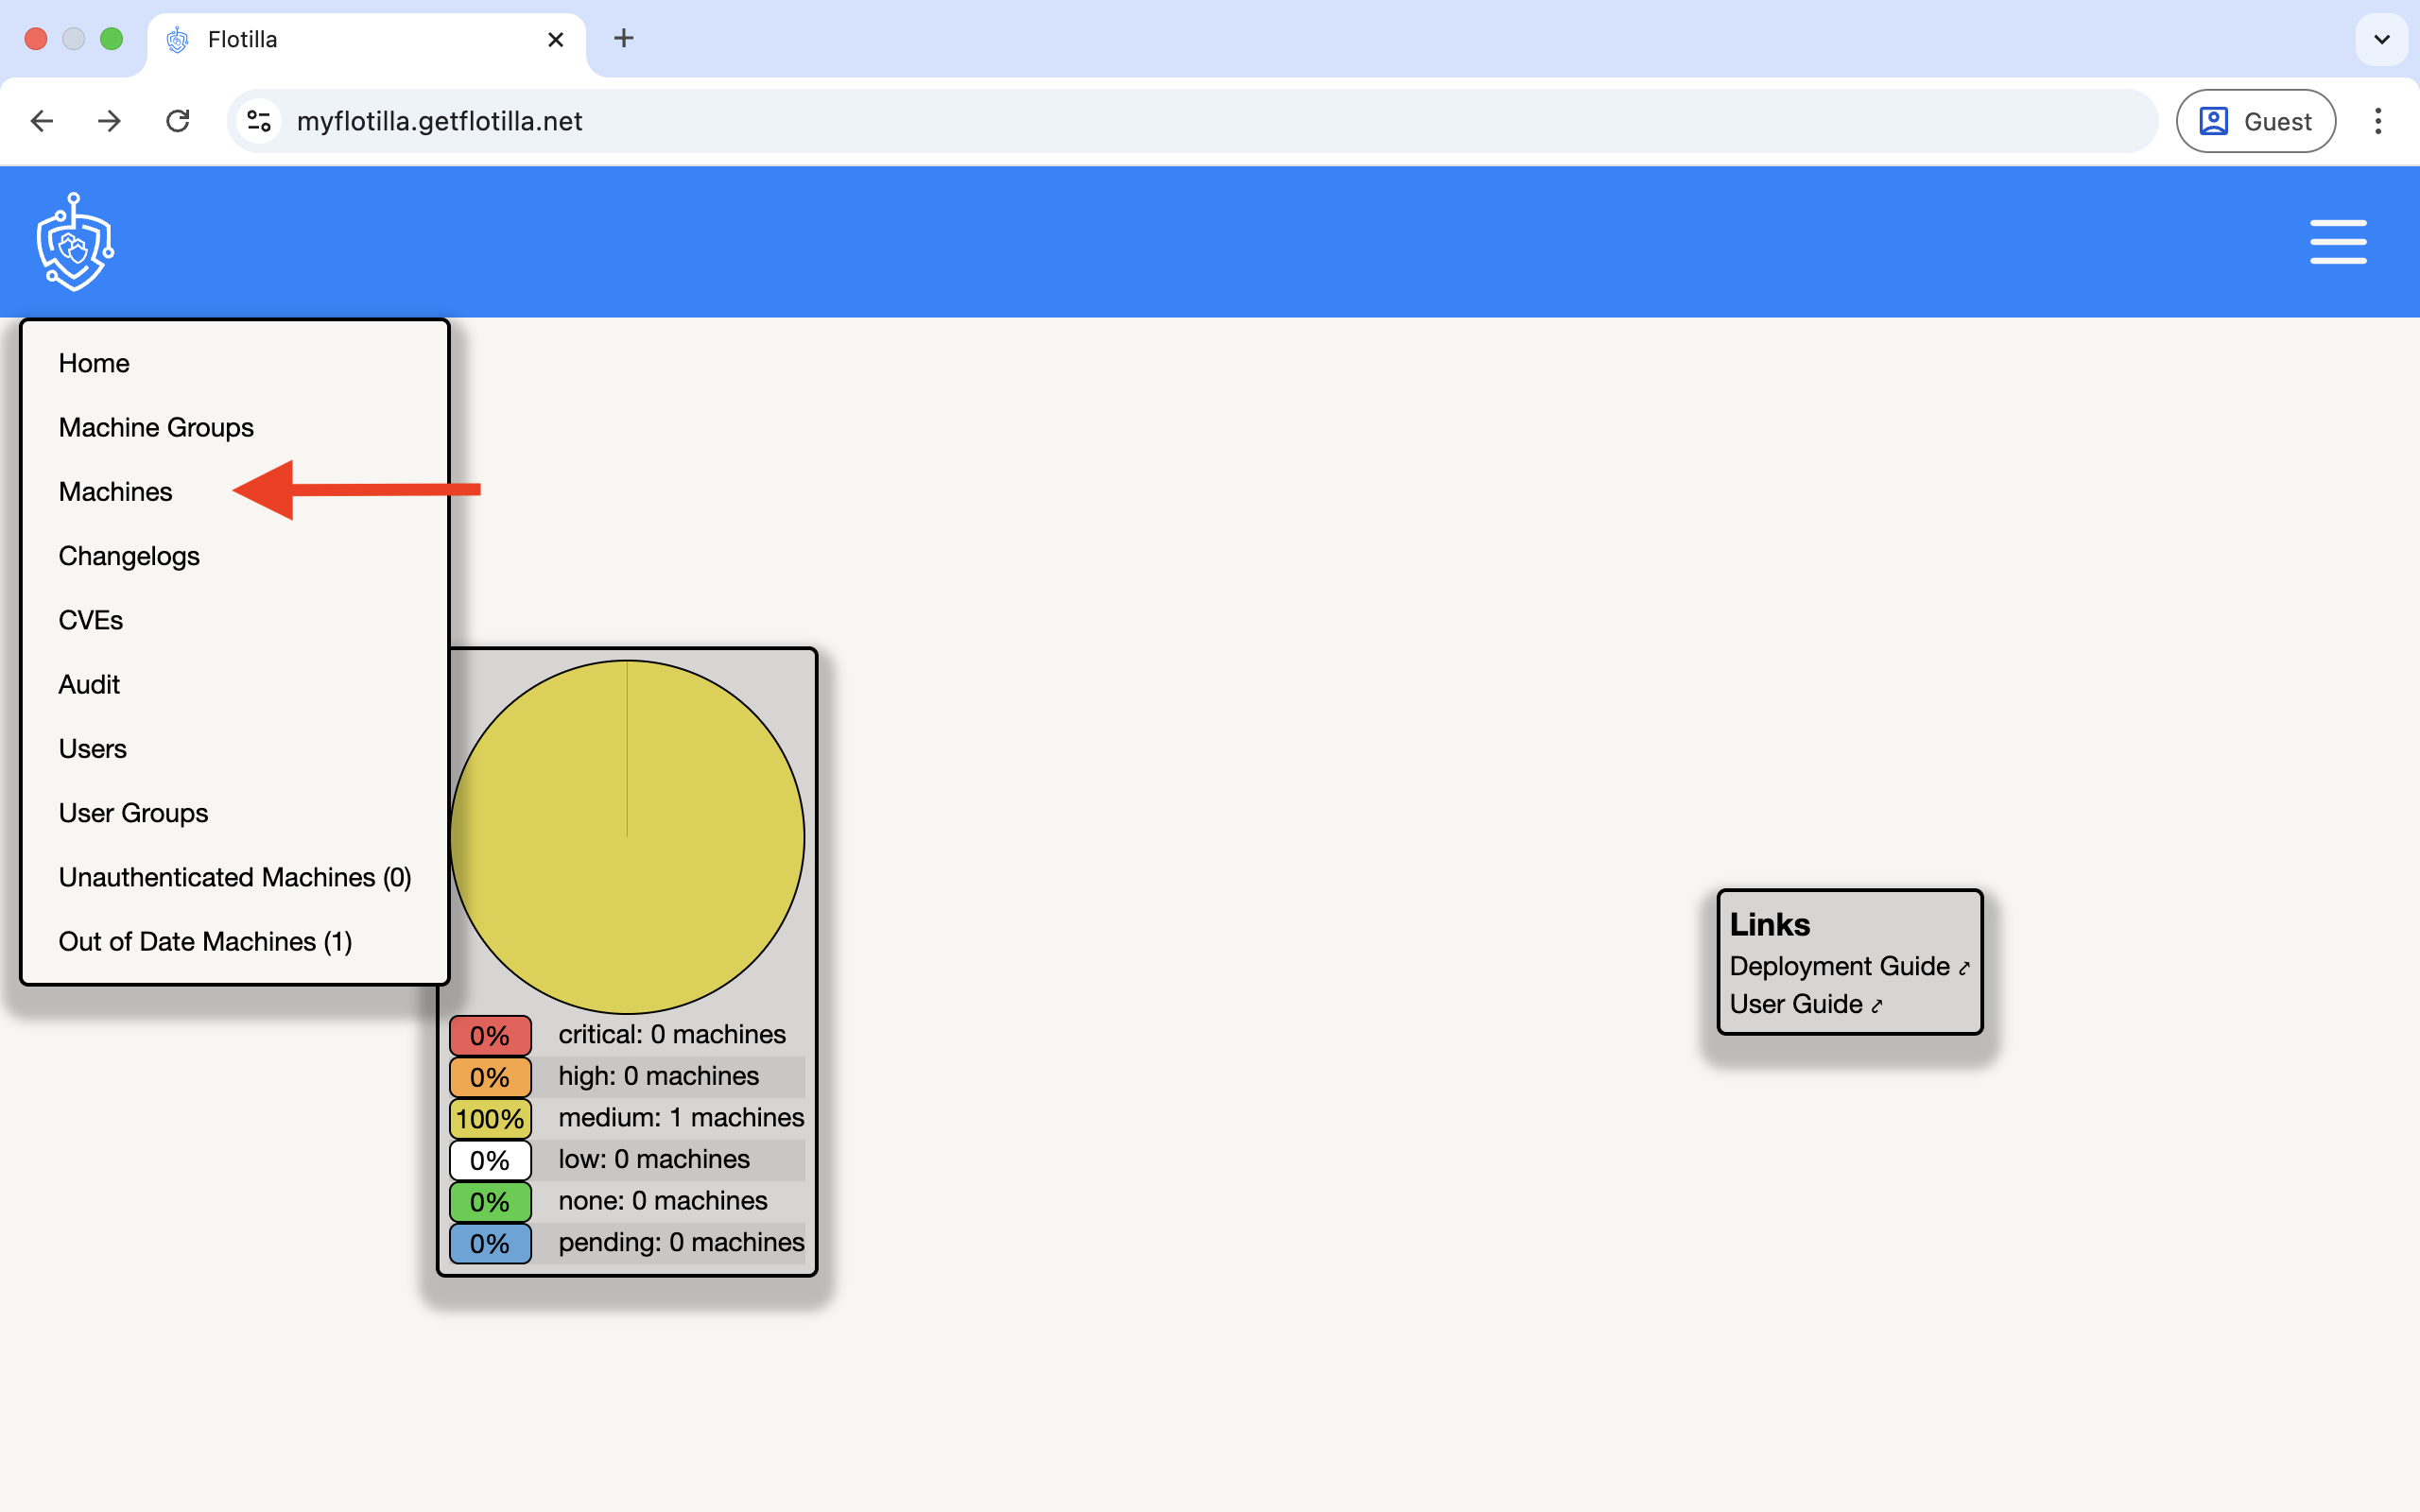
5.Machines
This lists all the machines registered to your account, including unauthenticated and out-of-date machines.
To access the list click here:
This will now display a table of the machines with the last known highest CVSS score for each machine, the hostname, OS & version.
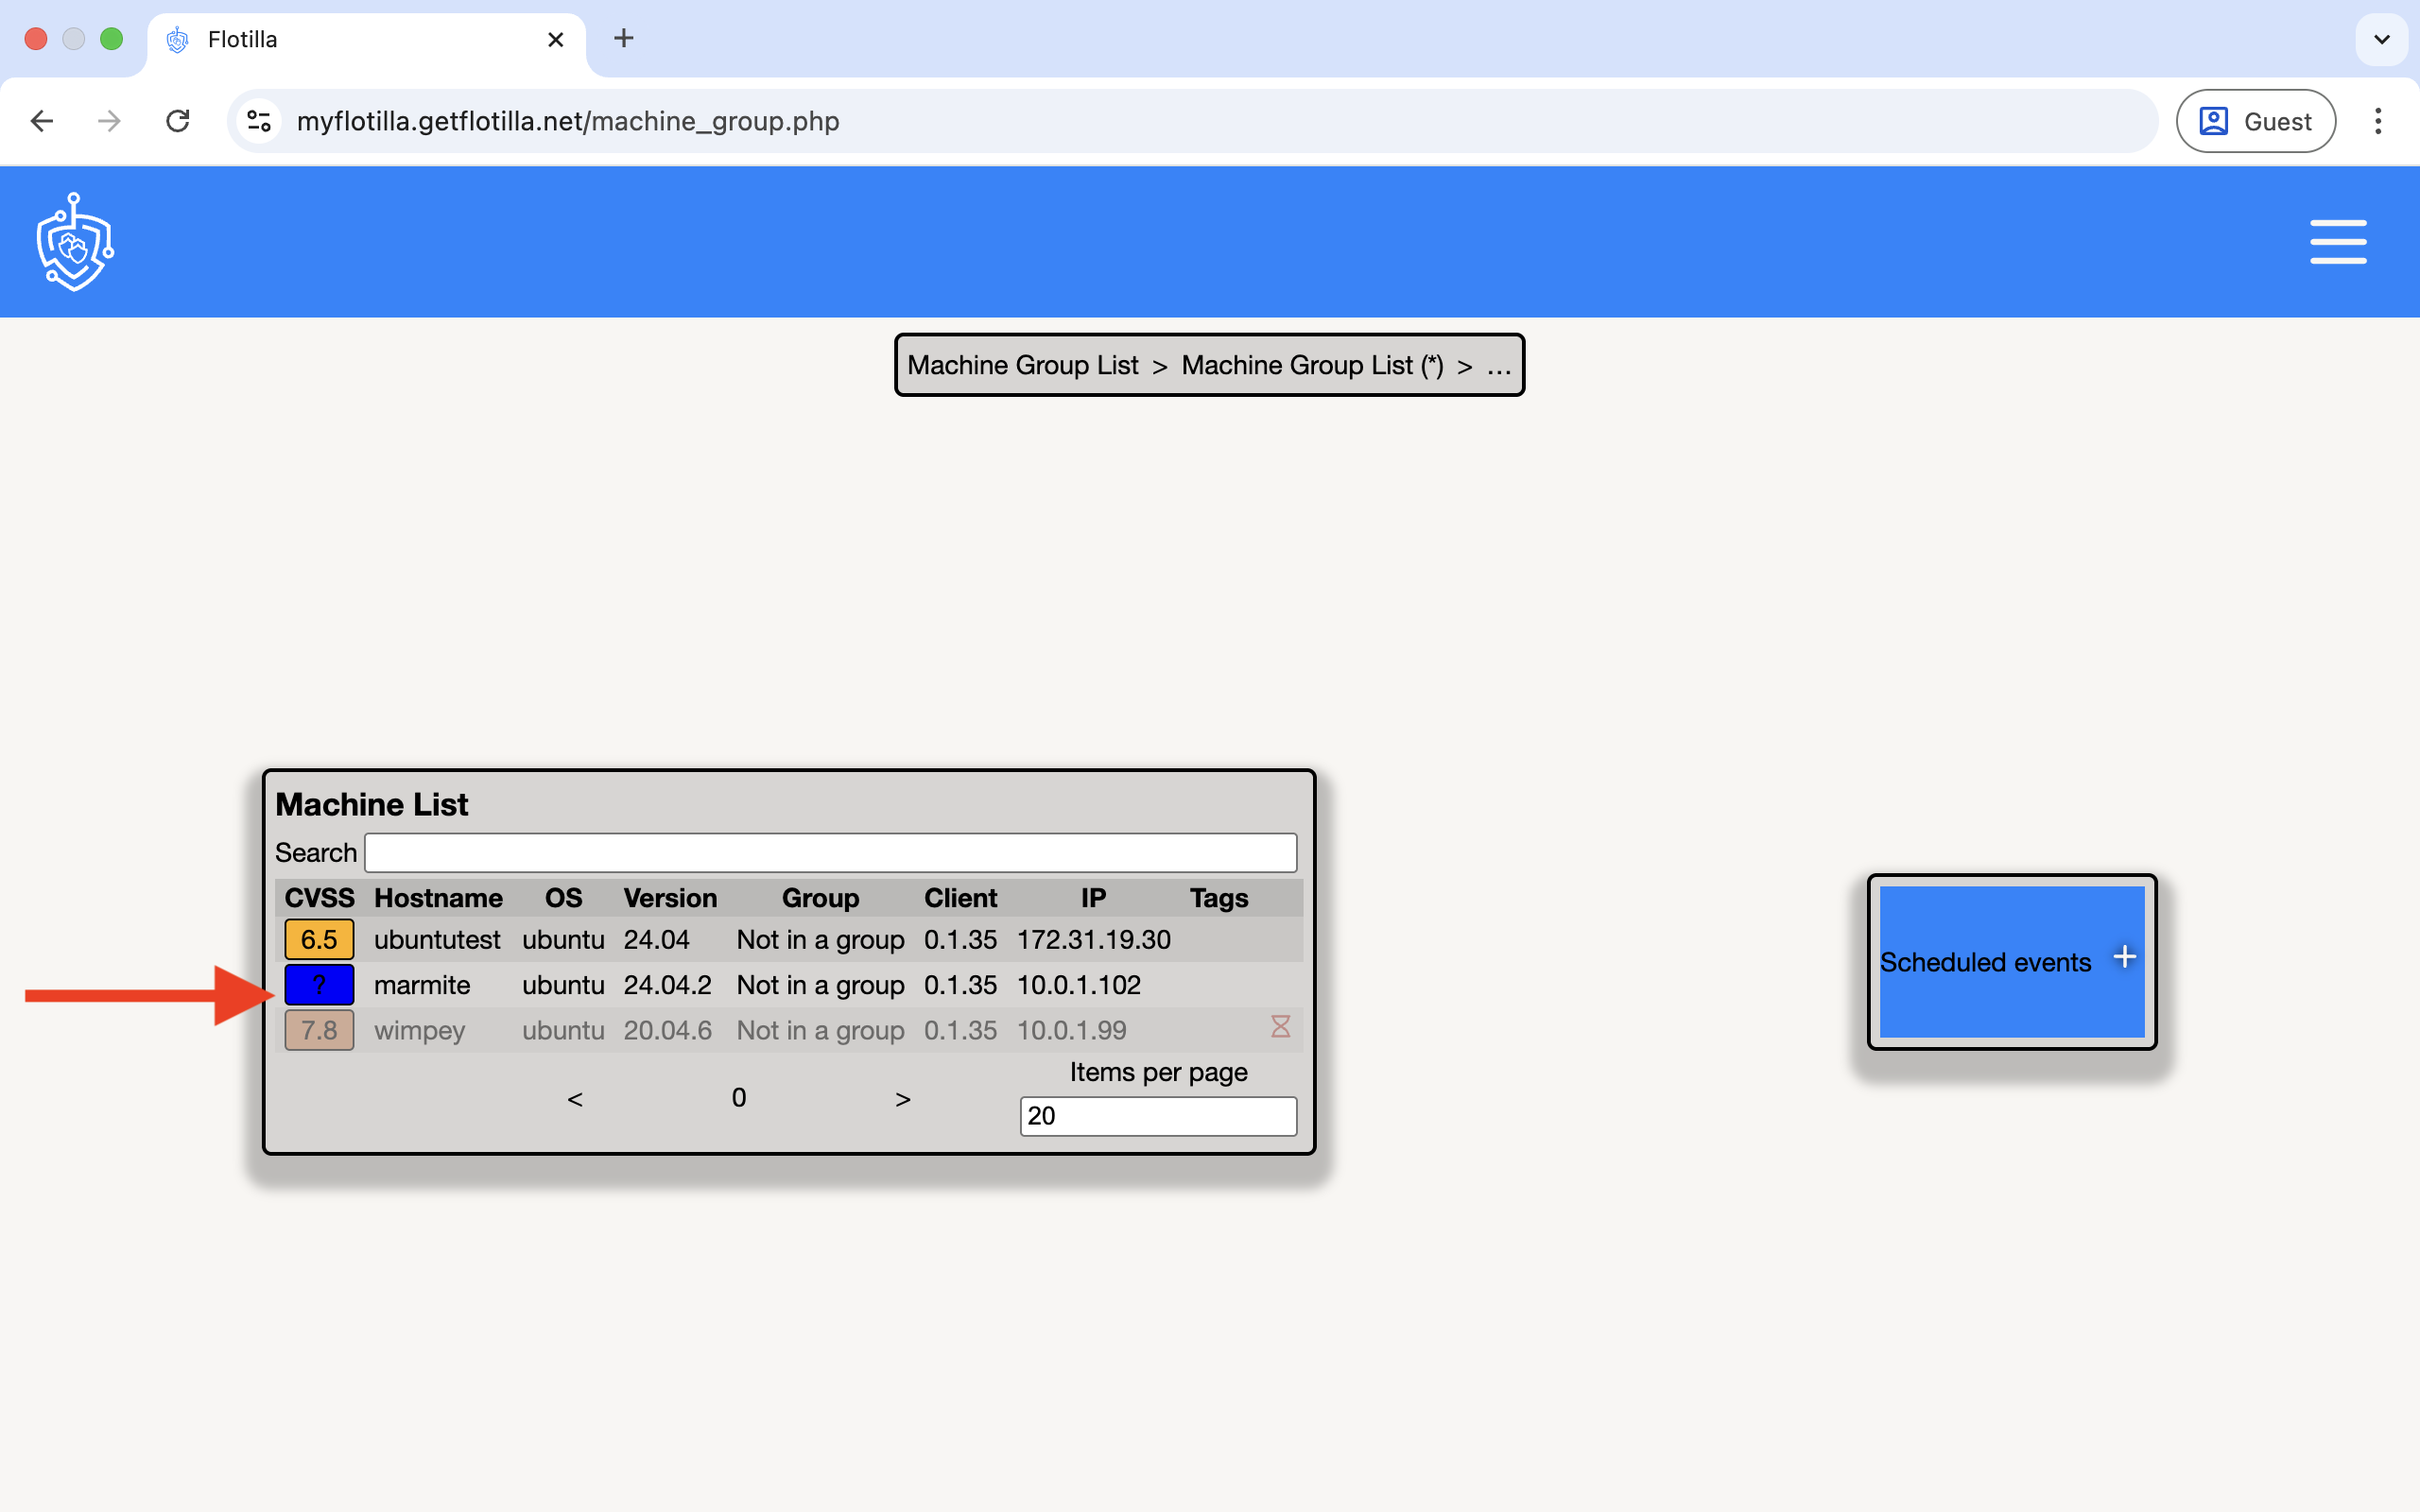
Machines which have not checked into the server for 30 minutes or more will appear greyed out. Clicking the hostname here will take you to a Machine View:
Any text typed into the ‘Search’ text field will limit the view to any machine where the contents of the text field can be found in hostname, OS, or version.
Labels
Machines can be assigned descriptive labels to help in the organisation of email reports run on a group of machines. E.g. Running an email report on a group of machines named Flotilla with machines labelled Security, Server and Till will generate 3 separate email reports per label. If you had one machine with both Security and Server you would receive one email for that combination.
A blue rectangle (below) indicates Flotilla is actively calculating data being sent by the machine:
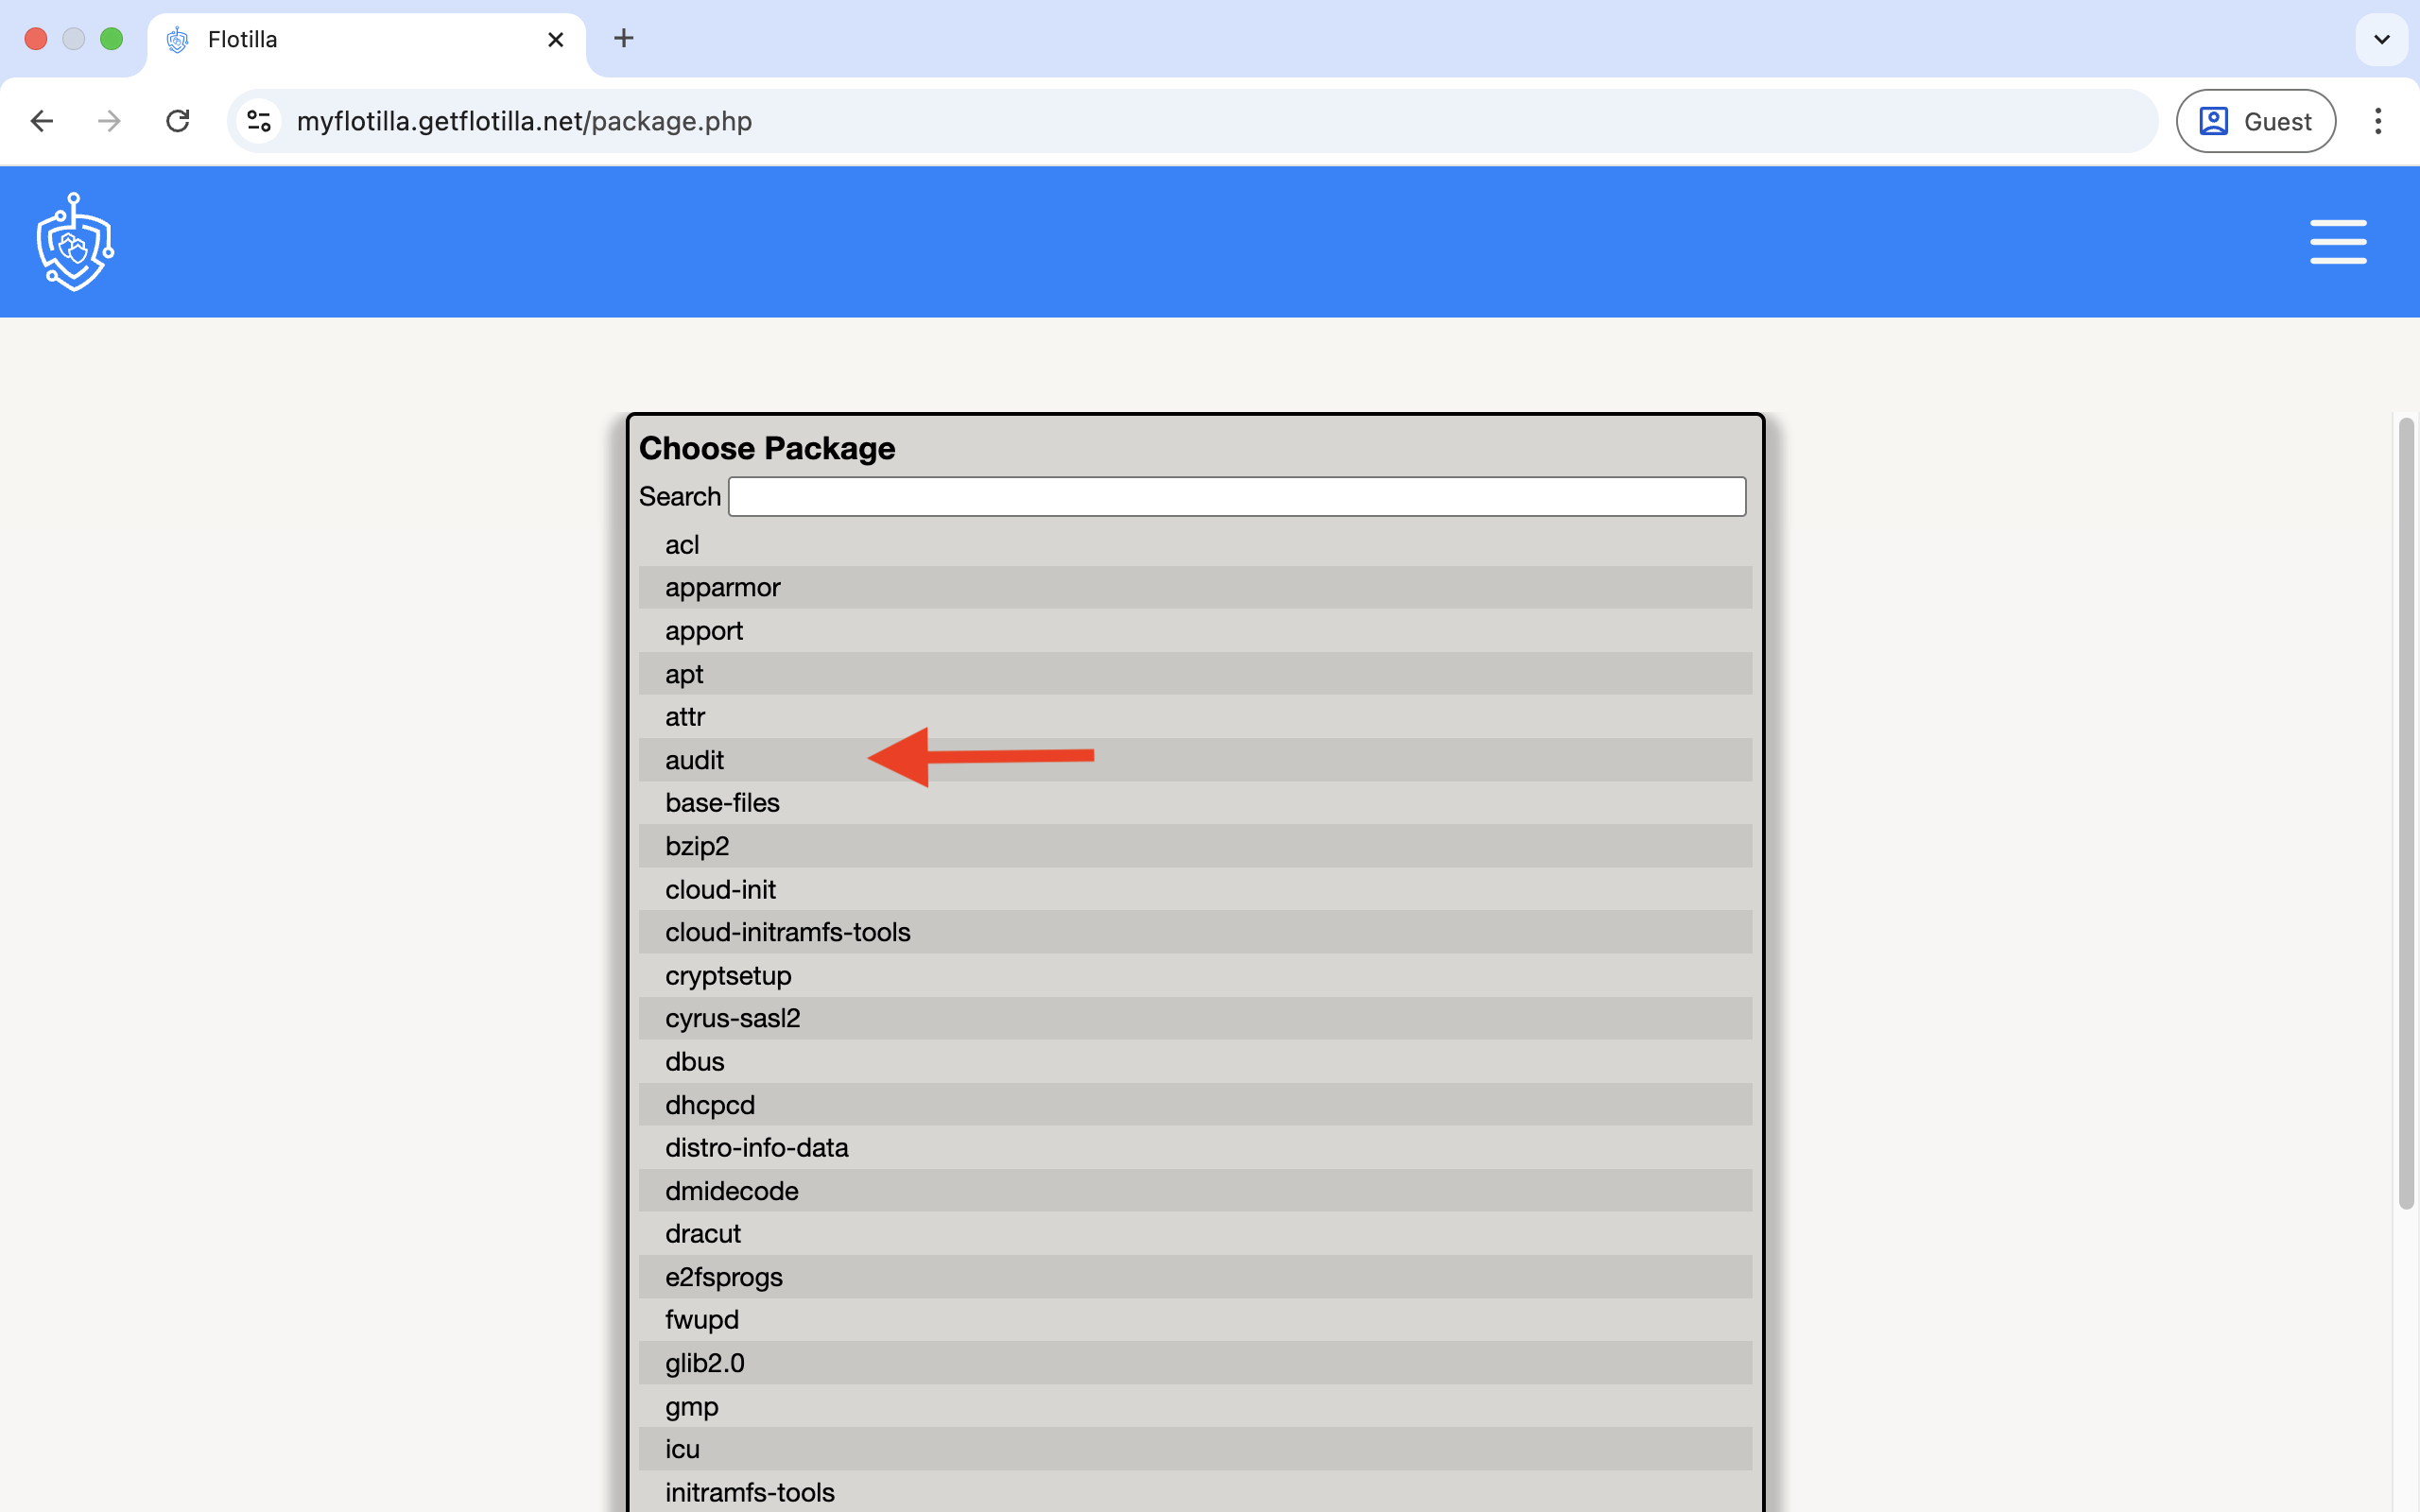
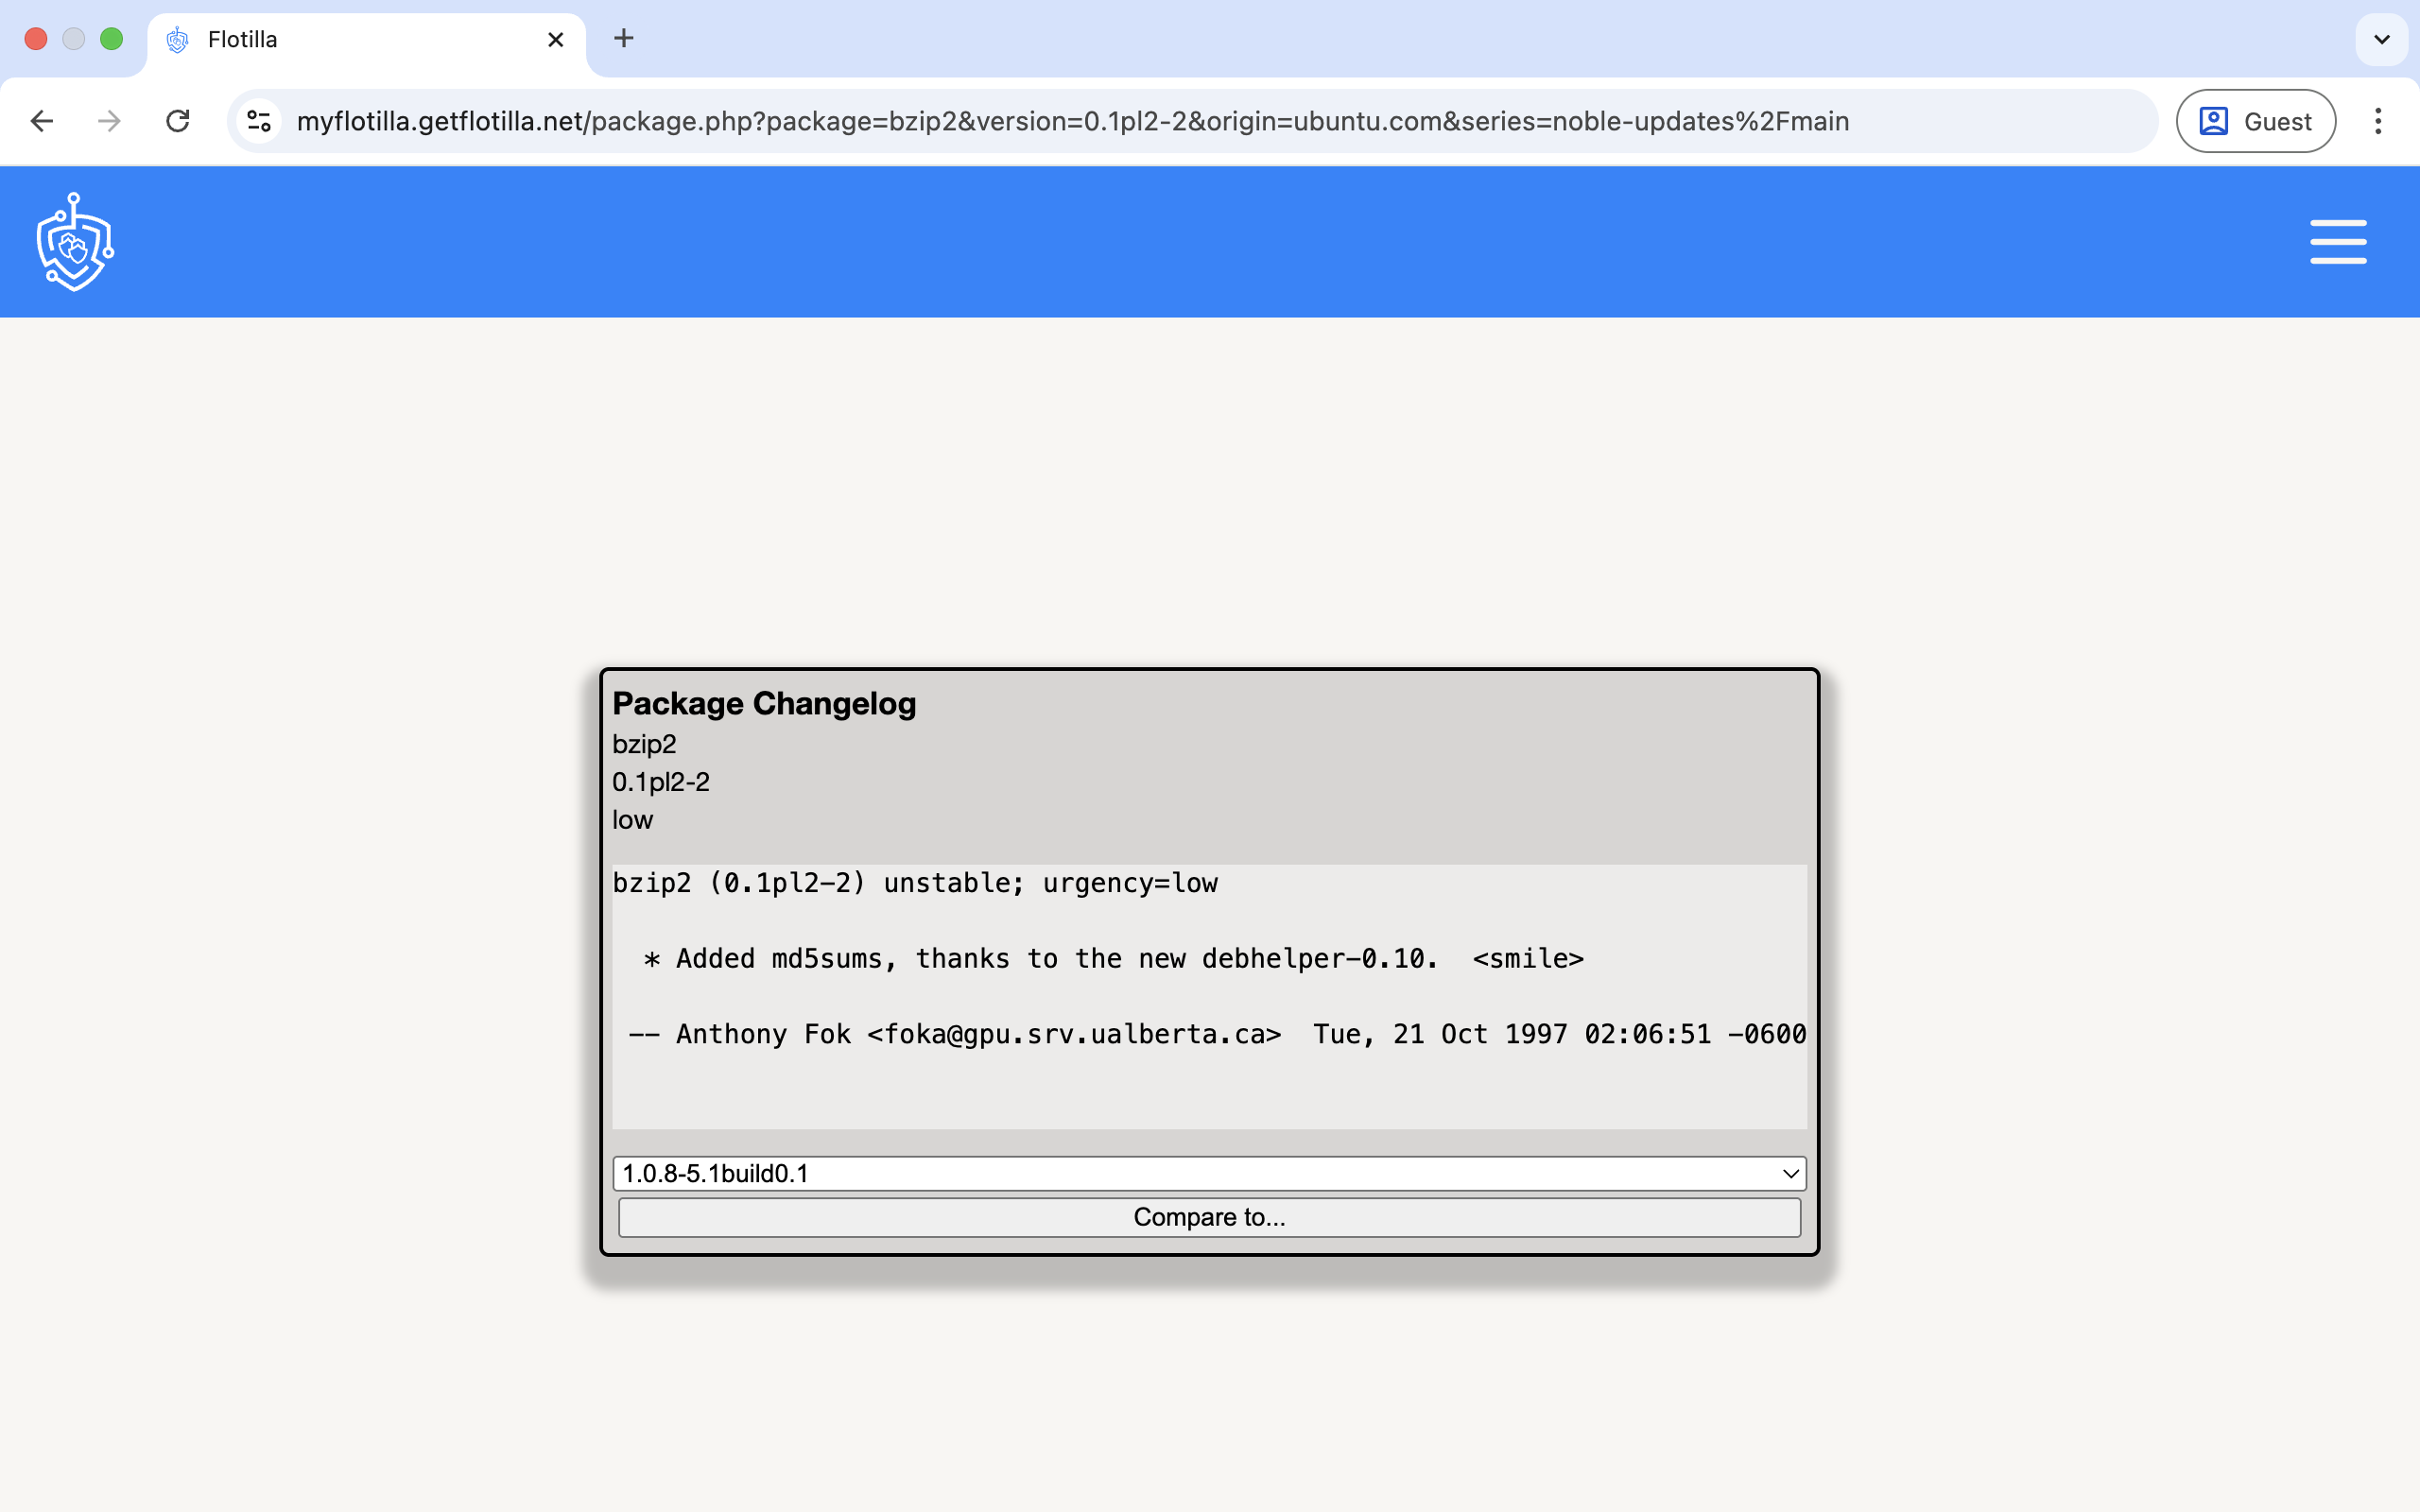
6.Changelogs
A changelog is a summary of all notable changes Flotilla makes to a specific package. This usually includes records of changes such as bug fixes, new features, etc.
To access the changelogs click here:

Select the package you wish to view the Changelogs for:
Select a package source:
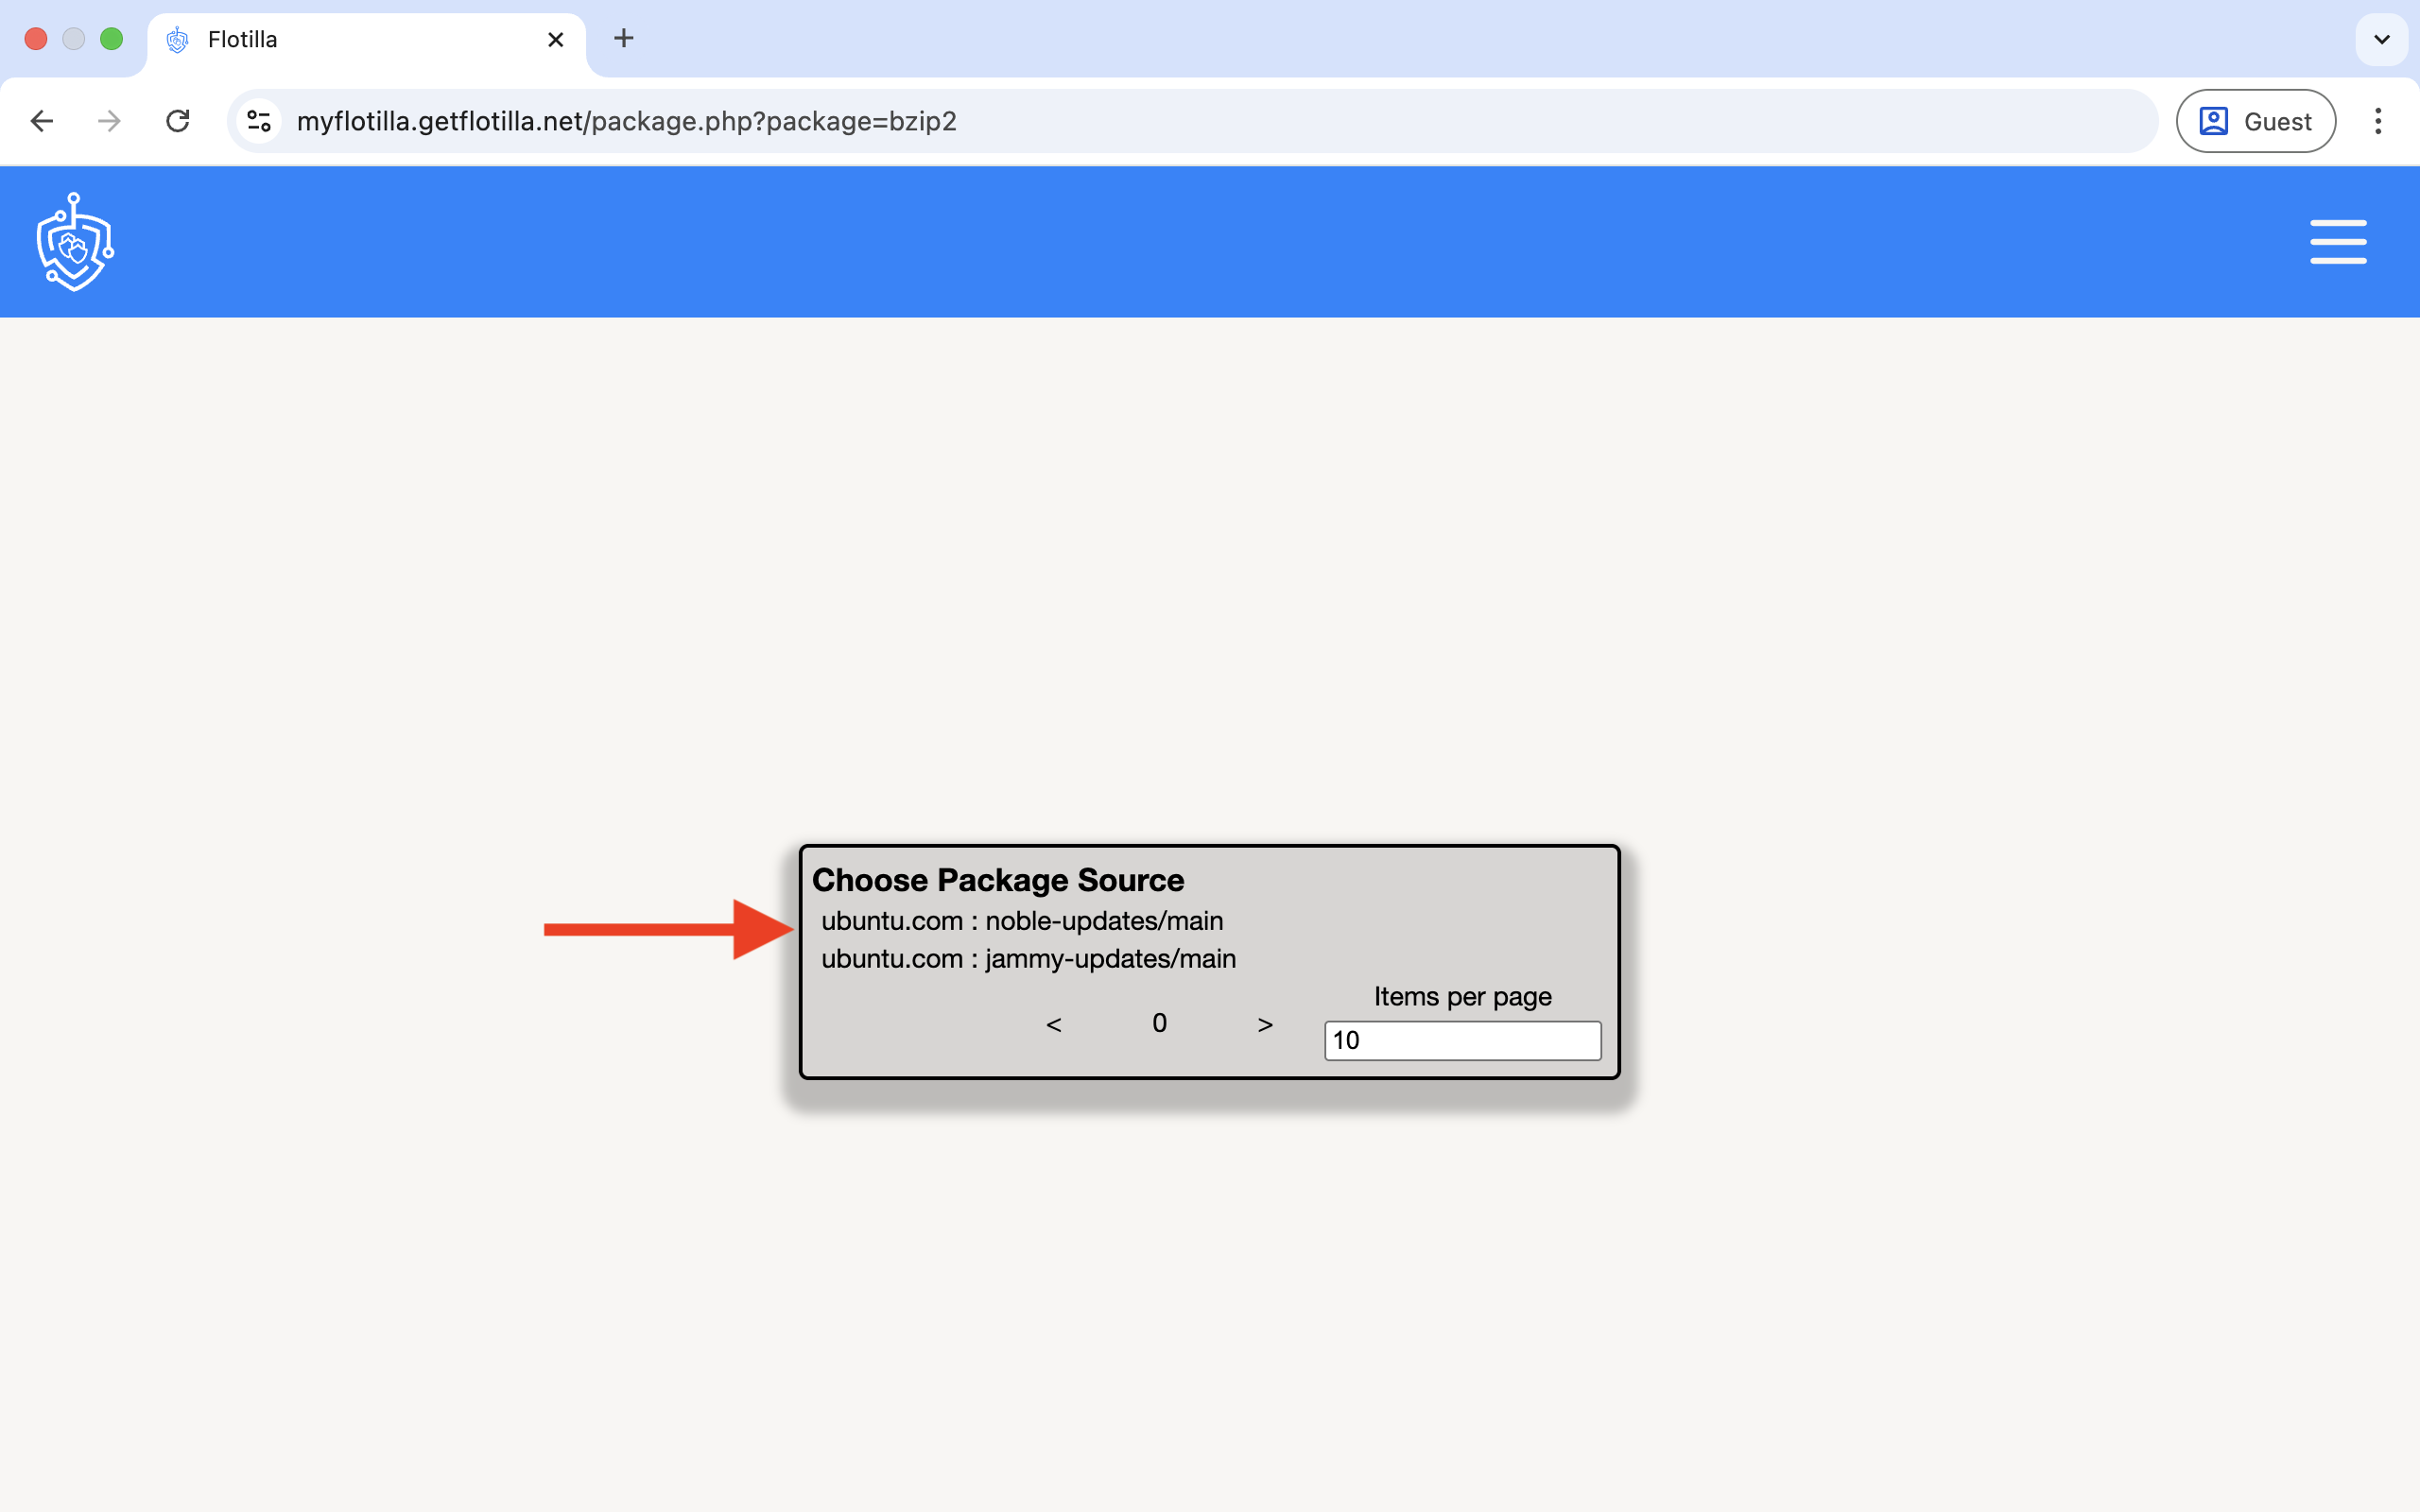
Now select the package version:
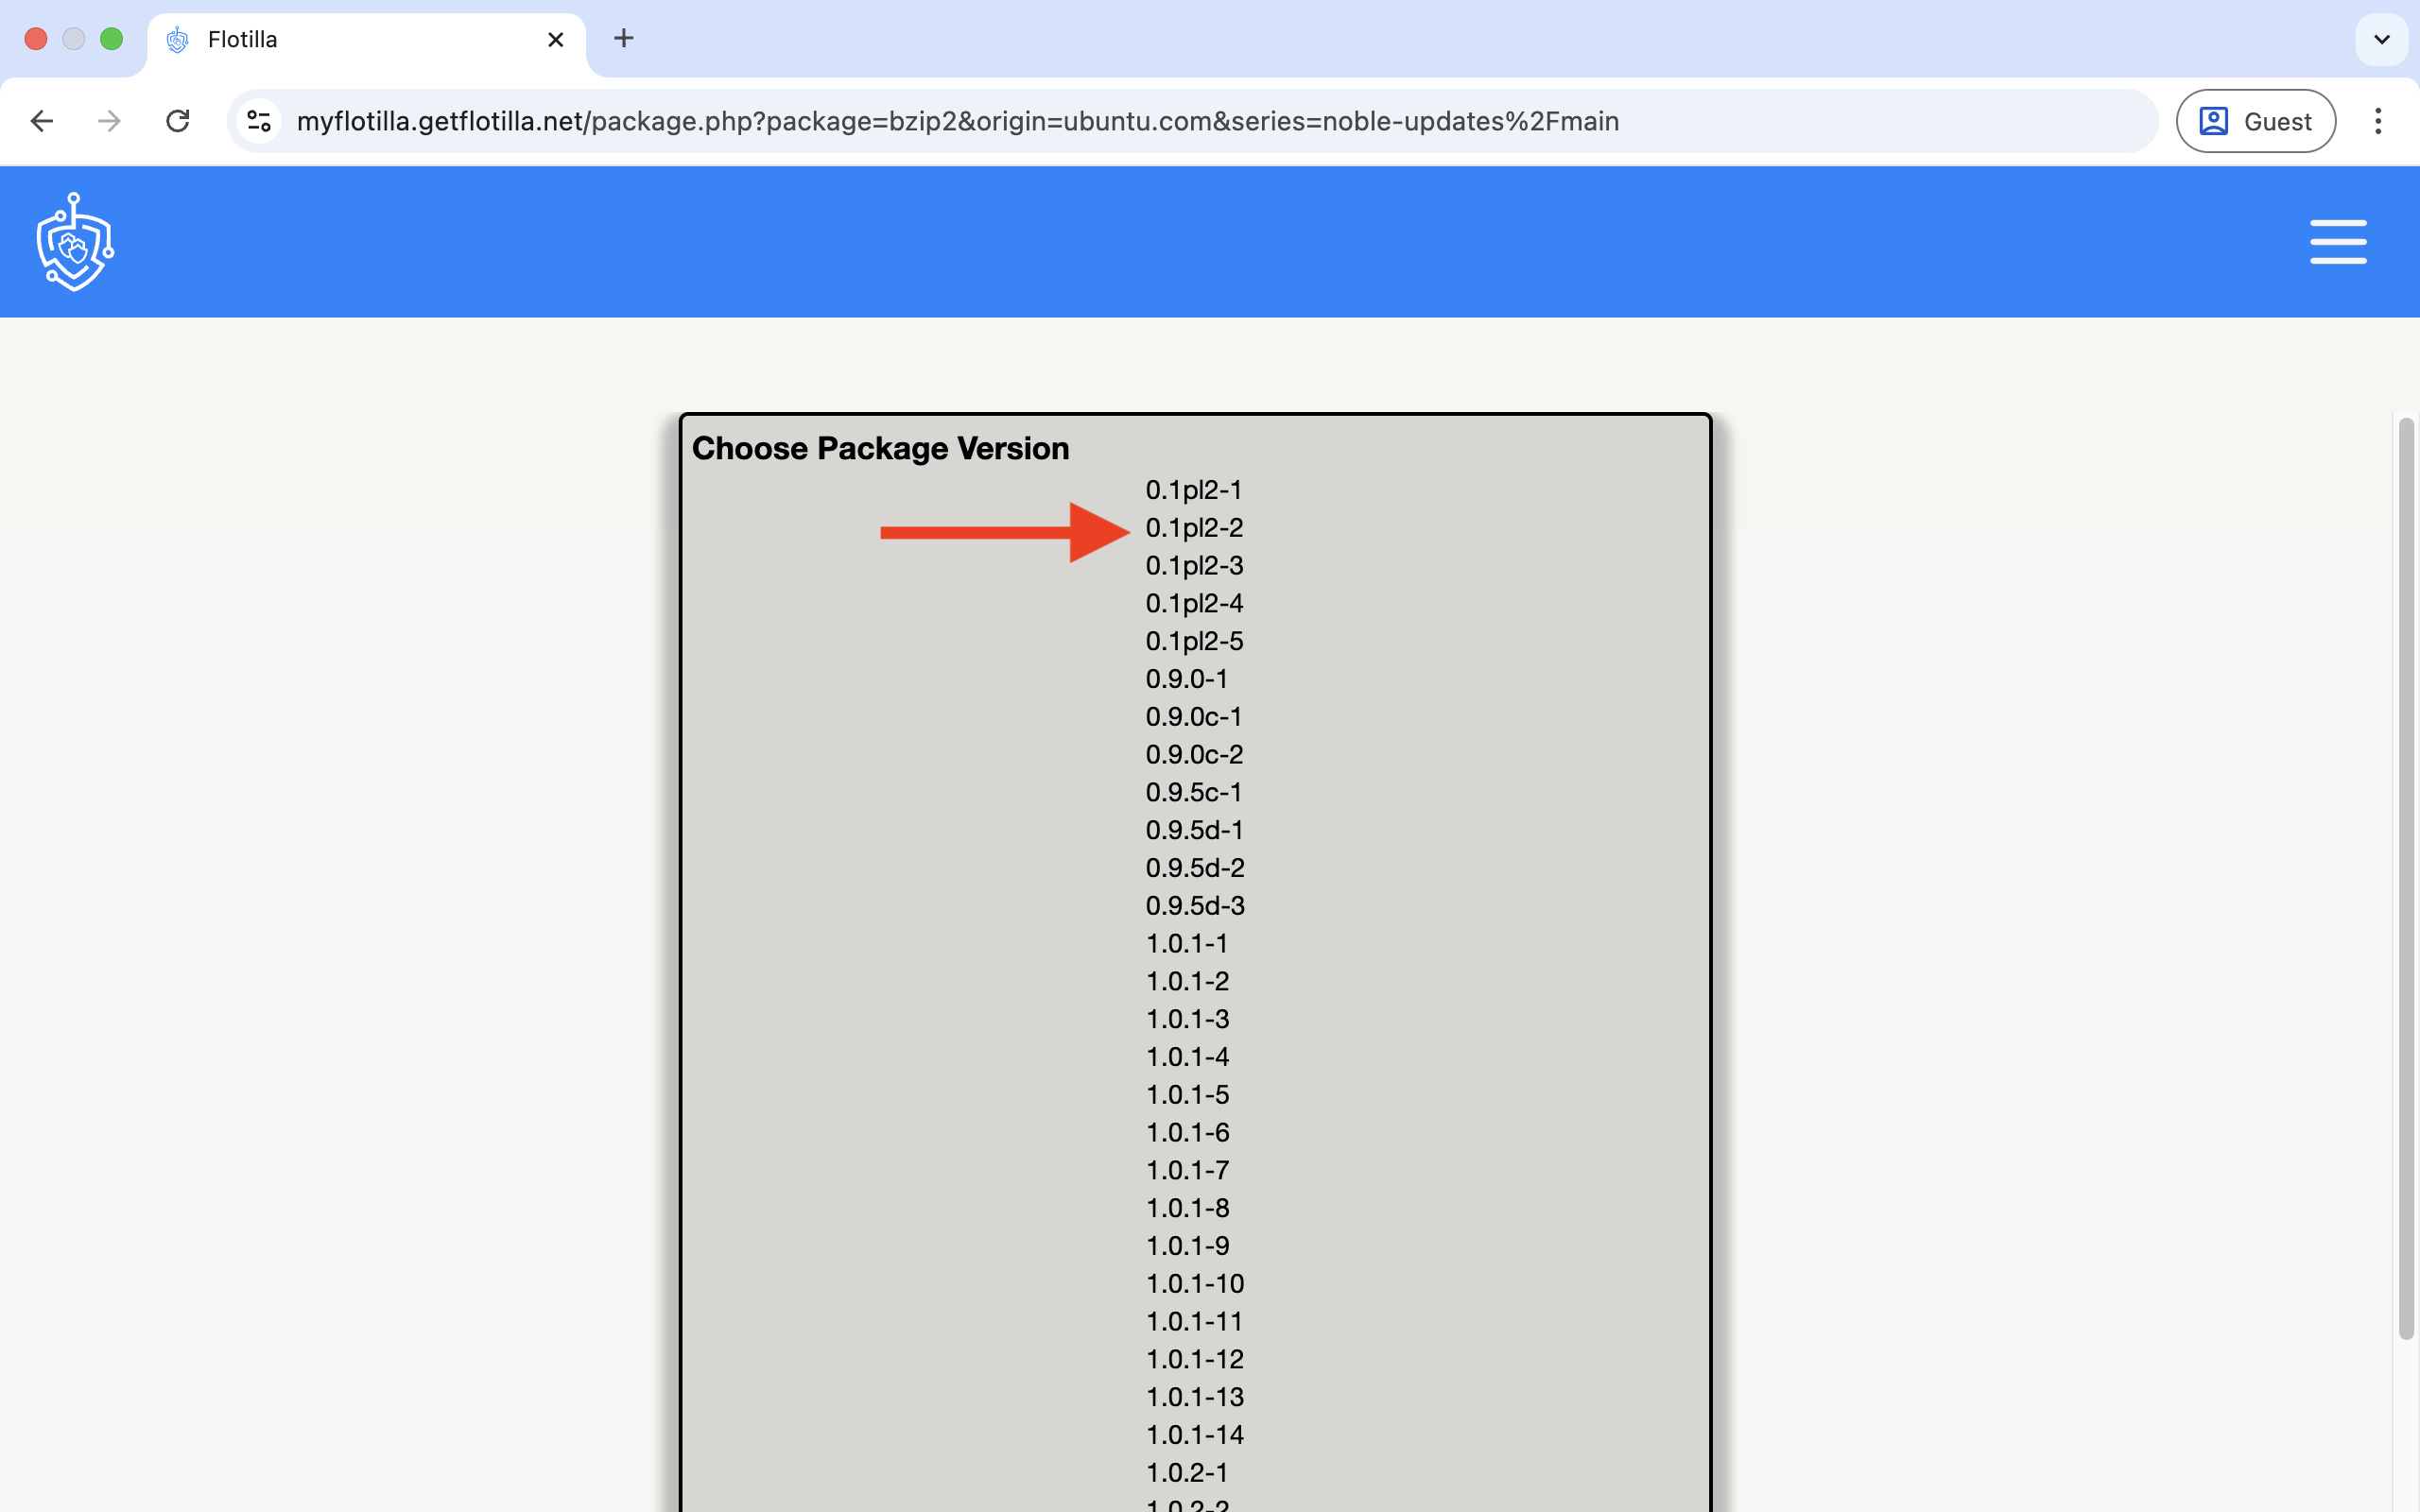
Flotilla will now display the changelogs:
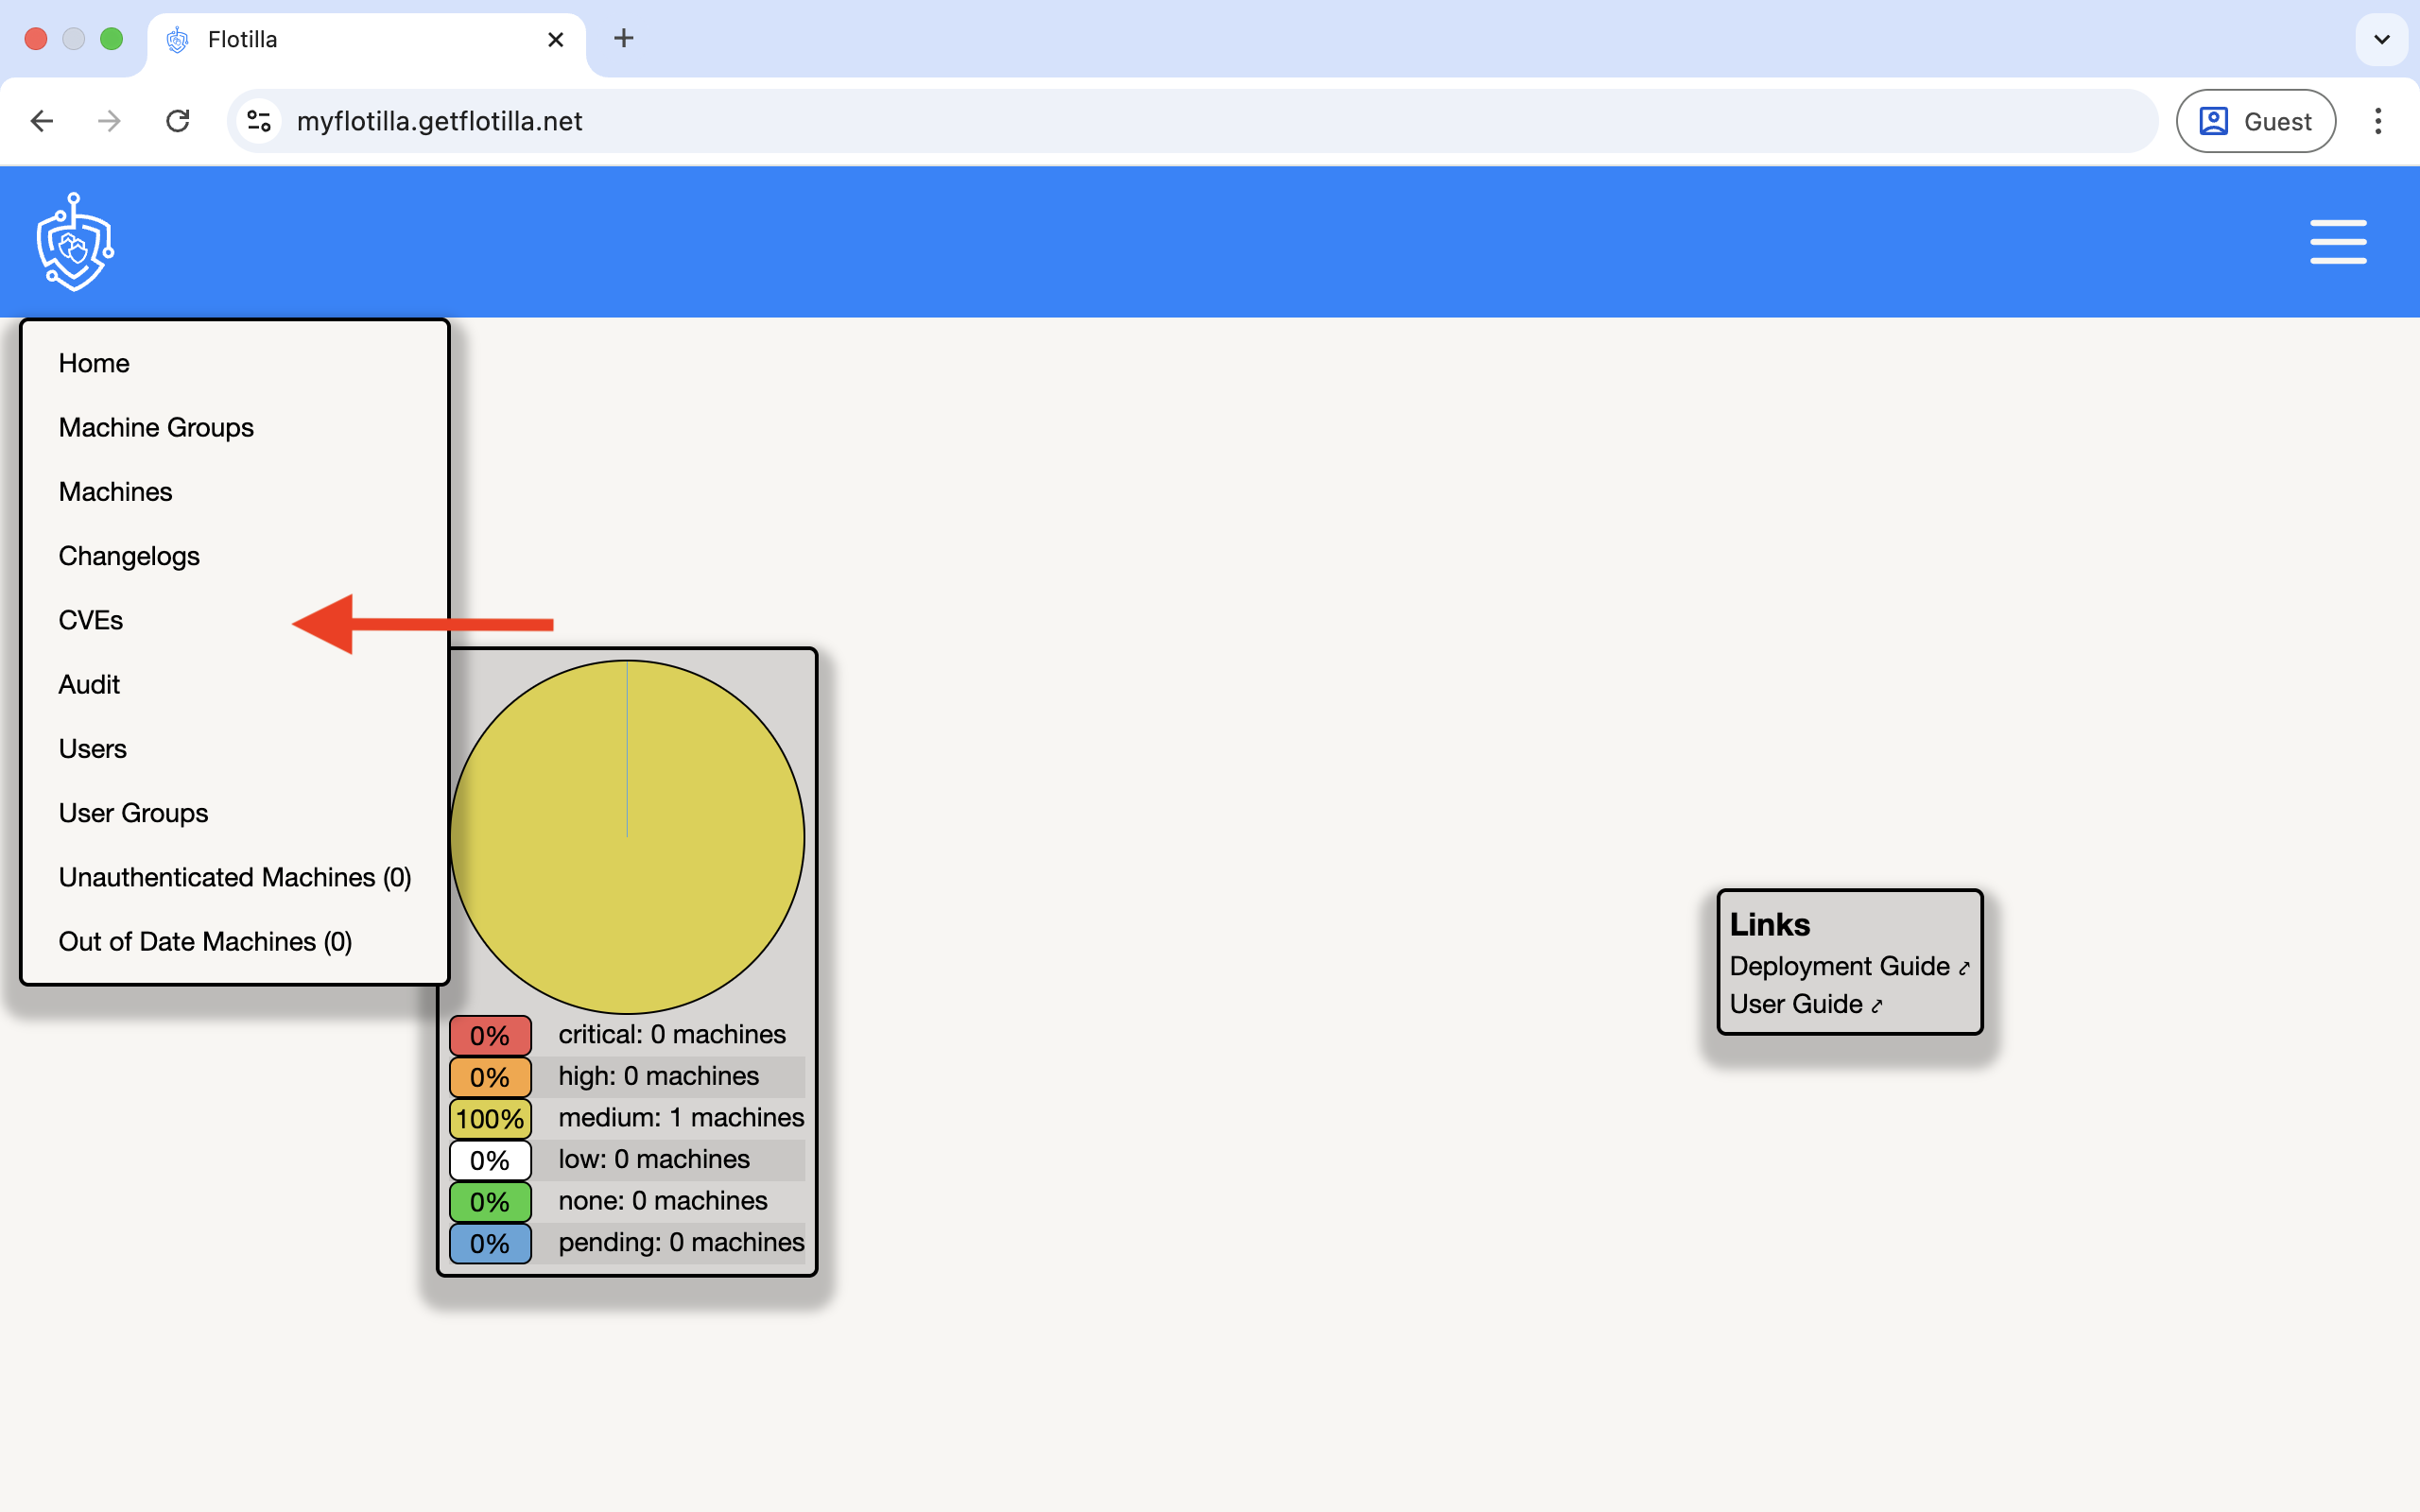
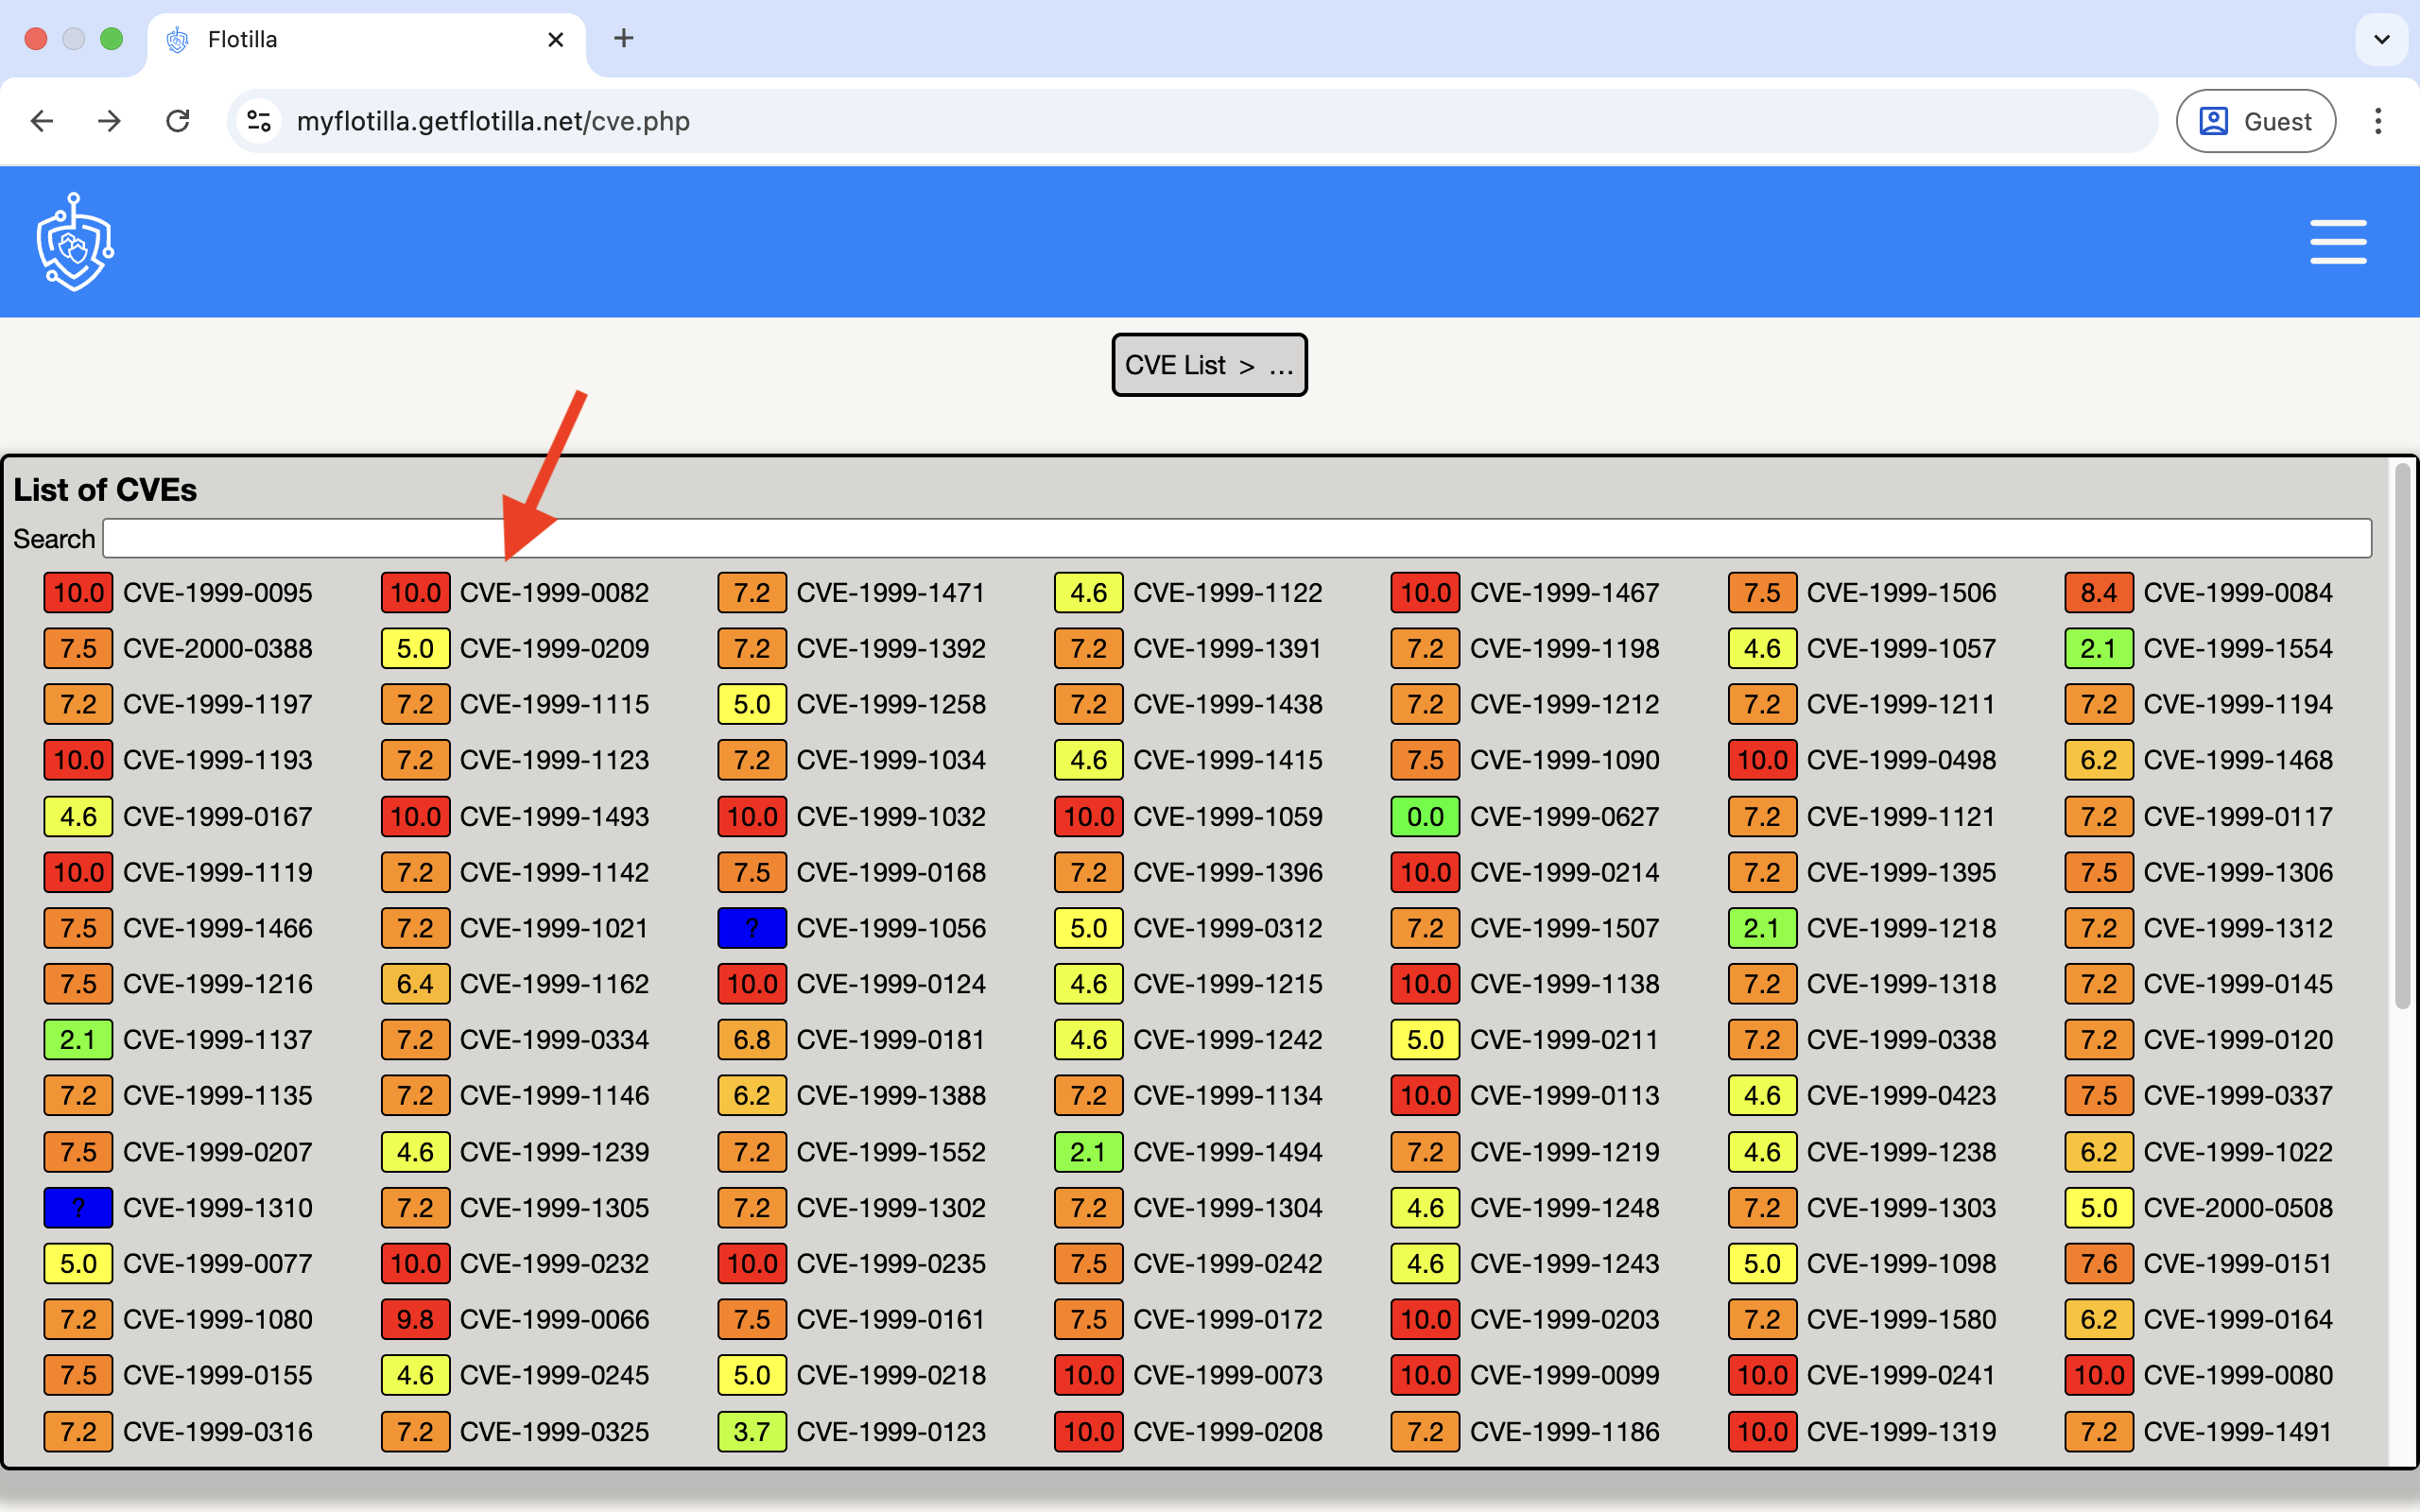
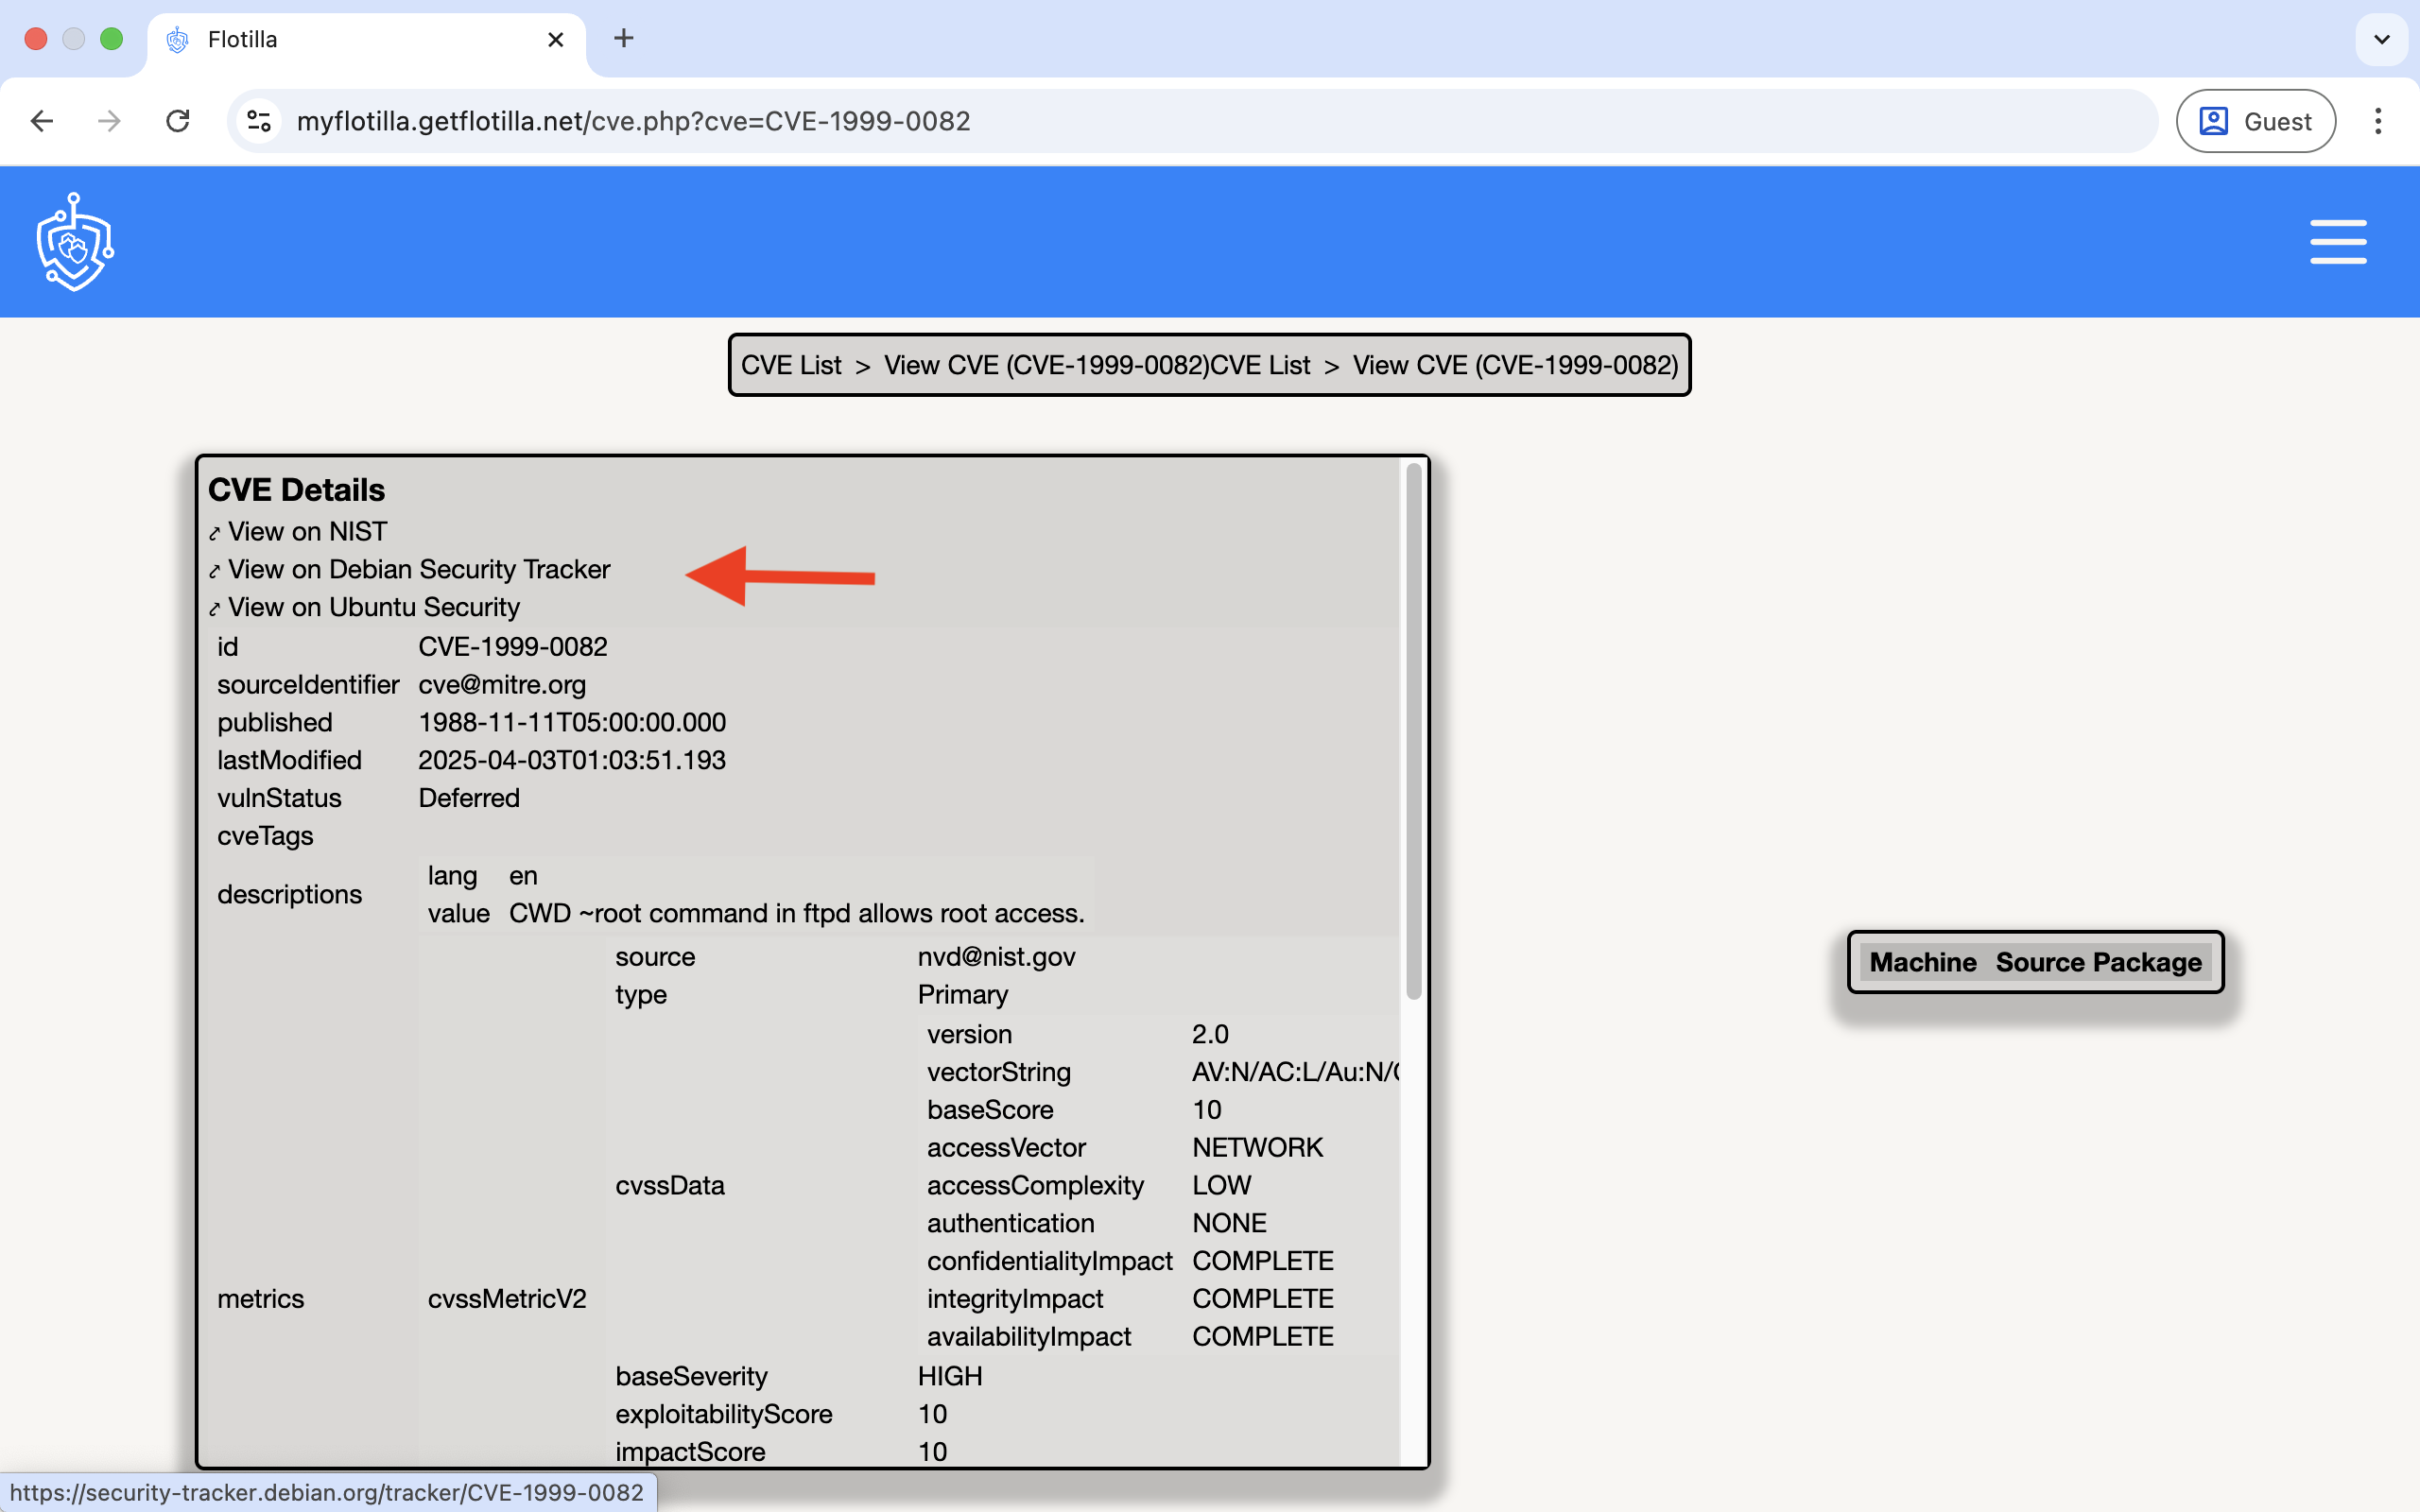
7.CVEs
The Common Vulnerabilities and Exposures (CVE) system provides a reference method for publicly known information-security vulnerabilities and exposures.
The CVE-ID syntax is variable in length and includes:
CVE prefix + Year + Arbitrary Digits.
The Common Vulnerability Scoring System assigns each CVE a score dependant on the degree of vulnerability with 10 being the highest. To access CVEs click here:
Clicking a CVE displays more information:
Three external links point to extra information regarding the vulnerability:
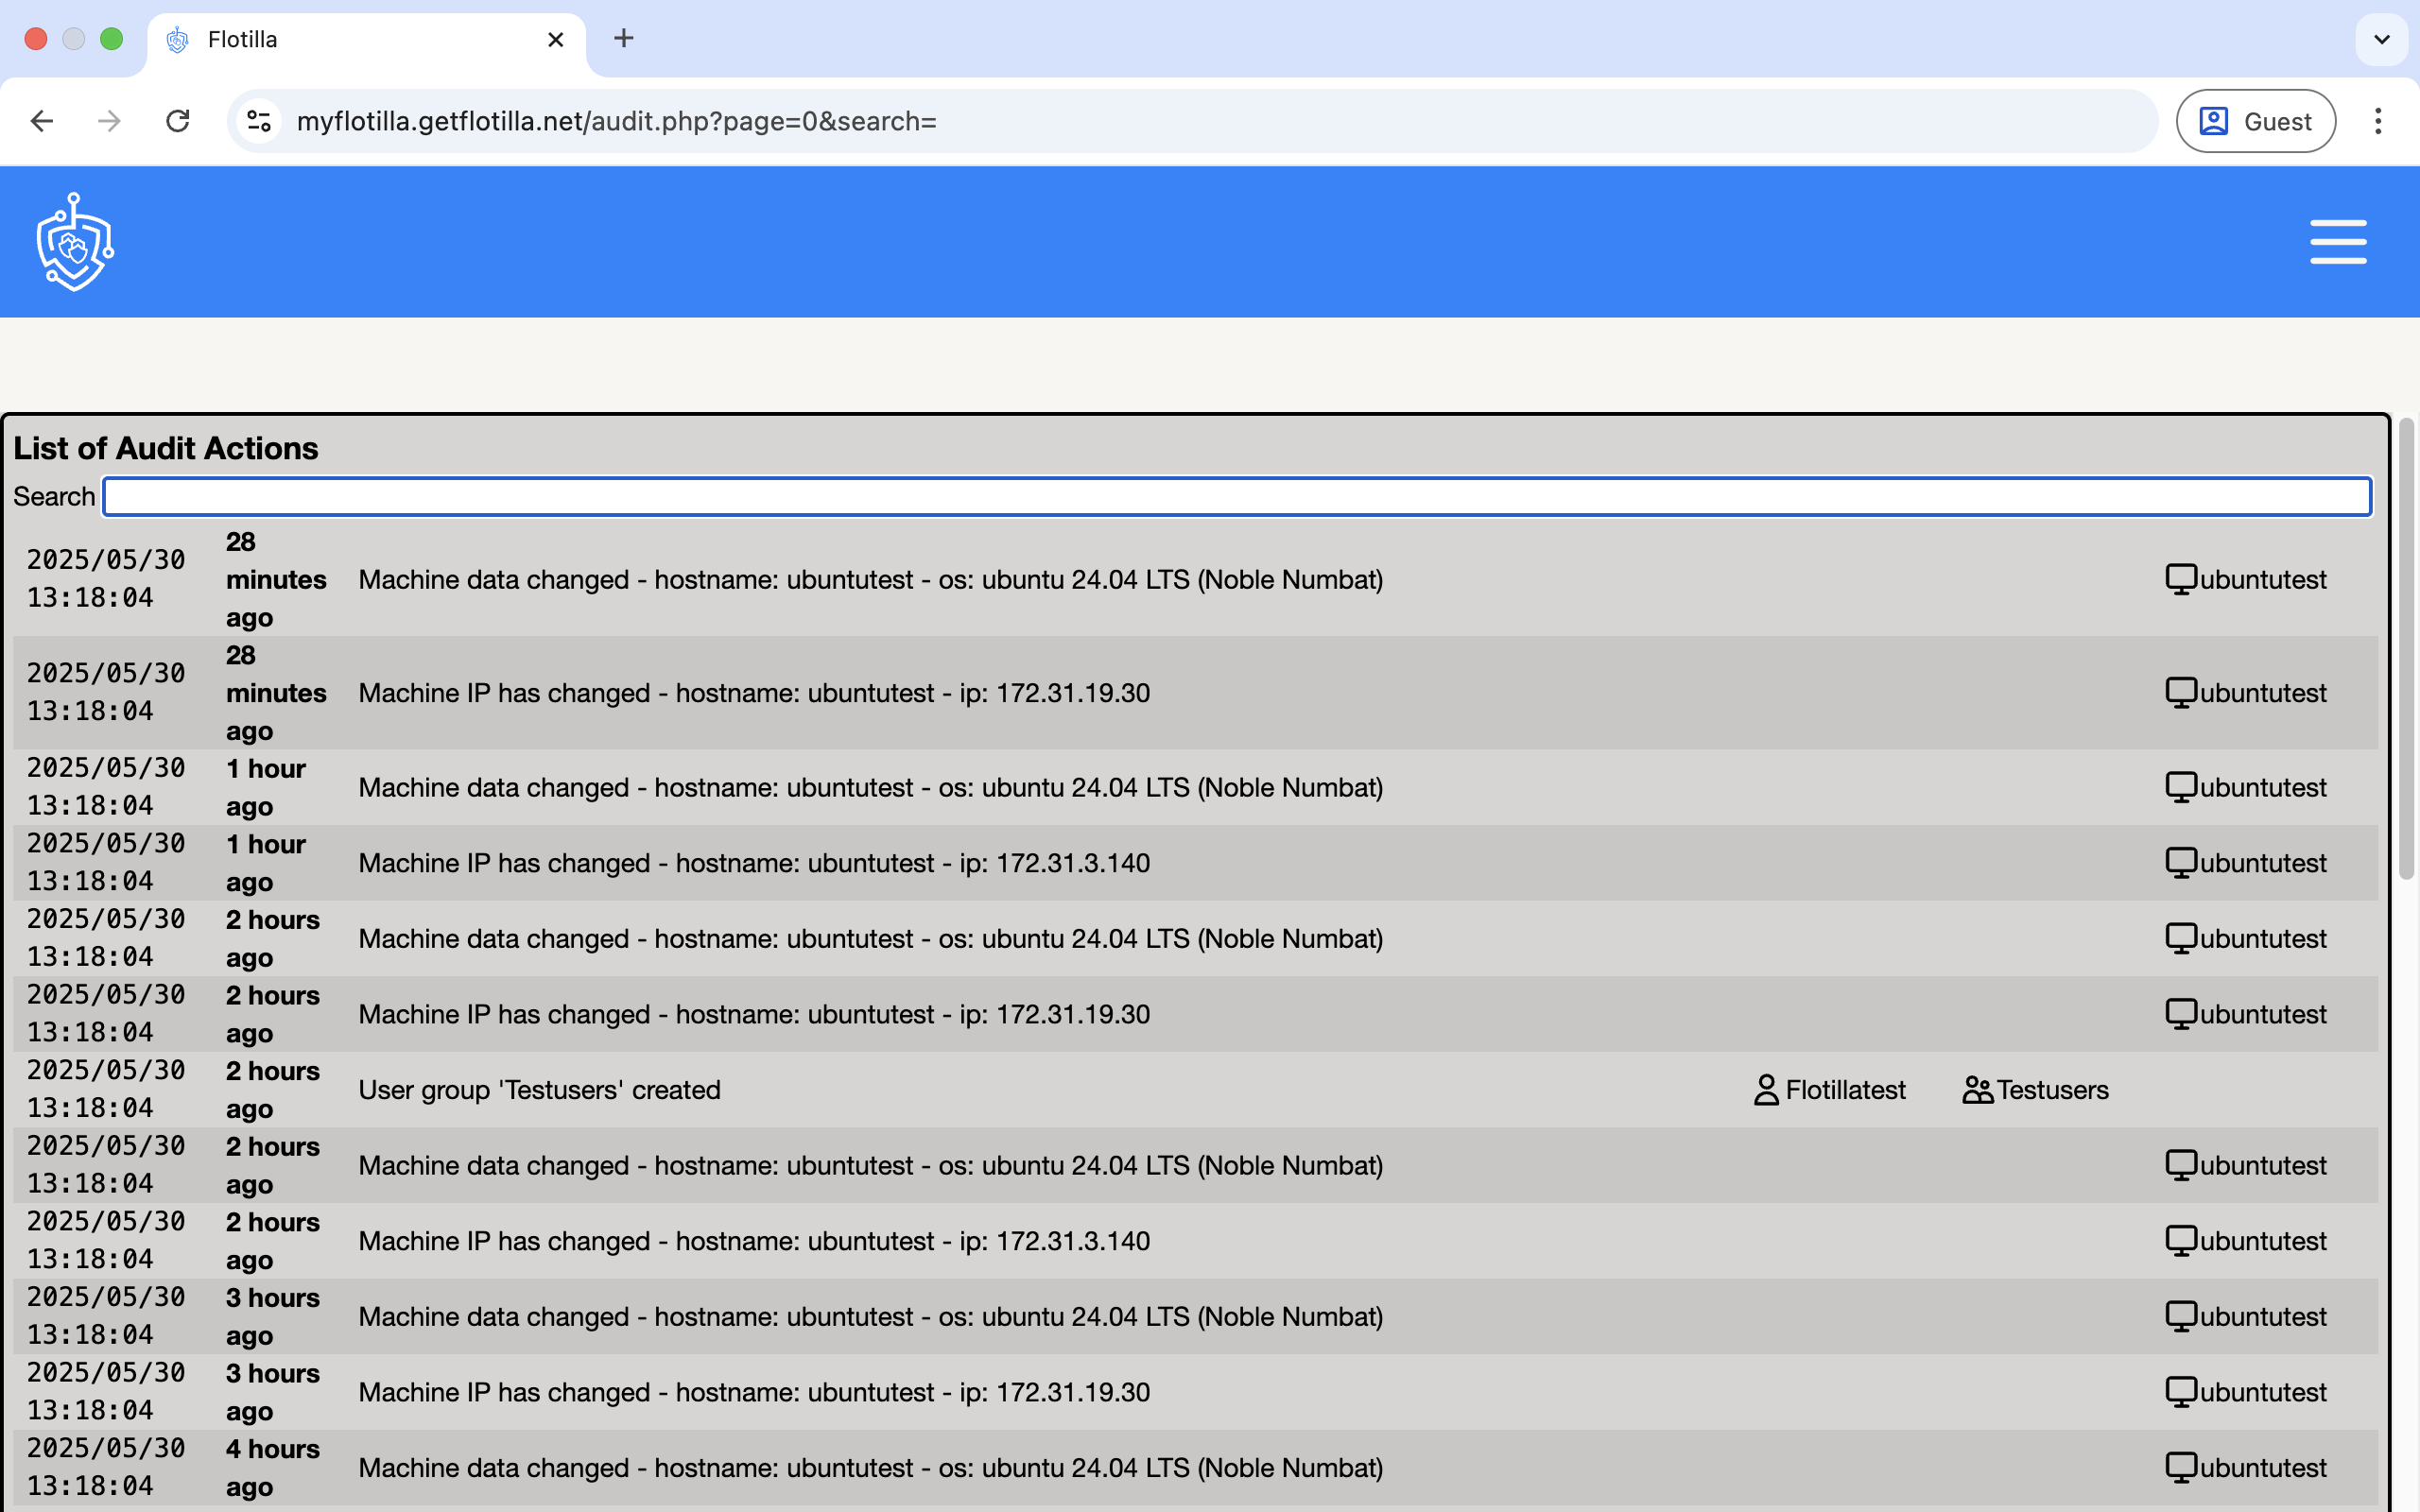
8.Audit
This section logs any changes made by users and machines. This is particularly useful in identifying which user has made any unauthorised changes and which machine has recently contacted the server.
The records in the audit log broadly encompass two types of activity: anything user generated in the Management Portal and anything machine related (eg. machines sending in updates, events triggering an update).
Click on ‘Audit’ below to access the logs:

The view below shows a list of actions, both user and machine initiated, with a datestamp, a time-since field for readability, a description of the event and if appropriate a handful of links to related views.
Views can include:
-
The user who initiated this action
-
The event which initiated this action
-
The machine which initiated this action
-
The user this action affects
-
The event this action affects
-
The machine this action affects
-
The group this action affects
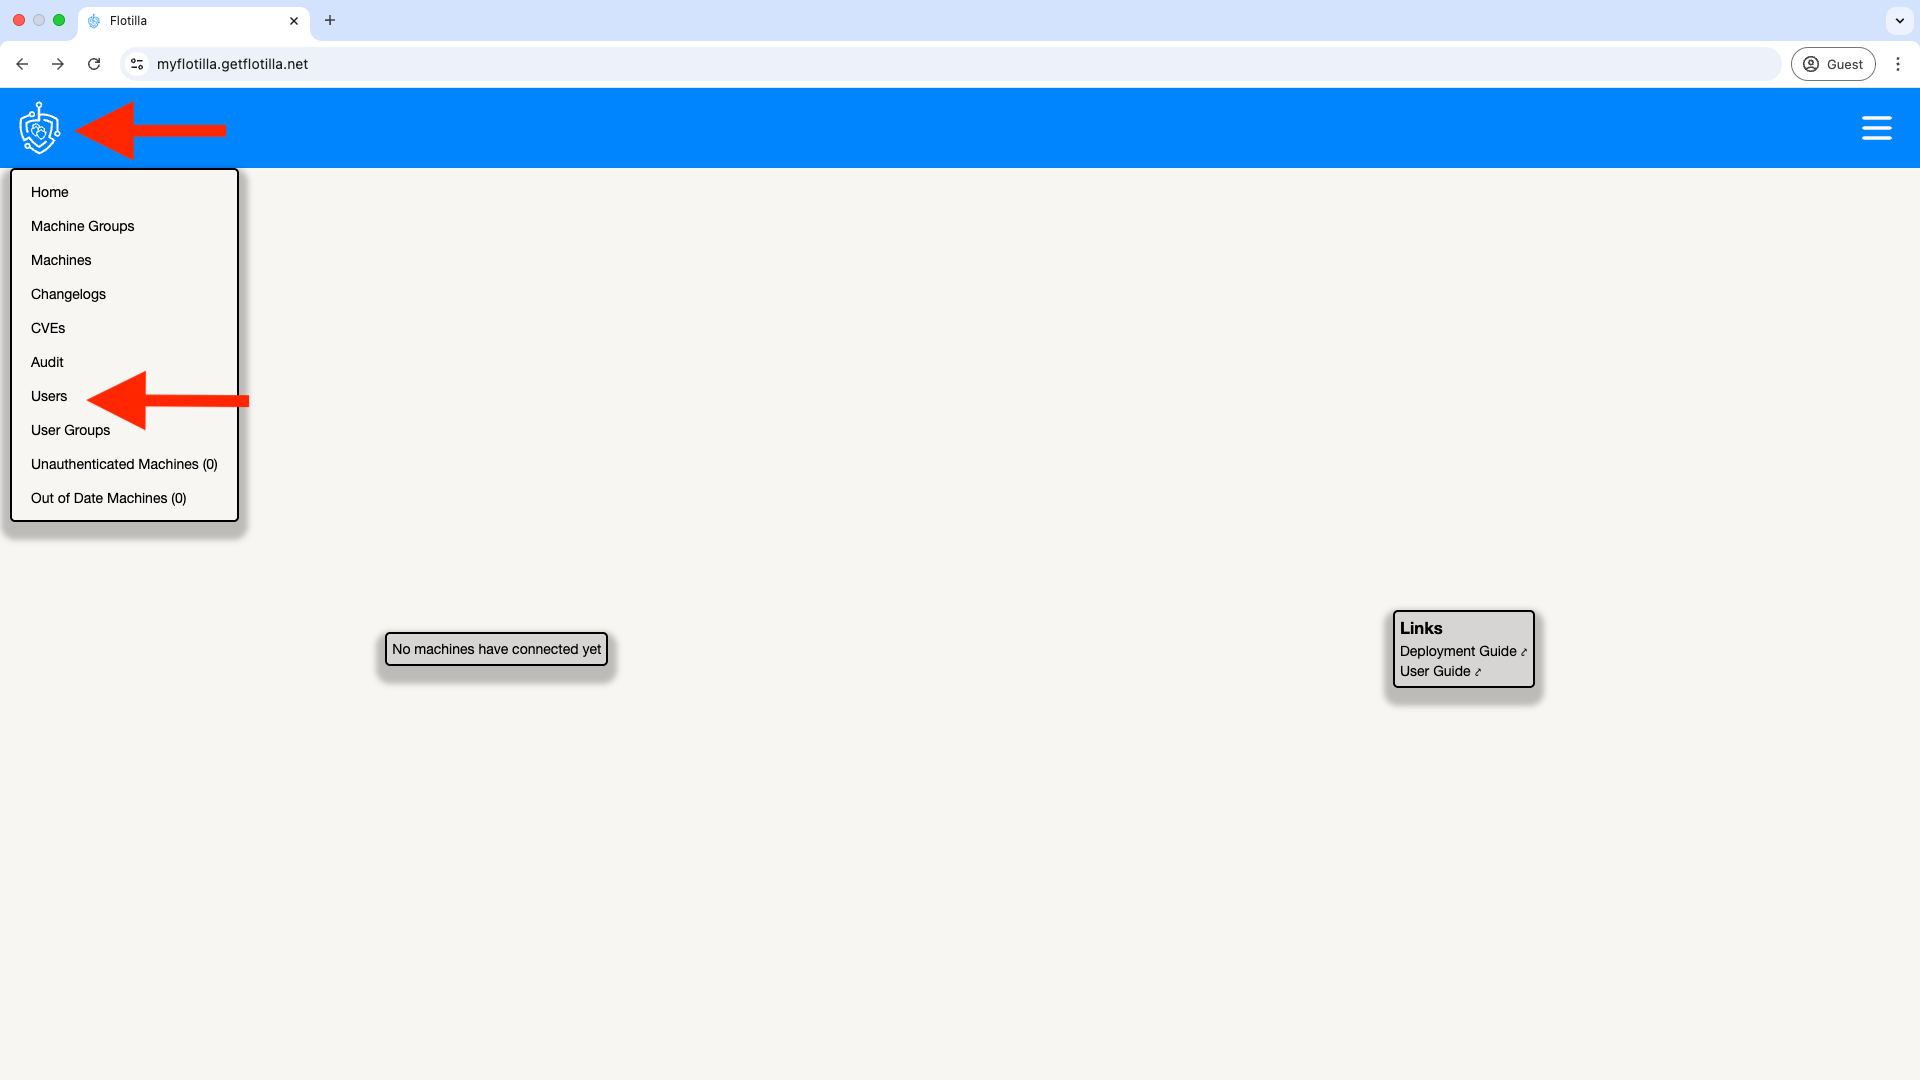
9.Users
This option allows Administrators to edit users' email addresses and passwords.
Users can be added to allow administration of your Flotilla management portal. To create a user click on the Flotilla icon in the top left and then ‘Users’:
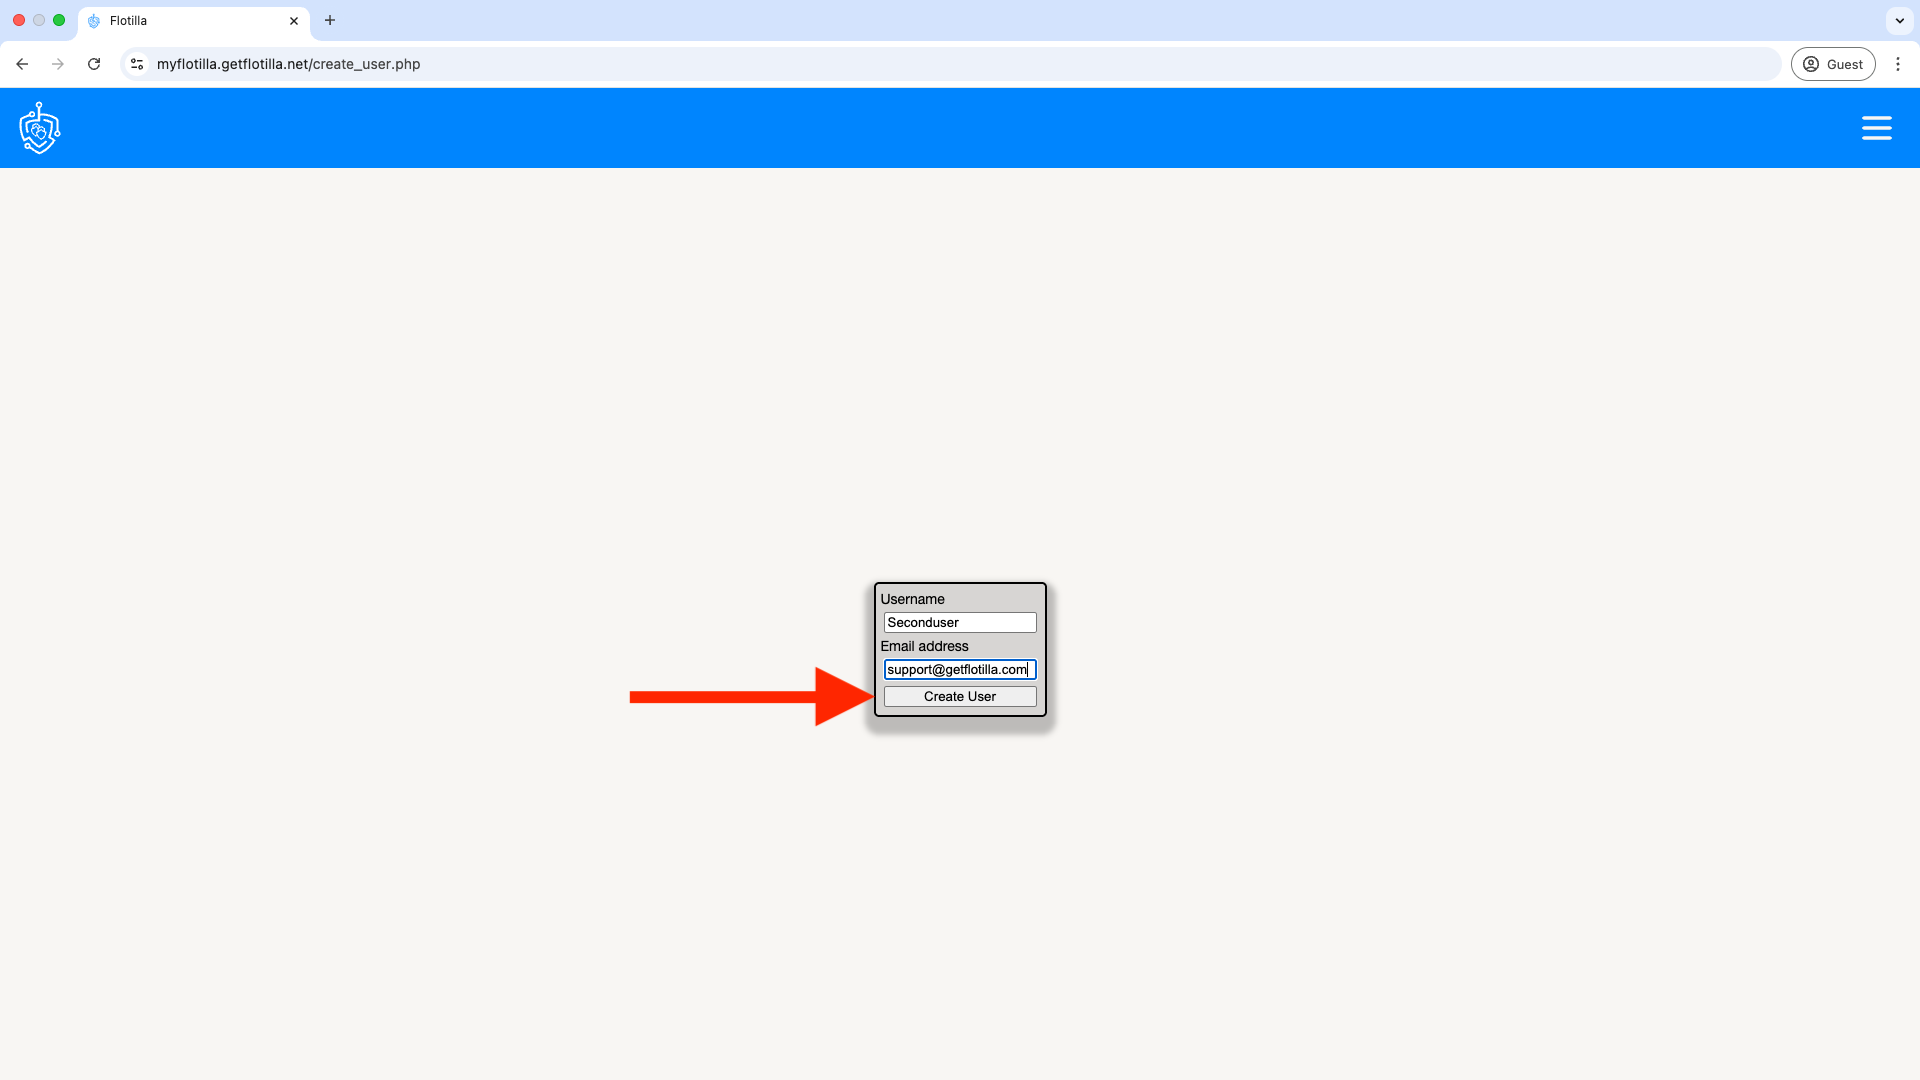
Click on 'Create User”:
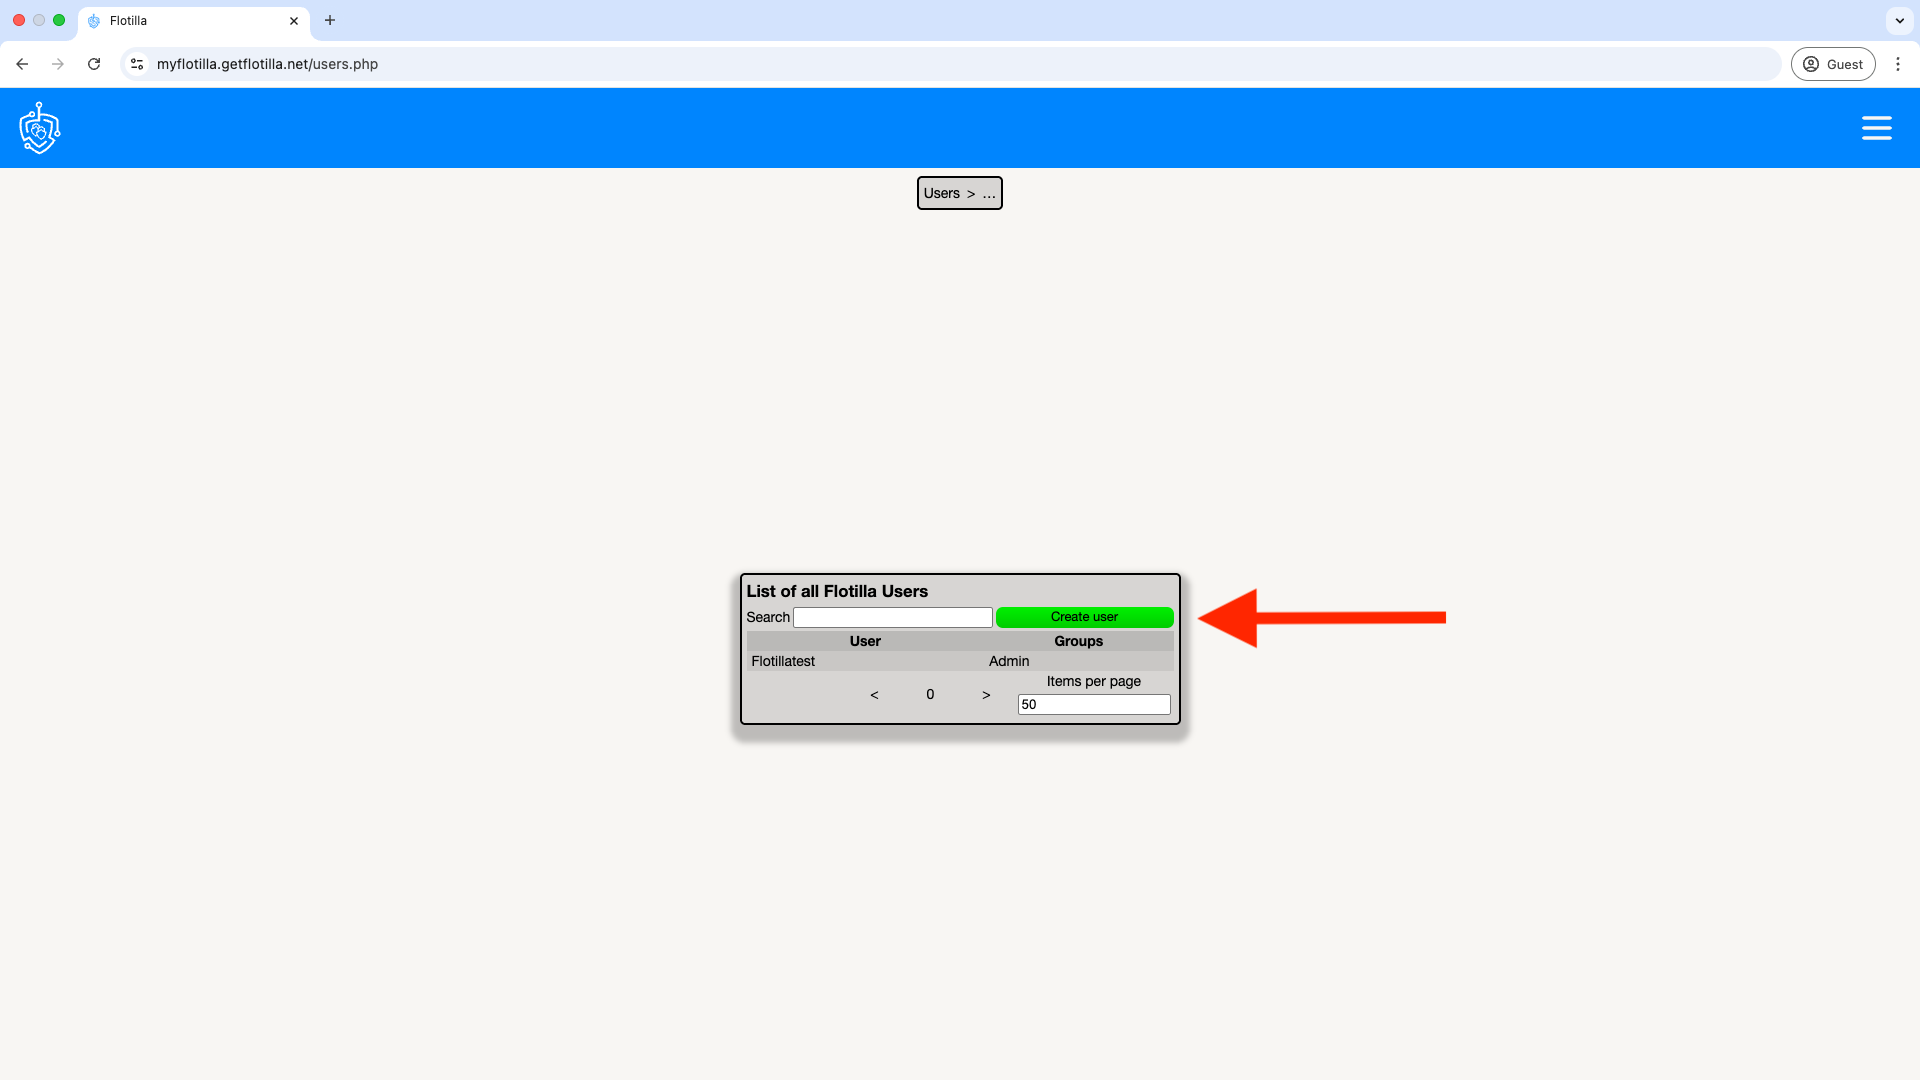
Enter a username and email address. Lastly click on ‘Create User’. This will send a confirmatory email to the address specified with a link enabling the user to create a password and login to Flotilla:
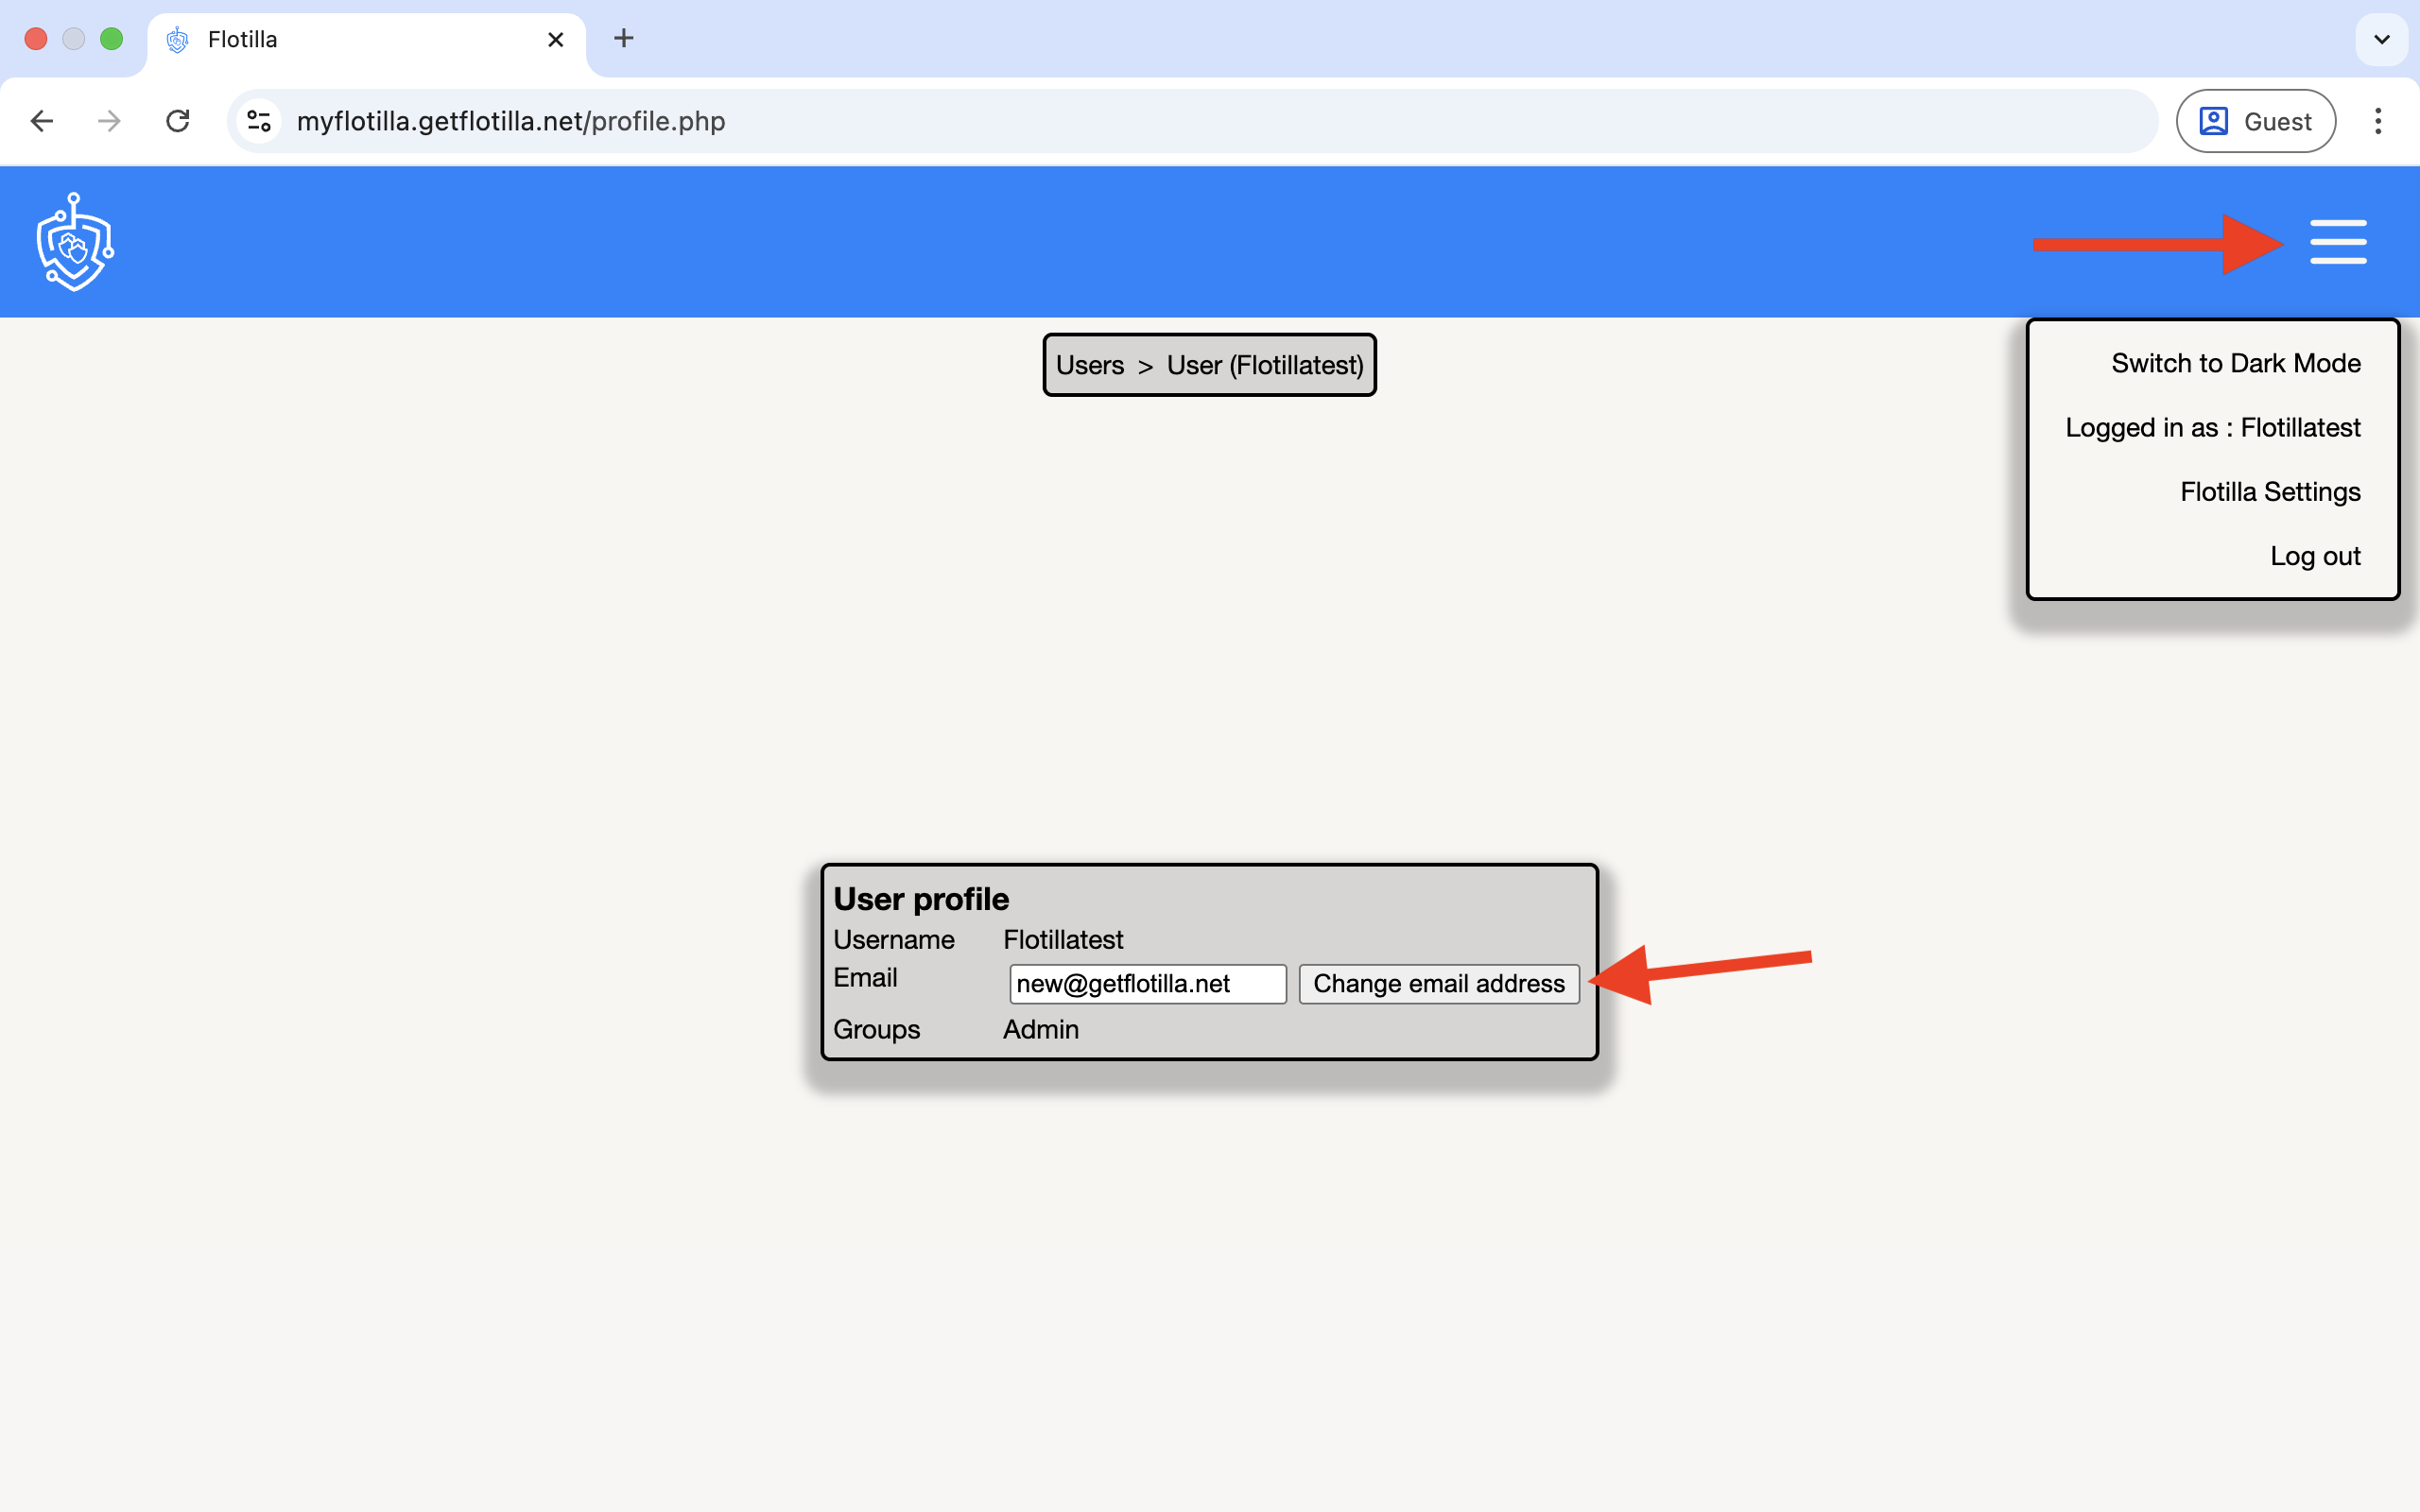
A user may change their email address by clicking on the hamburger icon on the right and selecting ‘Logged in as:’. Next edit the email address and save by clicking ‘Change email address’.
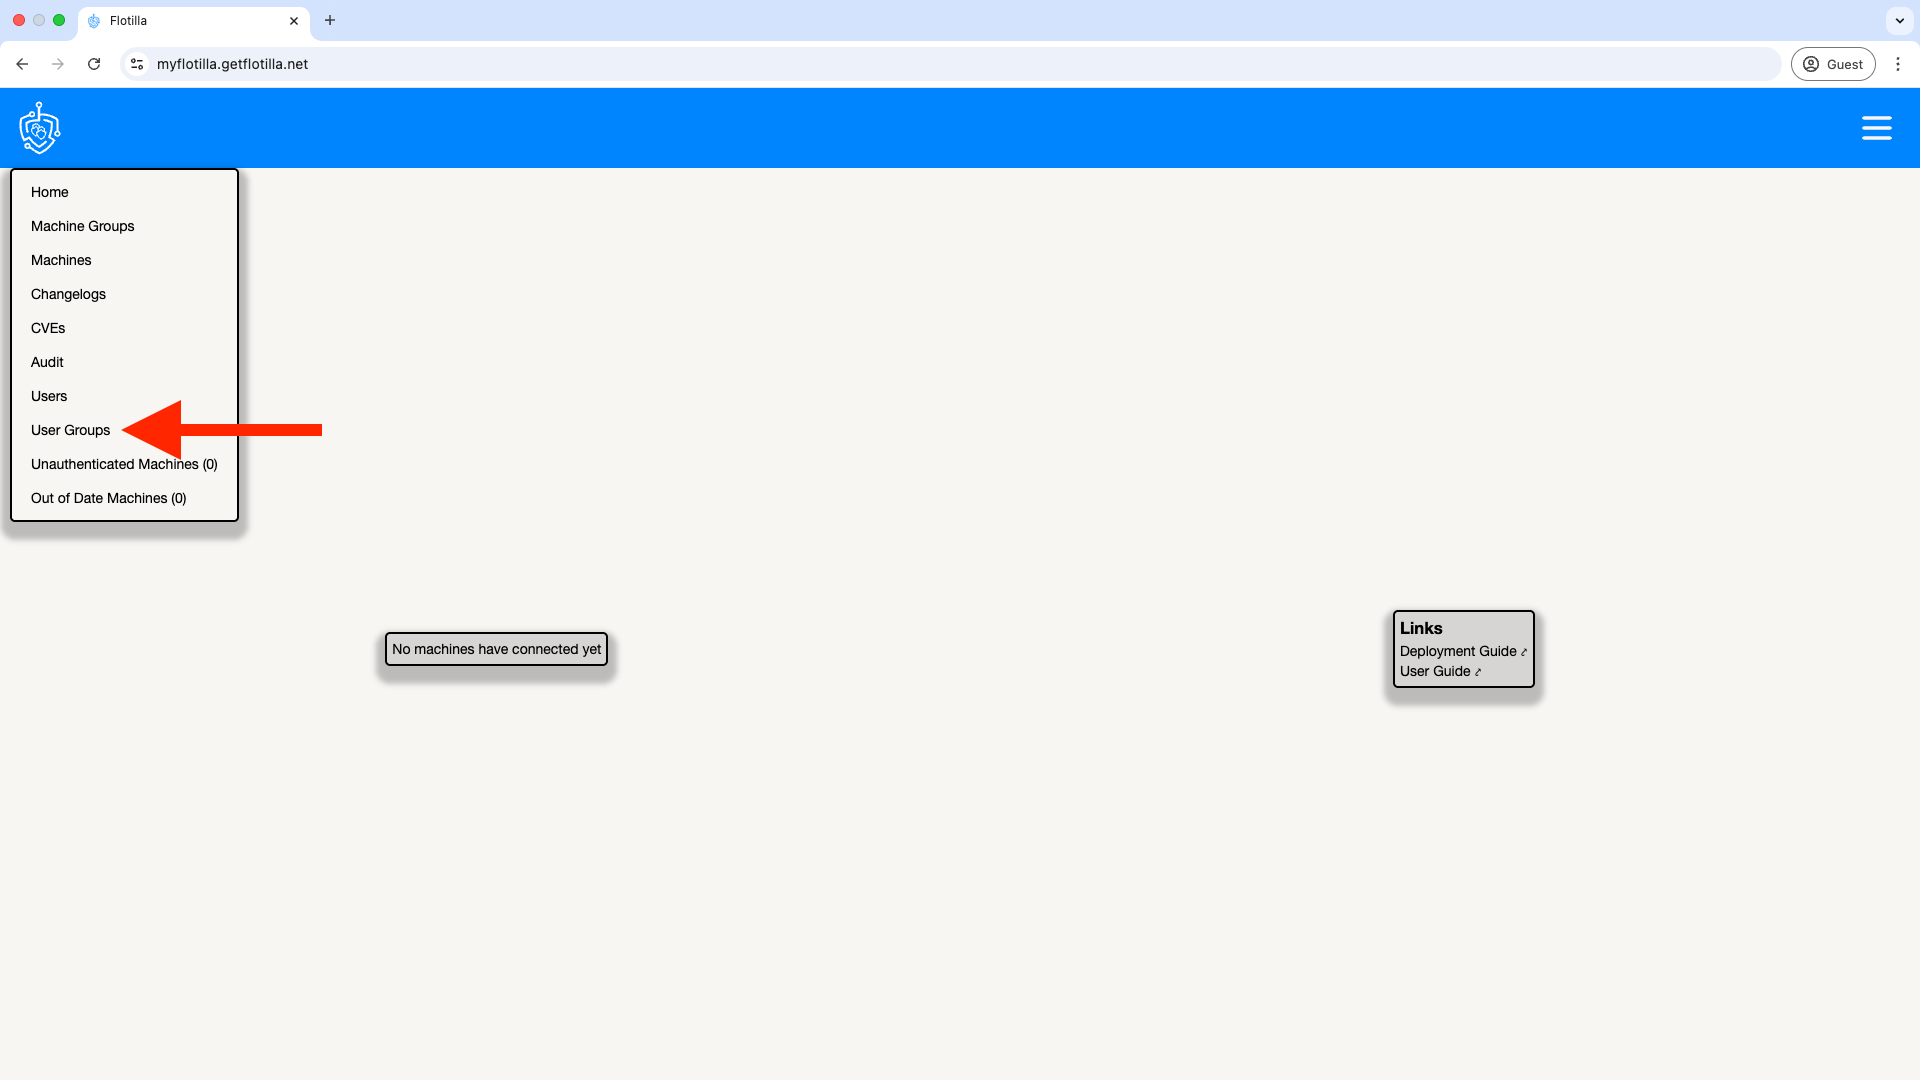
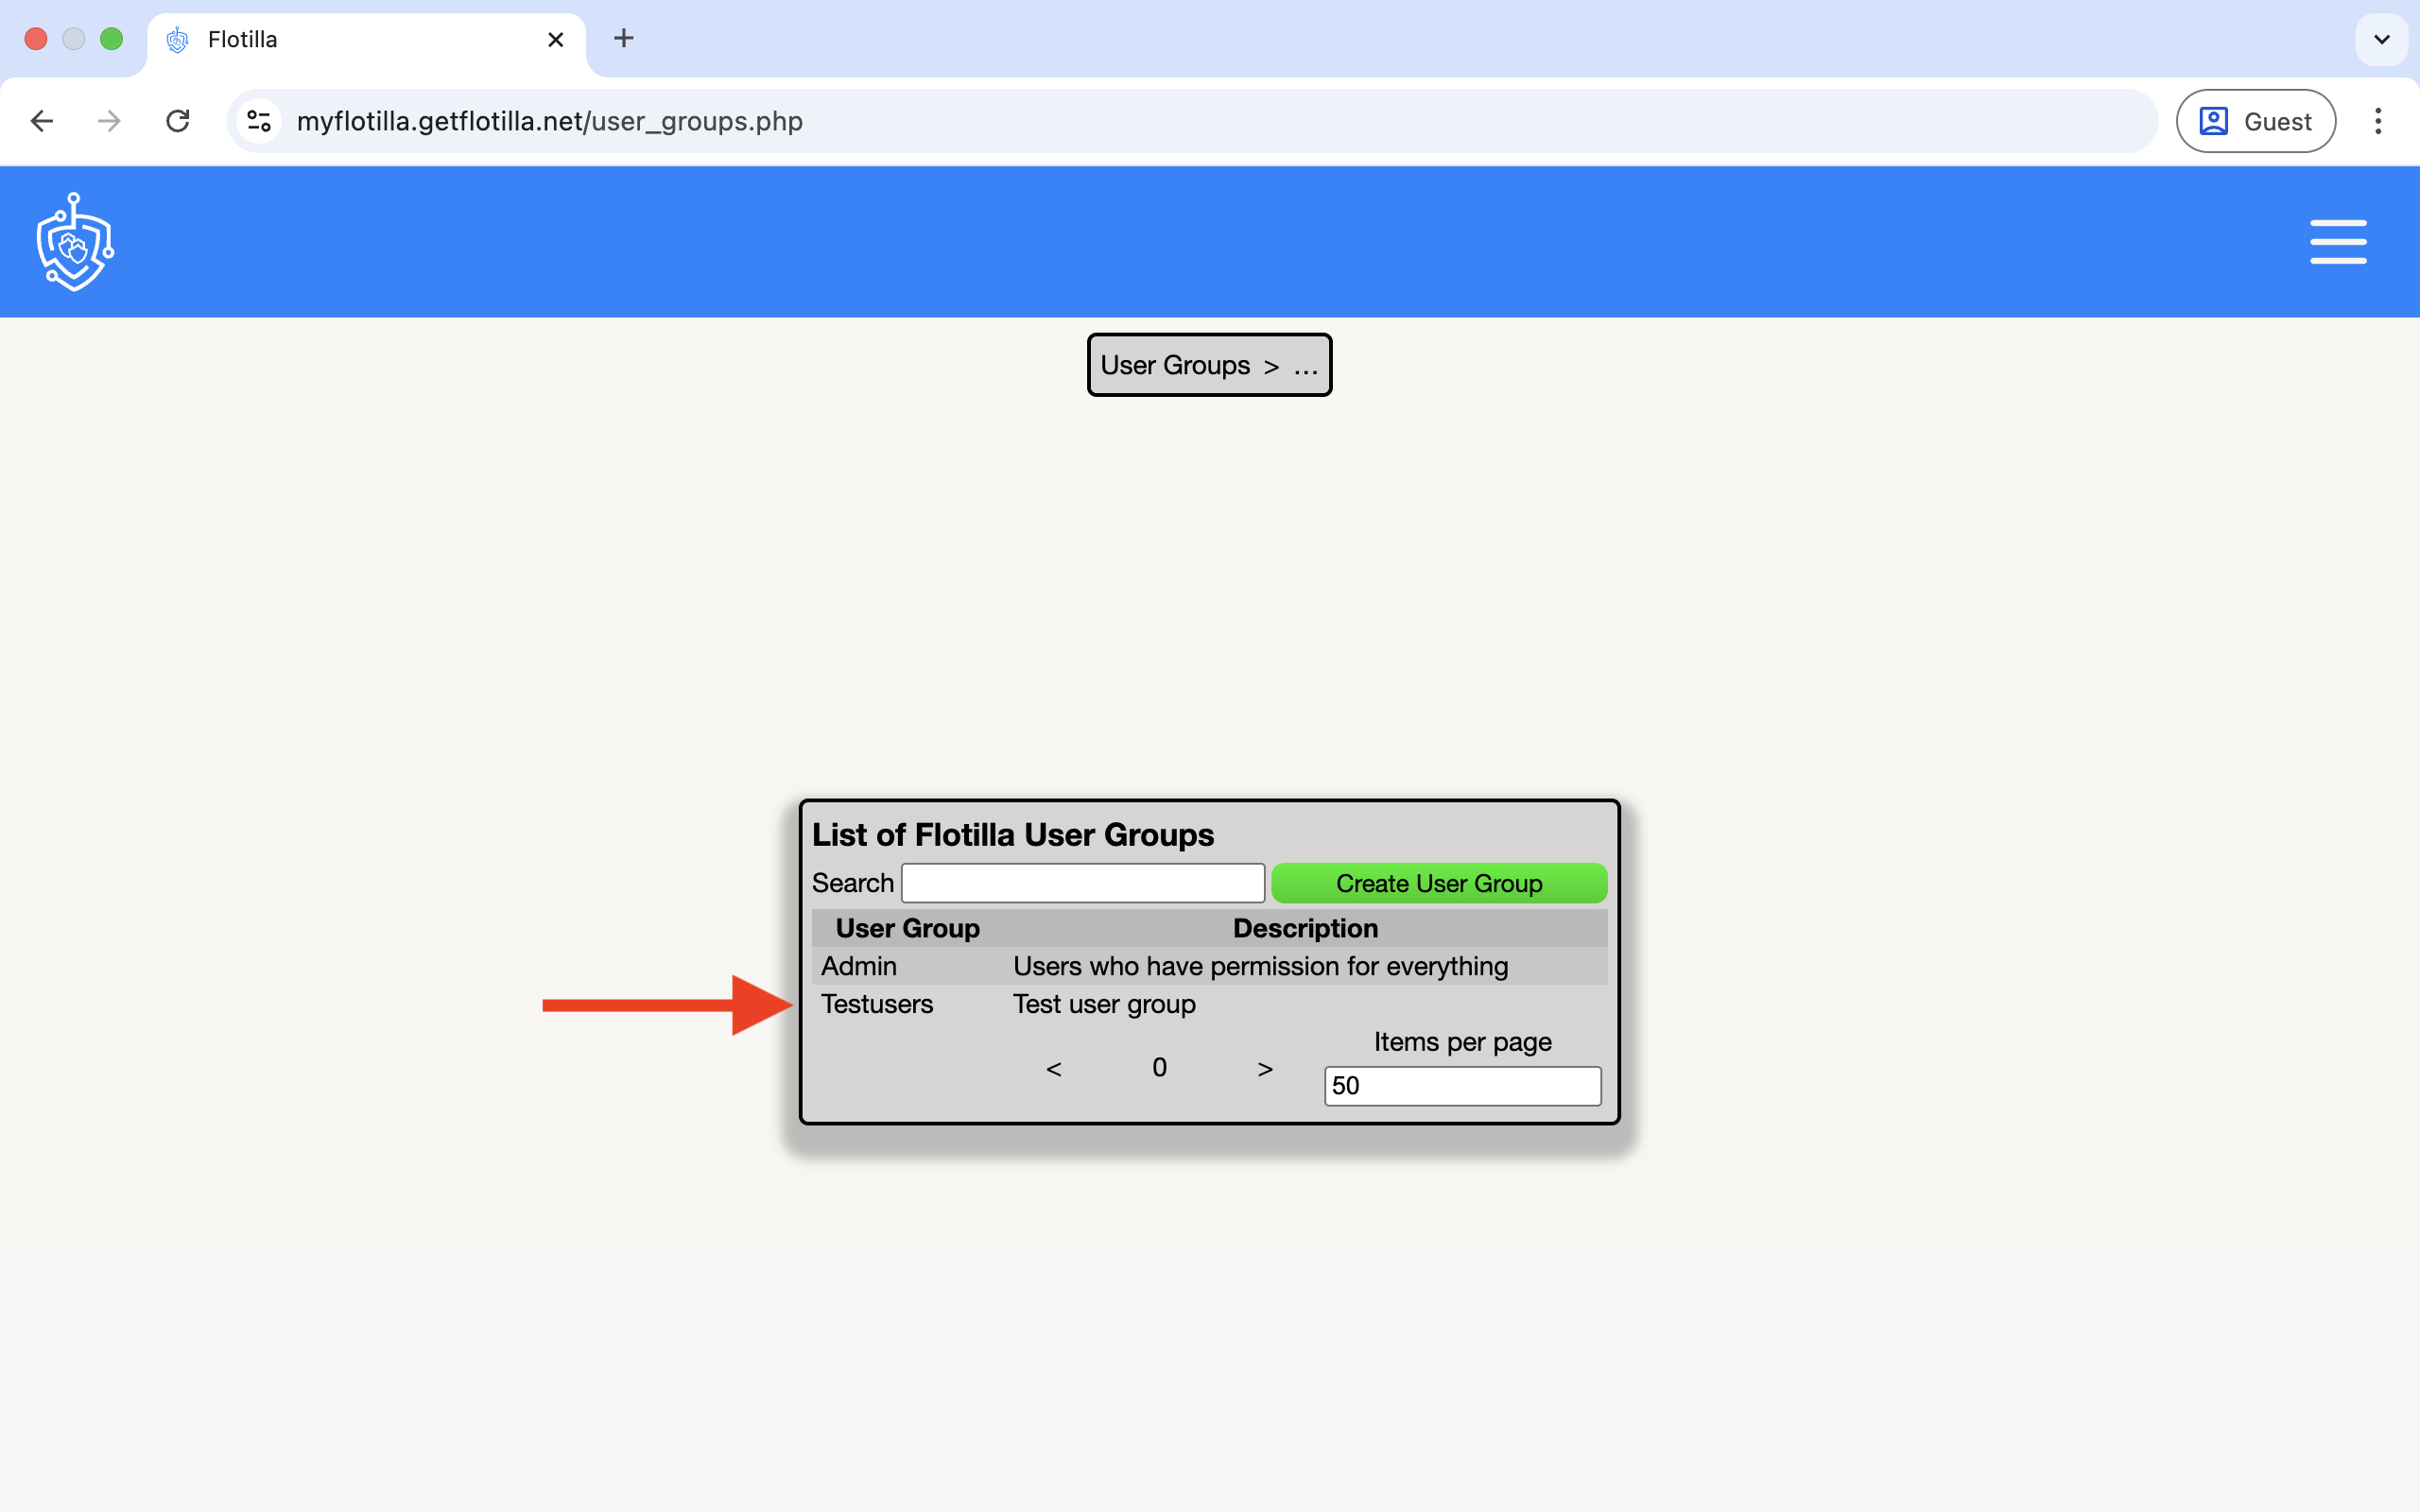
10.User Groups
Creating User Groups allows you to manage which users have permissions to access admin menu options. To create a User Group select the option below:
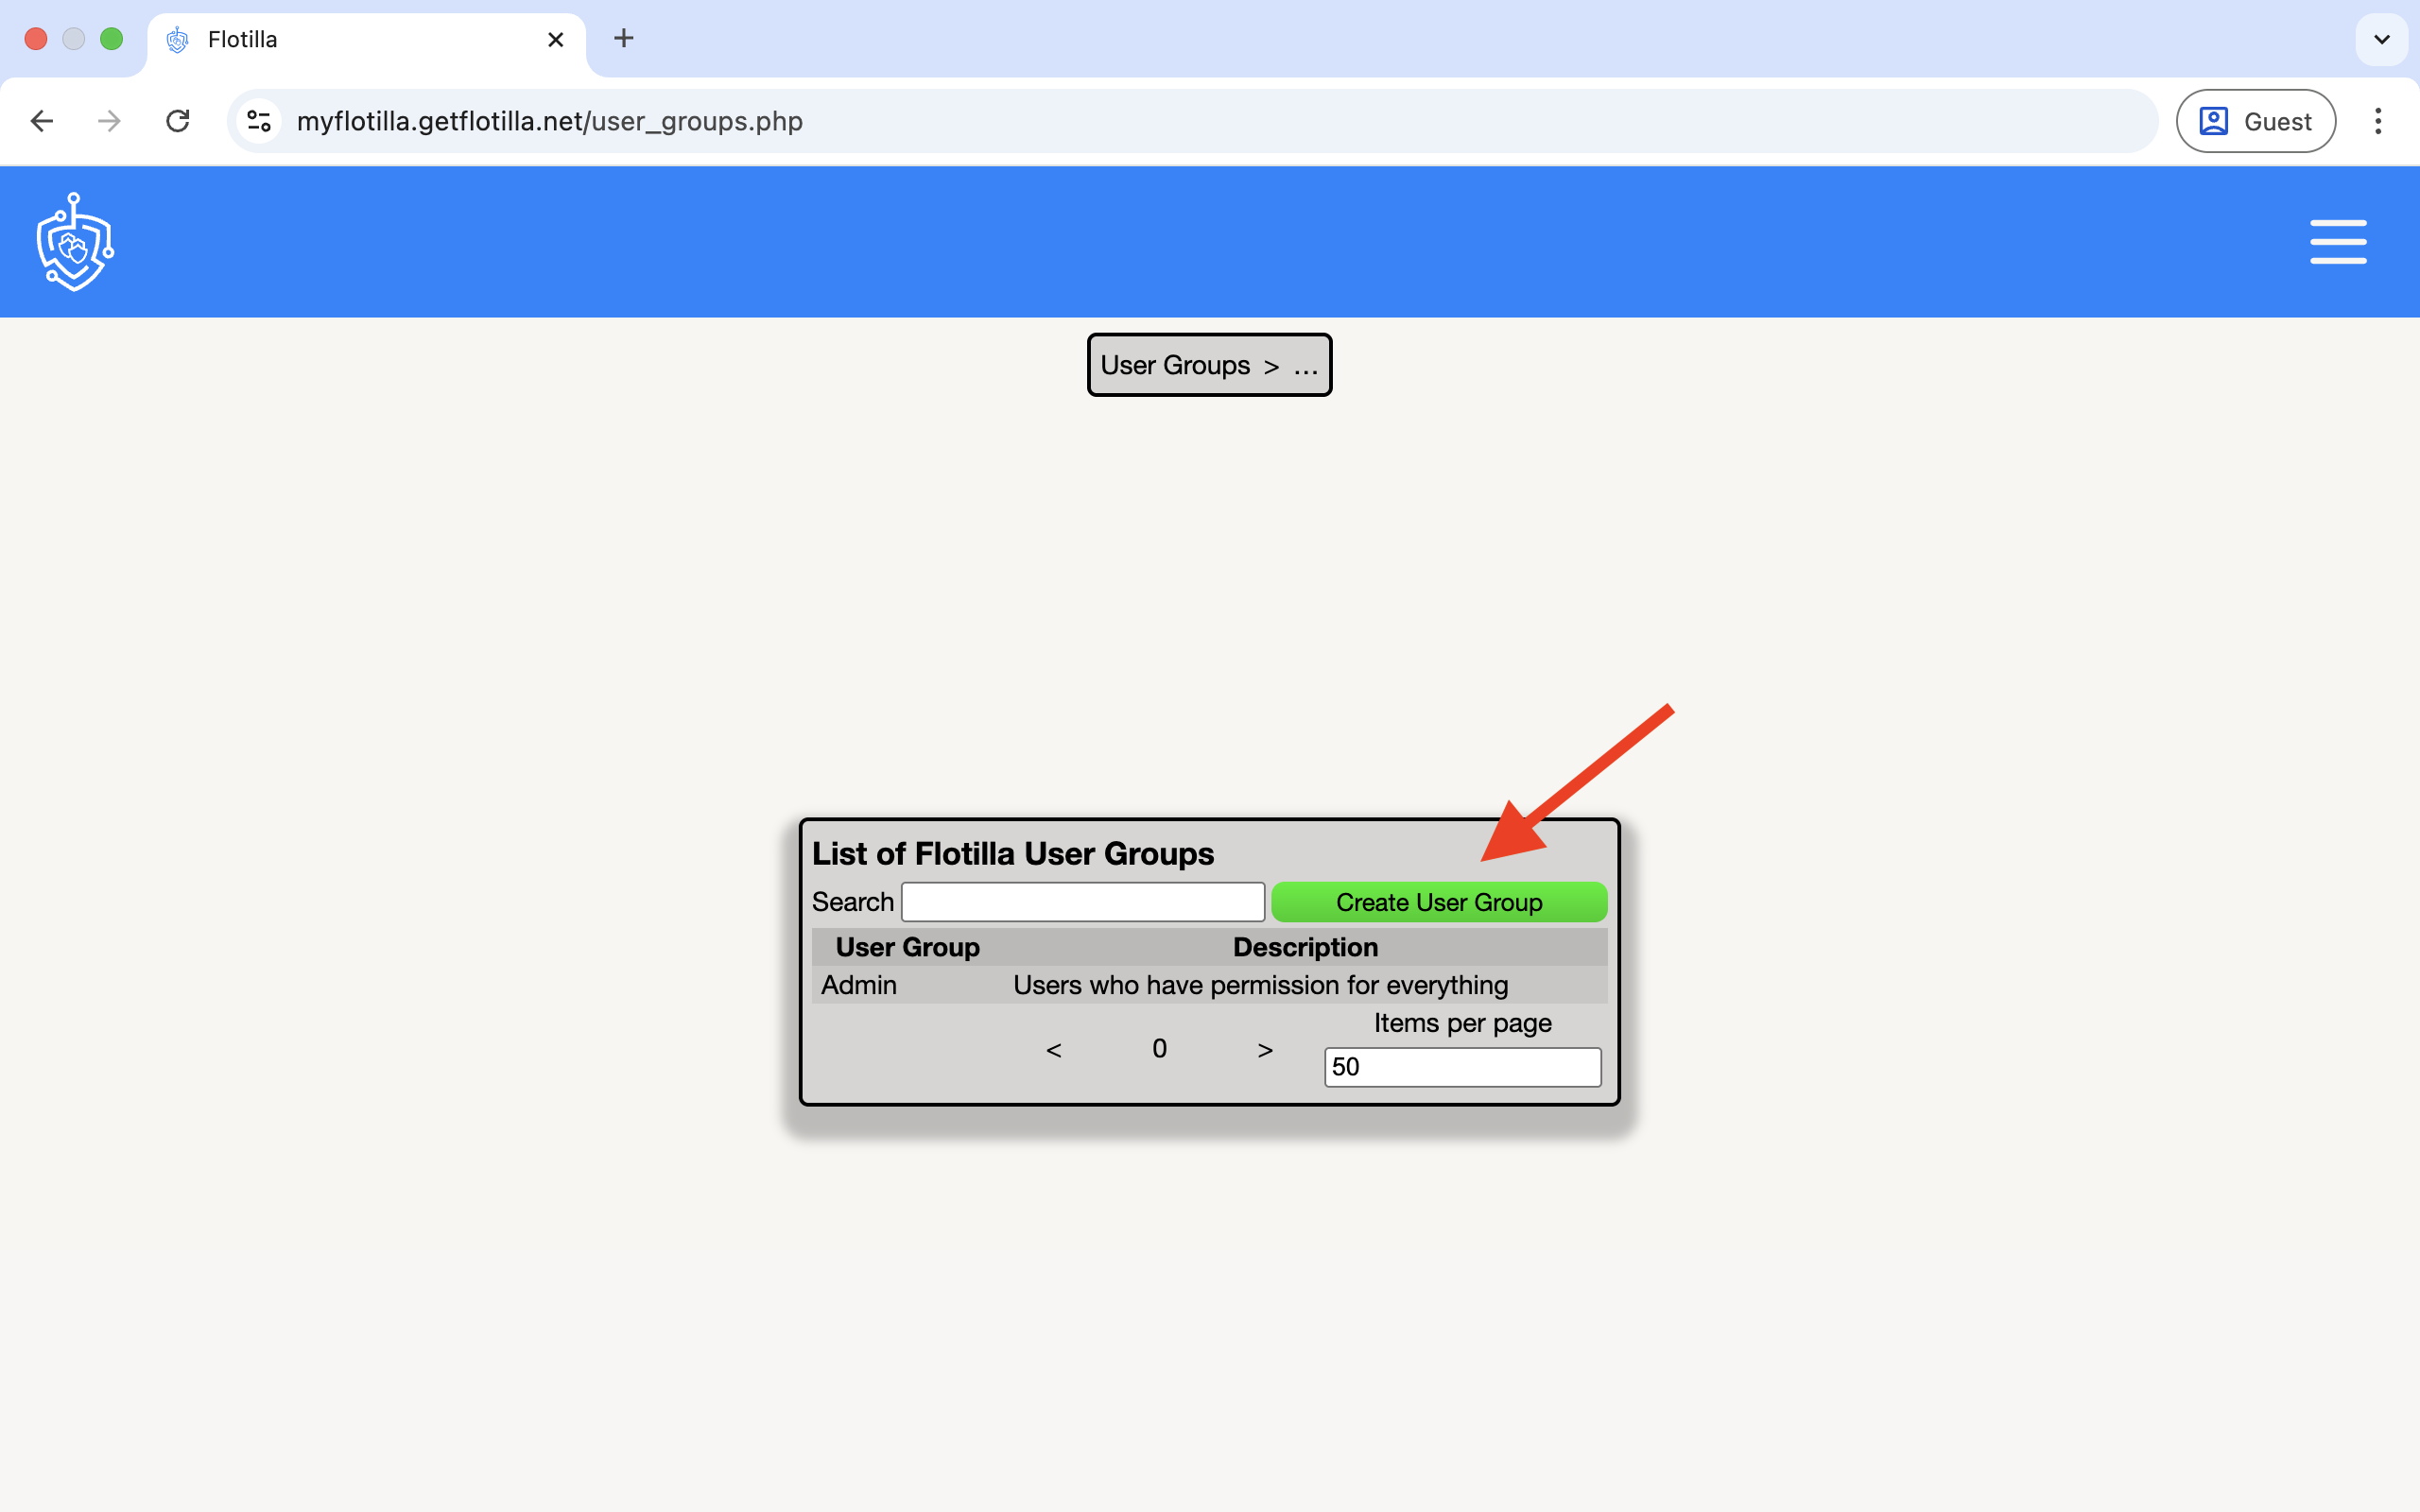
Click on ‘Create User Group’:
Enter a name and description and click ‘Create Group’:
This will now take you back to the main page that displays the User Group. Hover over your recently created group and click:
You can now add users and permissions:
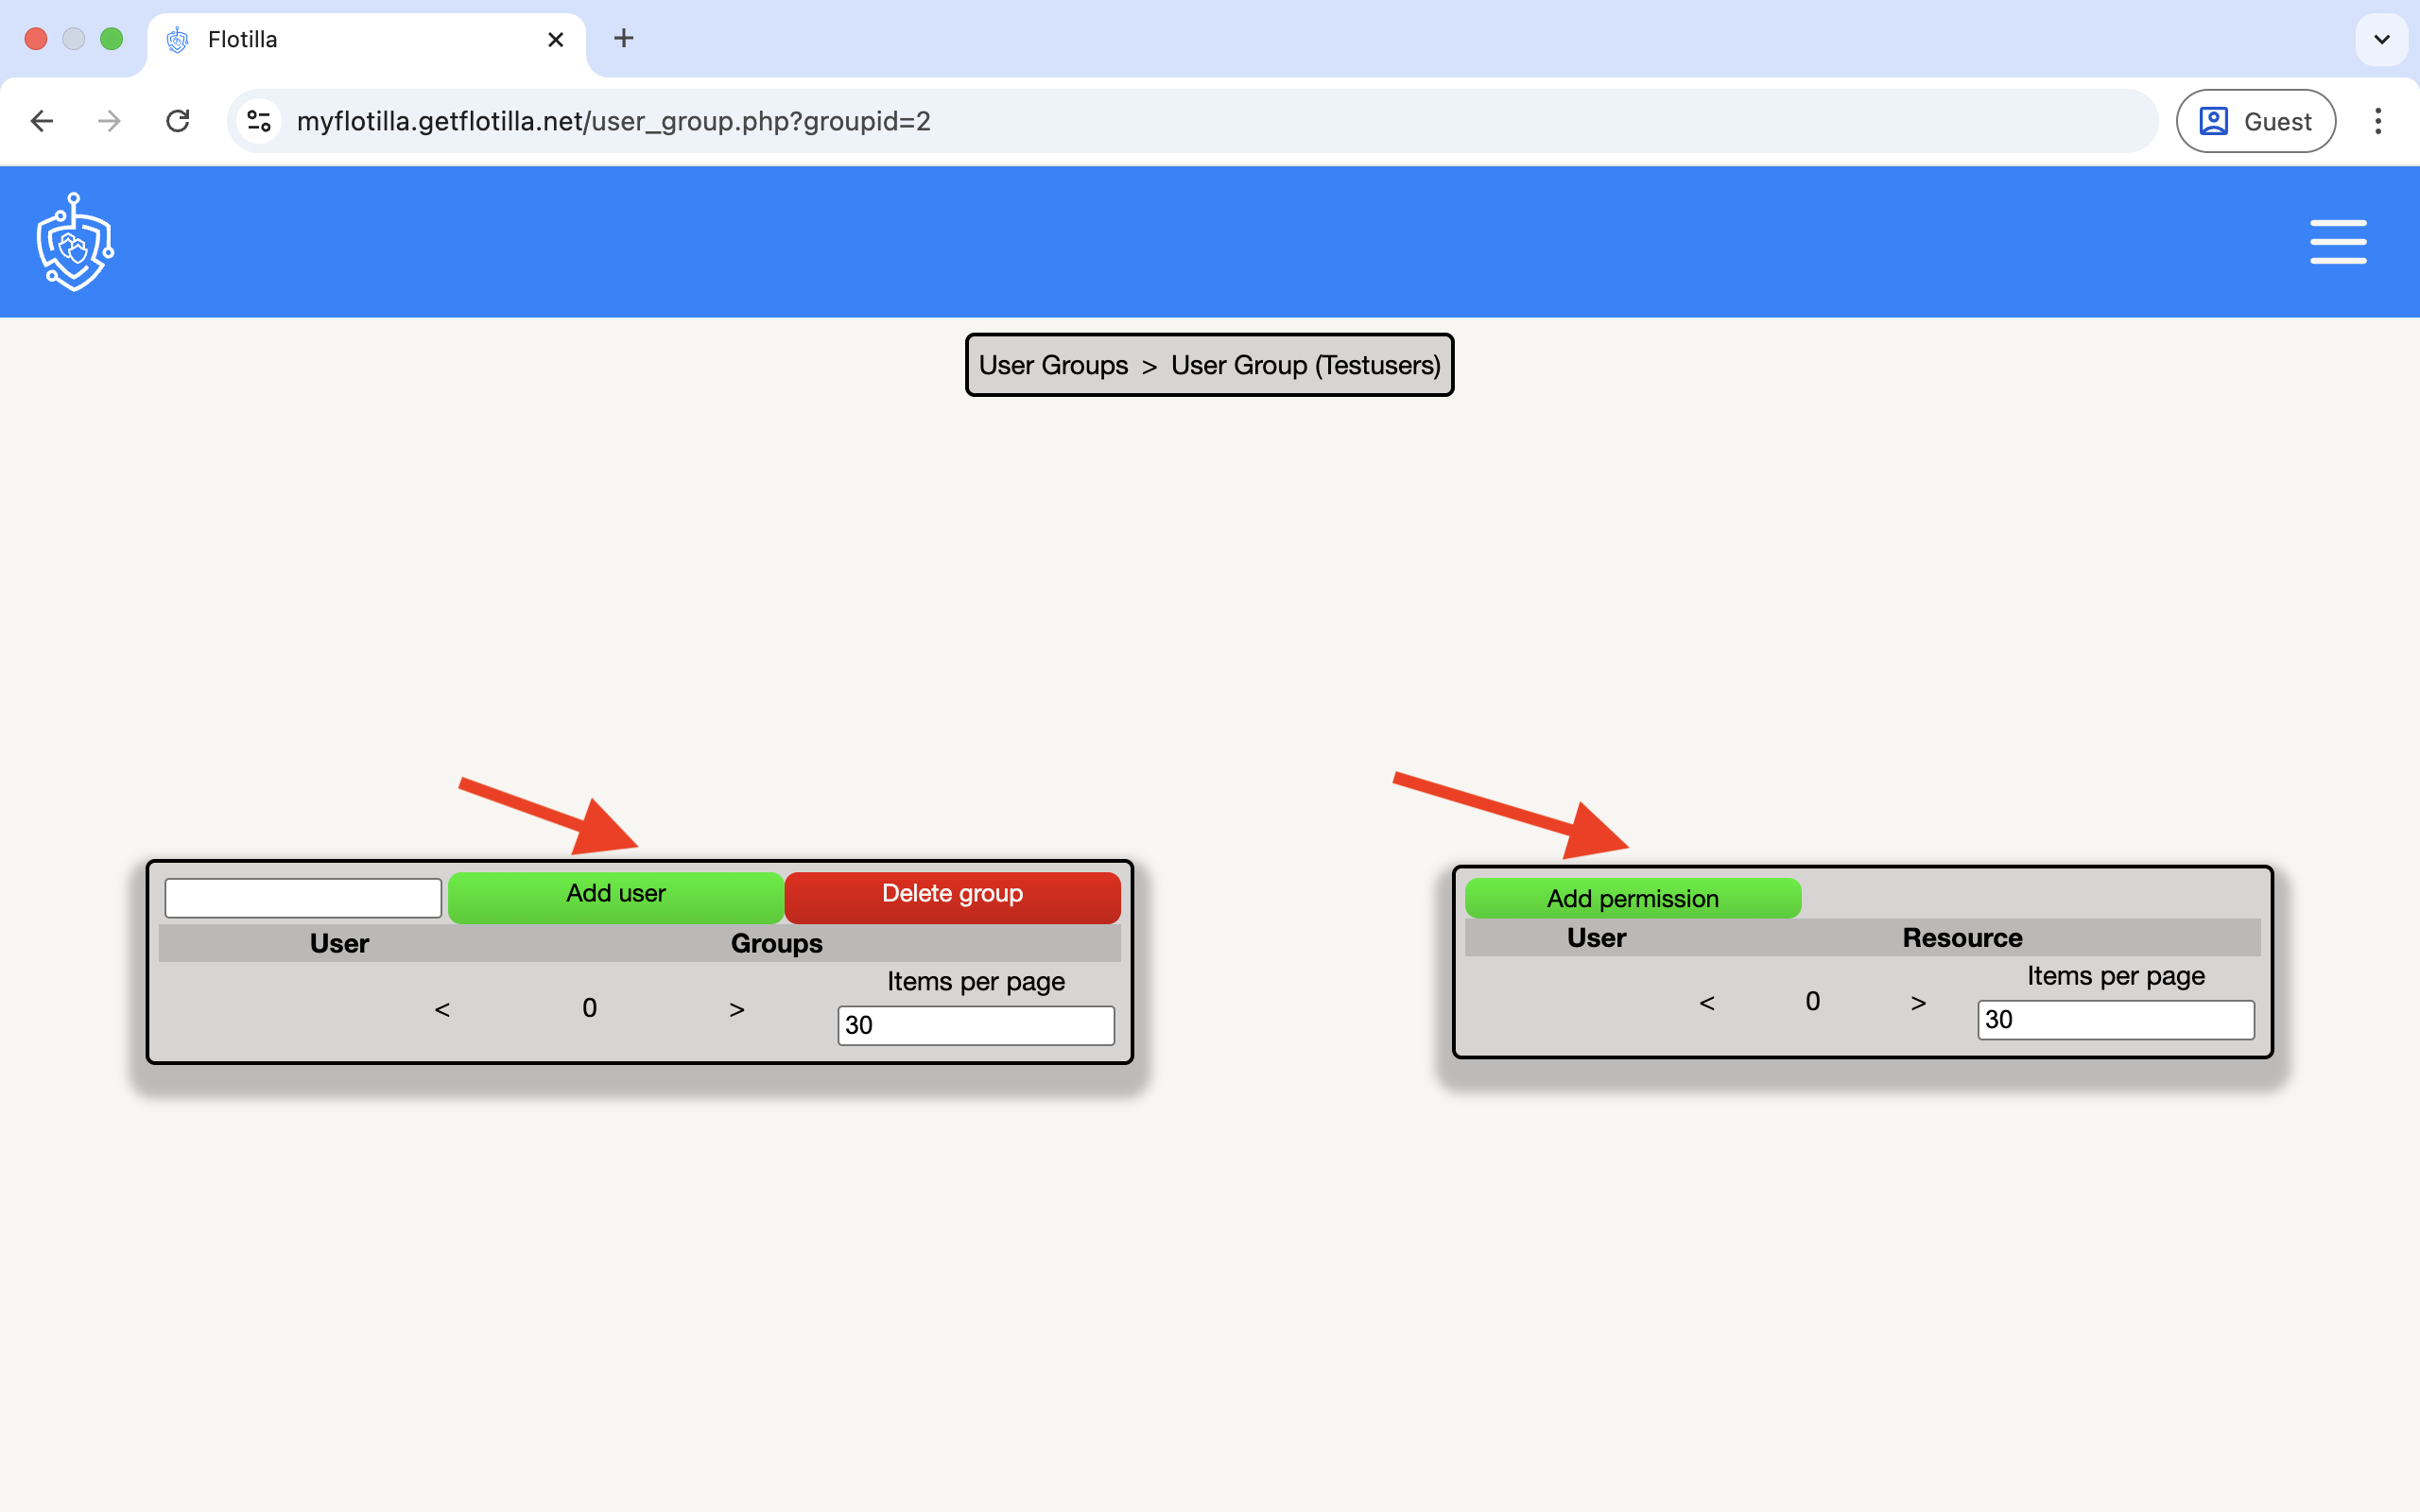
The following is a list of all permissions available:
superuser_all, admin_all_users, view_global_event, create_global_event, delete_global_event, view_audit, view_profile, view_user_groups, view_machine_groups, view_ungrouped_machine, create_machine_group, create_user, create_user_group, delete_machine, reset_password_other, authenticate_machines, view_user_group, edit_user_group_permissions, put_user_in_group, remove_user_from_group, view_machine_group, alter_machine_group, create_machine_event, delete_machine_event, alter_server_settings.
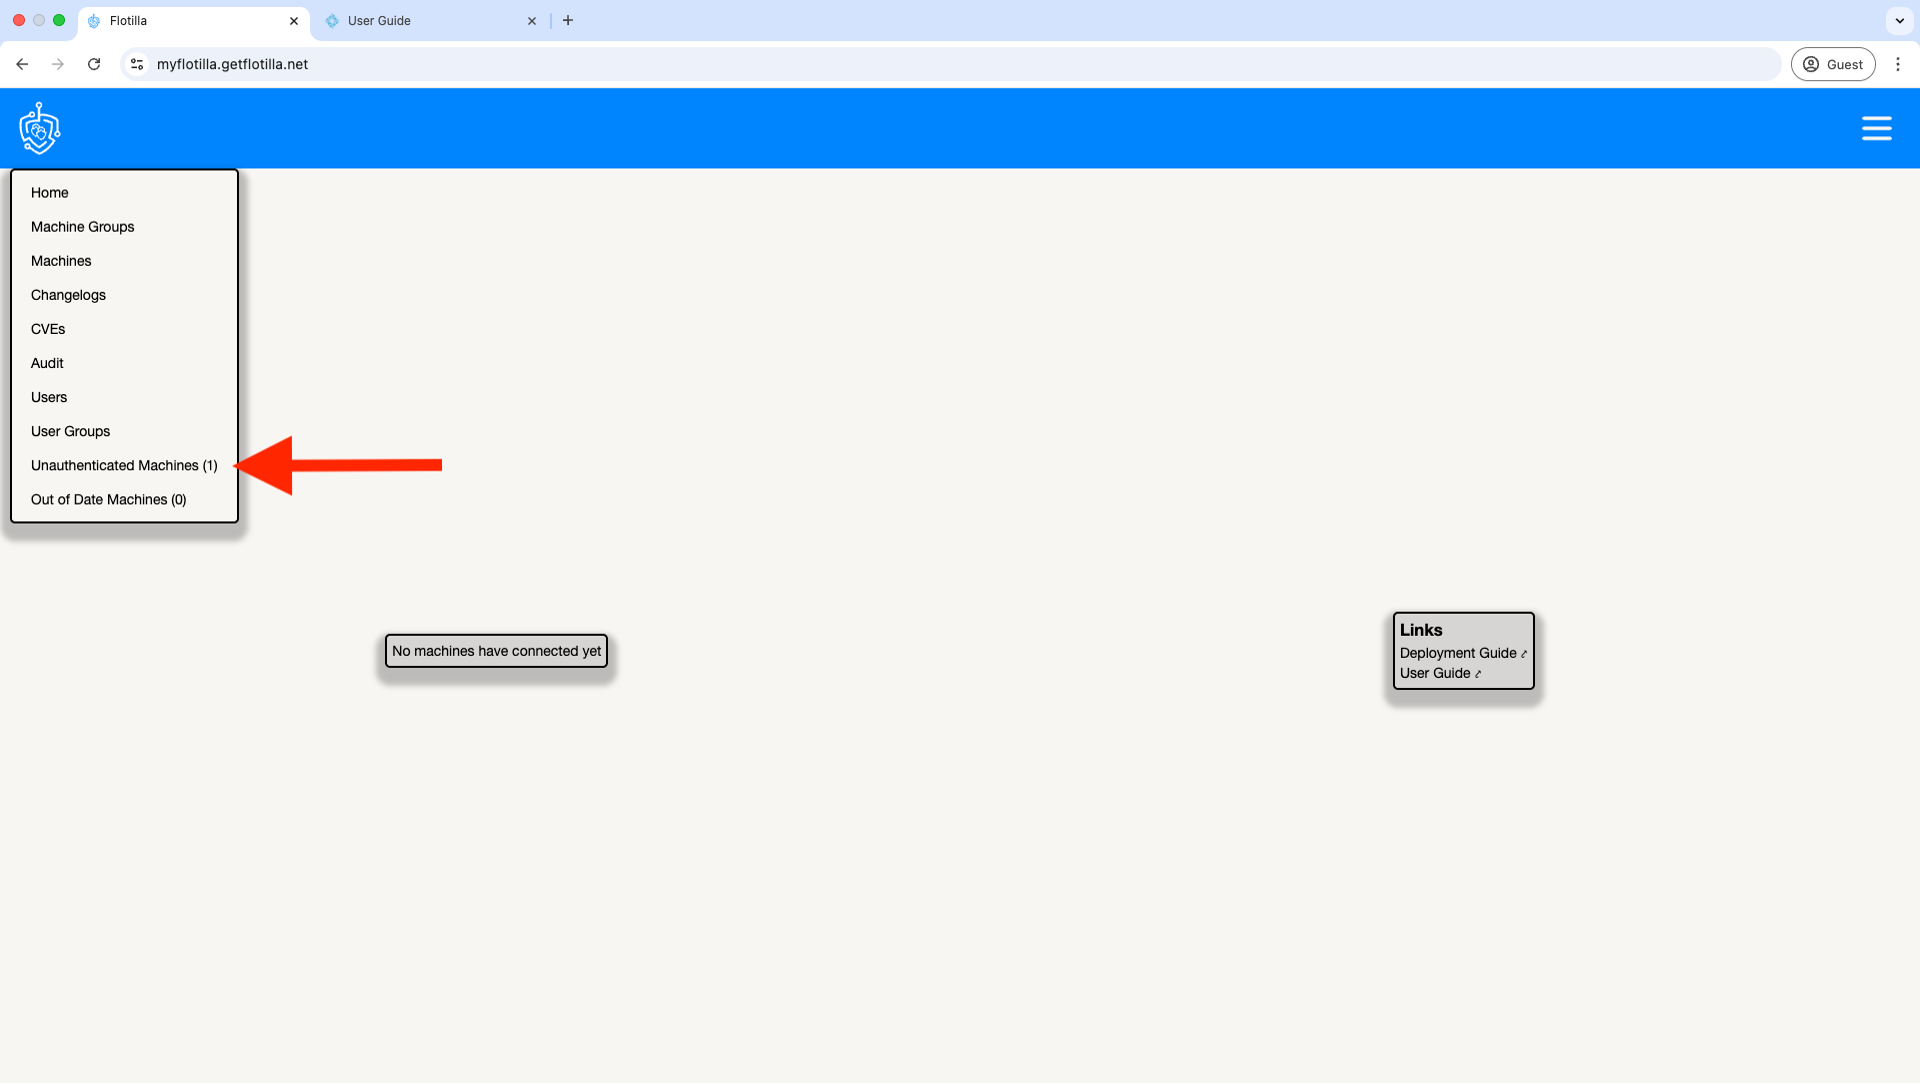
11.Unauthenticated Machines
This lists machines pending authentication. During installation of the client a prompt appears asking the user to authenticate the machine. If this step is not completed the machine will appear in this list. Reference: https://documentation.owta.net/flotilladocs/user-guide#UserGuide-Step4:AuthoriseyourdeviceinFlotilla
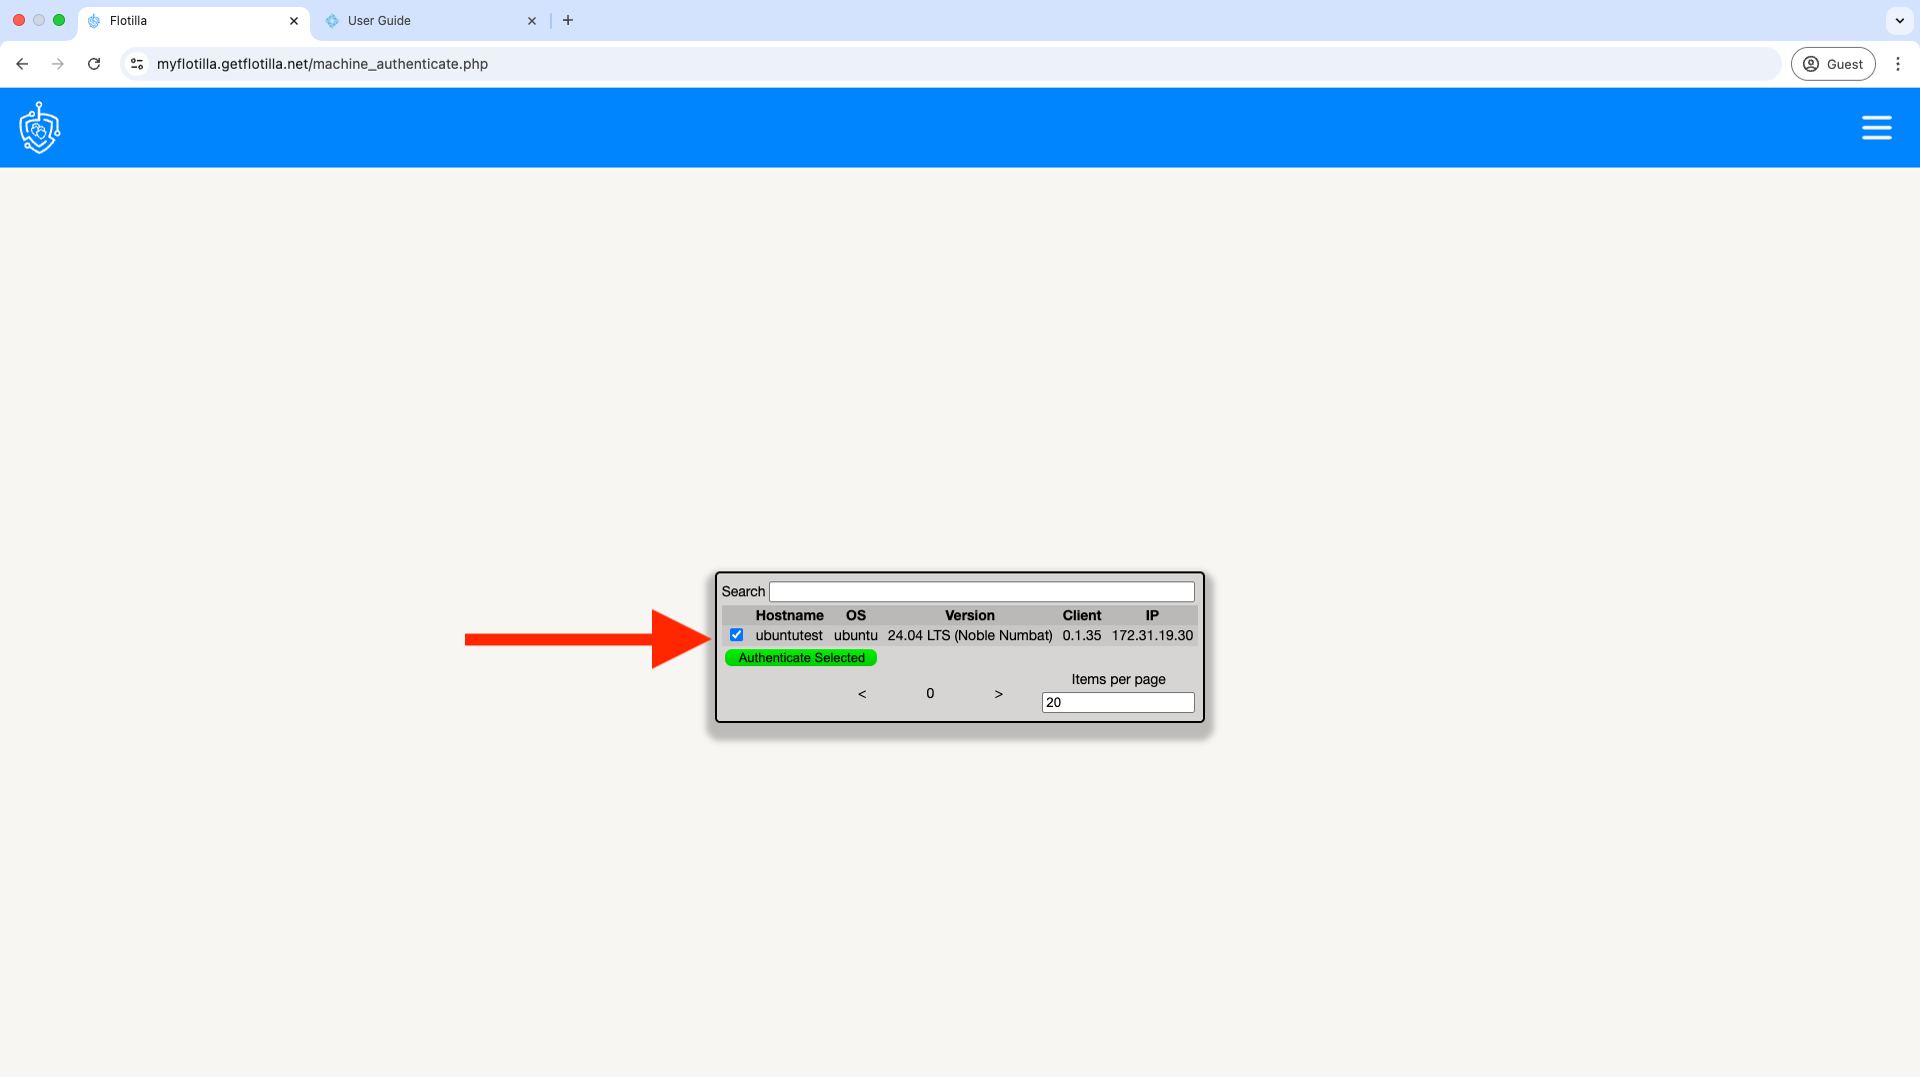
Select which machines you wish to authenticate by ticking the appropriate check boxes and clicking ‘Authenticate Selected’:

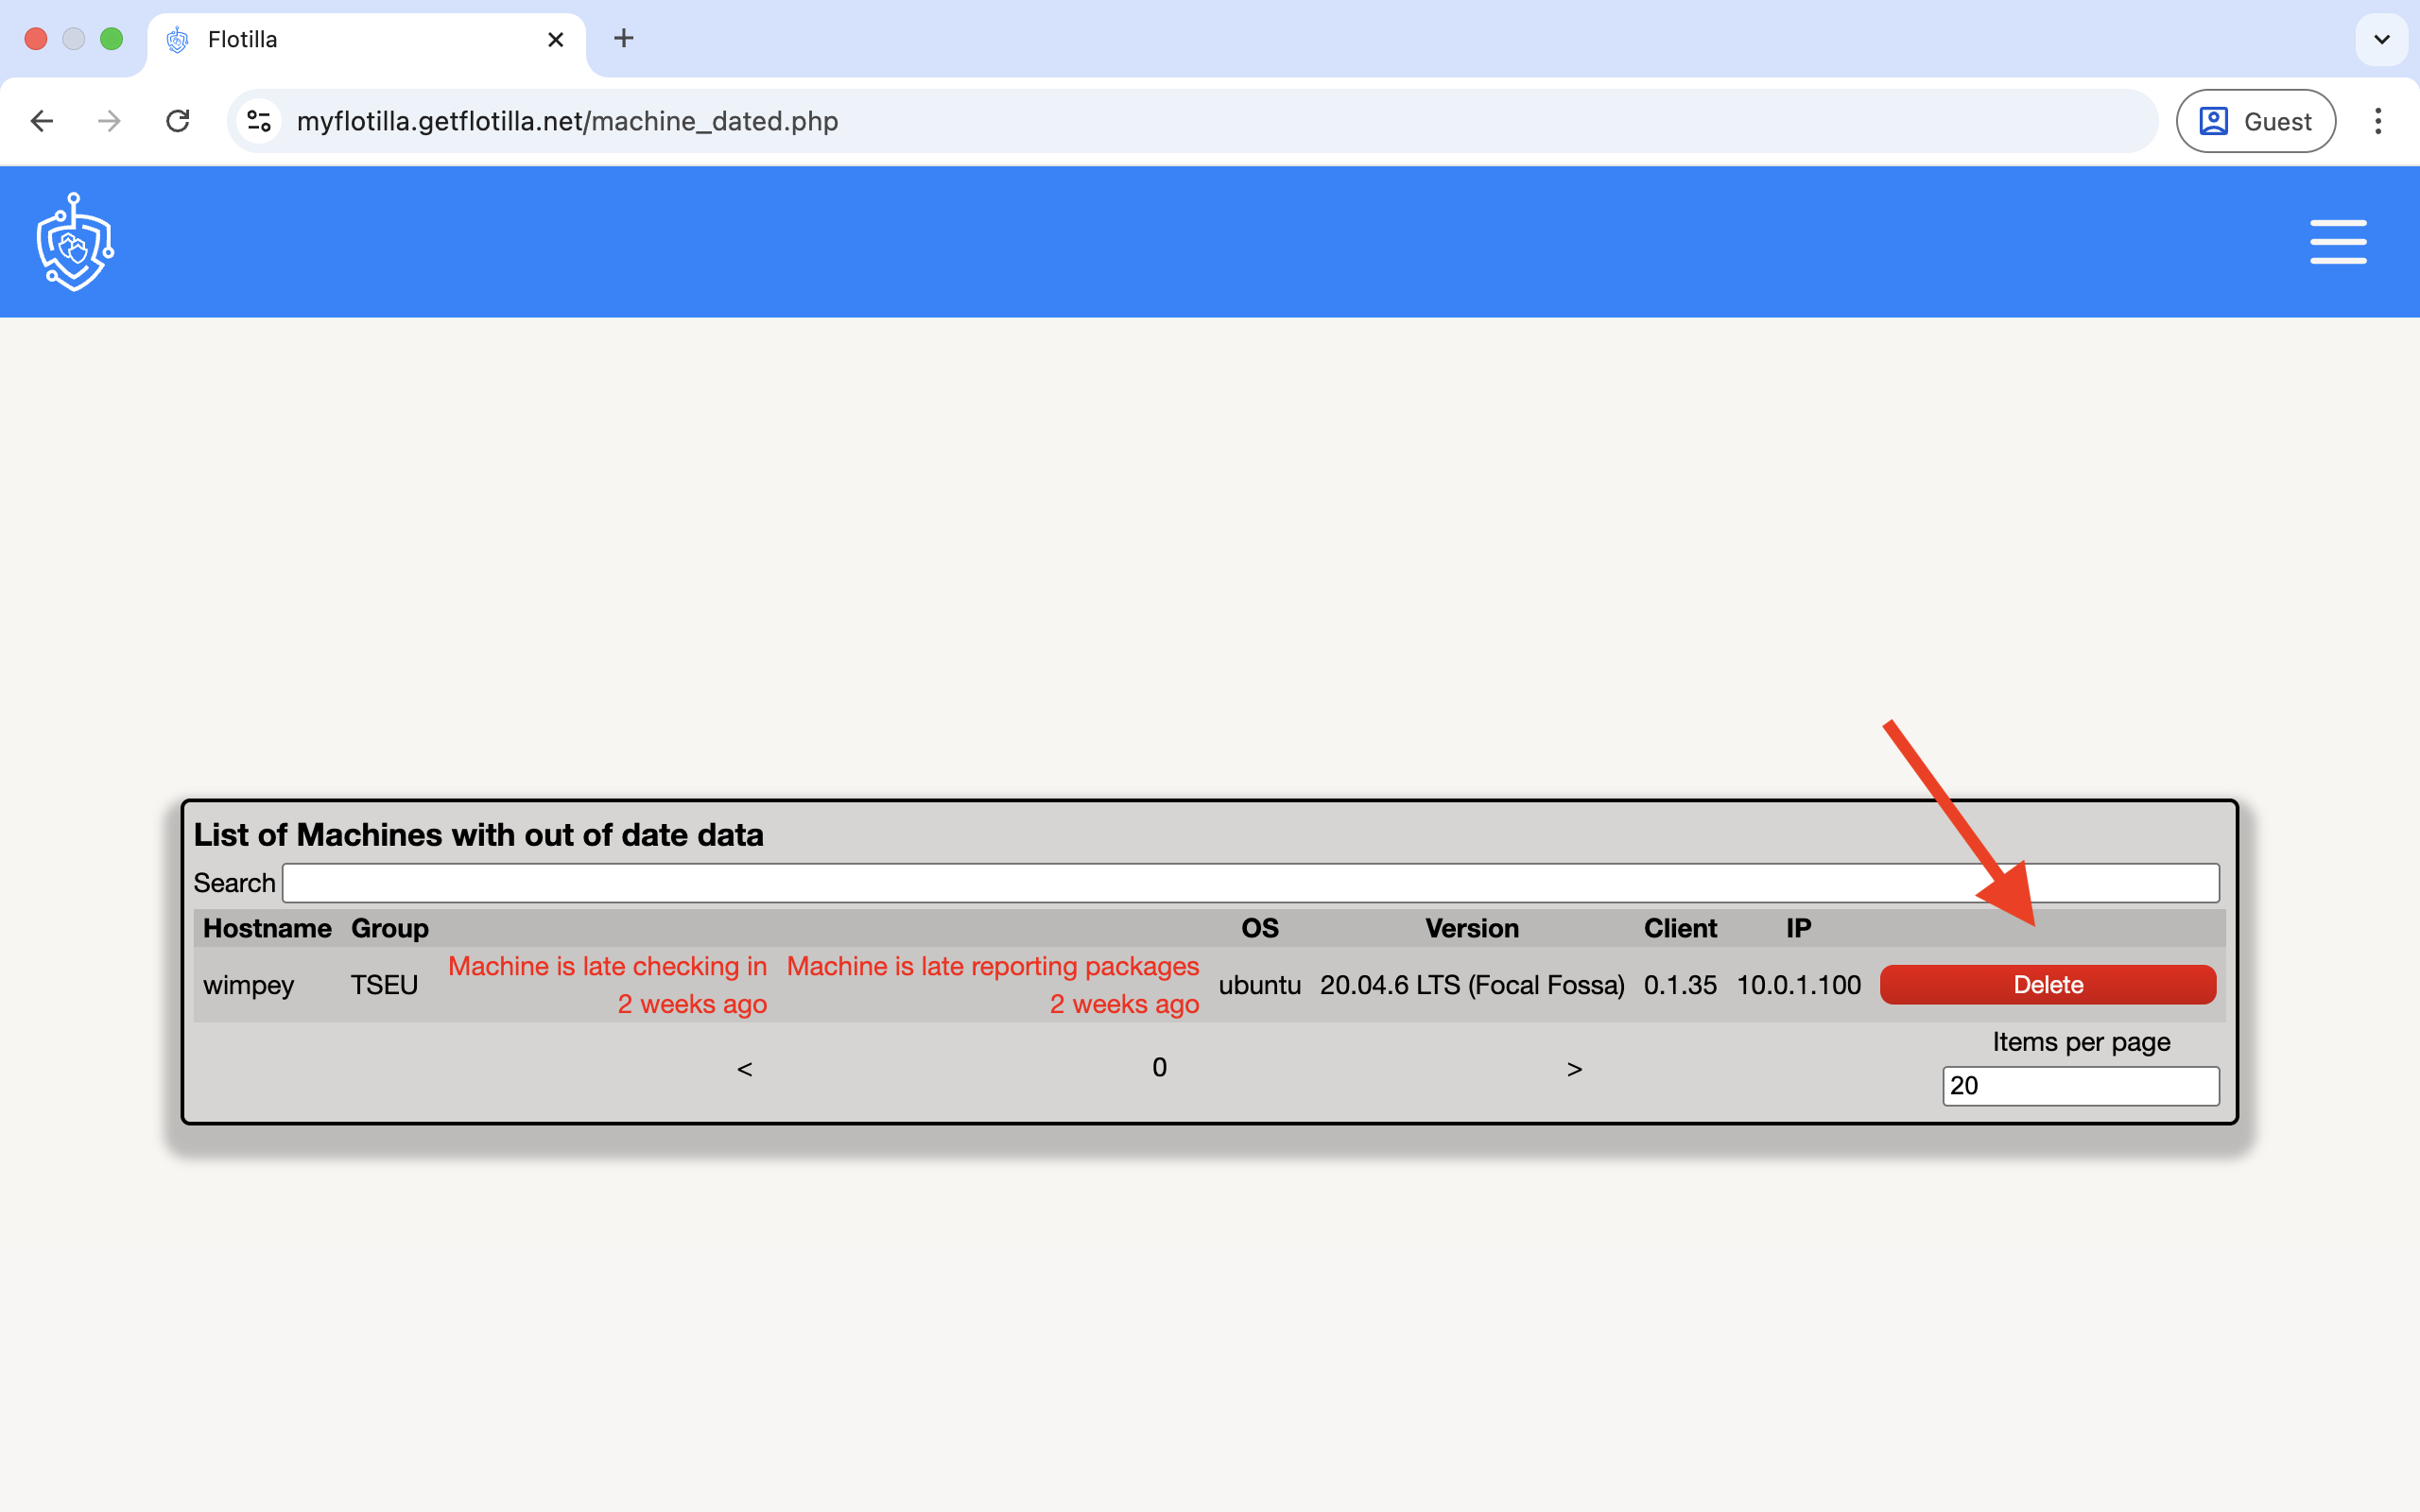
12.Out of Date Machines
Machines can be classified as ‘out-of-date’ for one of two reasons: they are no longer making any connections back to the Flotilla server or they are connecting but not providing any update information.
Click on ‘Out of Date Machines’ to display the list of machines:

These machines can be deleted by clicking the tab on the right:
13.Troubleshooting
If you receive the error ‘Unable to check in’ as below ensure the ip address of your Flotilla client is included in the range of ip addresses in your AWS security groups:

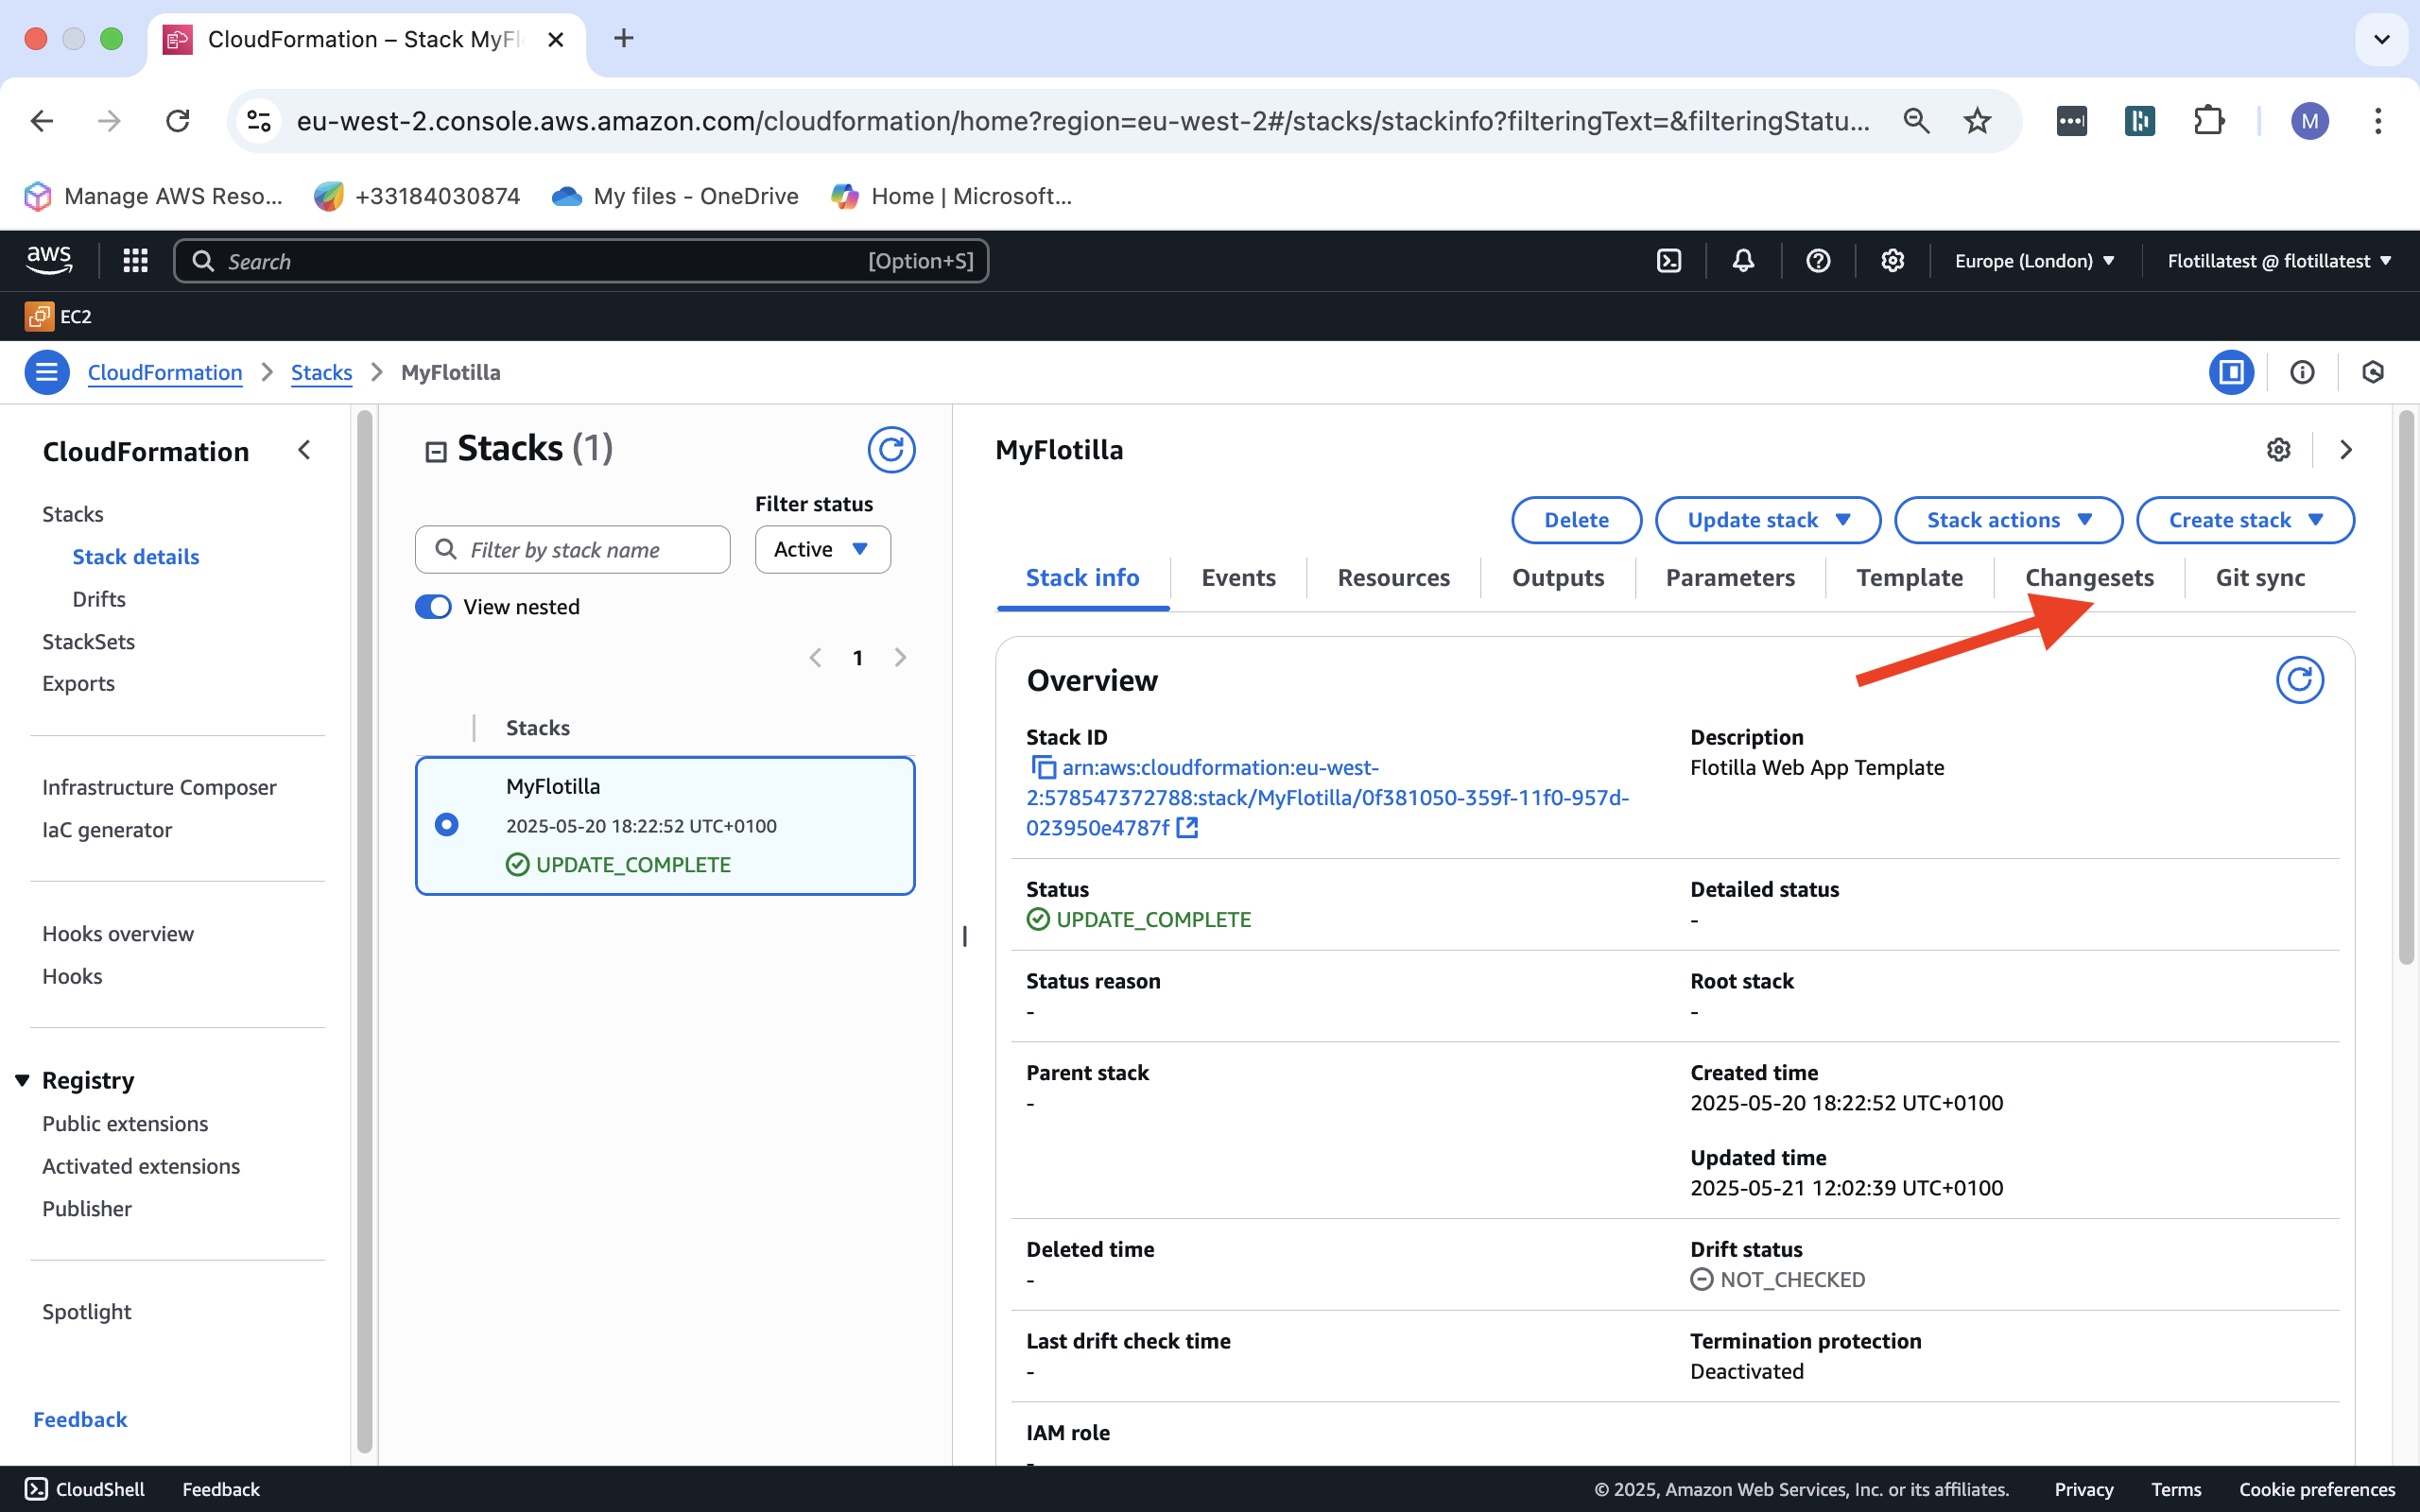
Changes to your Flotilla server configuration can be made via the changesets option in AWS.
1.Under stacks click on the Changesets option.
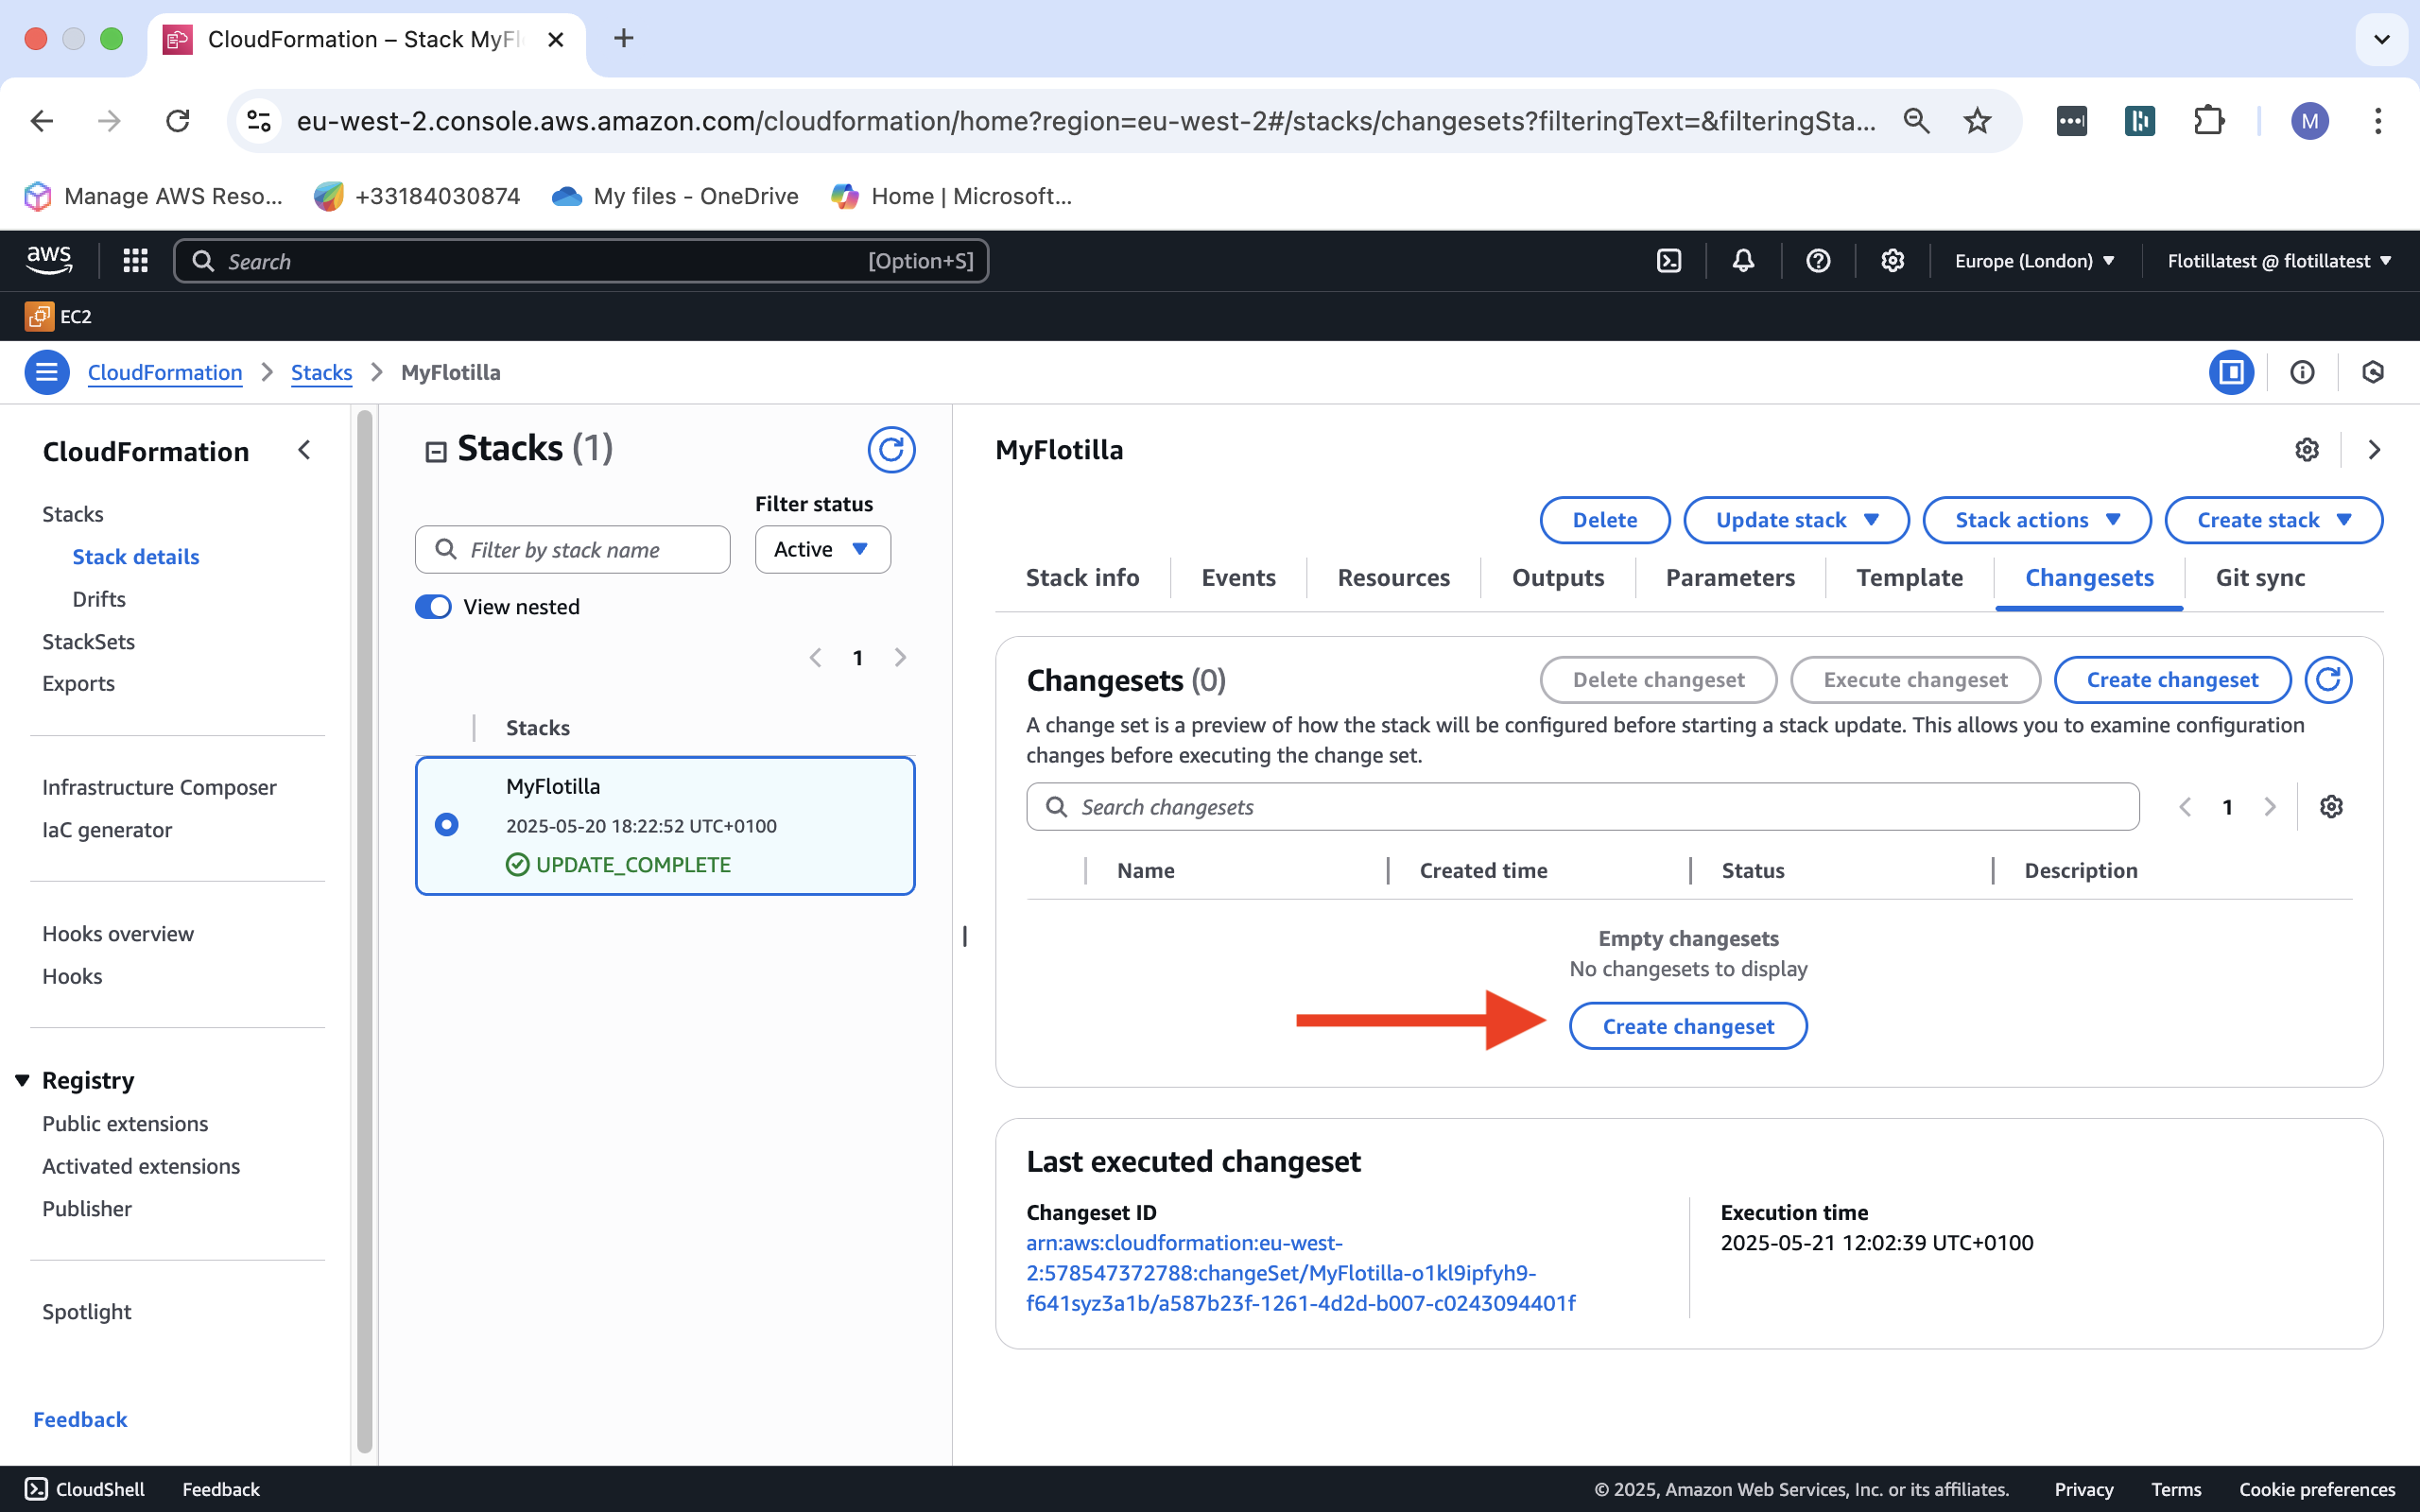
2.Click on create Changeset.
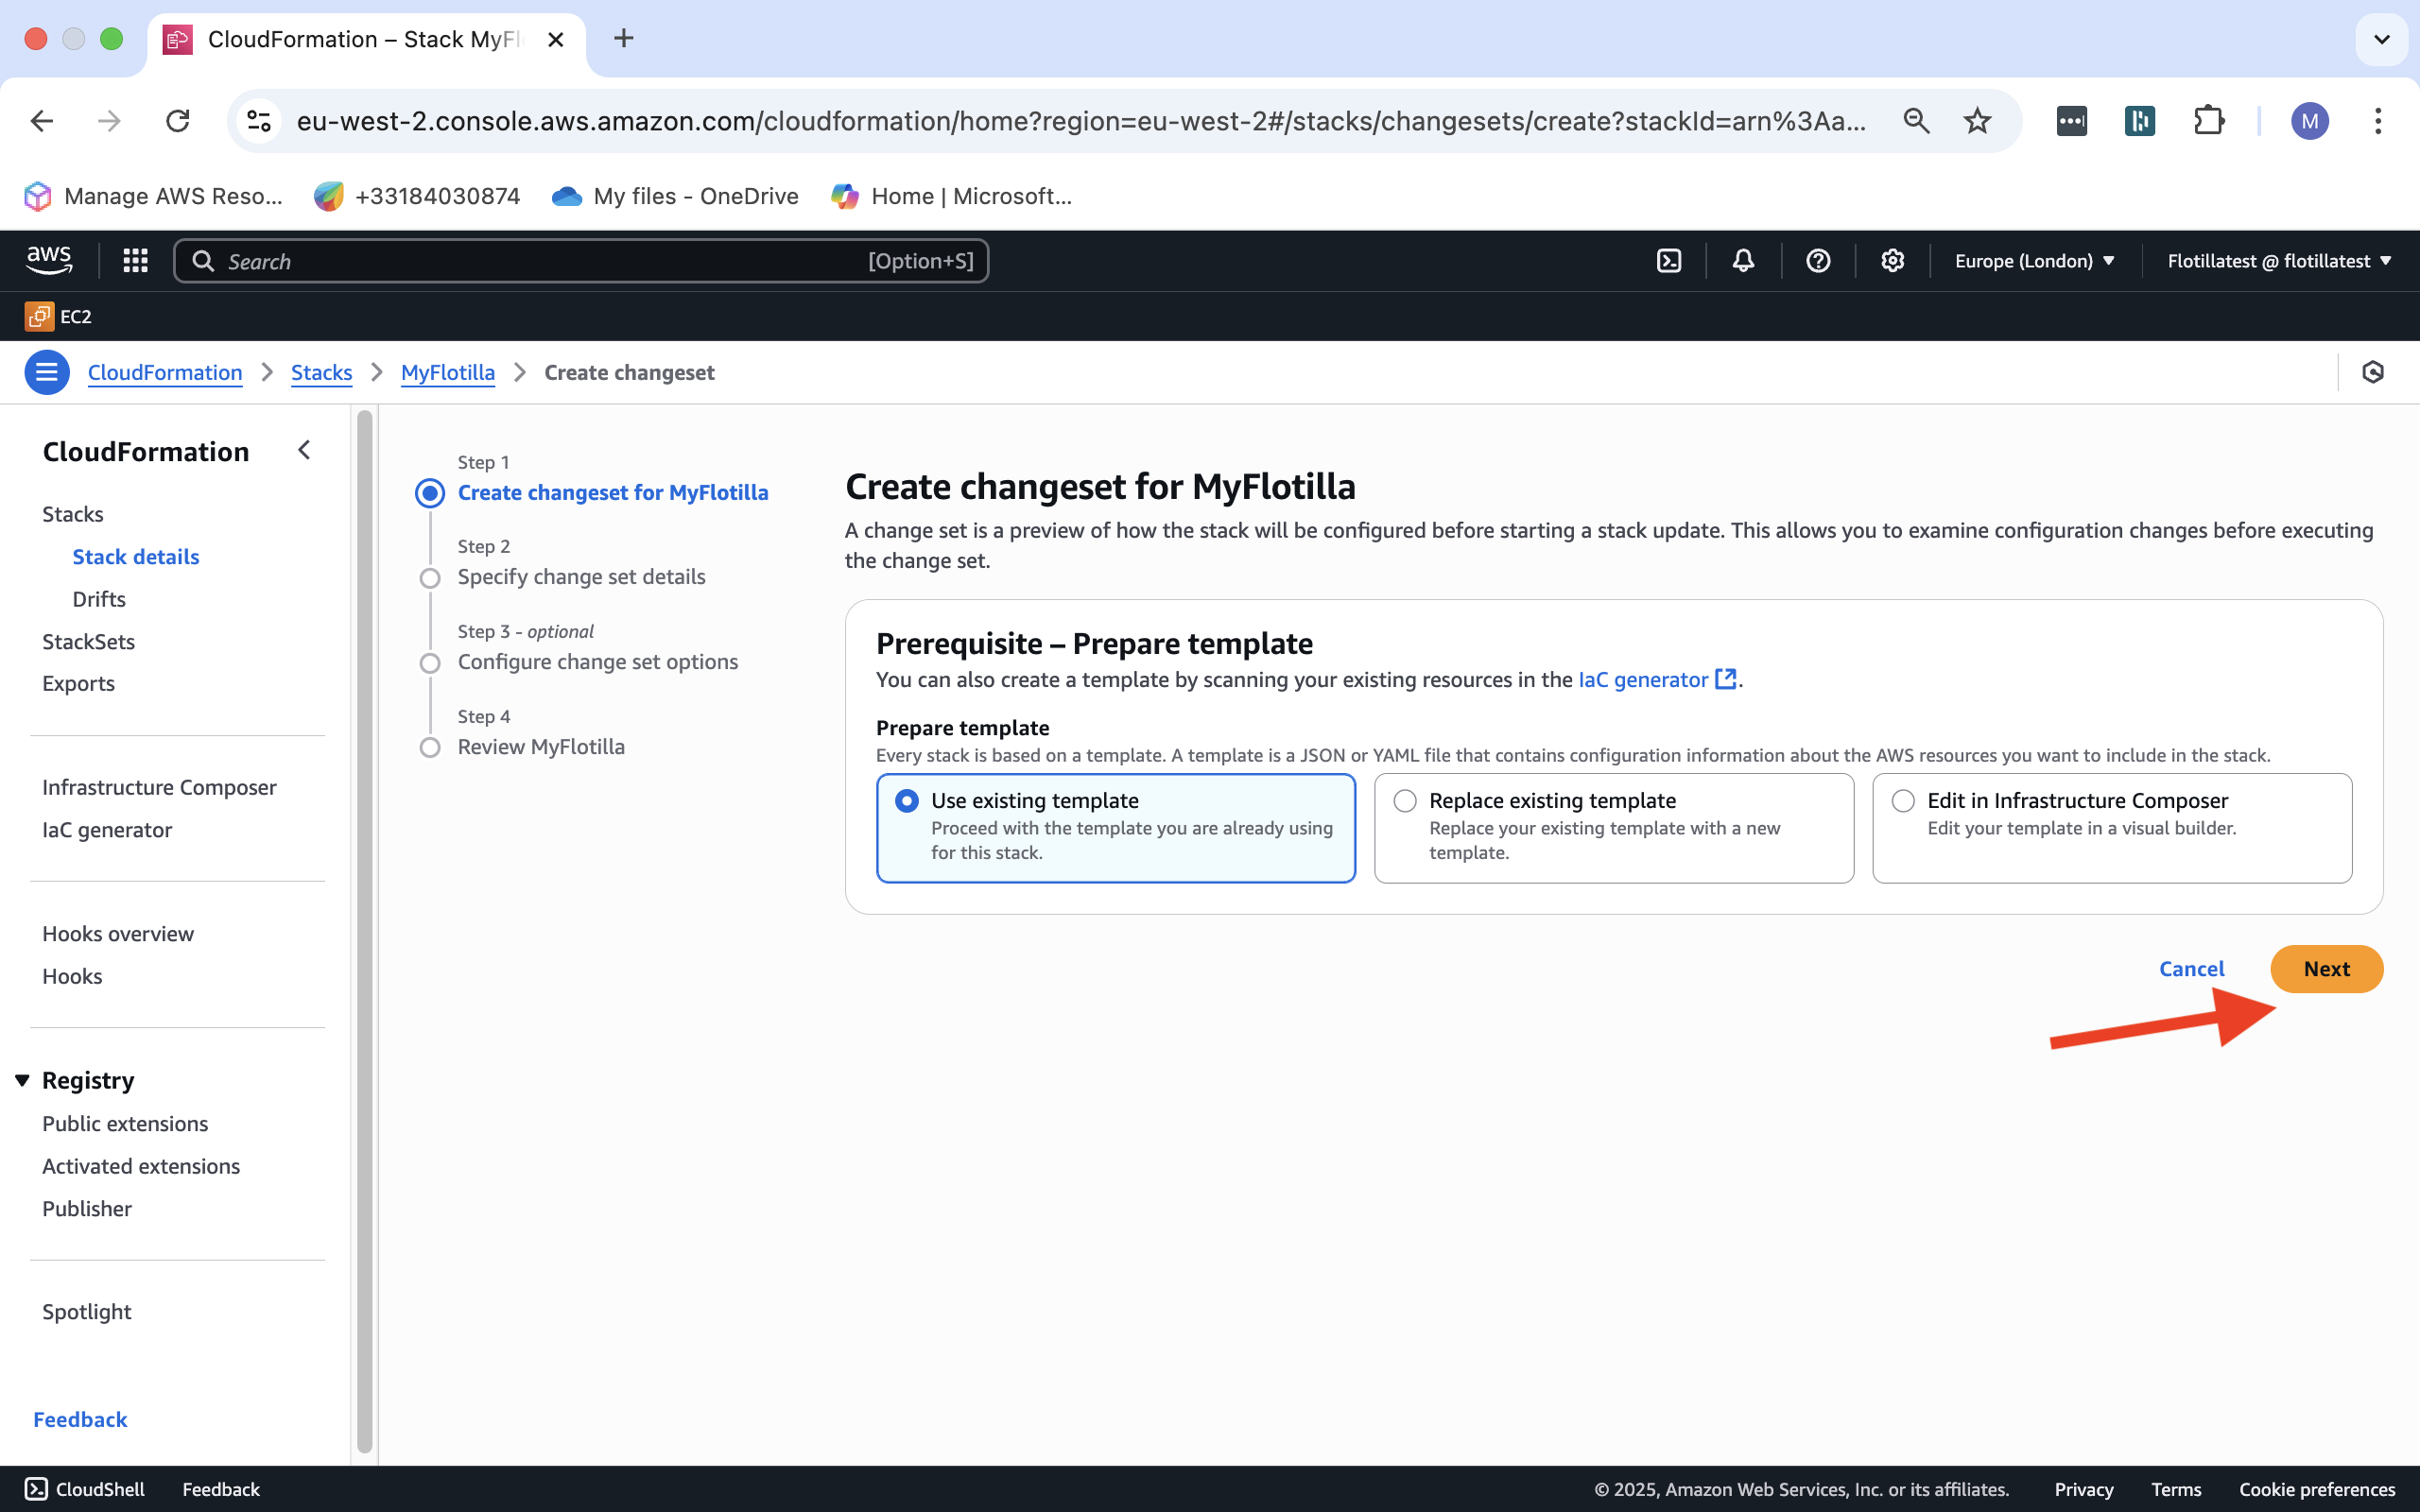
3.Use the existing template and click on next,
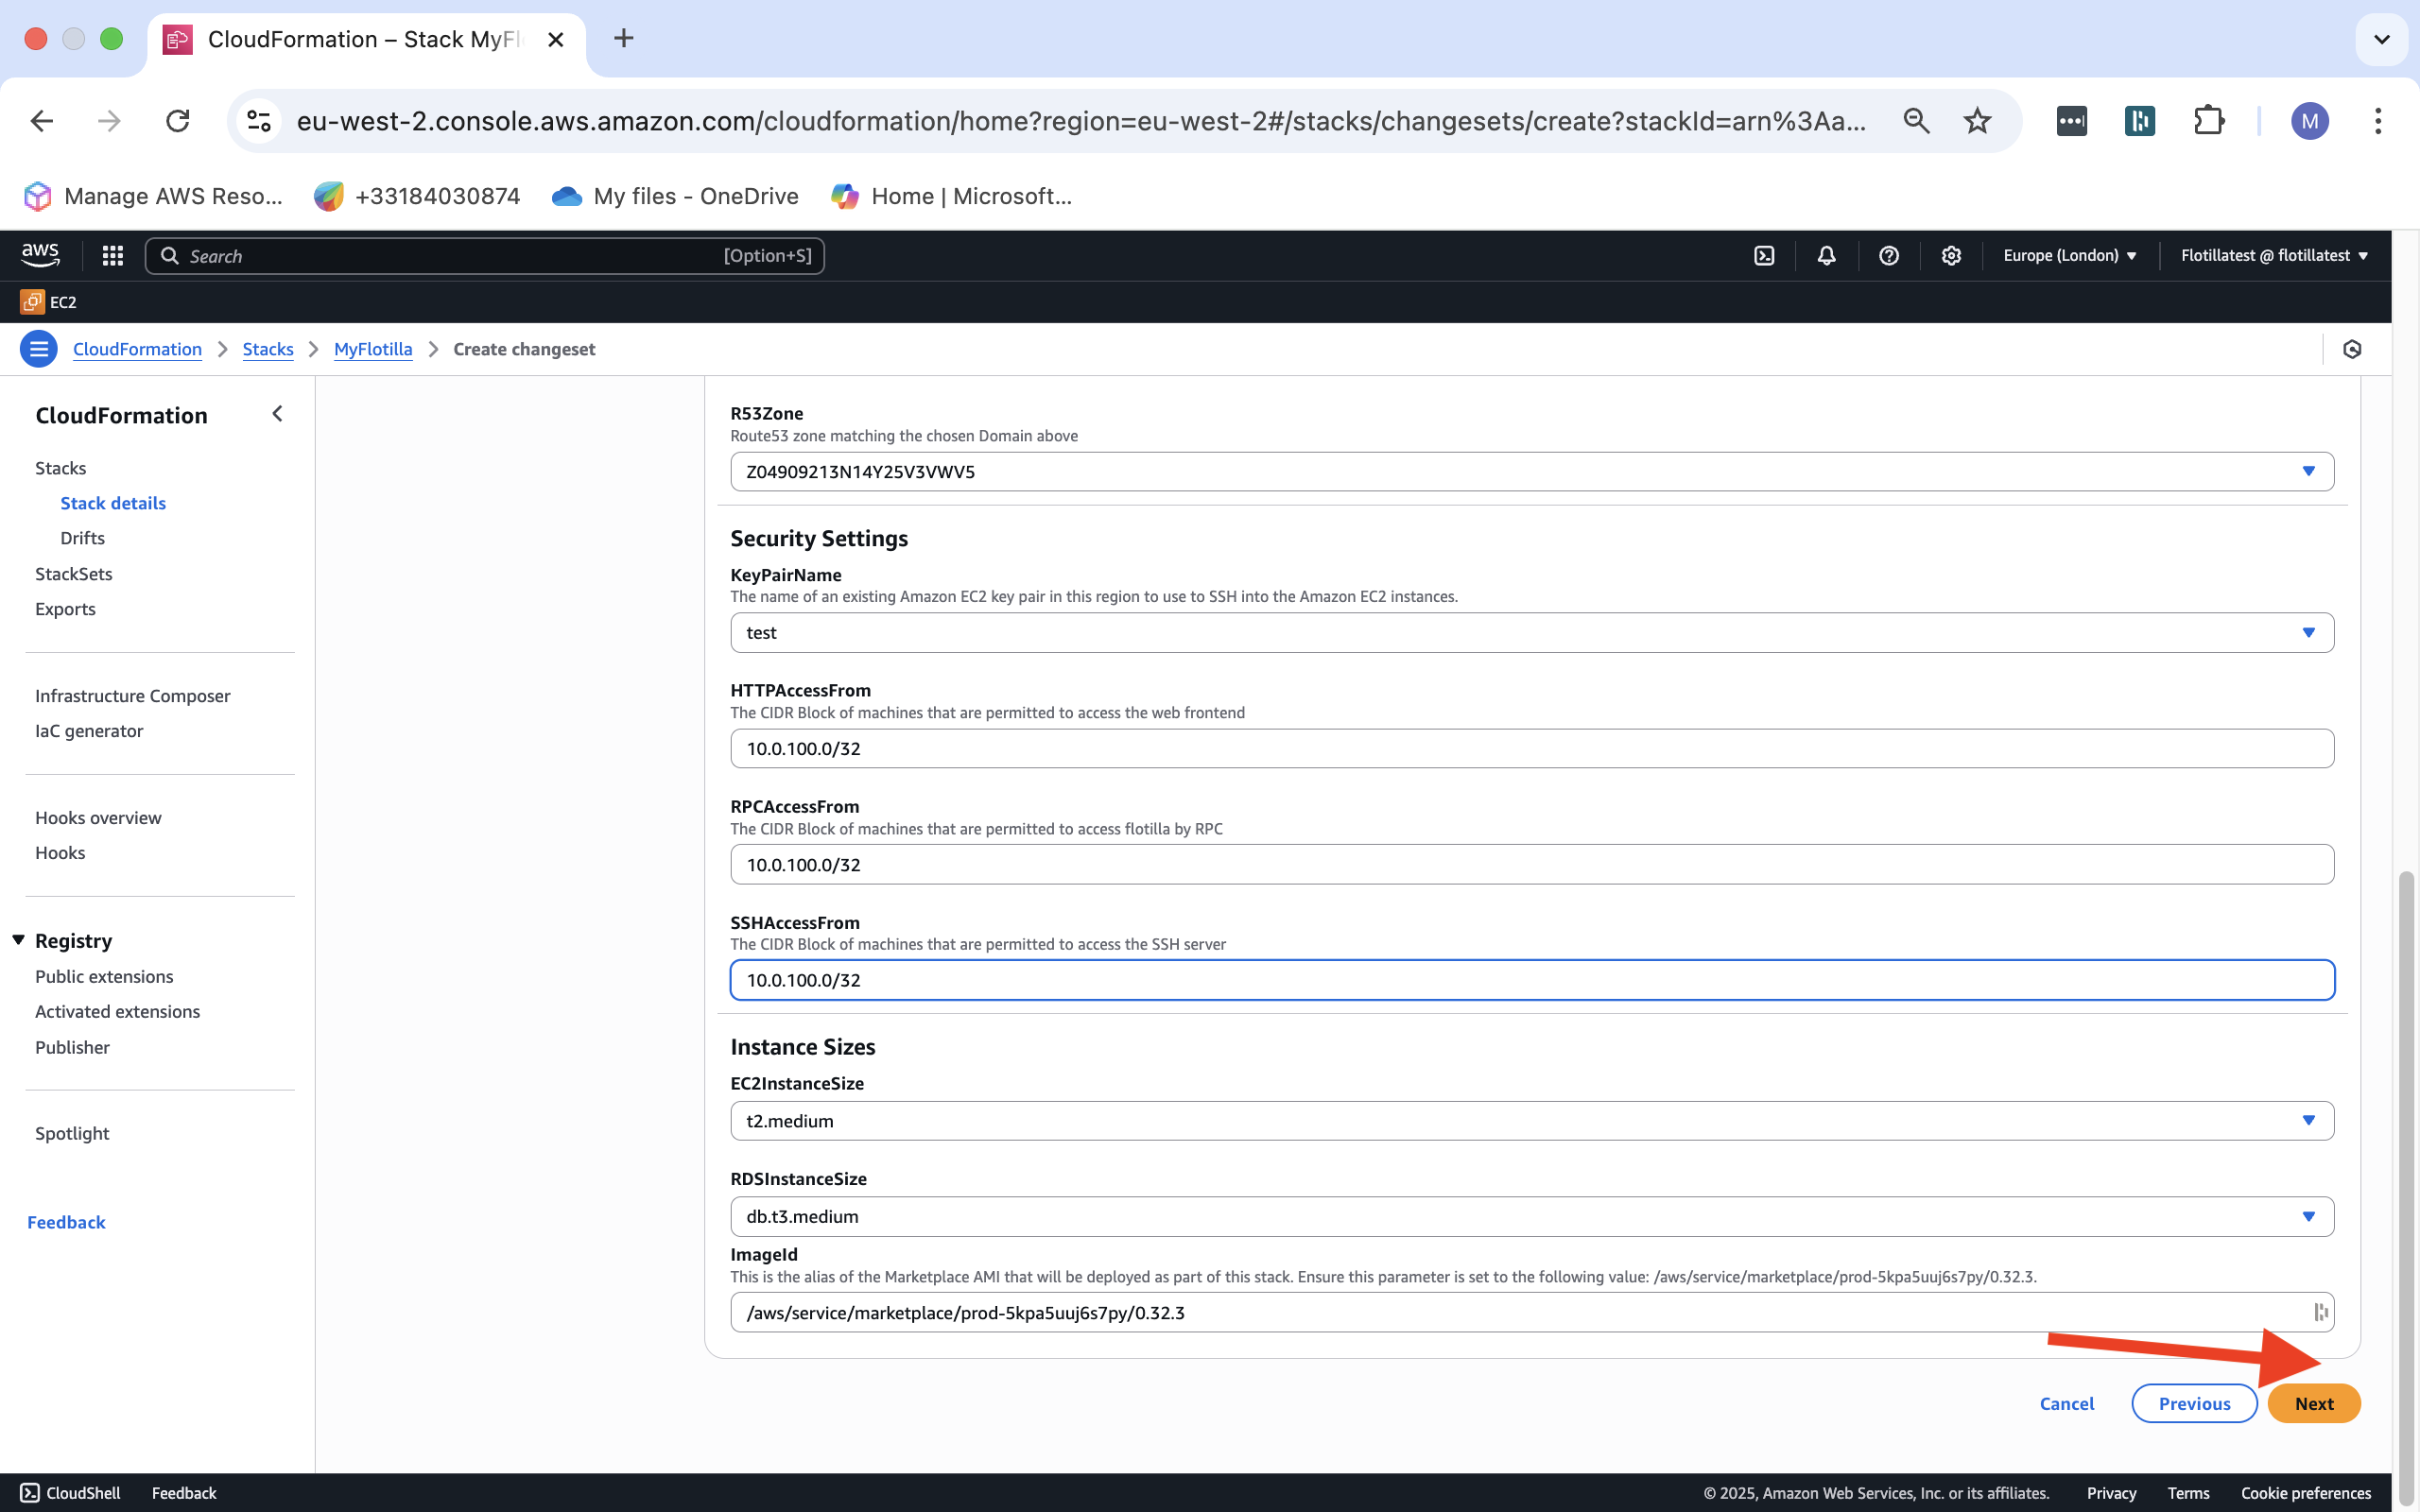
4.Specify the Changeset details.
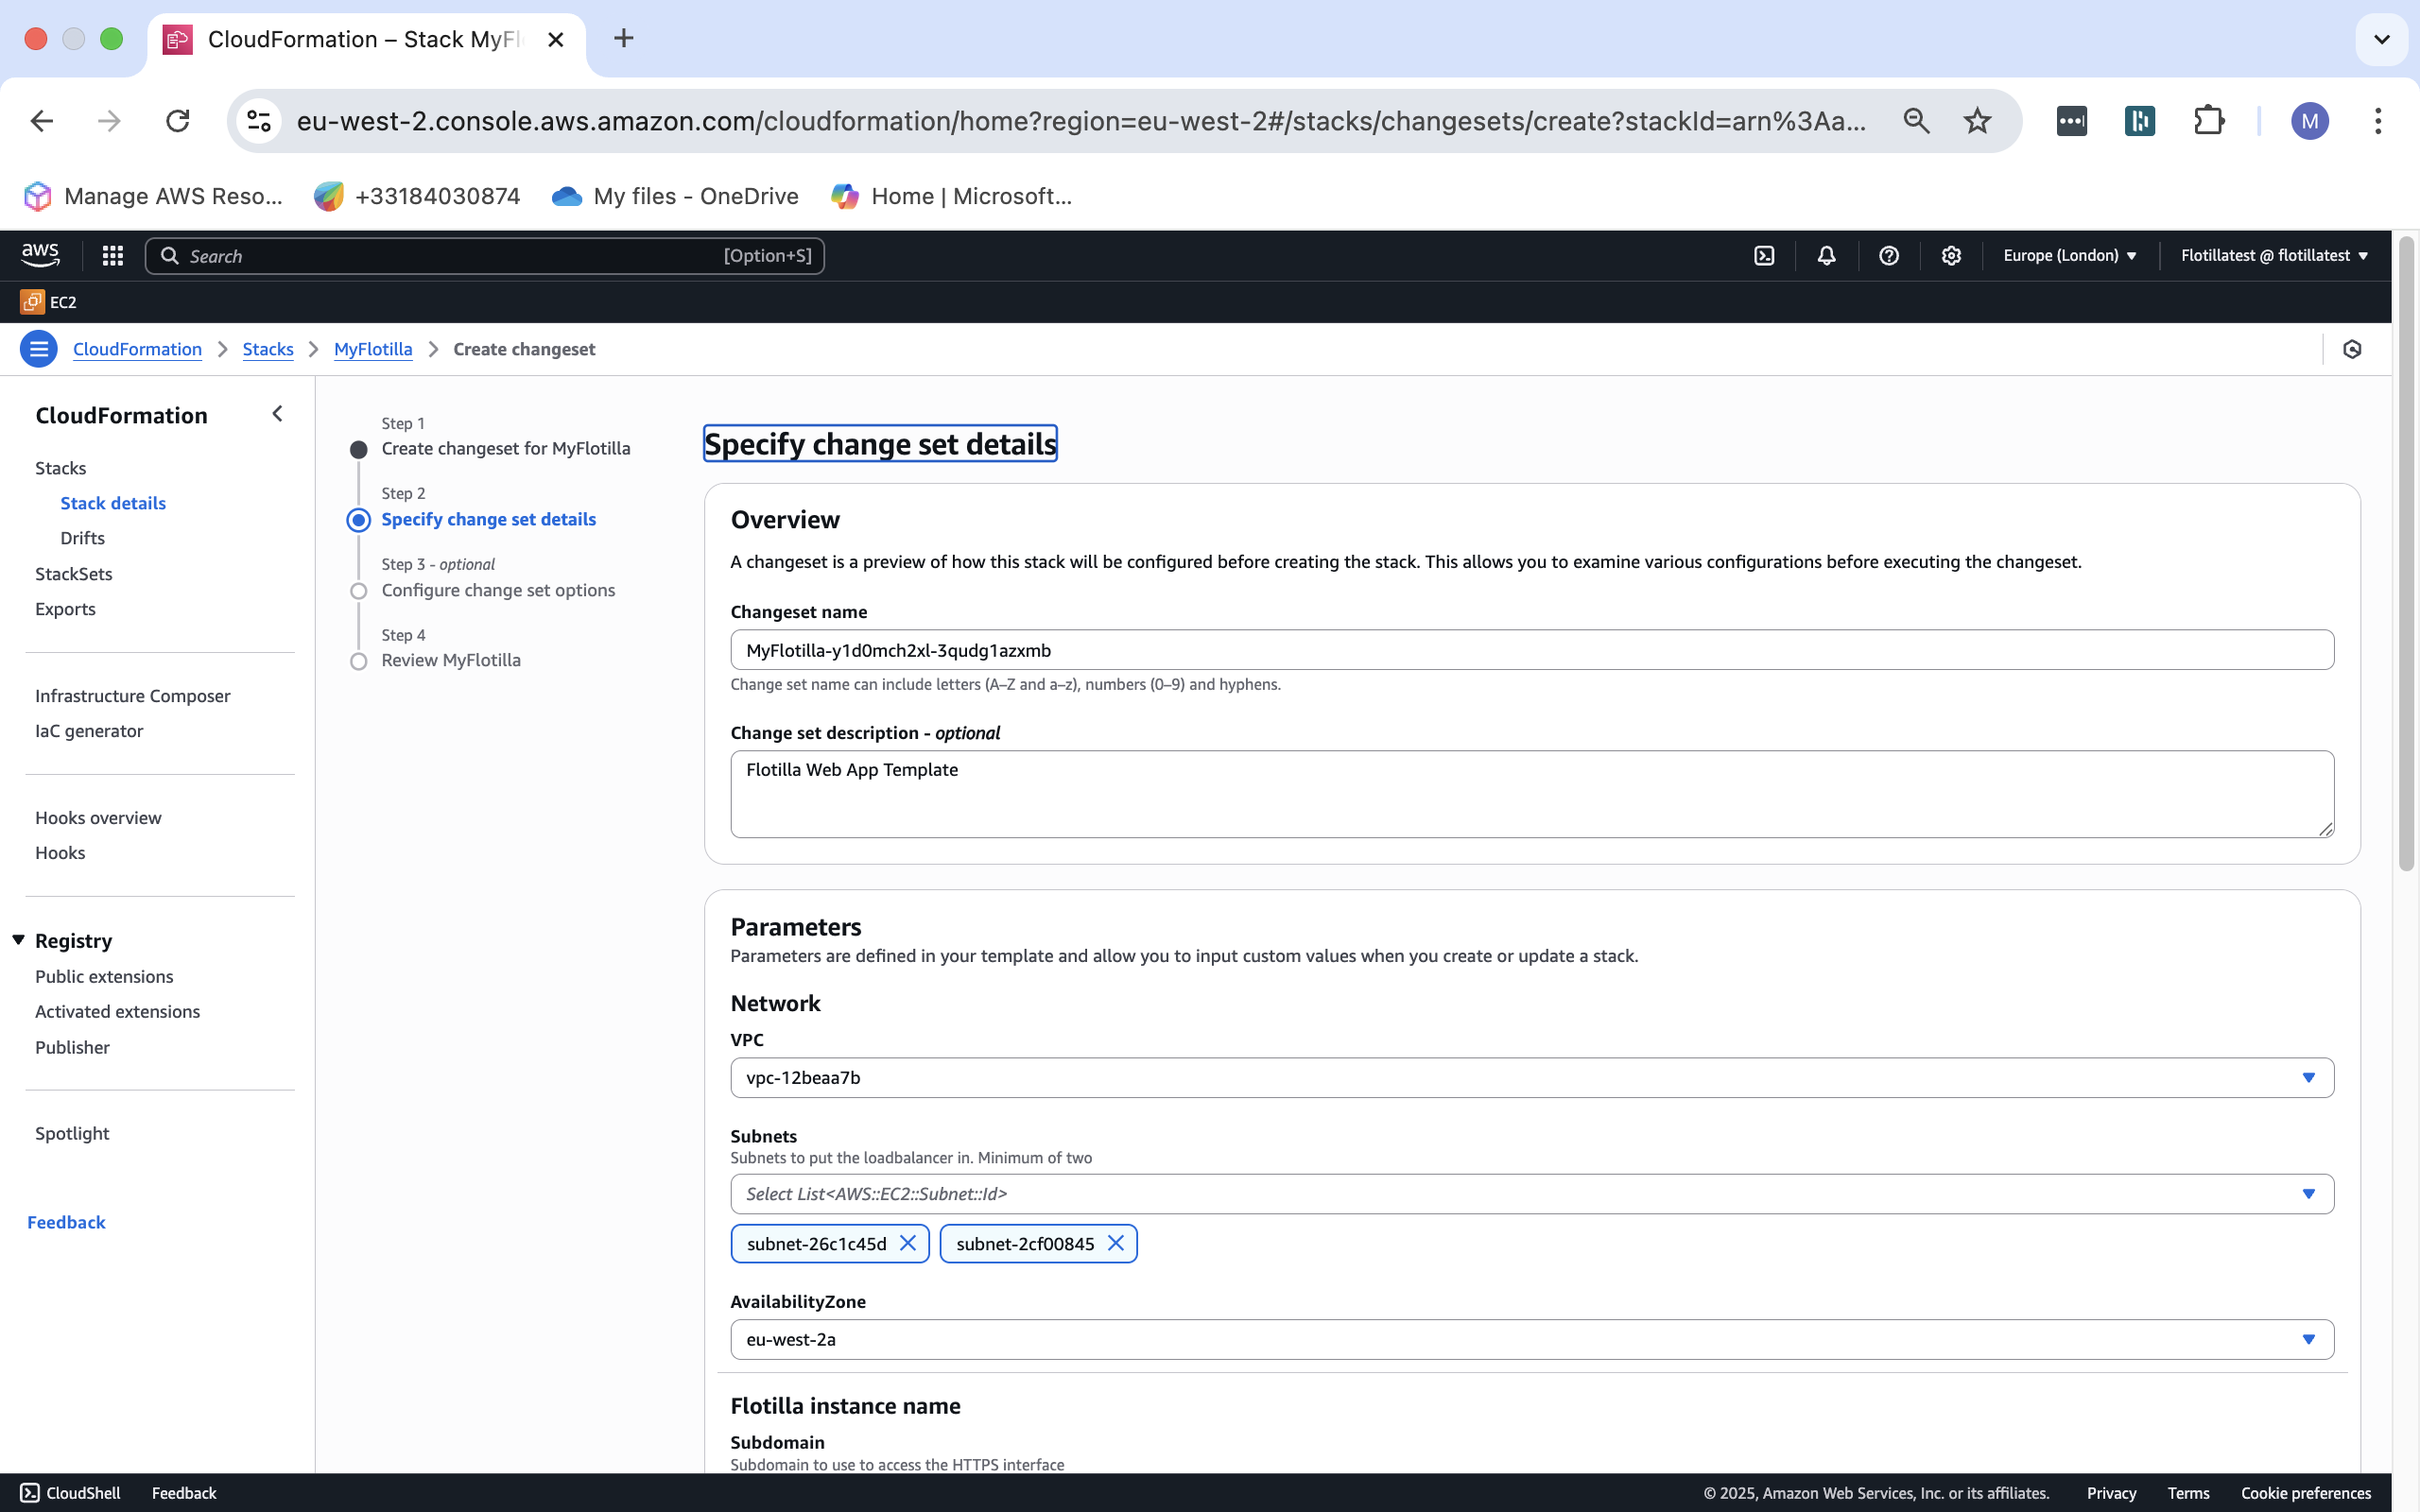
5.Click on next to proceed.
6.Tick the check box and next to proceed.
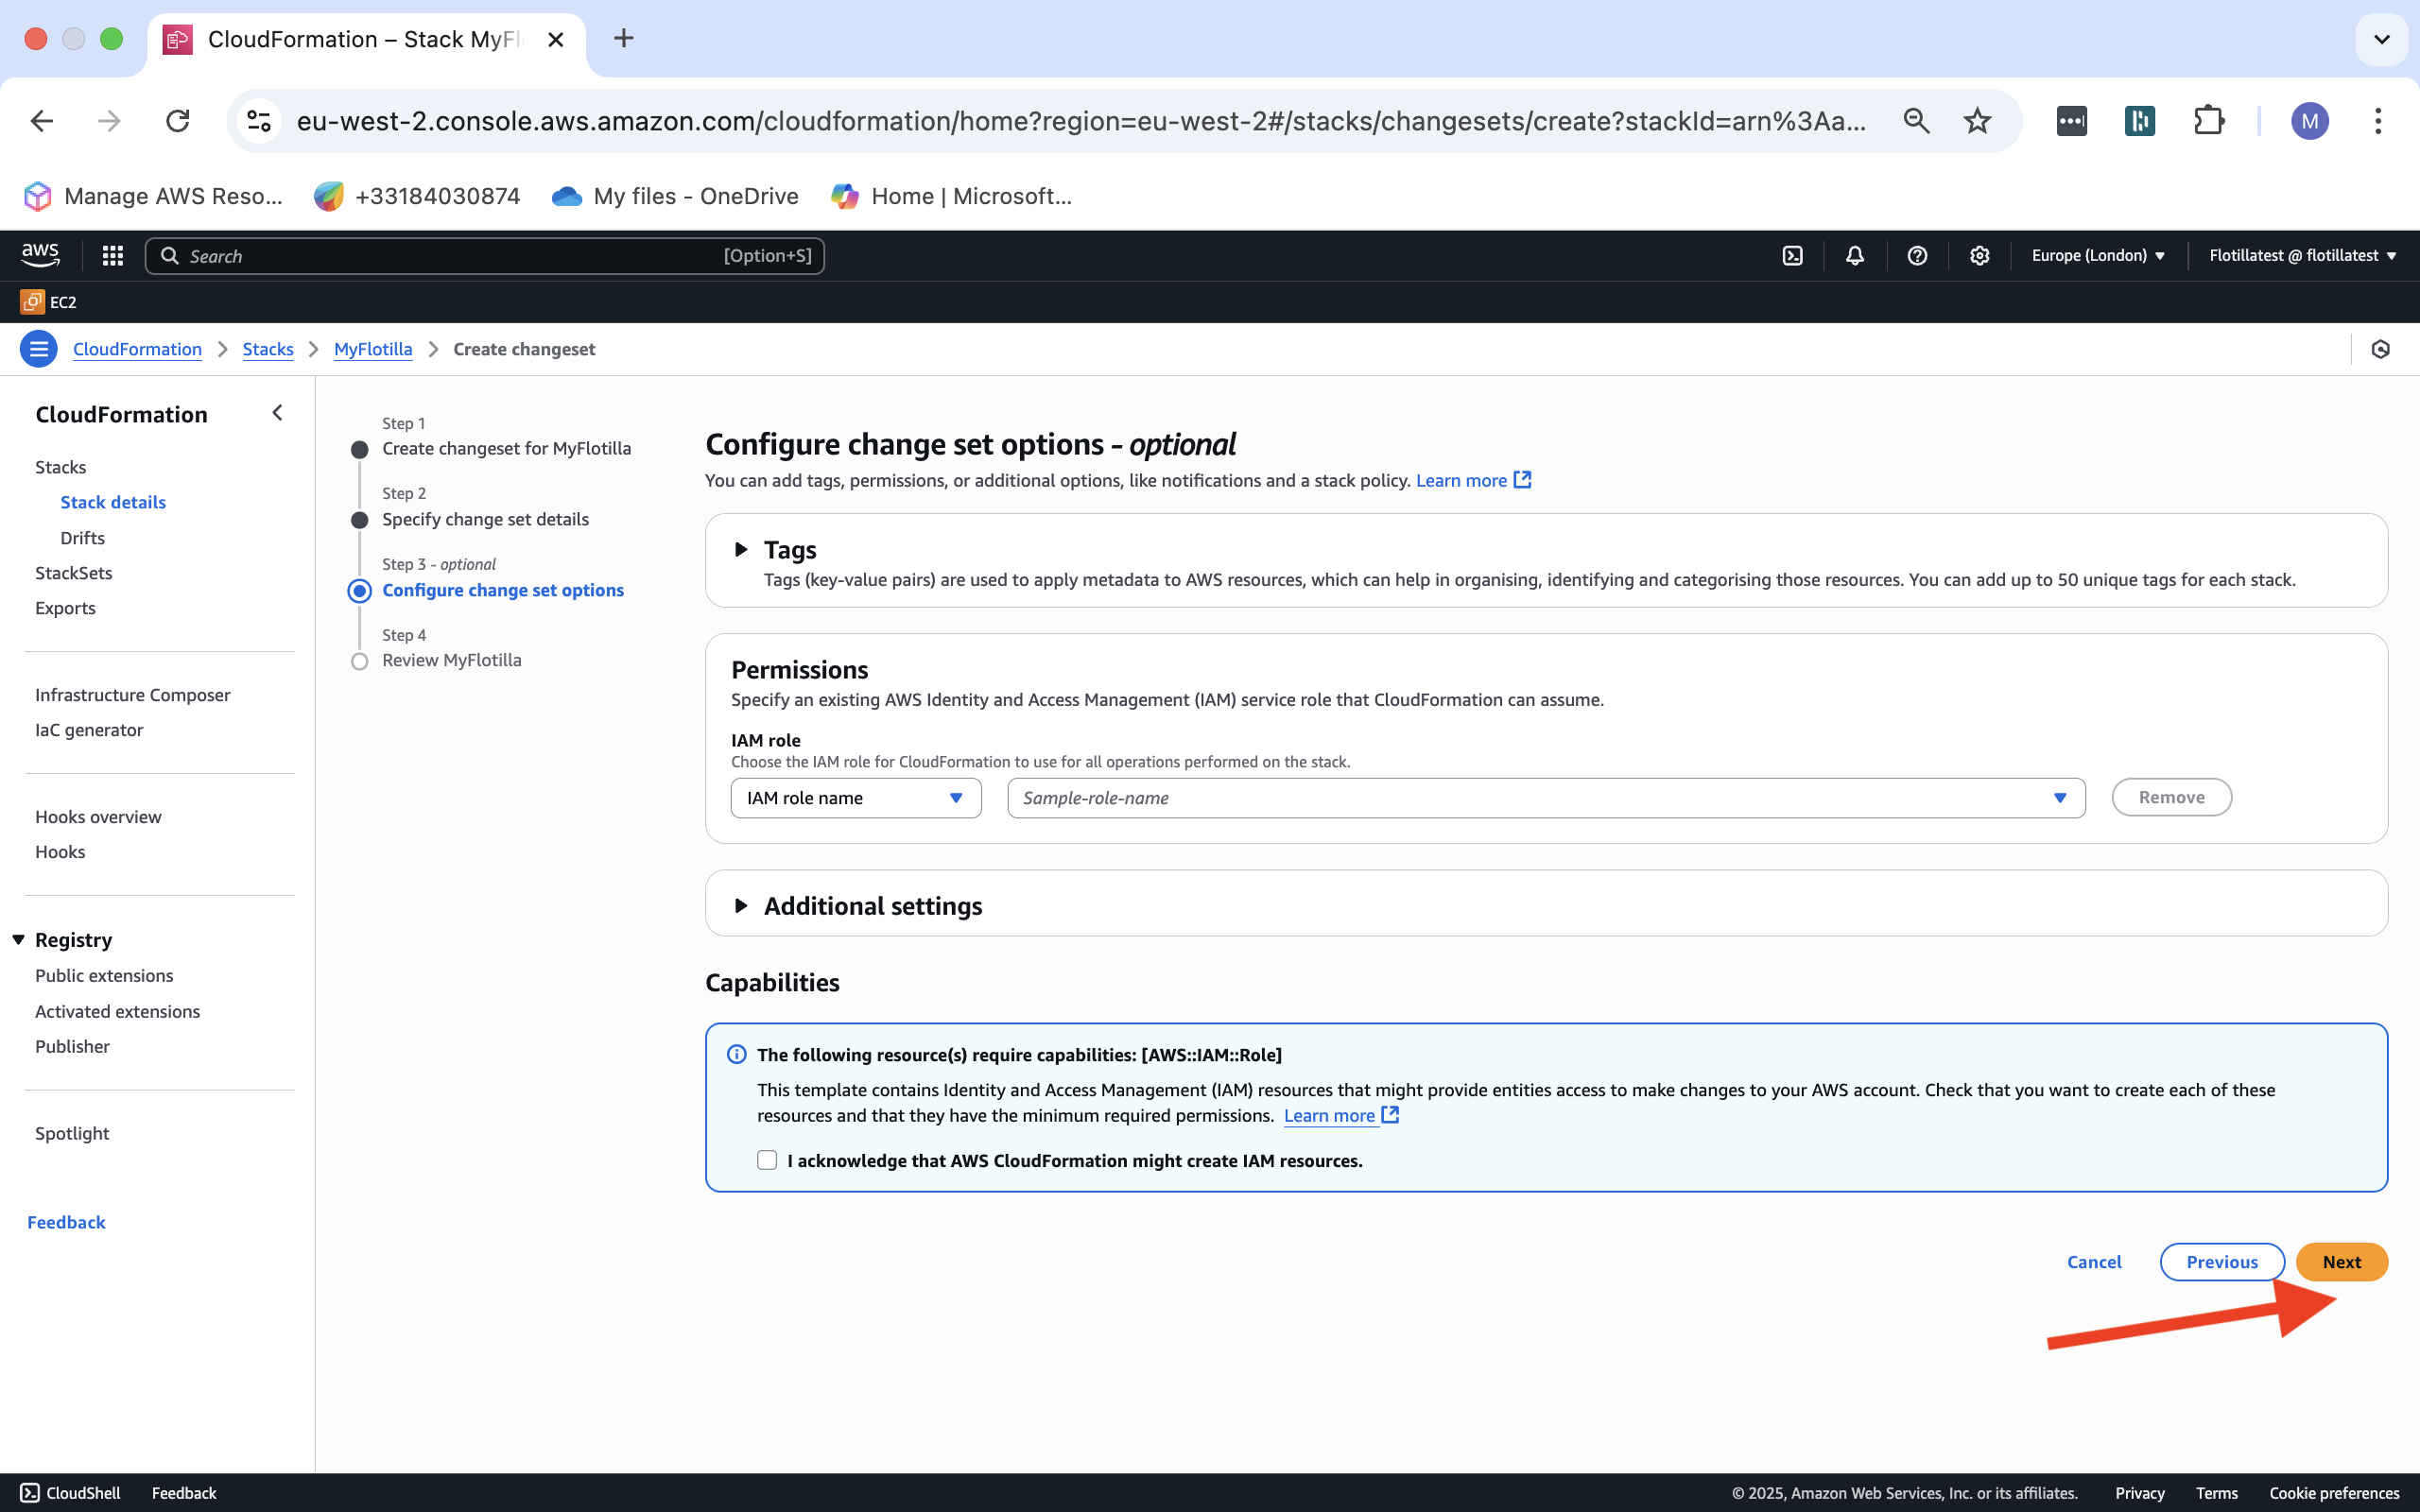
7.Review your details and click on submit.

14.Miscellaneous
The Home Tab
This displays at a glance the status of all your machines in the form of a pie chart giving you the ability to decide if there are any machines that need urgent updates.
Changing the background
Click on the hamburger icon on the far right and then switch to dark mode.
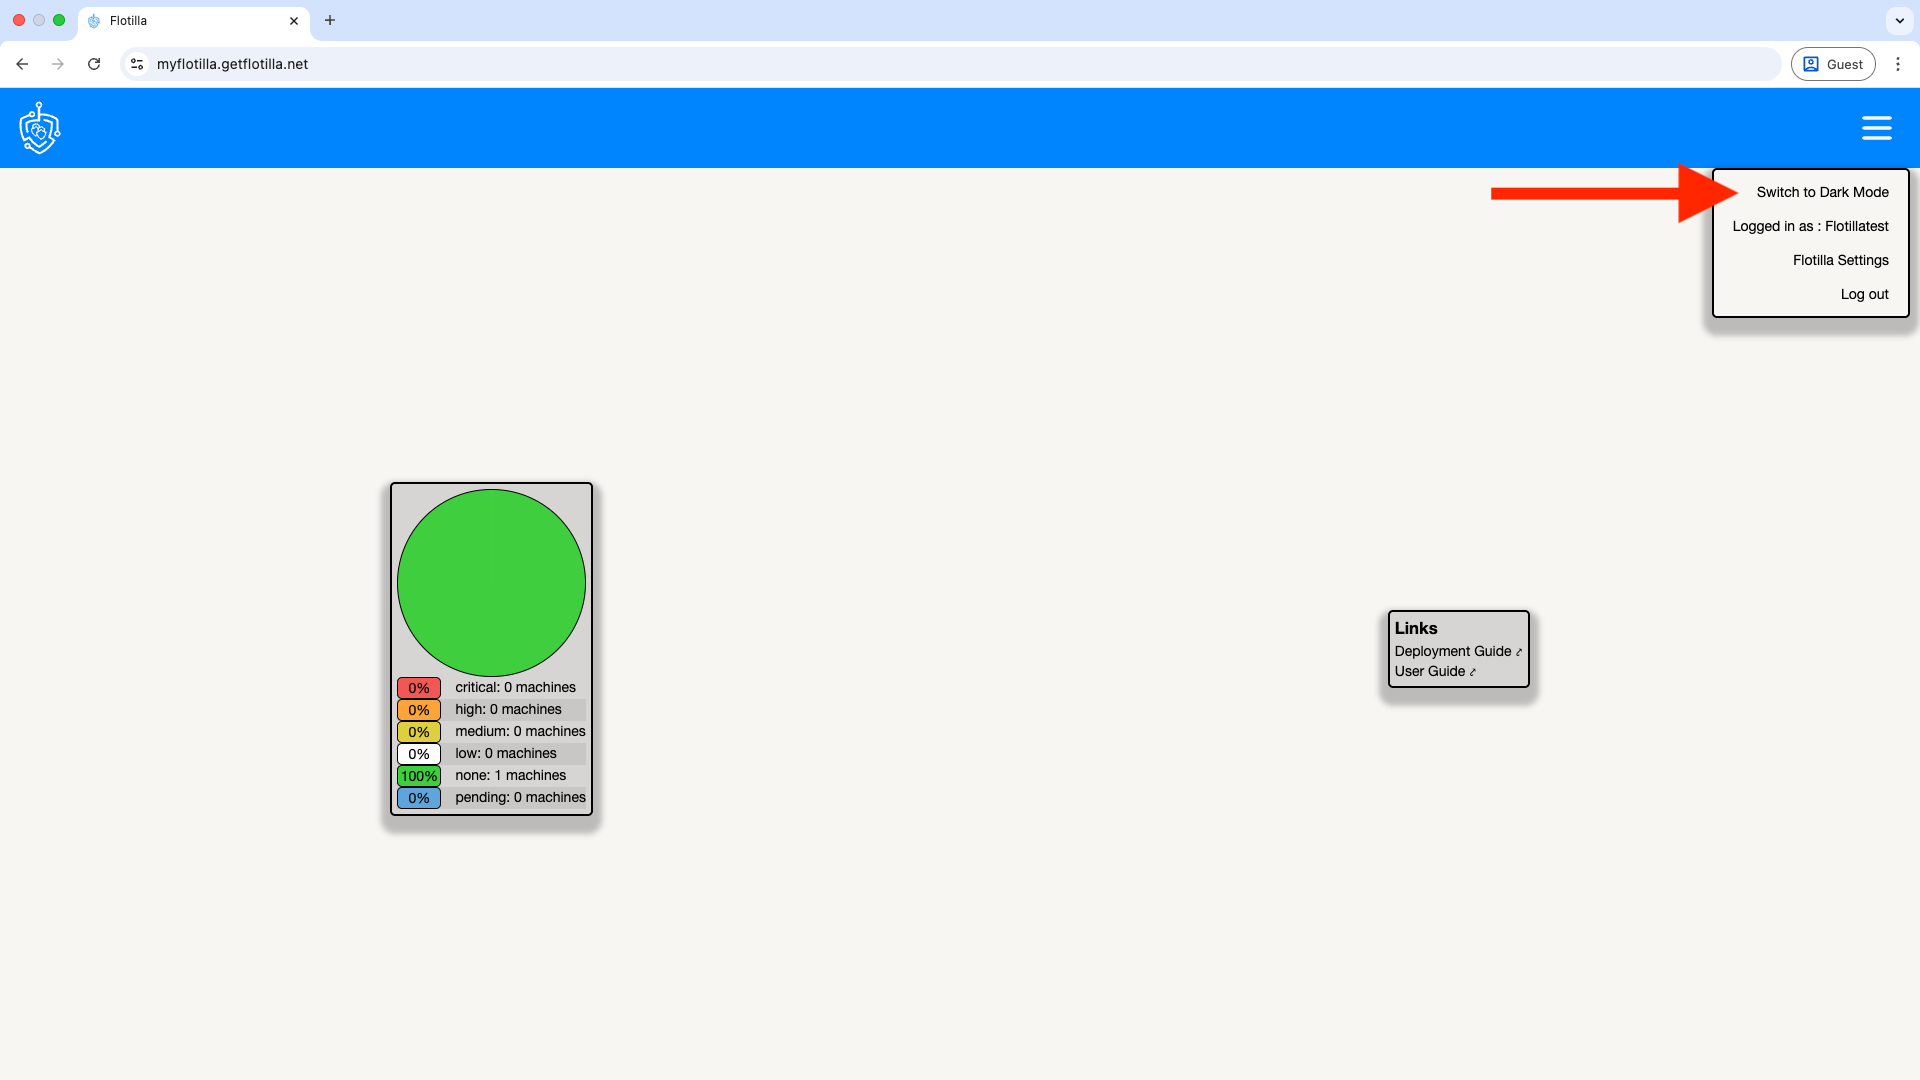
To change back simply click on switch to light mode.
