
Introduction: What Flotilla can do for you
Flotilla is a service that helps IT managers maintain and report on the patch levels of fleets of Linux computers. Everyone knows they need to install their patches, but we all know that patching is time consuming and disruptive. Our service helps you install what you need, when you need it, and with minimal risk.
Using an agent installed on each managed instance, we collect the existing installed applications and versions and match them against our huge custom database of updates and their CVE priorities. You set your patch schedules and we help to keep everything up-to-date with them.
We've tried to understand all the different ways you need the service, so while we're launching with a system limited to Ubuntu Linux and self-hosted, we're looking to expand our supported operating systems and hosting models, including SaaS, in the future.
Our self-hosted AWS native solution uses CloudFormation to make it really easy to self-host in your own AWS tenancy - we do most of the setup work for you - but you keep all the information about your machines so there's no privacy concern about sharing it with us.
AWS Marketplace
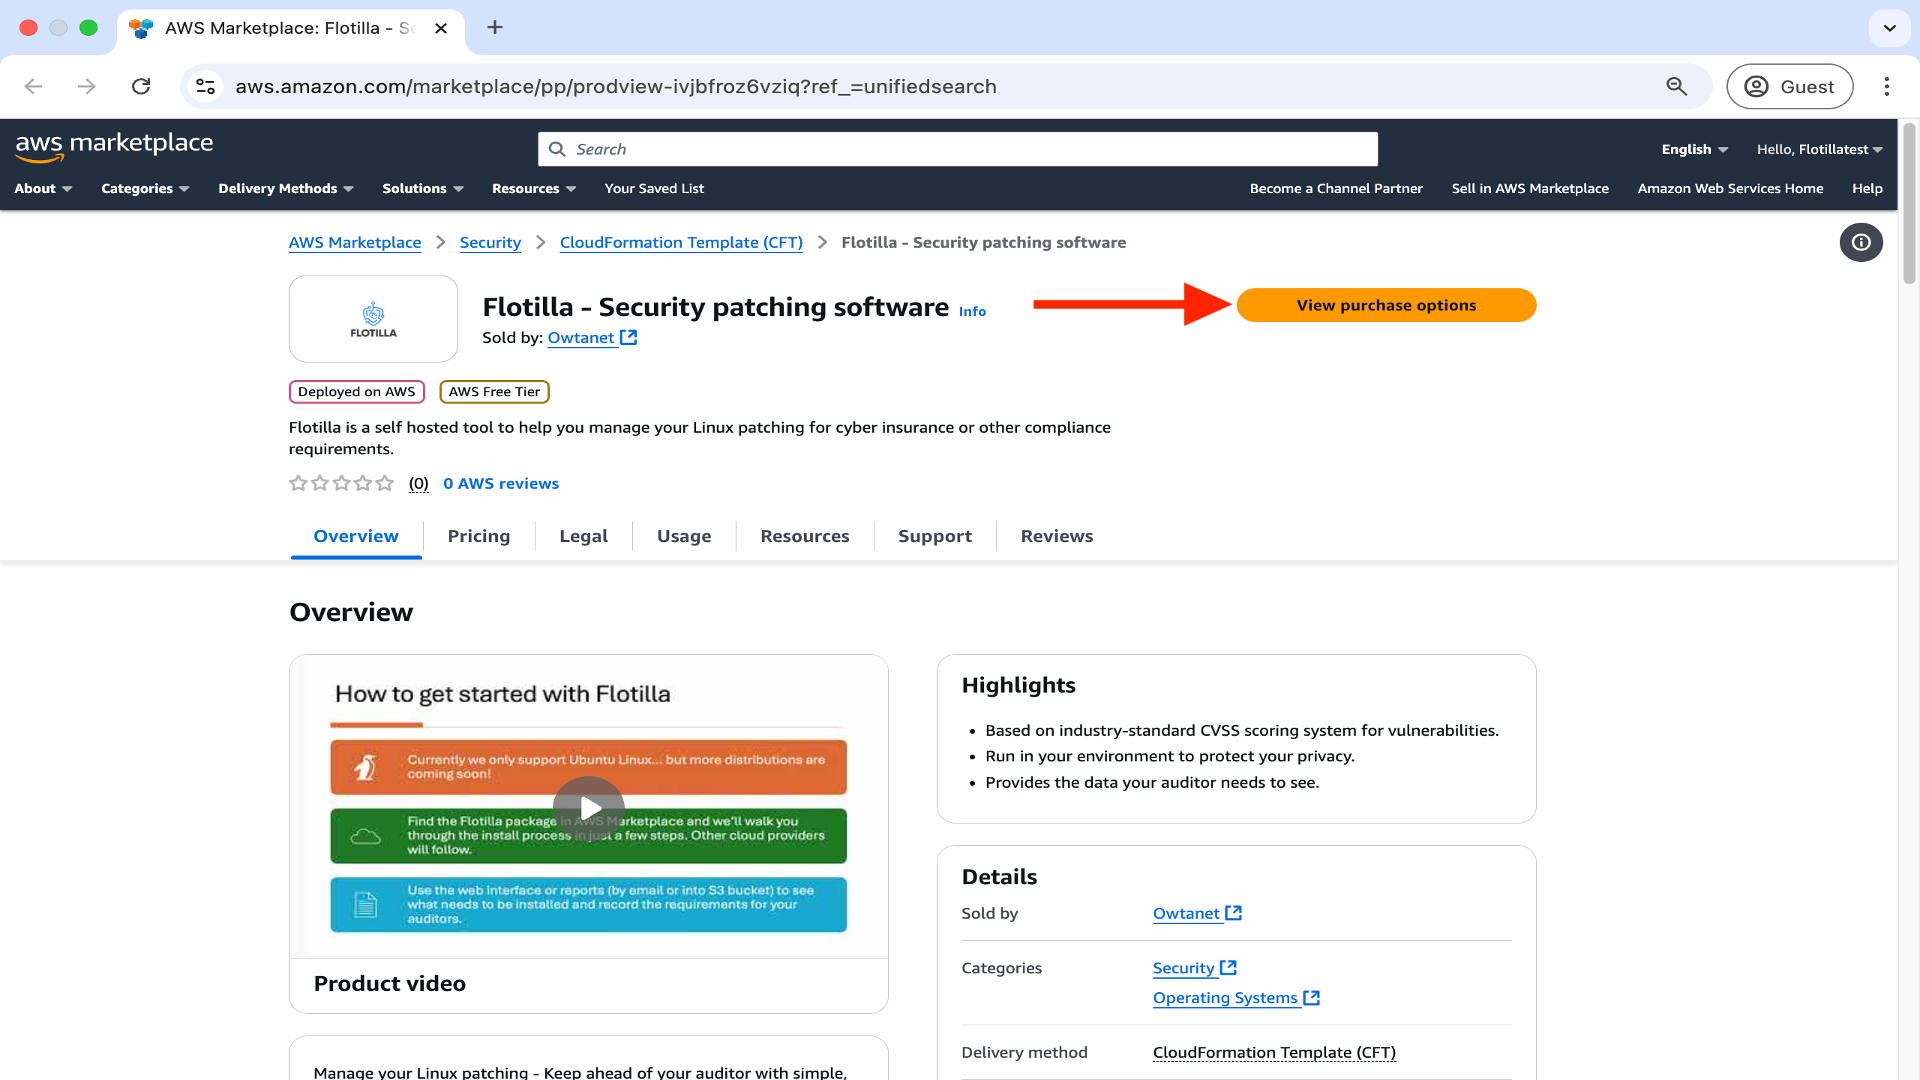
In AWS Marketplace click on ‘View purchase options’ below.
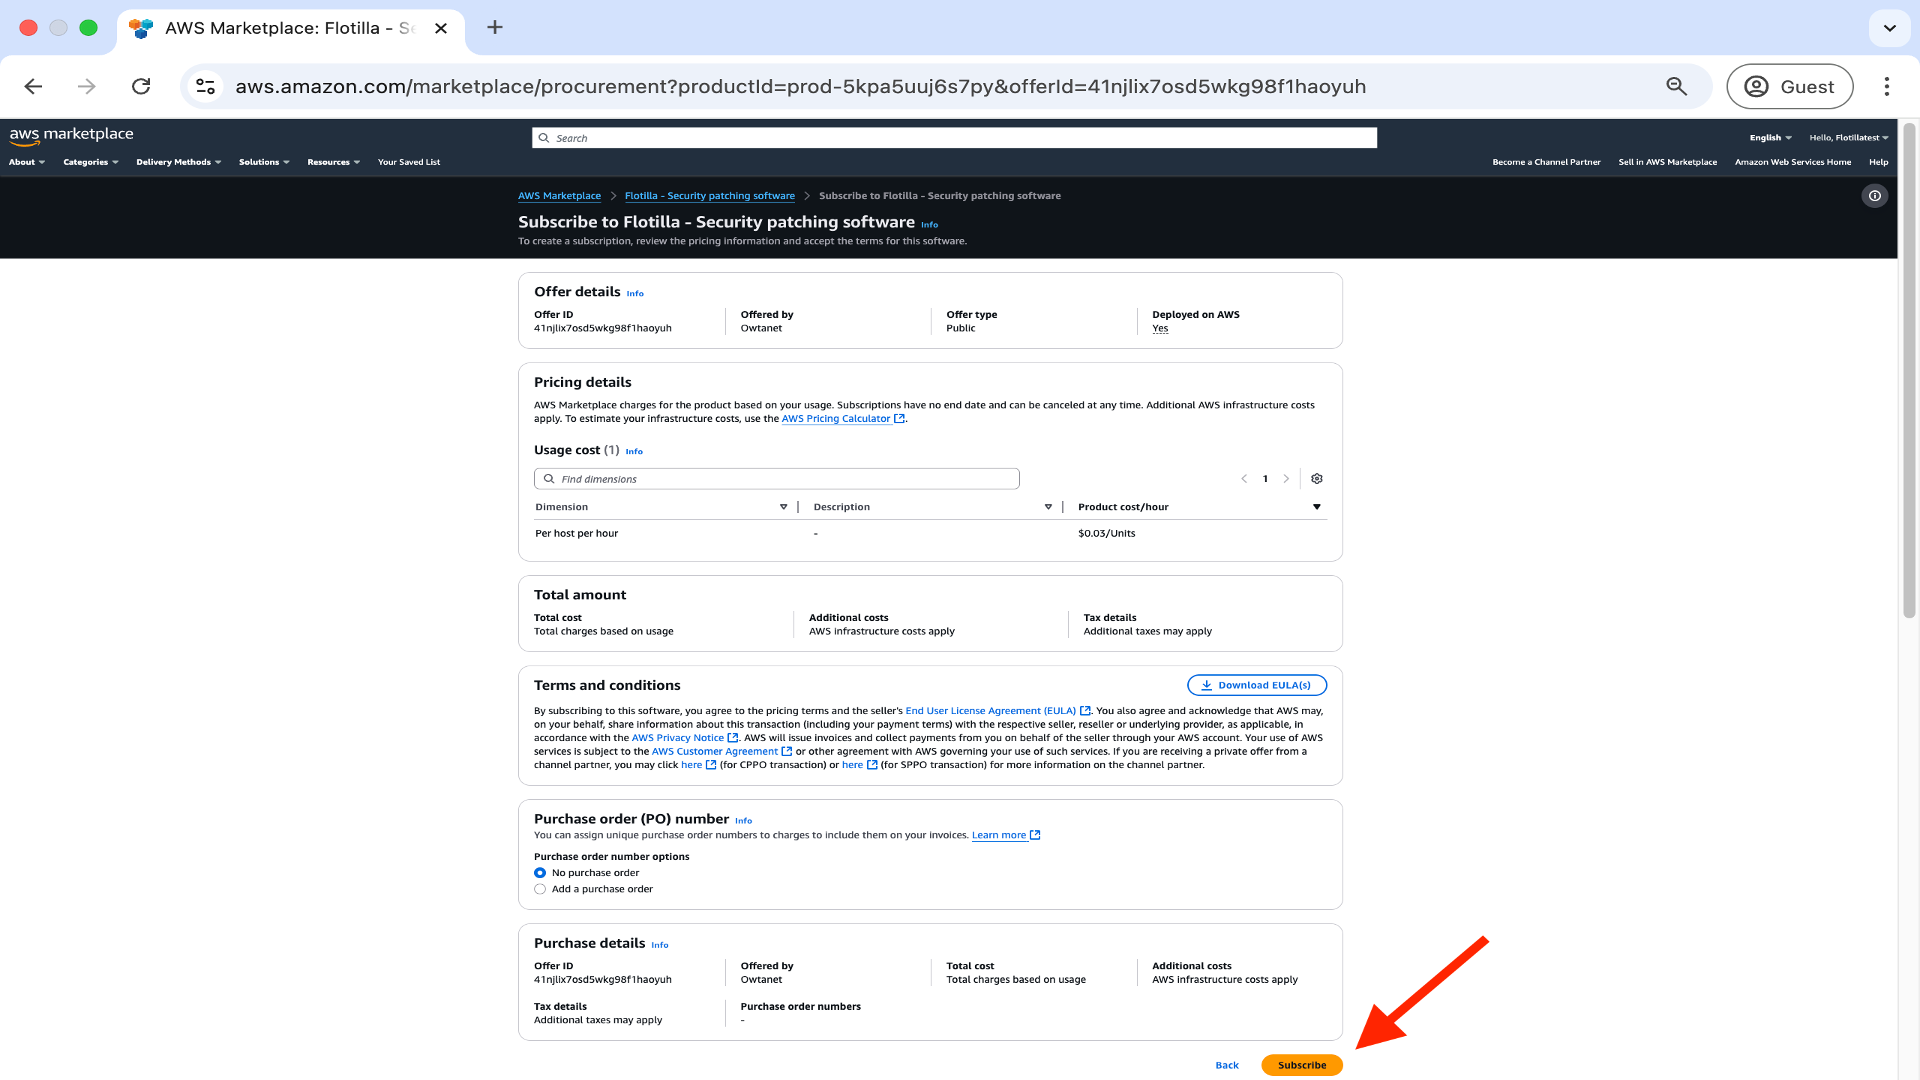
Accept the terms and conditions by clicking Subscribe below.
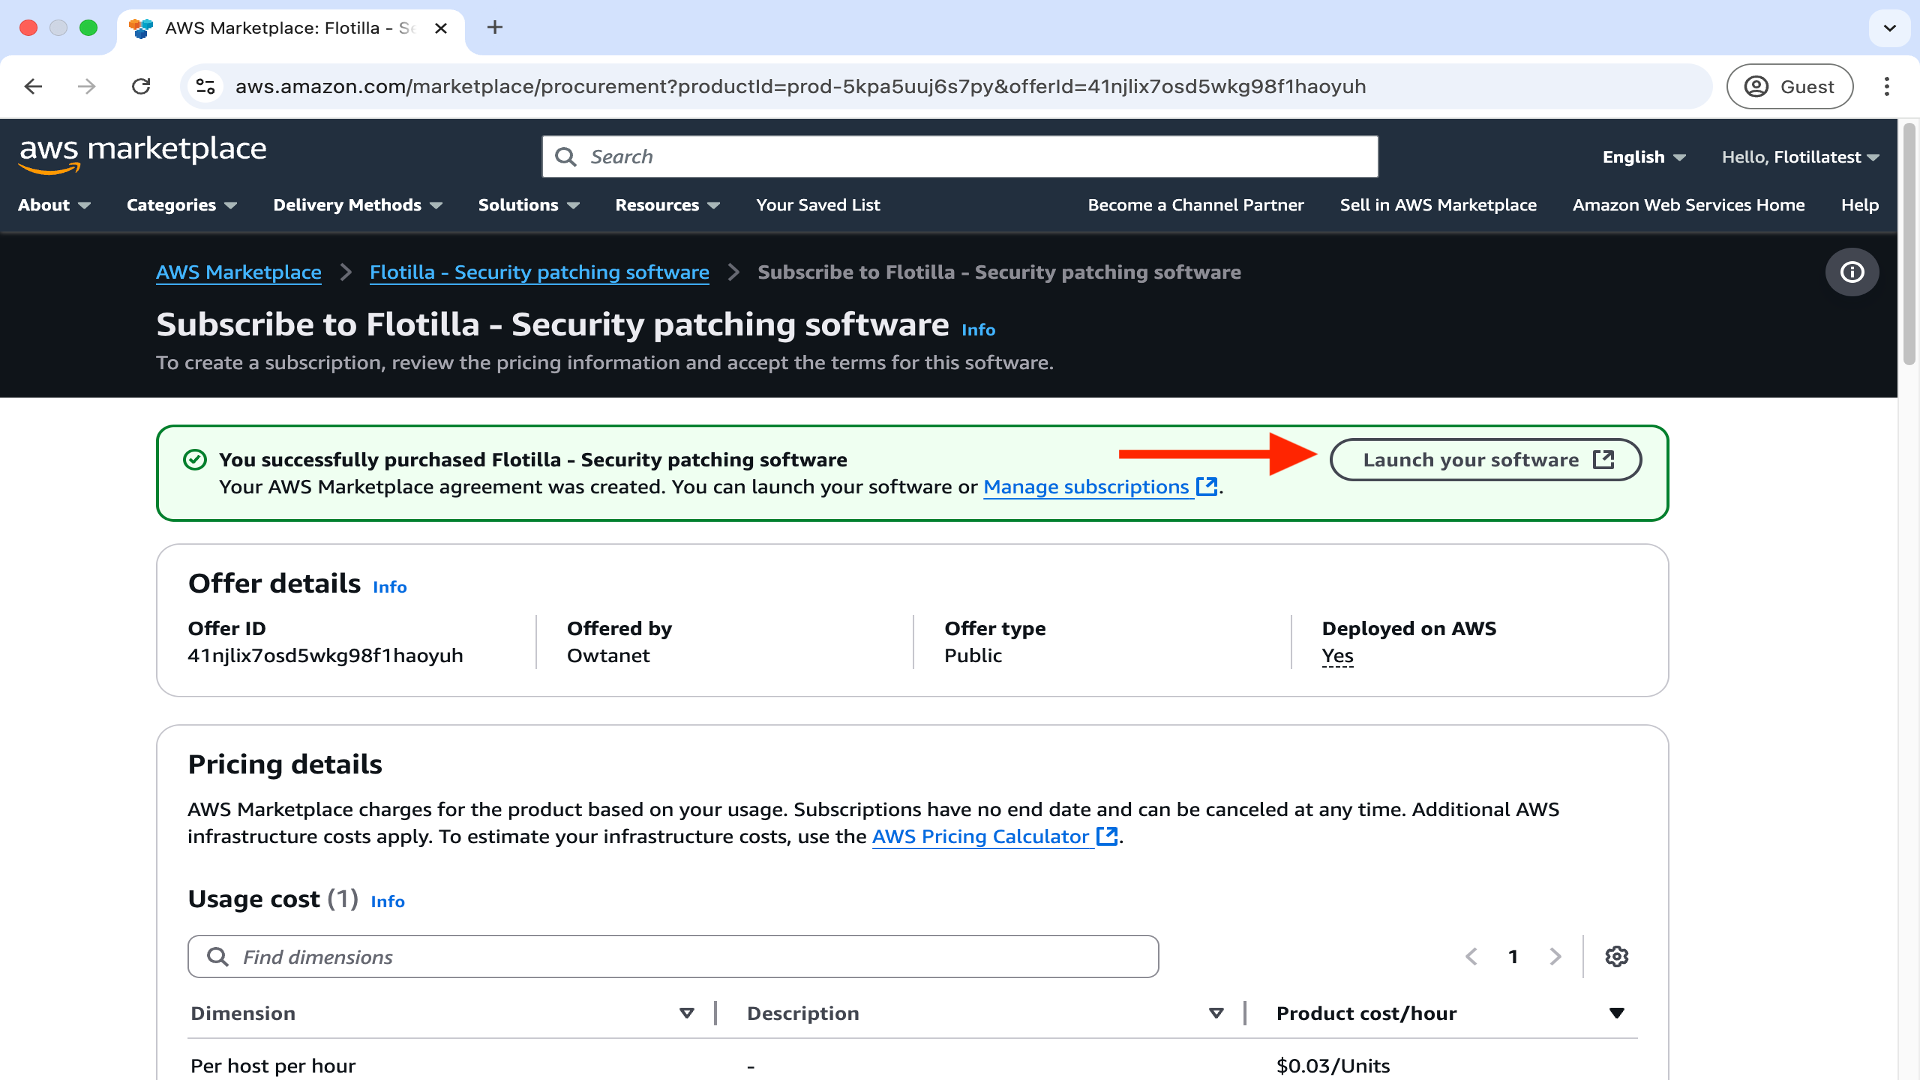
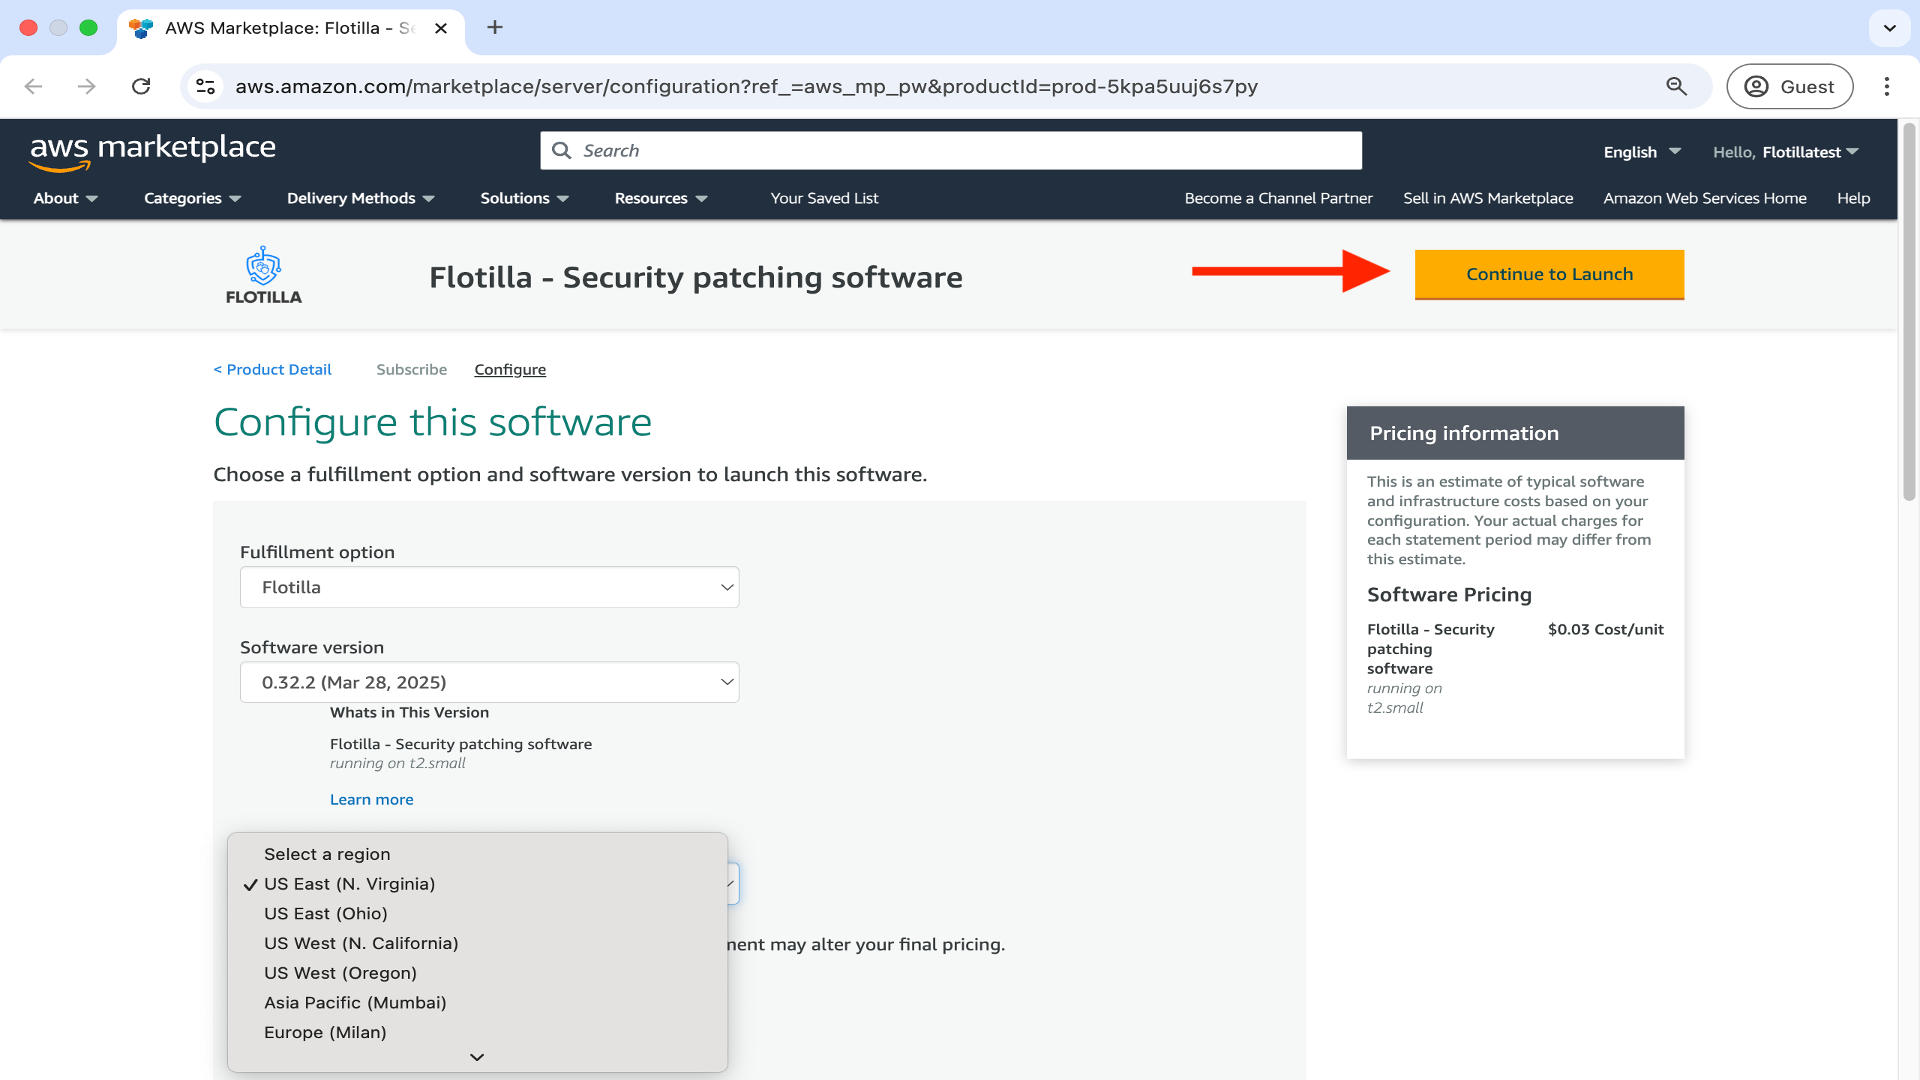
Now proceed to click on Launch your software.
Select your region and then proceed to click on Continue to launch.
Now click on Launch.
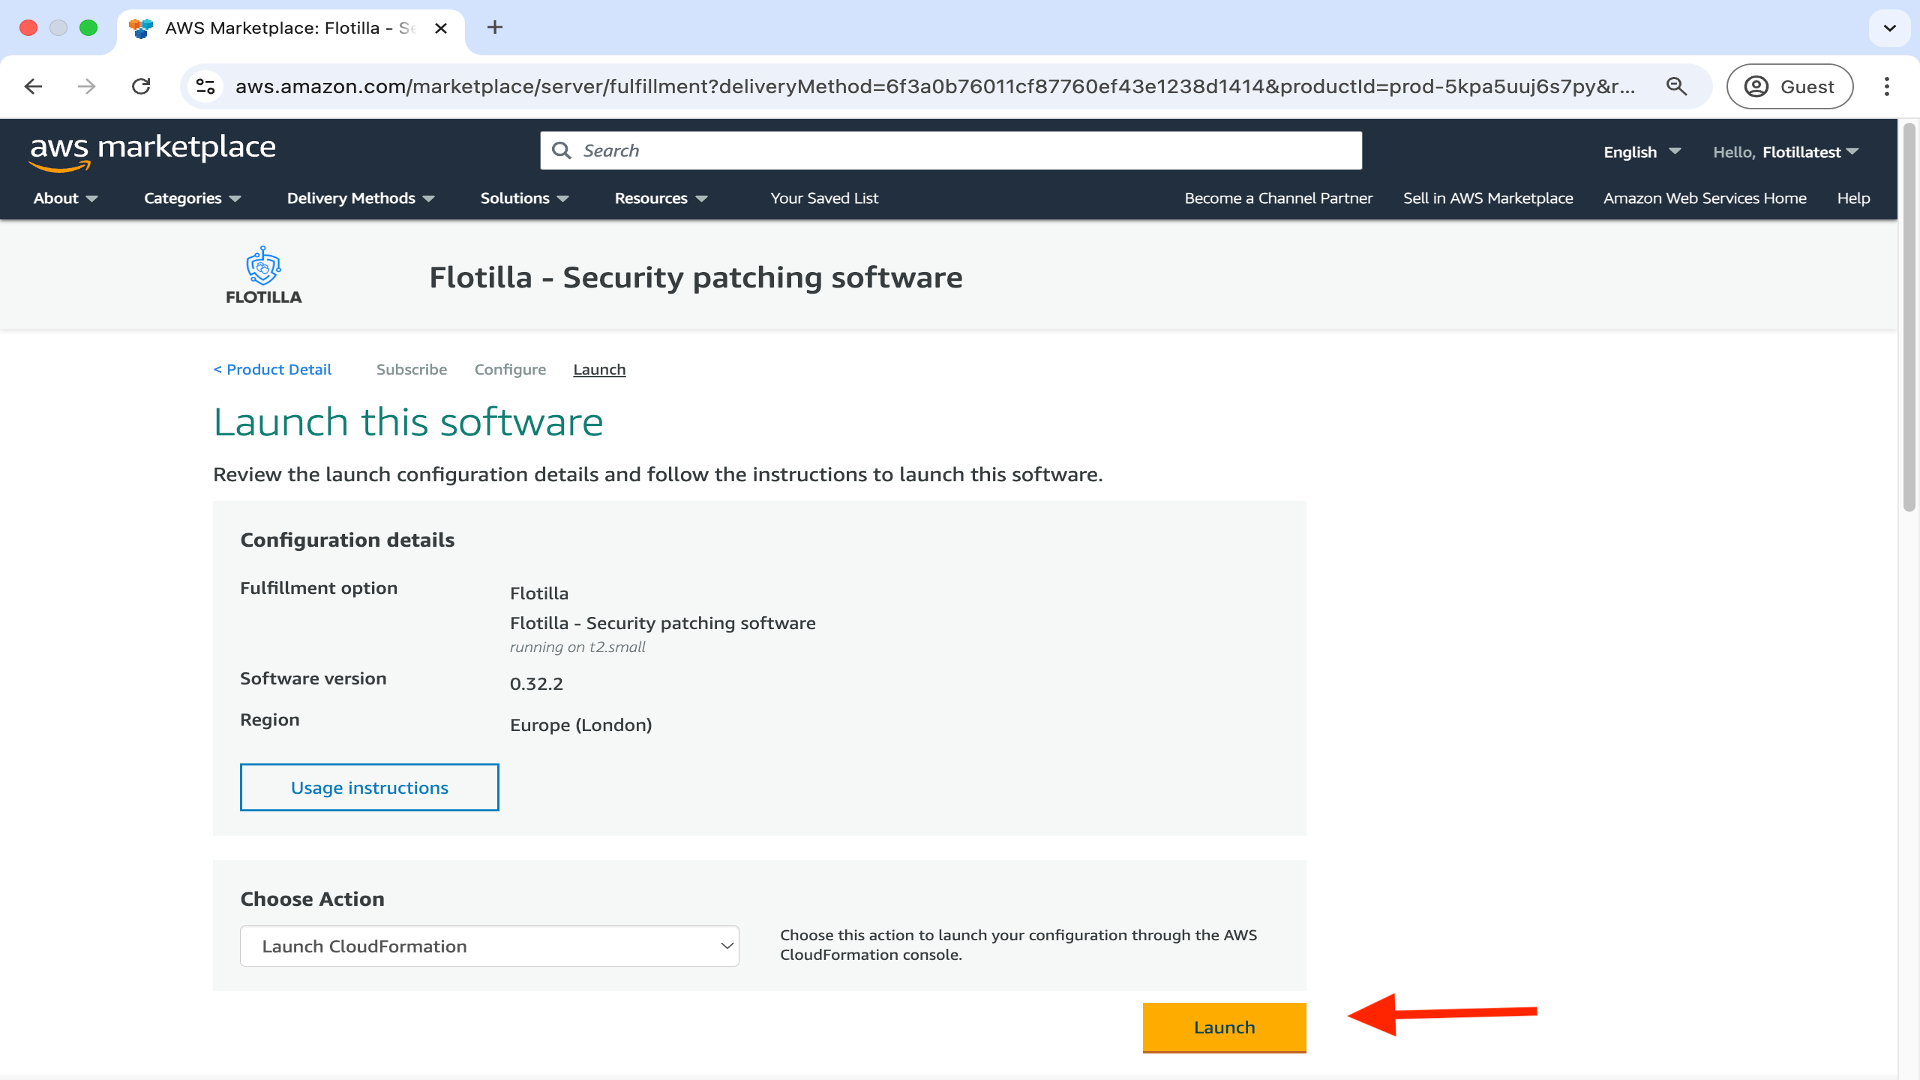
This will now take you to Creating a stack below.
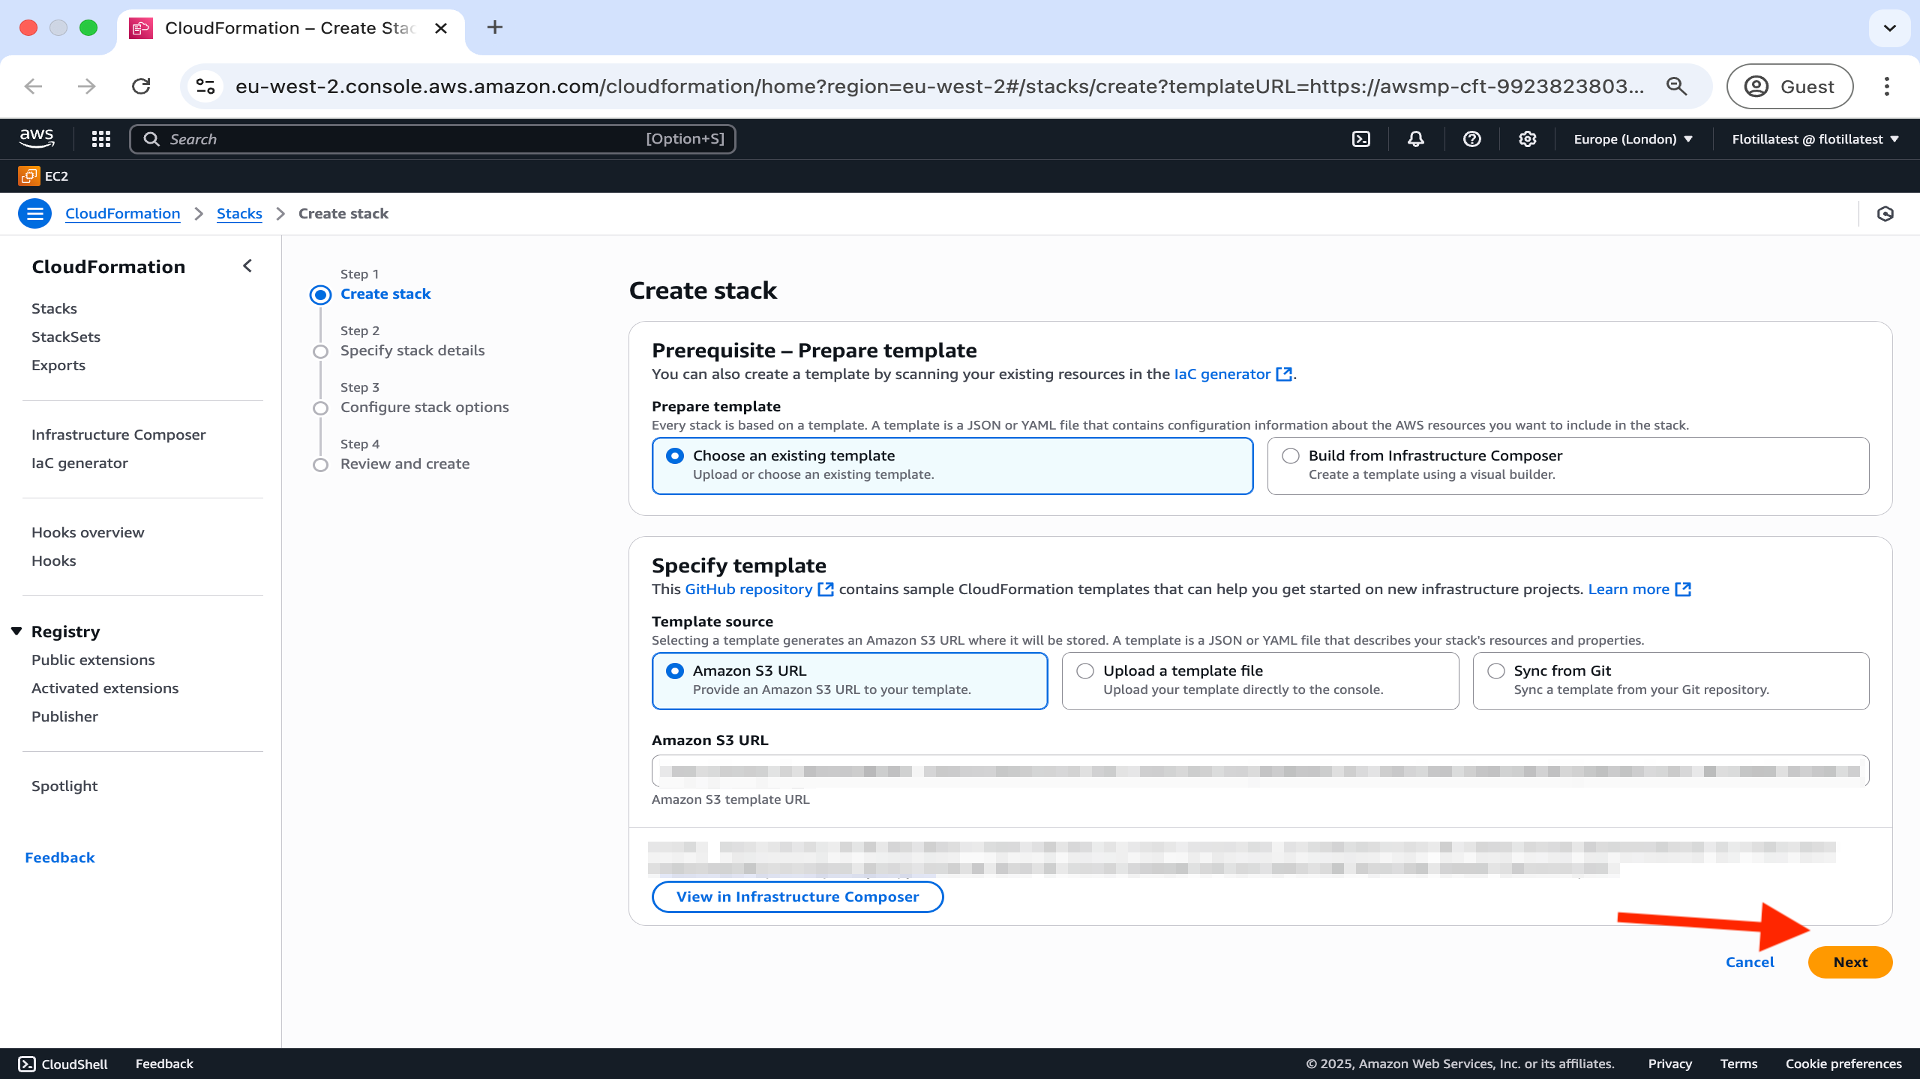
If you do not already have the required AWS infrastructure, complete the Getting started pre-launch tasks below, otherwise click on ‘Next’ and proceed to Launching Flotilla Step 1 here
Getting started (pre-launch tasks)
This Deployment Guide has as its aim to provide an easy to follow step-by-step description of how to set up the Flotilla Management Portal.
Flotilla requires a basic understanding of the AWS Management Console, specifically the ability to start a Cloudformation deployment and to copy/paste bash commands for the purposes of troubleshooting.
Step 1: Permission prerequisites
Flotilla follows the principle of least privilege:
All users should log on with a user account that has the absolute minimum permissions necessary to complete the current task and nothing more. Doing so provides protection against malicious code, among other attacks.
Therefore prior to launching Flotilla in AWS an IAM Policy needs to be created which includes the permissions in the json file below. The policy is then applied to the group in which you have nested your user. (Detailed steps of how to create an IAM policy are in Appendix 2 here. These permissions are essential to create the infrastructure in Step 2 below and to launch Flotilla.
(We do not recommended to use your root account to perform any of these actions).
The json file which encompasses all the required AWS permissions is as follows:
{
	"Version": "2012-10-17",
	"Statement": [
		{
			"Sid": "VisualEditor0",
			"Effect": "Allow",
			"Action": [
				"ec2:AuthorizeSecurityGroupIngress",
				"ec2:DescribeInstances",
				"ssmmessages:*",
				"iam:PutRolePolicy",
				"route53:ListHostedZonesByName",
				"iam:AddRoleToInstanceProfile",
				"ses:GetEmailIdentity",
				"cloudformation:DescribeStackEvents",
				"ses:TagResource",
				"route53:GetHostedZoneCount",
				"ec2:DescribeKeyPairs",
				"elasticache:CreateCacheCluster",
				"rds:DeleteDBInstance",
				"ses:CreateConfigurationSet",
				"ec2:CreateTags",
				"elasticloadbalancing:CreateTargetGroup",
				"ec2:RunInstances",
				"iam:DeleteRole",
				"elasticache:DeleteCacheCluster",
				"elasticache:AddTagsToResource",
				"ses:PutEmailIdentityDkimAttributes",
				"ec2:CreateNetworkInterface",
				"cloudformation:DeleteStack",
				"elasticloadbalancing:AddTags",
				"ses:ListVerifiedEmailAddresses",
				"ec2:DescribeSubnets",
				"iam:GetRolePolicy",
				"secretsmanager:TagResource",
				"ec2:DisassociateAddress",
				"iam:CreateInstanceProfile",
				"ses:UpdateEmailIdentityPolicy",
				"ses:VerifyDomainIdentity",
				"ses:DeleteEmailIdentityPolicy",
				"ses:ListEmailIdentities",
				"iam:PassRole",
				"route53:ListHostedZonesByVPC",
				"ec2:DescribeAvailabilityZones",
				"elasticache:DescribeCacheSubnetGroups",
				"rds:CreateDBInstance",
				"iam:DeleteRolePolicy",
				"rds:DescribeDBInstances",
				"route53:DeleteHostedZone",
				"elasticache:CreateCacheParameterGroup",
				"kms:CreateGrant",
				"ses:ListIdentities",
				"ses:VerifyEmailAddress",
				"rds:AddTagsToResource",
				"ec2:ReleaseAddress",
				"iam:DeleteInstanceProfile",
				"ec2:DeleteLaunchTemplate",
				"elasticloadbalancing:CreateLoadBalancer",
				"elasticache:CreateCacheSecurityGroup",
				"route53:ListHostedZones",
				"elasticloadbalancing:DeleteTargetGroup",
				"ec2:DescribeSecurityGroups",
				"ec2:CreateLaunchTemplate",
				"ec2:DescribeVpcs",
				"elasticloadbalancing:DescribeTargetGroups",
				"acm:DeleteCertificate",
				"kms:Decrypt",
				"ses:ListRecommendations",
				"ses:VerifyEmailIdentity",
				"elasticloadbalancing:RegisterTargets",
				"route53:GetHostedZone",
				"iam:RemoveRoleFromInstanceProfile",
				"iam:CreateRole",
				"rds:DeleteTenantDatabase",
				"elasticloadbalancing:DeleteLoadBalancer",
				"elasticloadbalancing:DescribeLoadBalancers",
				"acm:RequestCertificate",
				"route53:ListResourceRecordSets",
				"ec2:DescribeAccountAttributes",
				"elasticache:DescribeCacheParameterGroups",
				"elasticache:DeleteCacheSubnetGroup",
				"route53:CreateHostedZone",
				"ec2:DescribeLaunchTemplates",
				"ec2:DeleteNetworkInterface",
				"route53:ChangeResourceRecordSets",
				"ses:CreateEmailIdentity",
				"cloudformation:DescribeStacks",
				"ses:PutEmailIdentityMailFromAttributes",
				"s3:GetObject",
				"ses:GetAccount",
				"acm:DescribeCertificate",
				"elasticache:DescribeCacheClusters",
				"ec2:AssociateAddress",
				"elasticache:ListTagsForResource",
				"ec2:DescribeAddresses",
				"route53:GetChange",
				"secretsmanager:CreateSecret",
				"ses:VerifyDomainDkim",
				"elasticache:DeleteCacheSecurityGroup",
				"ses:ListConfigurationSets",
				"elasticloadbalancing:CreateListener",
				"elasticloadbalancing:DescribeListeners",
				"ec2:DescribeNetworkInterfaces",
				"ec2:CreateSecurityGroup",
				"elasticache:CreateCacheSubnetGroup",
				"kms:DescribeKey",
				"elasticache:DeleteCacheParameterGroup",
				"cloudformation:ListStacks",
				"ec2:TerminateInstances",
				"iam:GetInstanceProfile",
				"cloudformation:GetTemplateSummary",
				"ec2:AllocateAddress",
				"ses:CreateEmailIdentityPolicy",
				"cloudformation:CreateStack",
				"ec2:DeleteSecurityGroup",
				"elasticloadbalancing:DescribeTargetHealth",
				"kms:GenerateDataKey",
				"ses:GetEmailIdentityPolicies",
				"rds:CreateTenantDatabase"
			],
			"Resource": "*"
		}
	]
}
Step 2: Infrastructure prerequisites
The following prerequisities need to exist before proceeding to launch Flotilla and need to be manually created in AWS.
A keypair, created here:

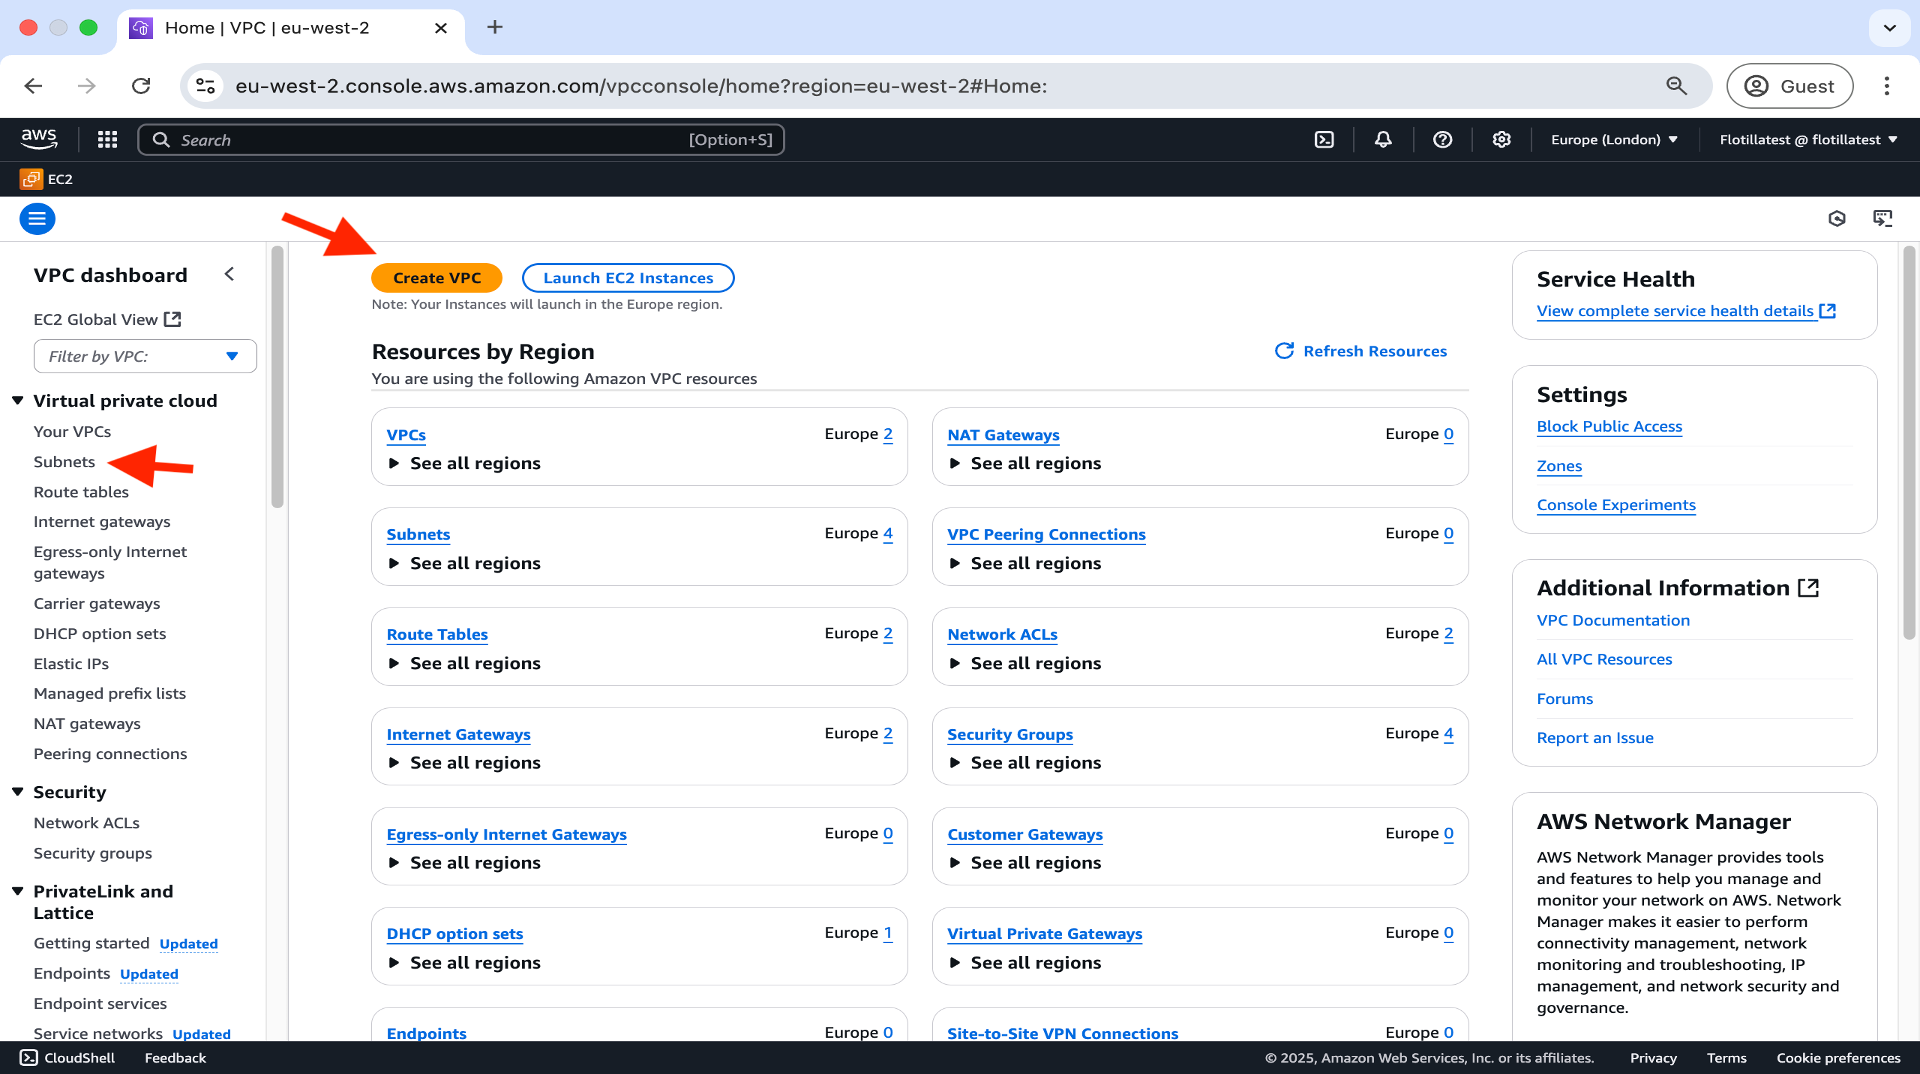
Two subnets and one virtual private cloud (vpn) created here:
(Optional: You may wish to use the default subnets and vpc provided by AWS)
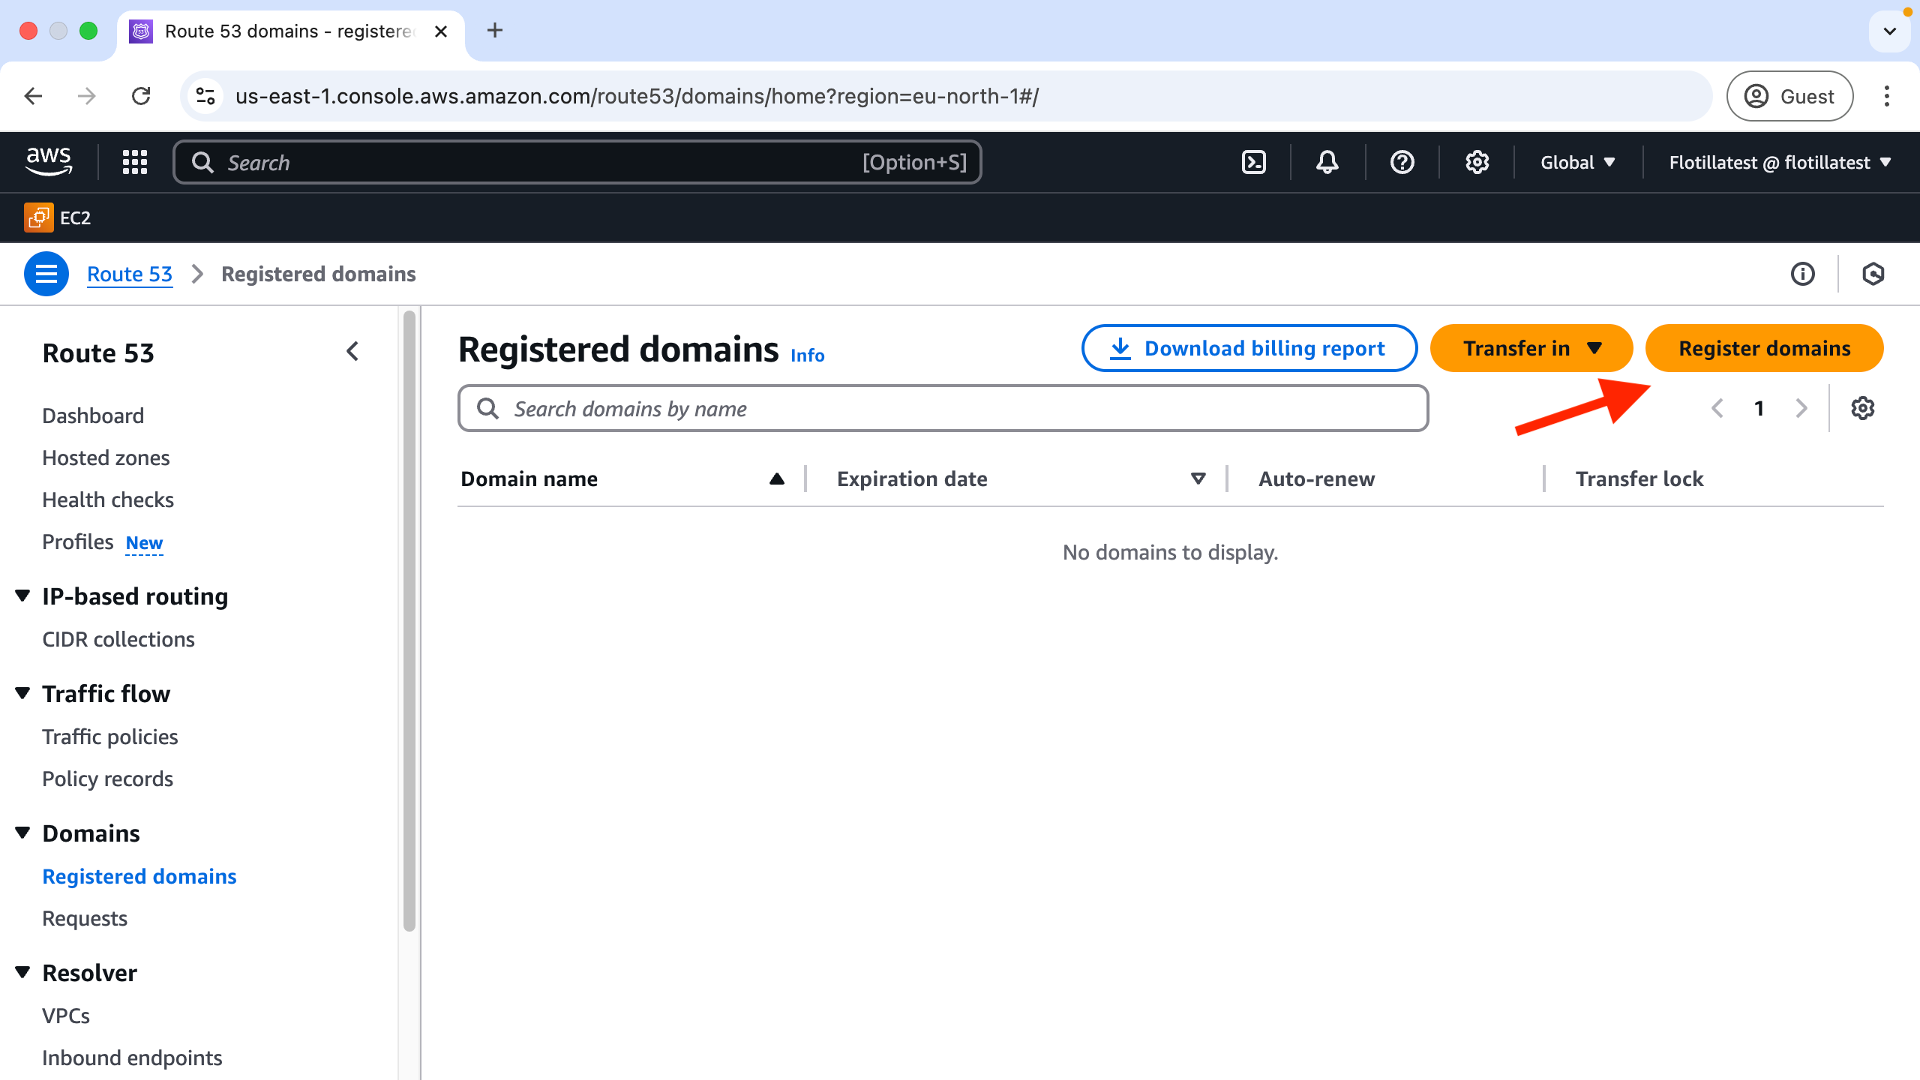
4.A domain registered in AWS.
Step 3: Enabling Emails
Note: An AWS administrator account will be required to enable emails. Other users can enable emails but they will require full SES permissions before completing the steps below. In line with AWS best practice it is recommended to add the user to a group and then apply the policy containing the permissions to the group. Instructions on creating a policy are here
The following core elements of Flotilla require the ability to send emails:
-
account creation
-
account recovery
-
generating reports.
Due to this it is important to ensure you have a working Simple Email Service (SES) setup.
SES can be configured as follows. Note that we have used getflotilla.net as an example only. You should use your own domain and substitute accordingly.
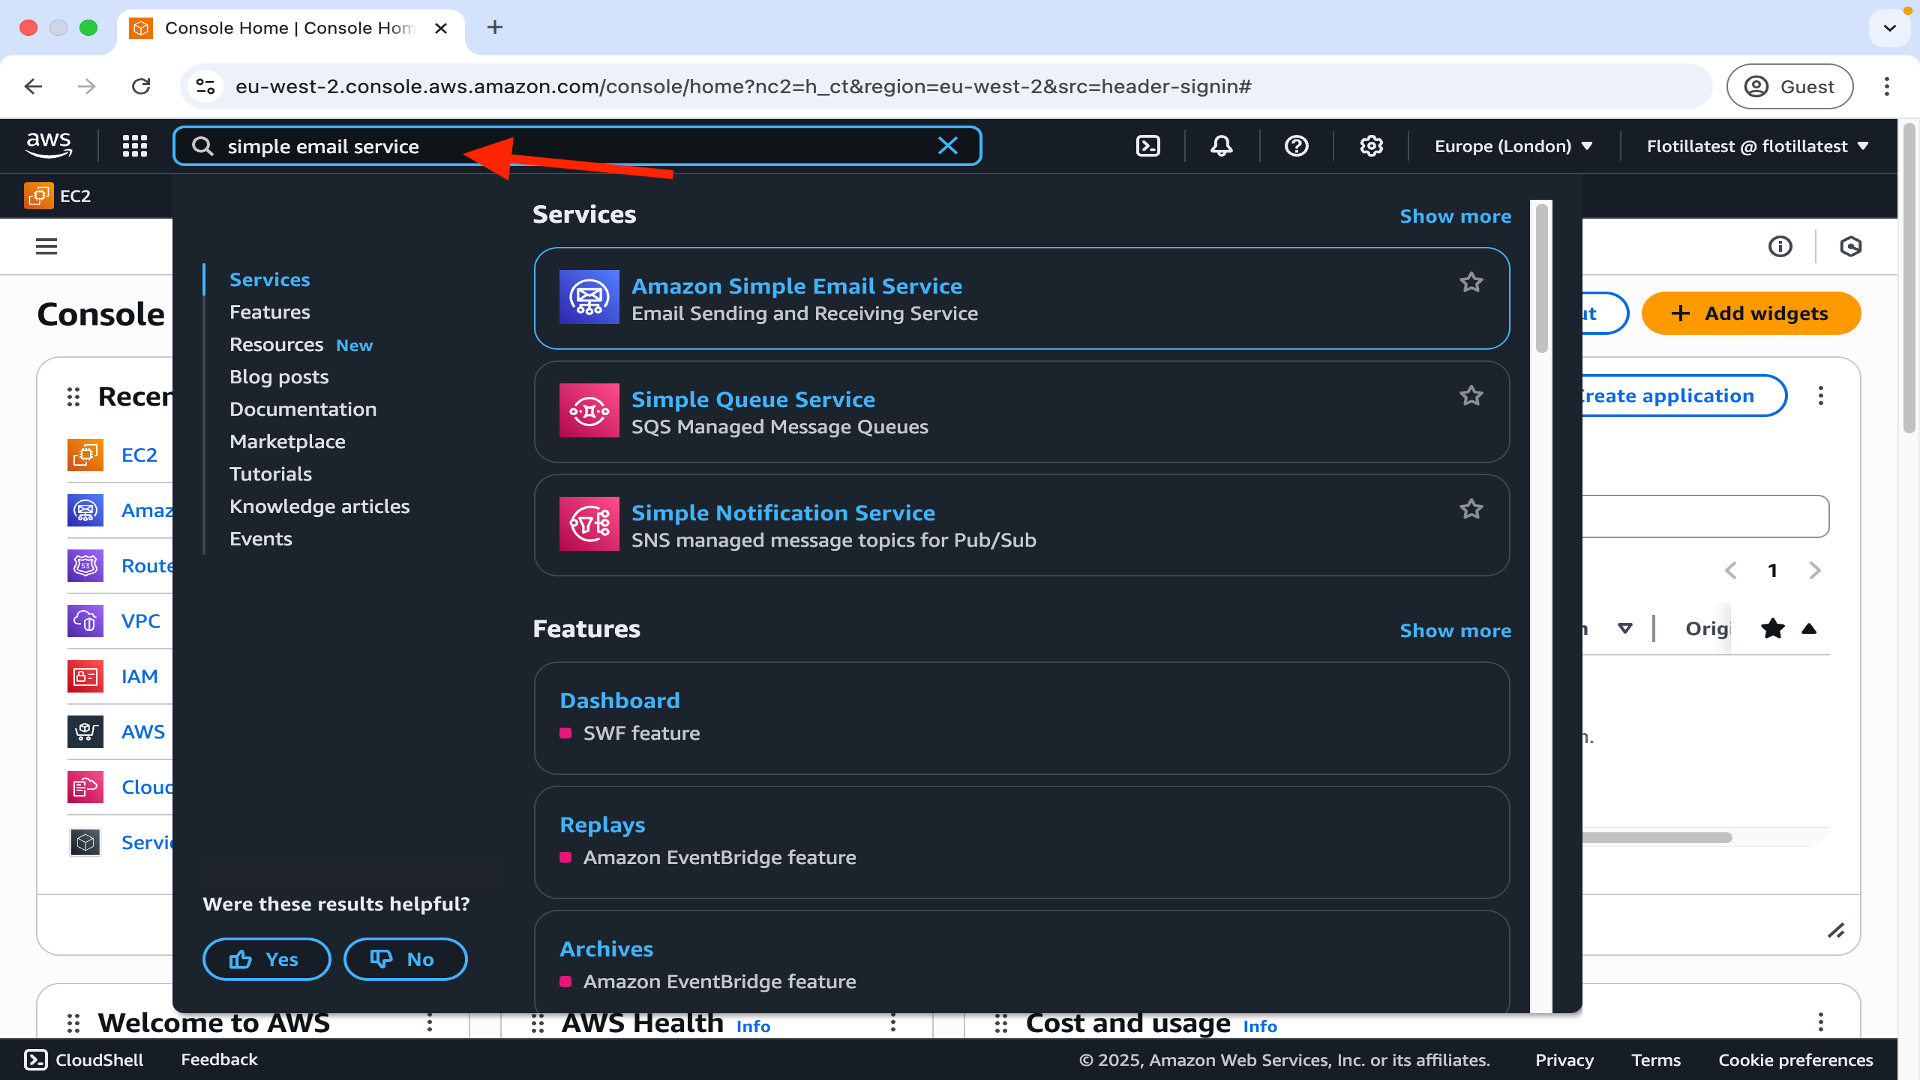
-
Go to AWS SES by typing Simple Email Service in the AWS Management Console search bar:
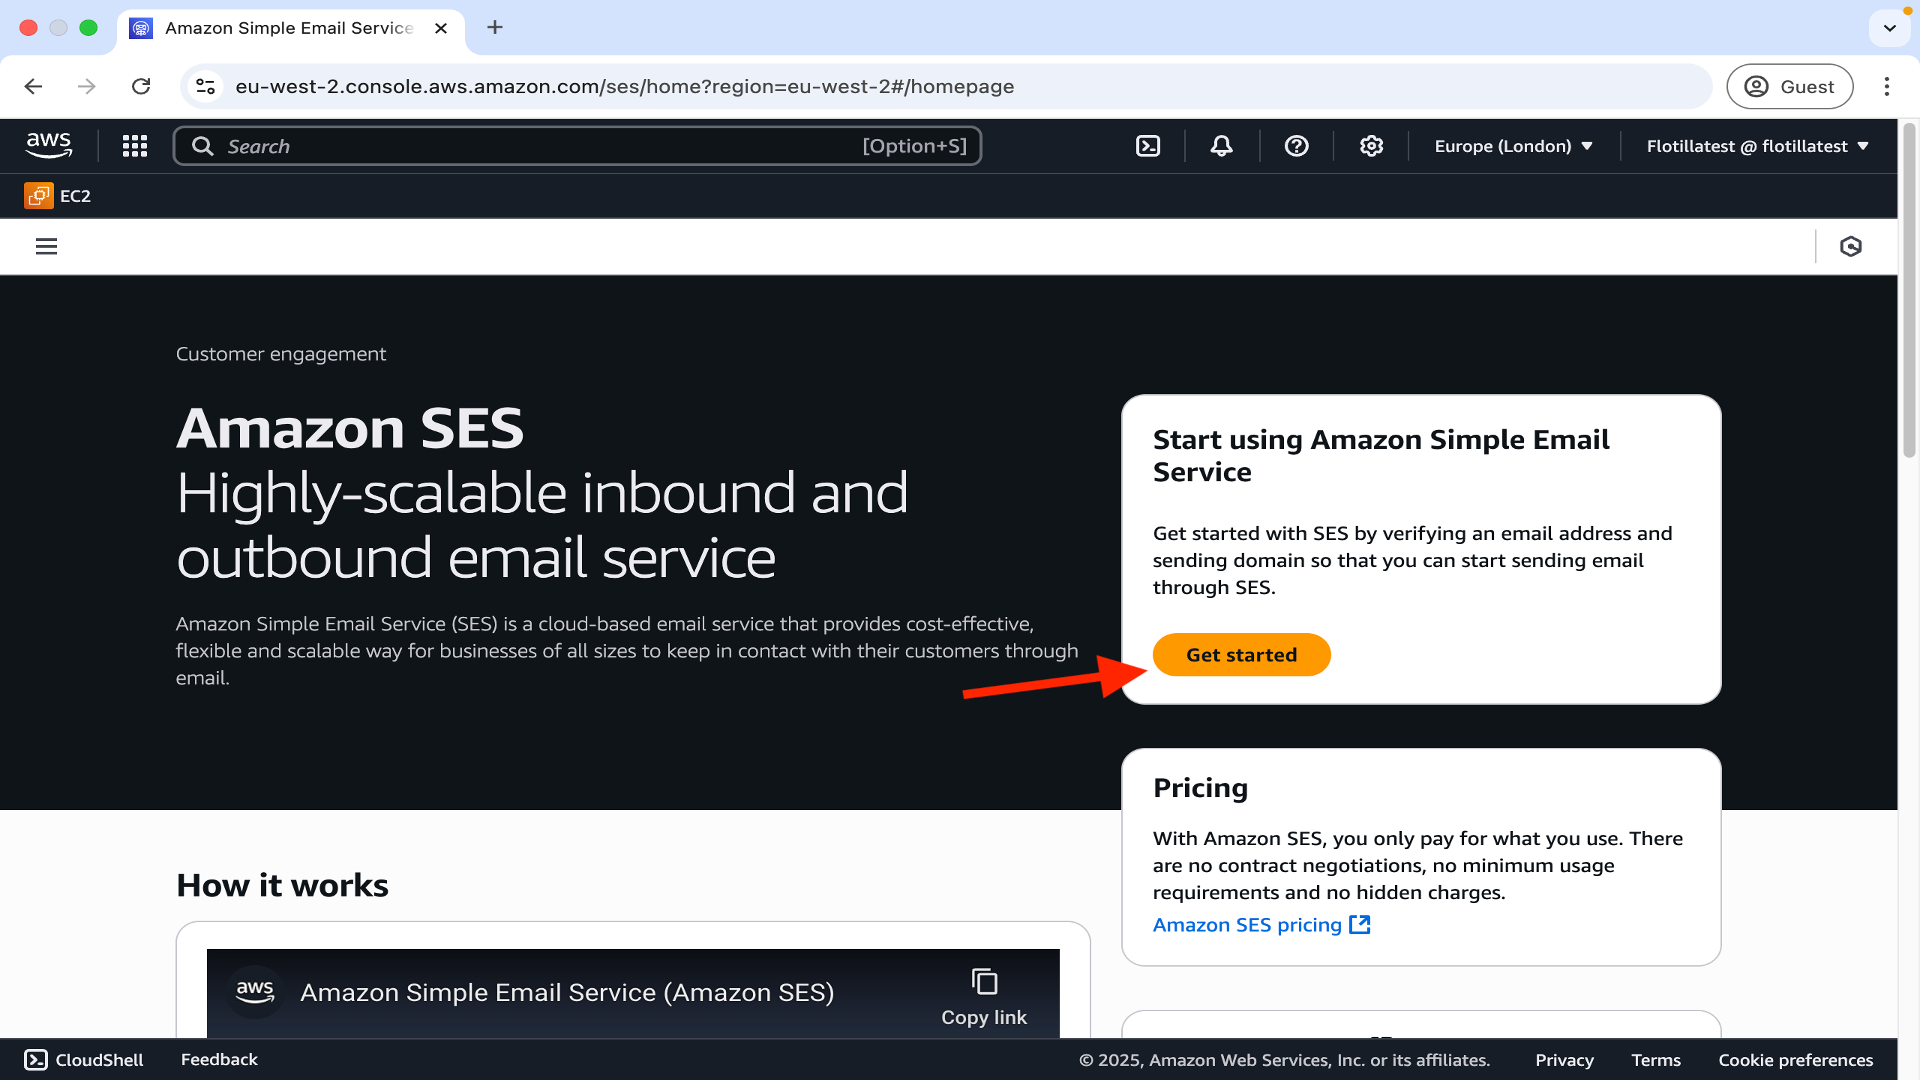
2.Click on Get started.
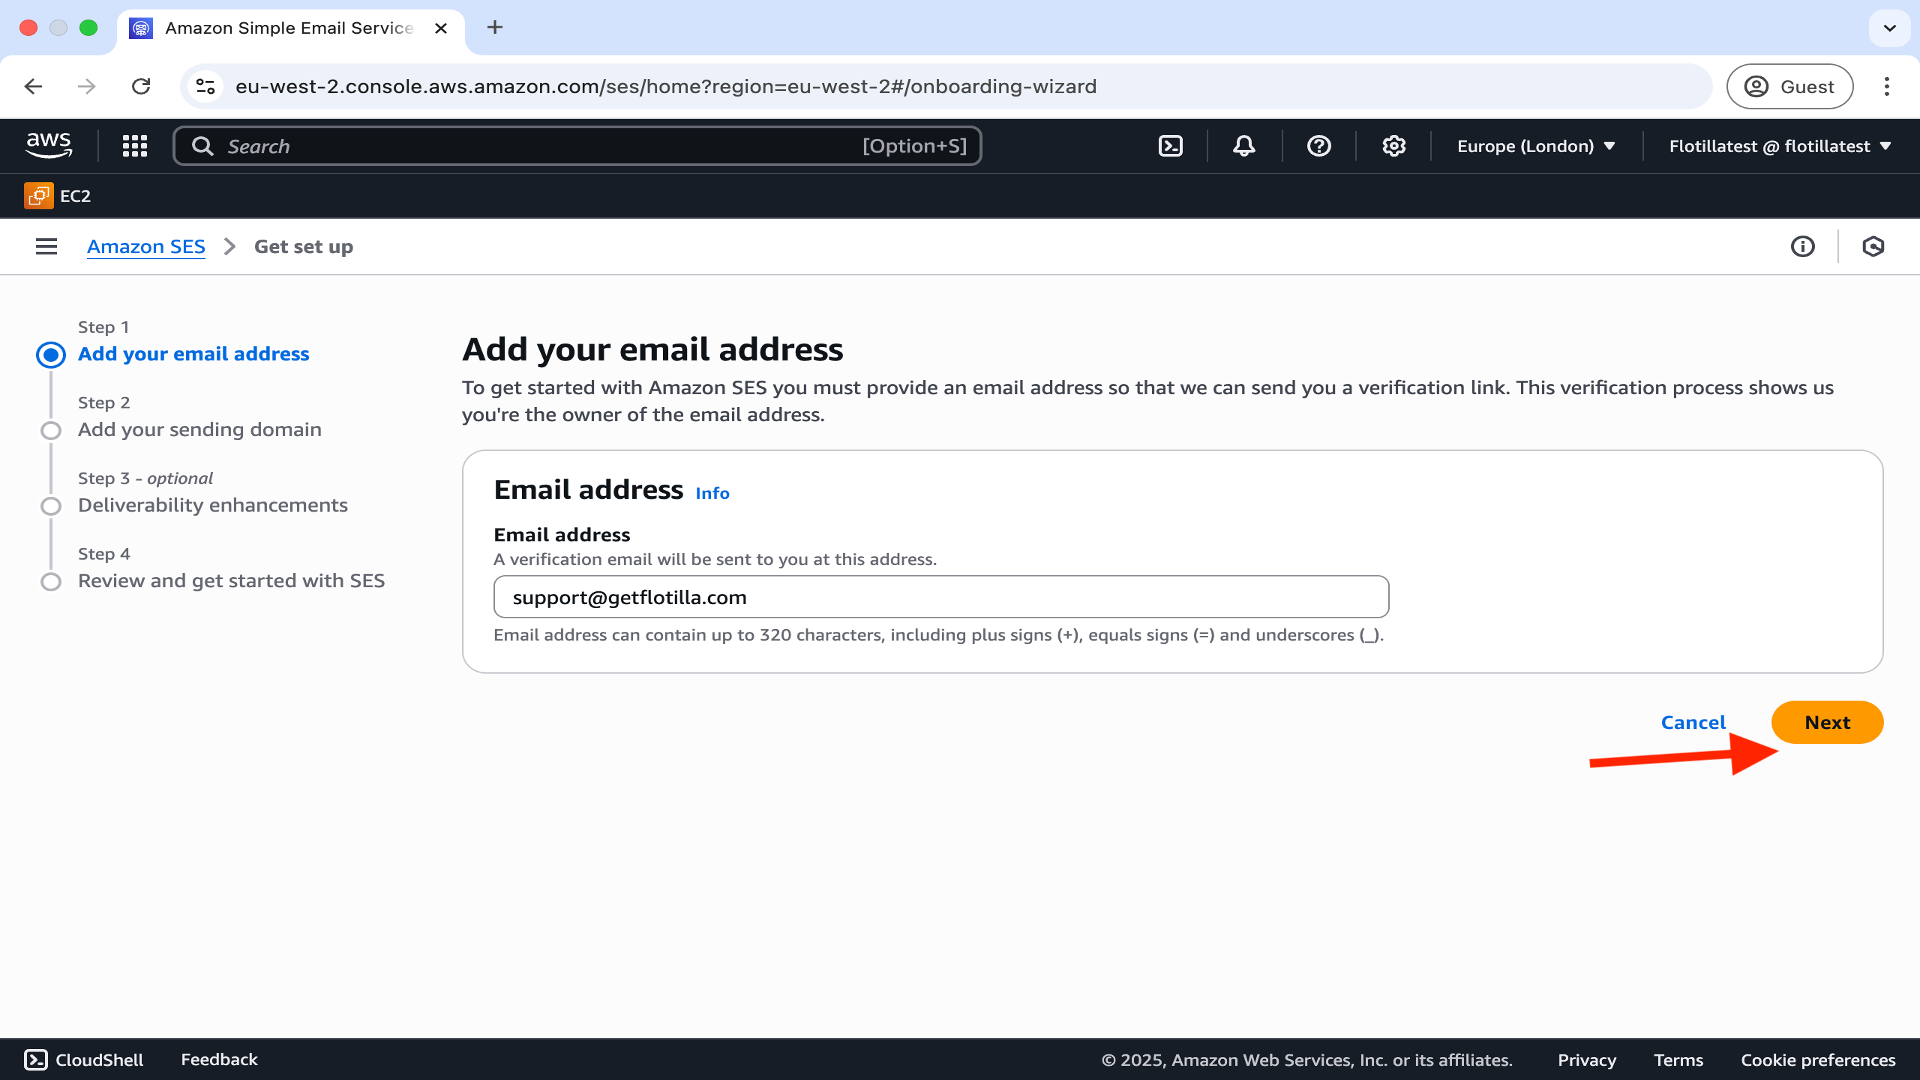
-
Enter the email address you wish to use and click next.
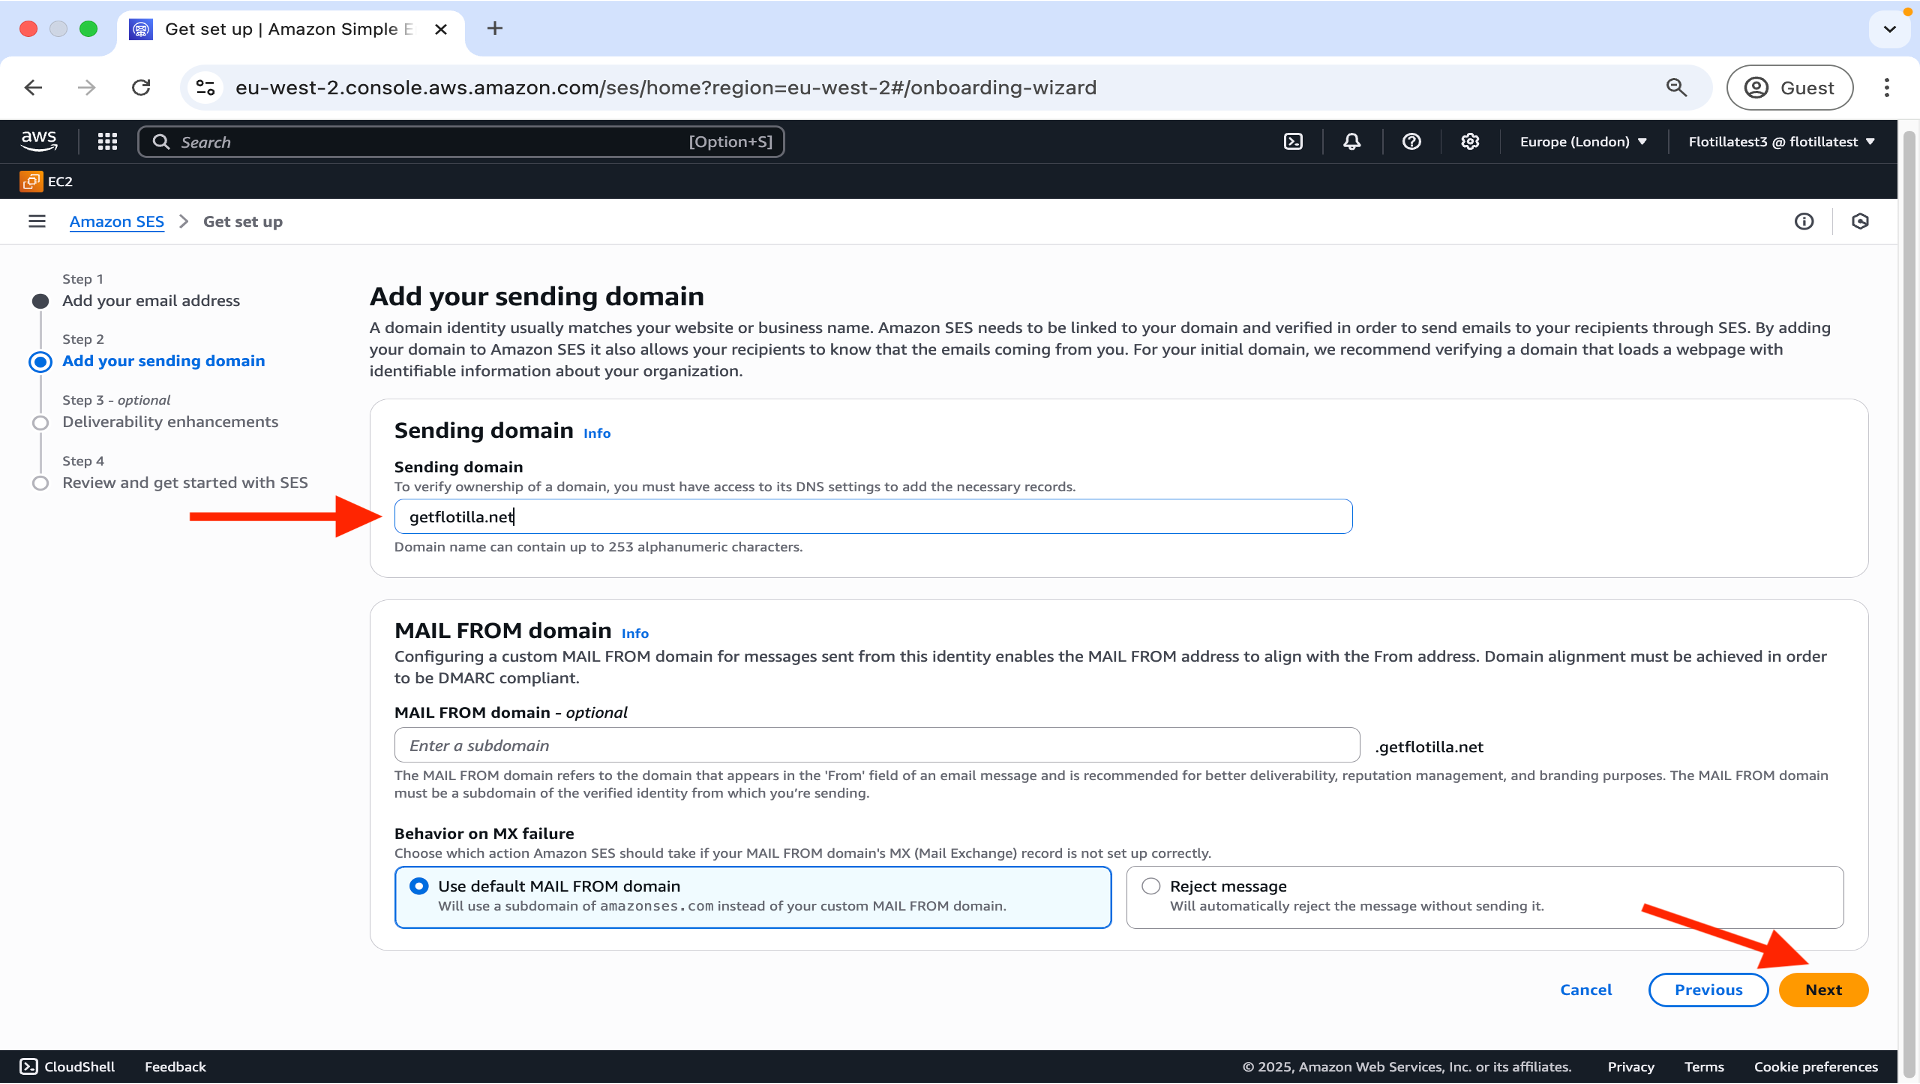
3.Add your sending domain and click Next.
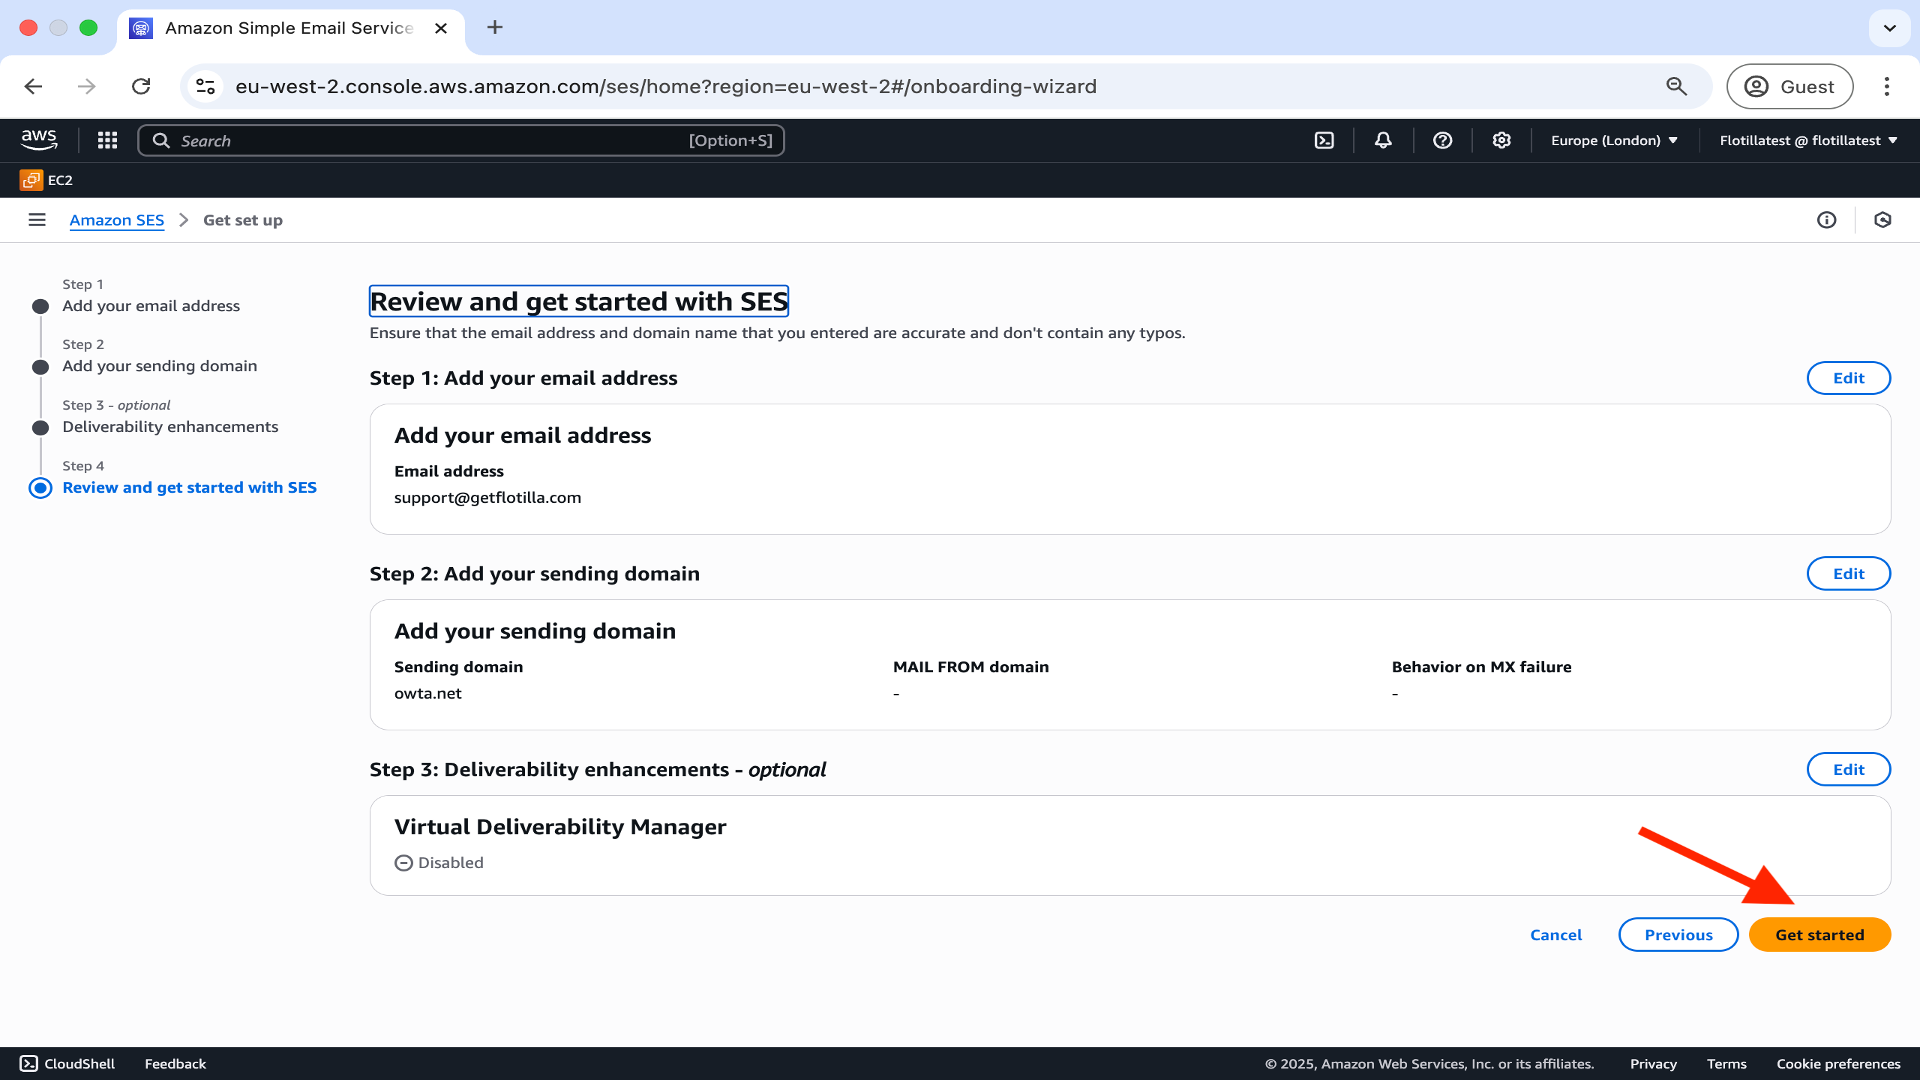
4.Step 3 is optional so proceed to Step 4 where you can review your configuration and then click Get Started.
-
Your Simple Email Service will now be in Sandbox mode which permits the quotas and sending rates below. If you expect to exceed the Sandbox limits you will need to request production access here. To complete the setup for the purposes of Flotilla verify your email address by clicking on Create Identity.
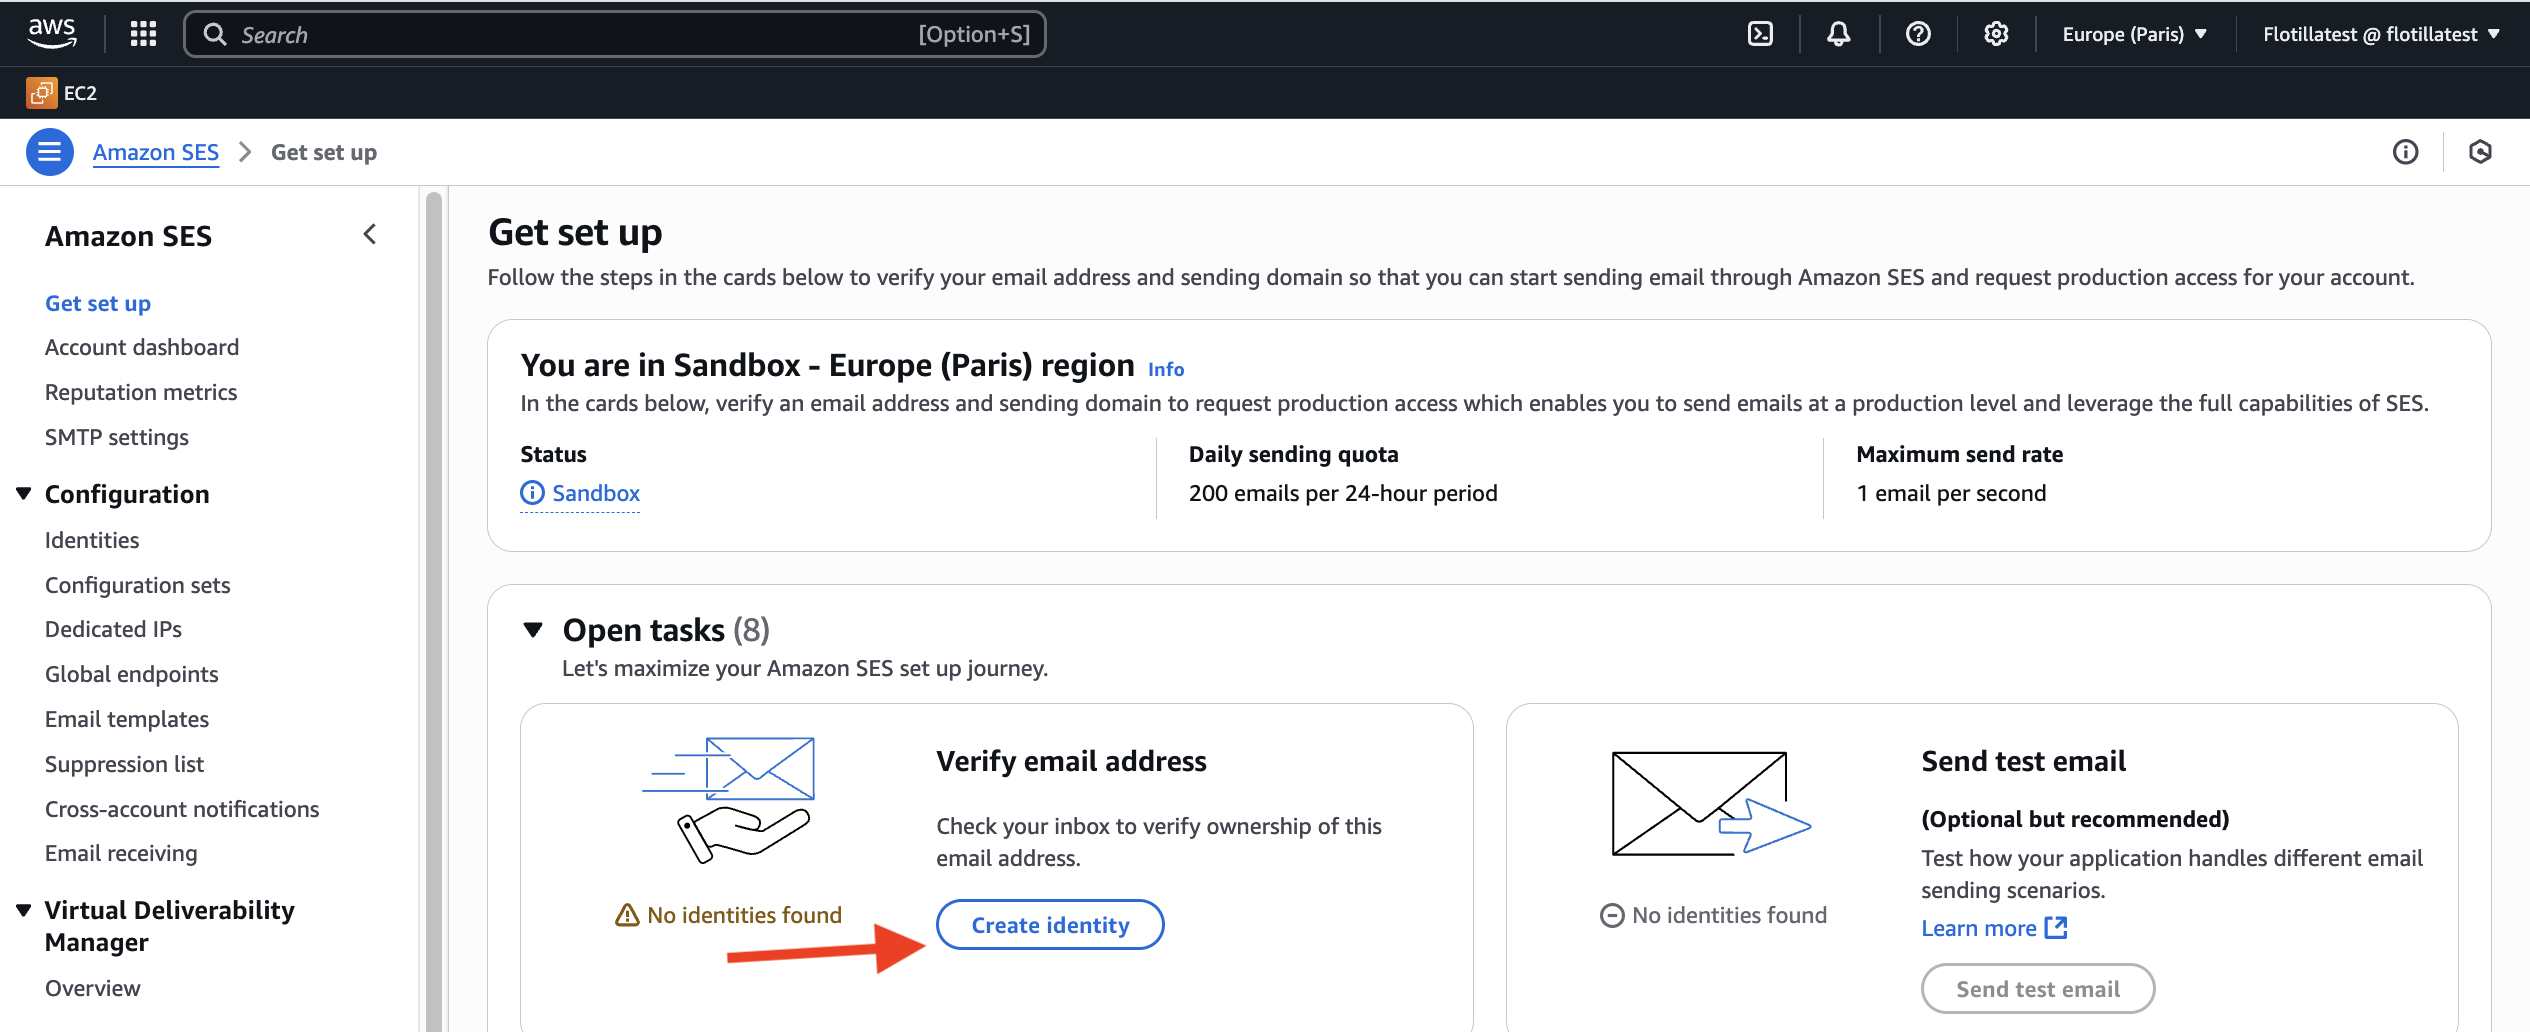
-
Confirm your email by clicking on the link in the email sent to you by AWS.
Step 4: Third party prerequisites
Flotilla relies heavily on the NIST website which is the principal source of CVE and CVSS data used in the software.
Launching Flotilla
The deployment of Flotilla should take approximately 20 minutes.
Step 1
In the AWS Management Console go to Cloud Formation and then Stacks. Accept the pre-populated fields and defaults, click on next to proceed.
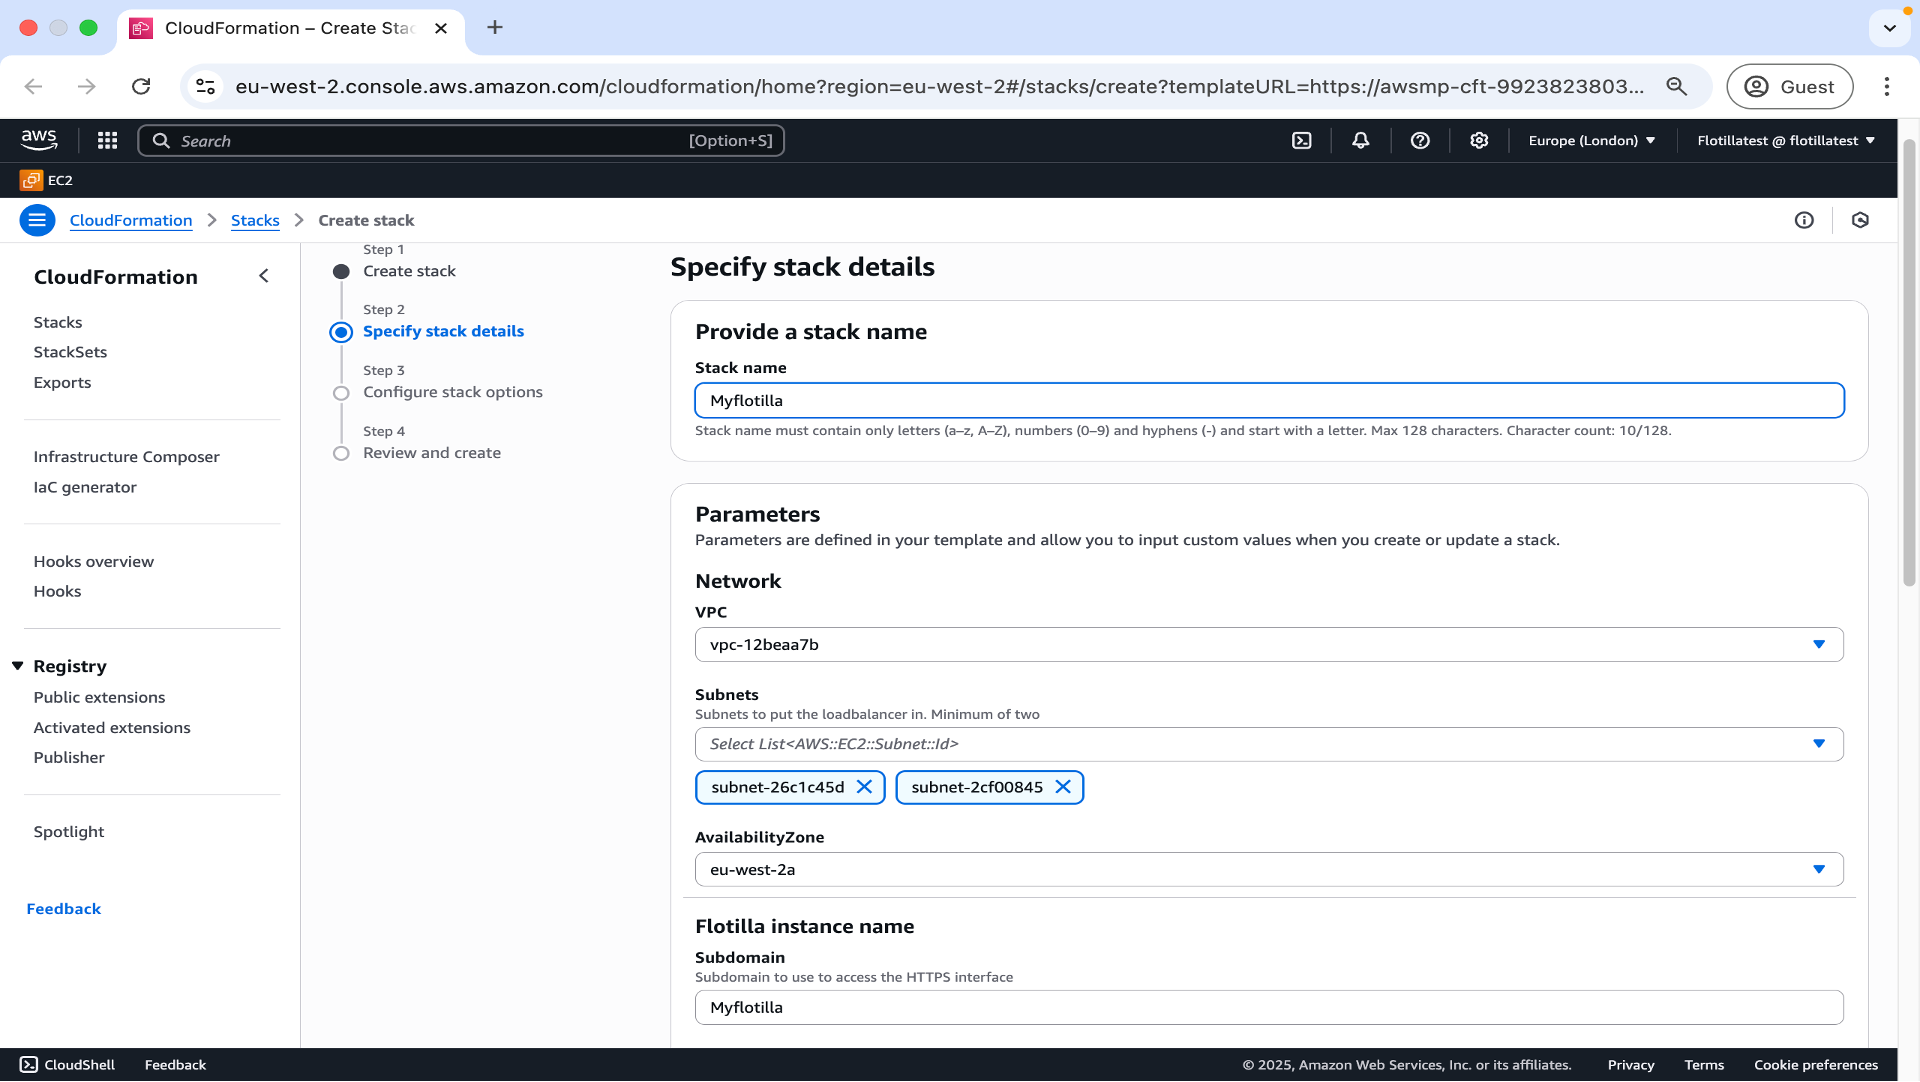
Step 2
Choose a name, vpc network, two subnets, availability zone and subdomain.
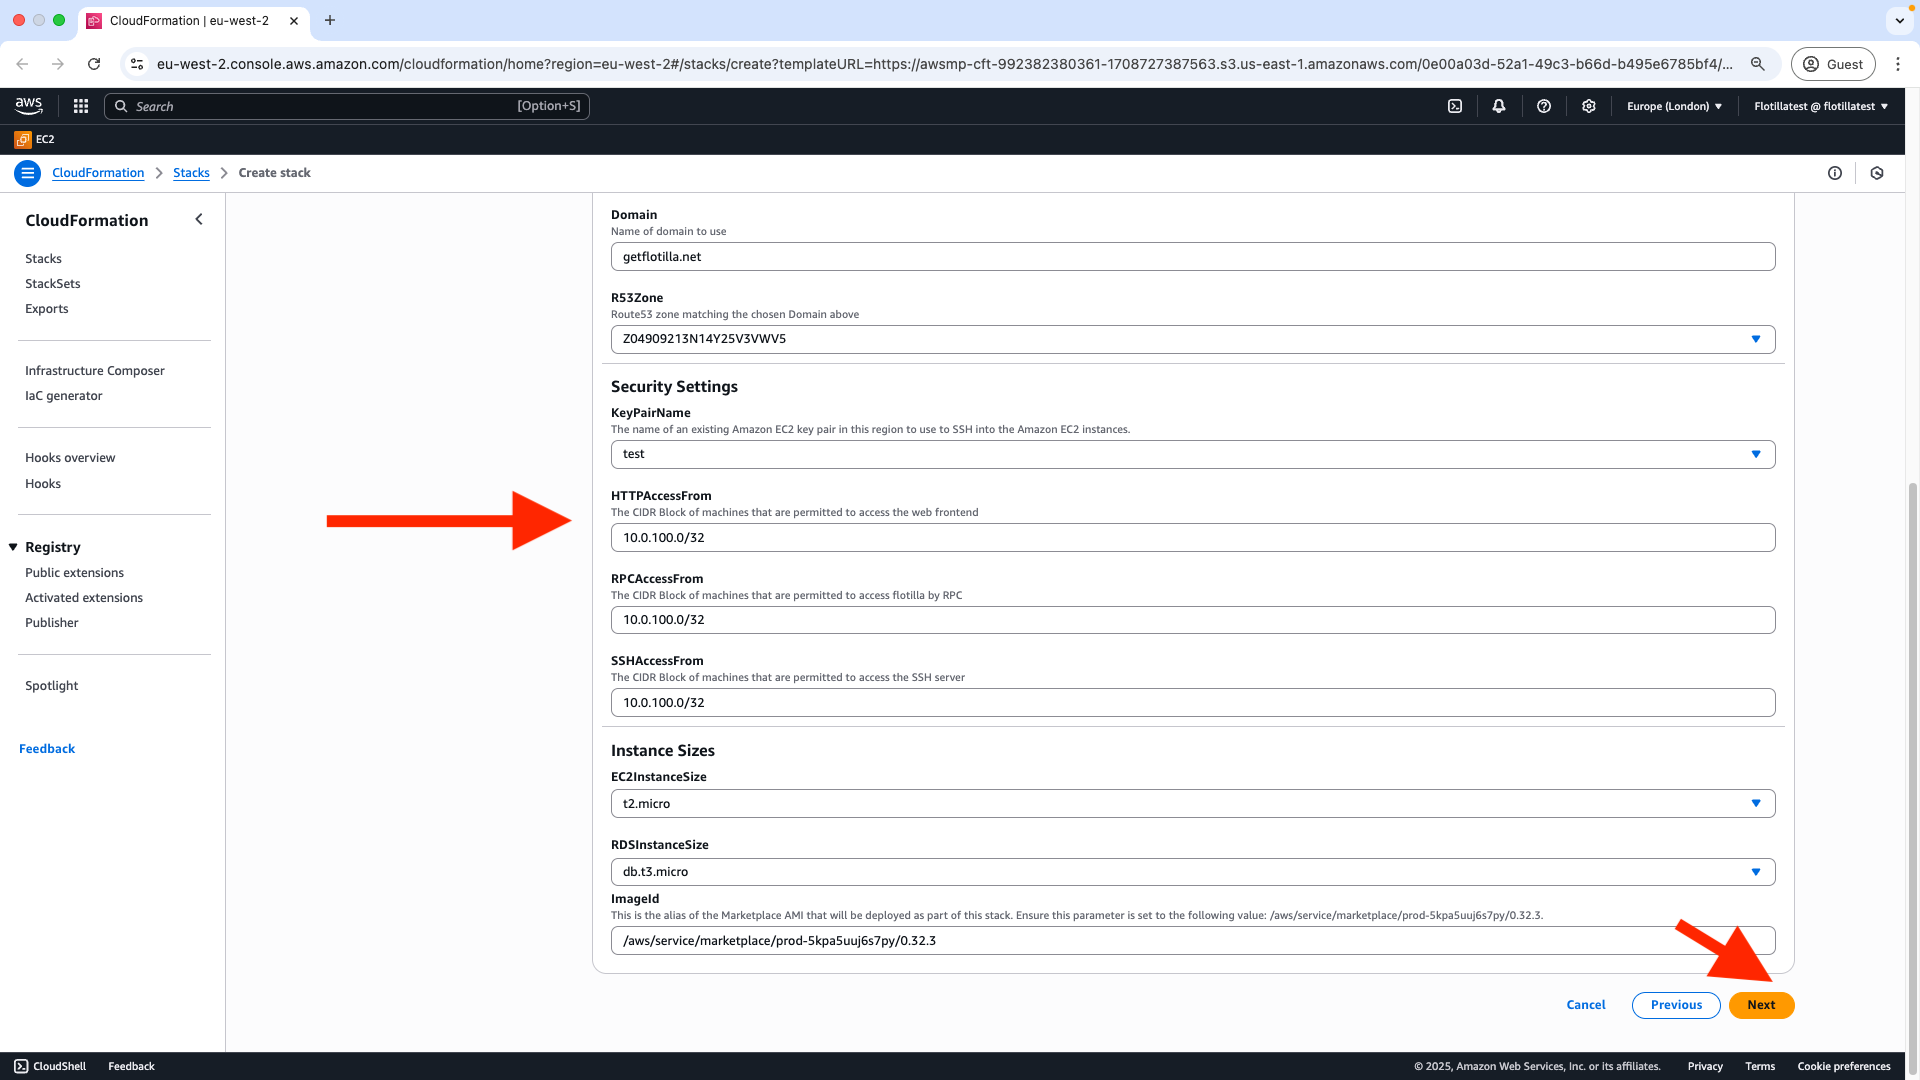
Step 3
Choose a domain, a R53 zone, a keypair, ec2 instance size and rds instance size (micro, small, or large). Our recommendations for instance sizes are available here in Appendix 4. Click Next once these options have been chosen.
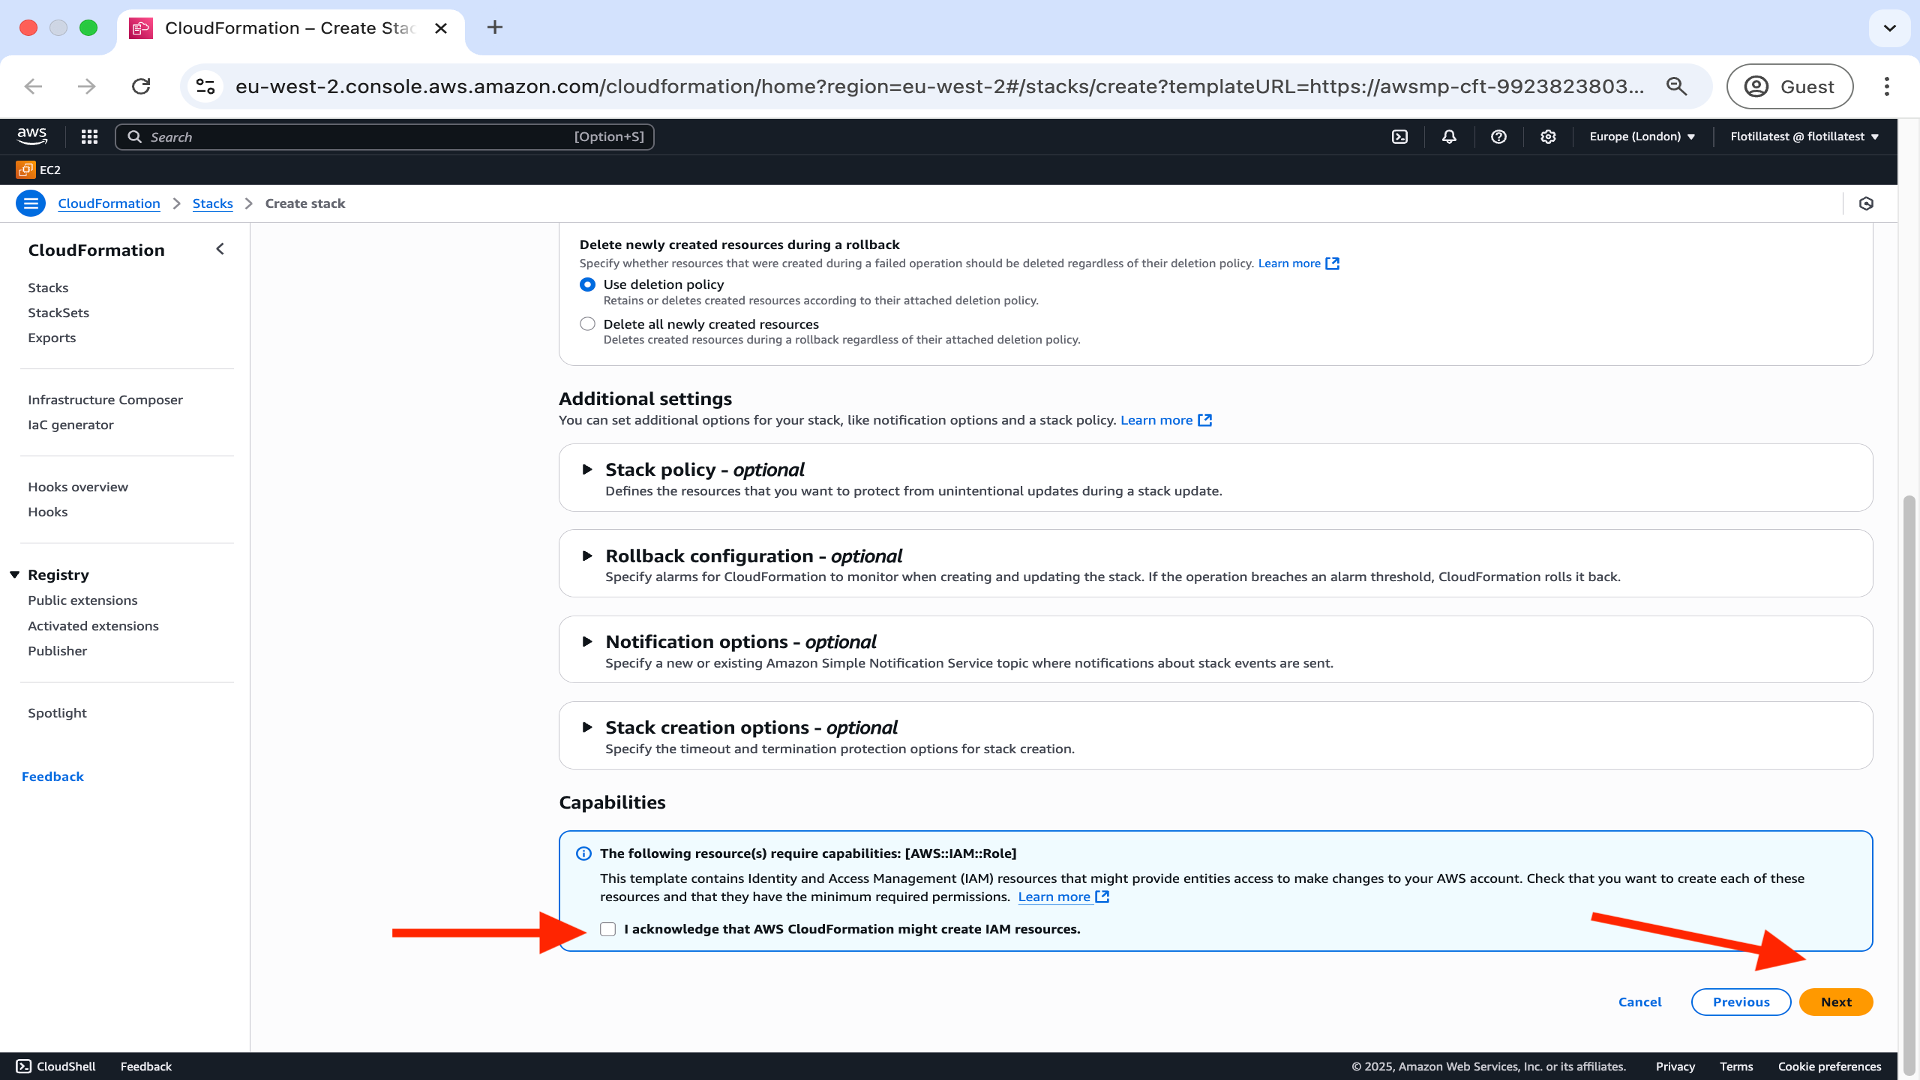
In the configure stack options page tick the box to acknowledge that AWS will create resources during the stack creation process and click on Next.
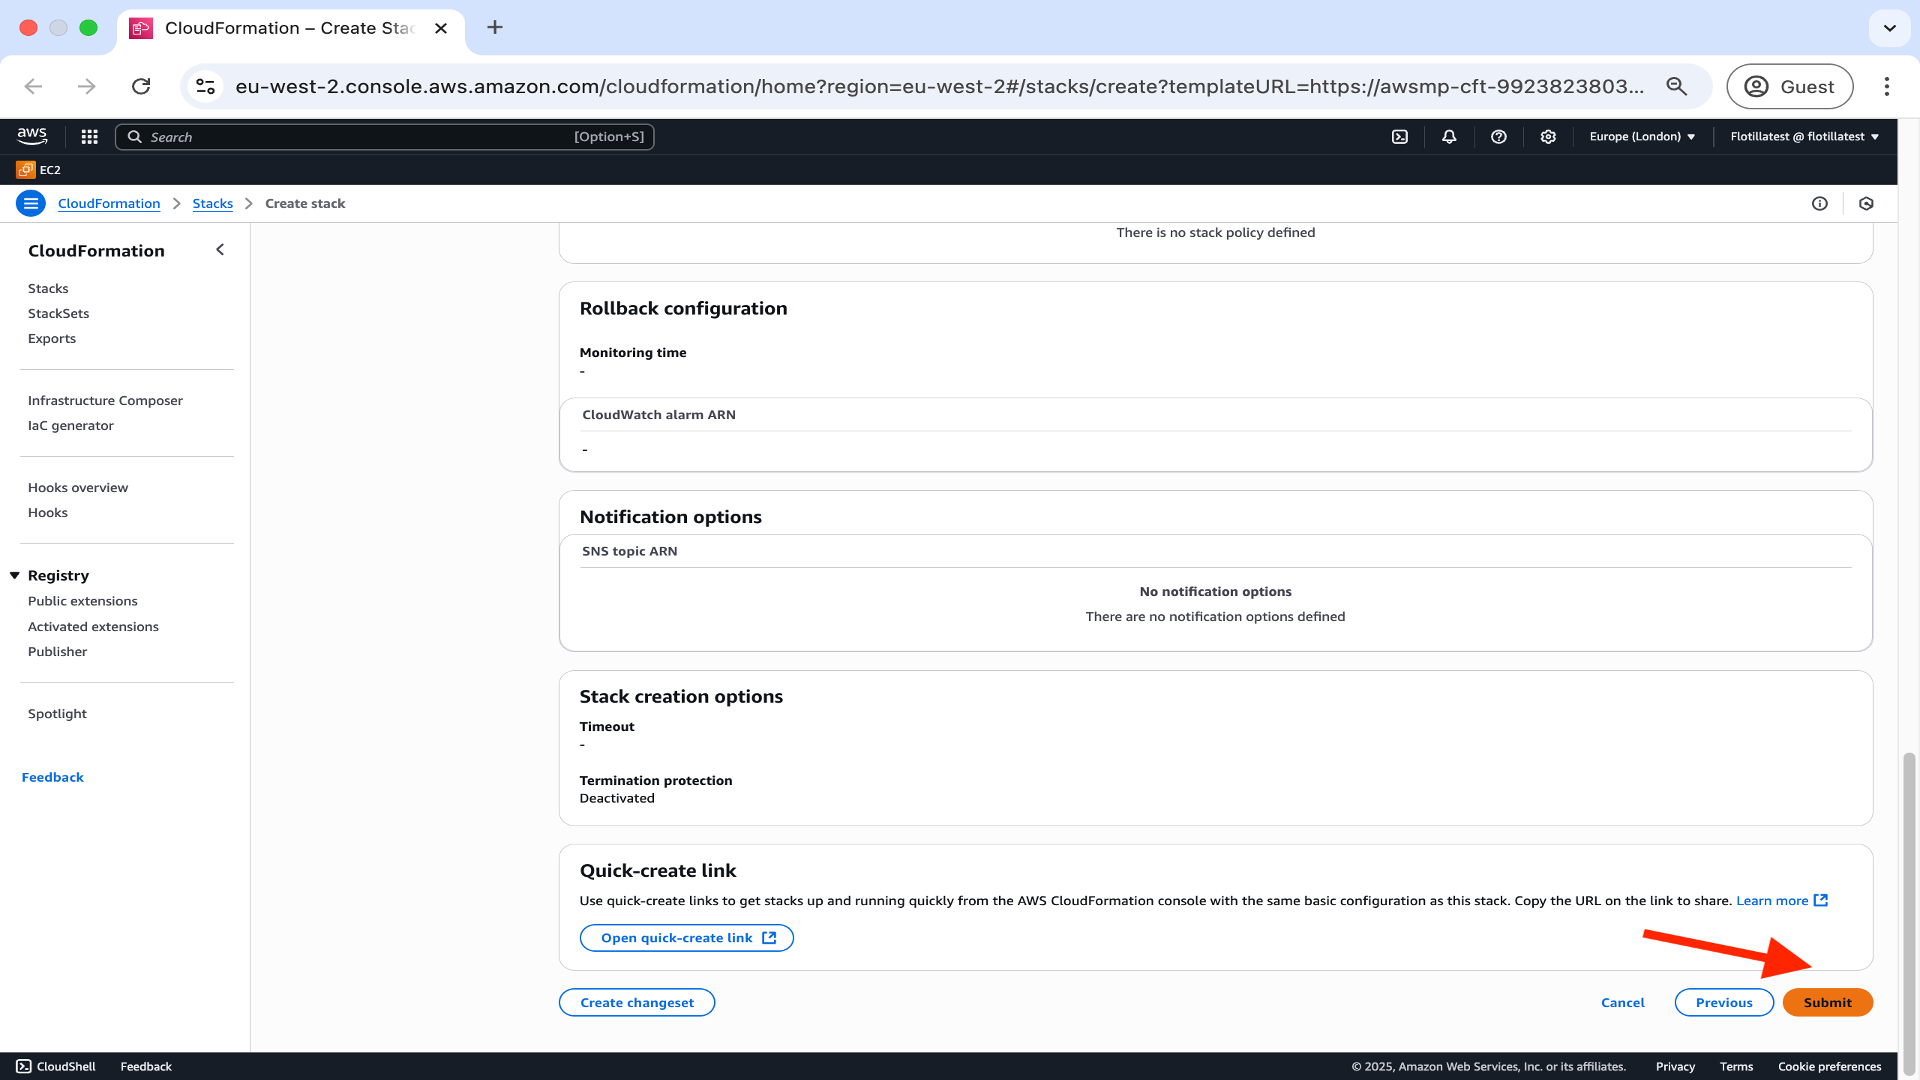
In the review page click submit.
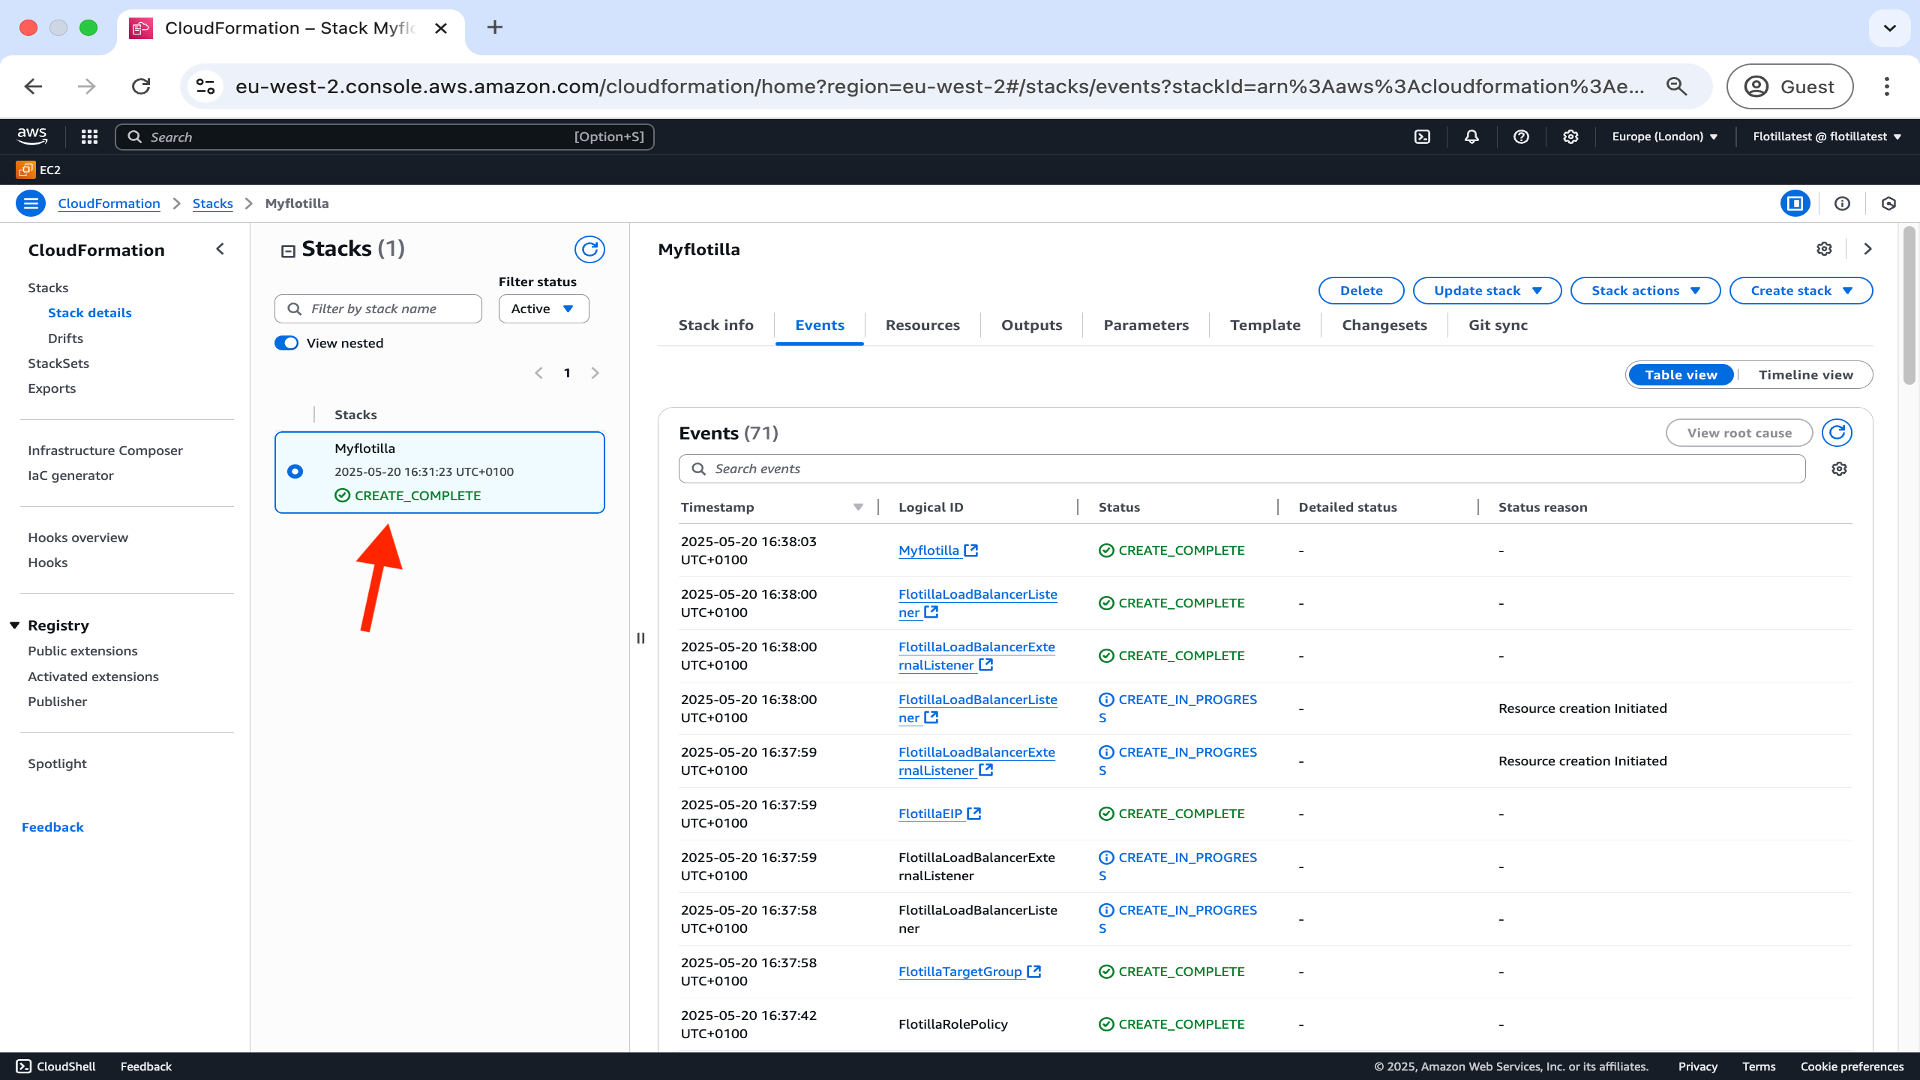
When the stack process has completed, the status of the stack changes to CREATE COMPLETE in green below.
Step 4
Accessing the management portal.
You will now be able to access your Flotilla Management Portal with the website address, displayed here.
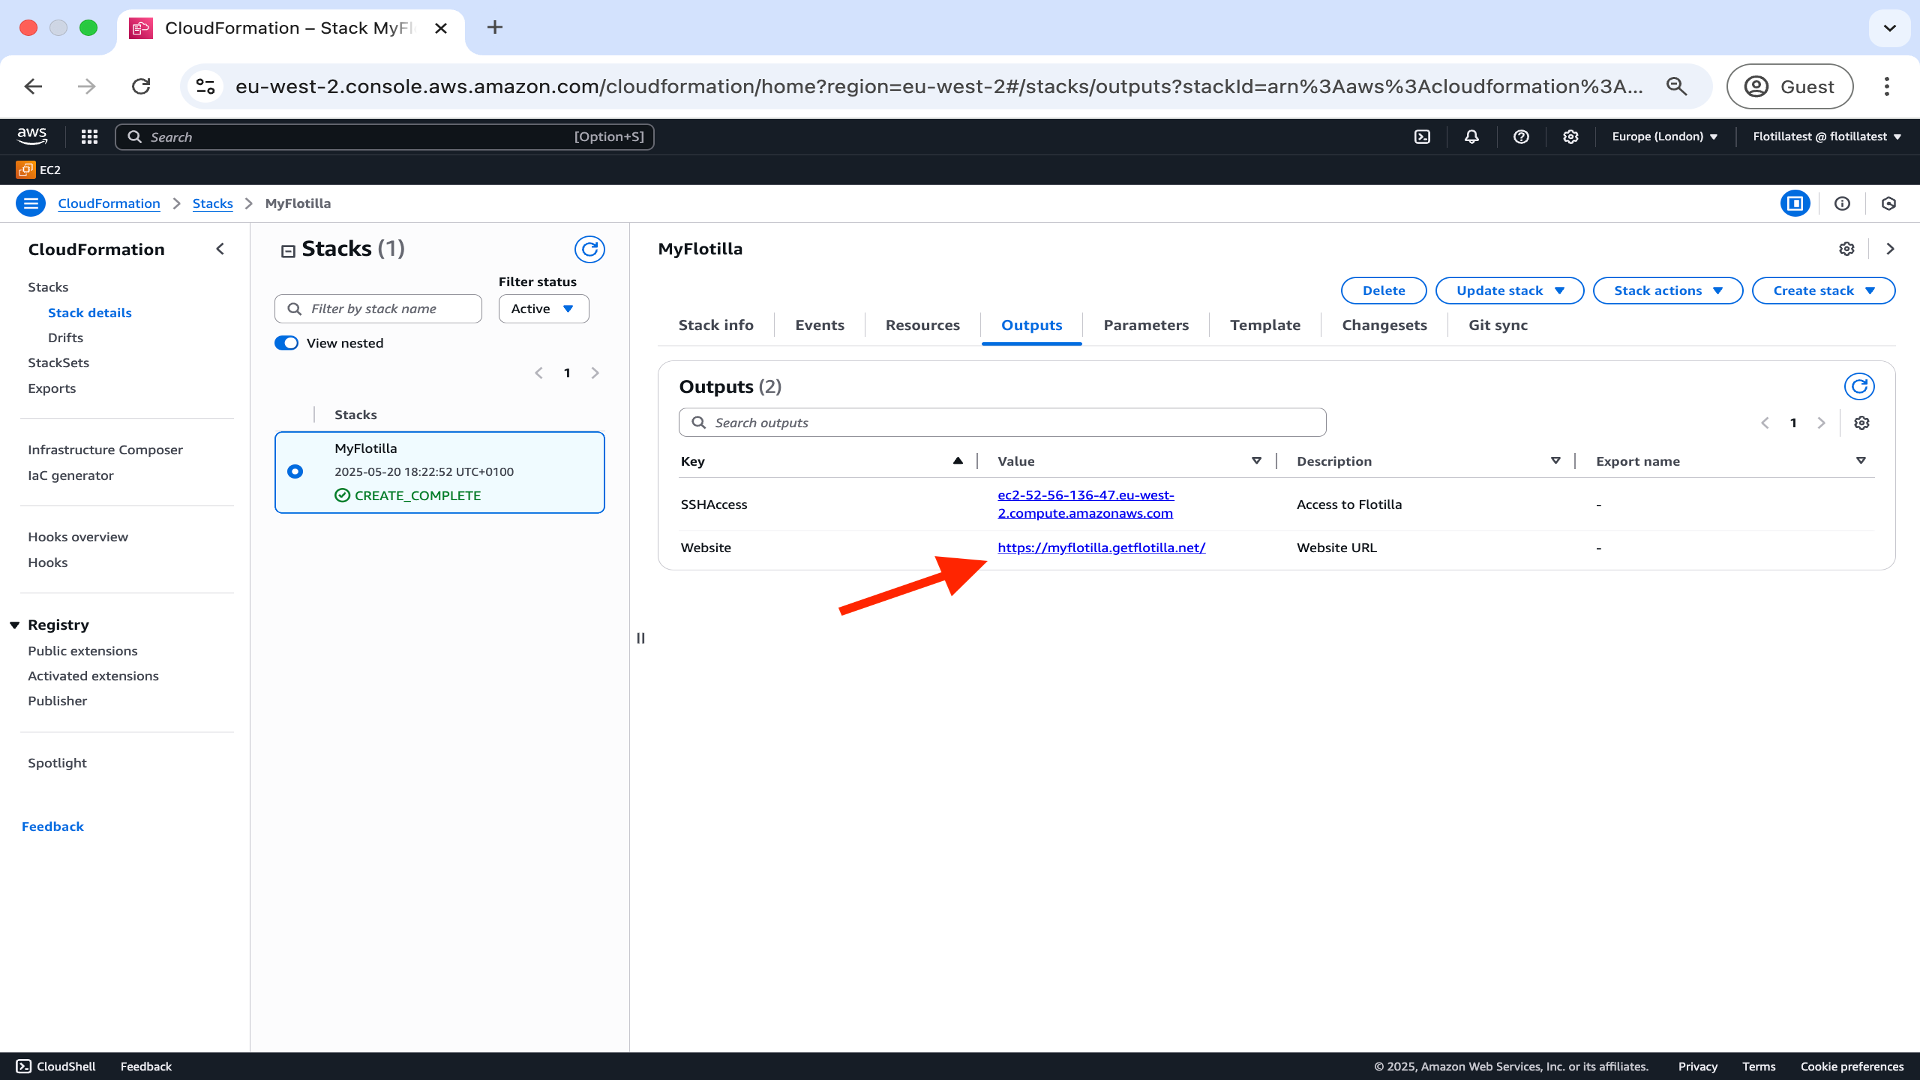
Note that configuration changes can still be made to your stack via the ‘Changesets’ option.
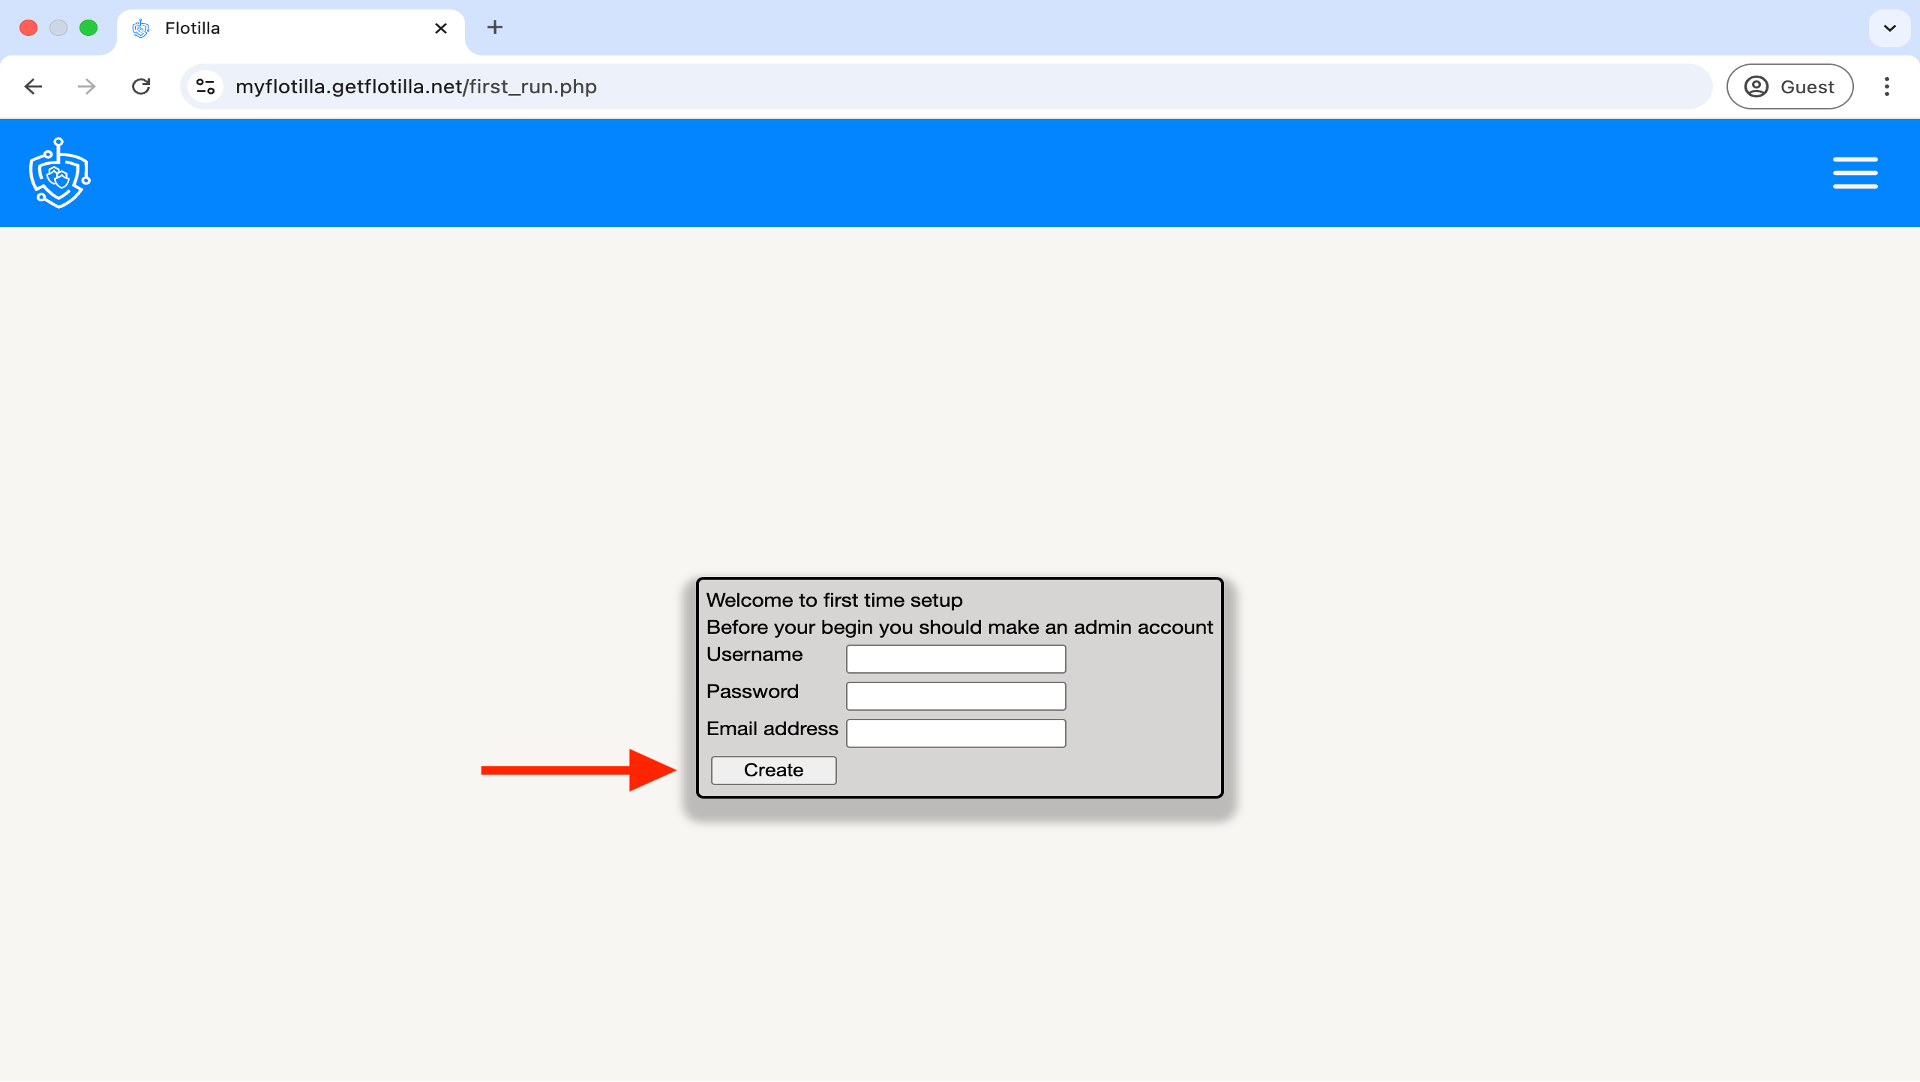
Access your Flotilla Management Portal by typing the address into a browser. The first time you access this page you will be asked to create an admin user as per the image.
Step 5
Backing up email reports.
Note that the following step is not mandatory and can be completed at any time after installation. In order to backup email reports generated by Flotilla first click on the 3 horizontal bars to the right of the admin page and then the ‘Flotilla Settings’ option:
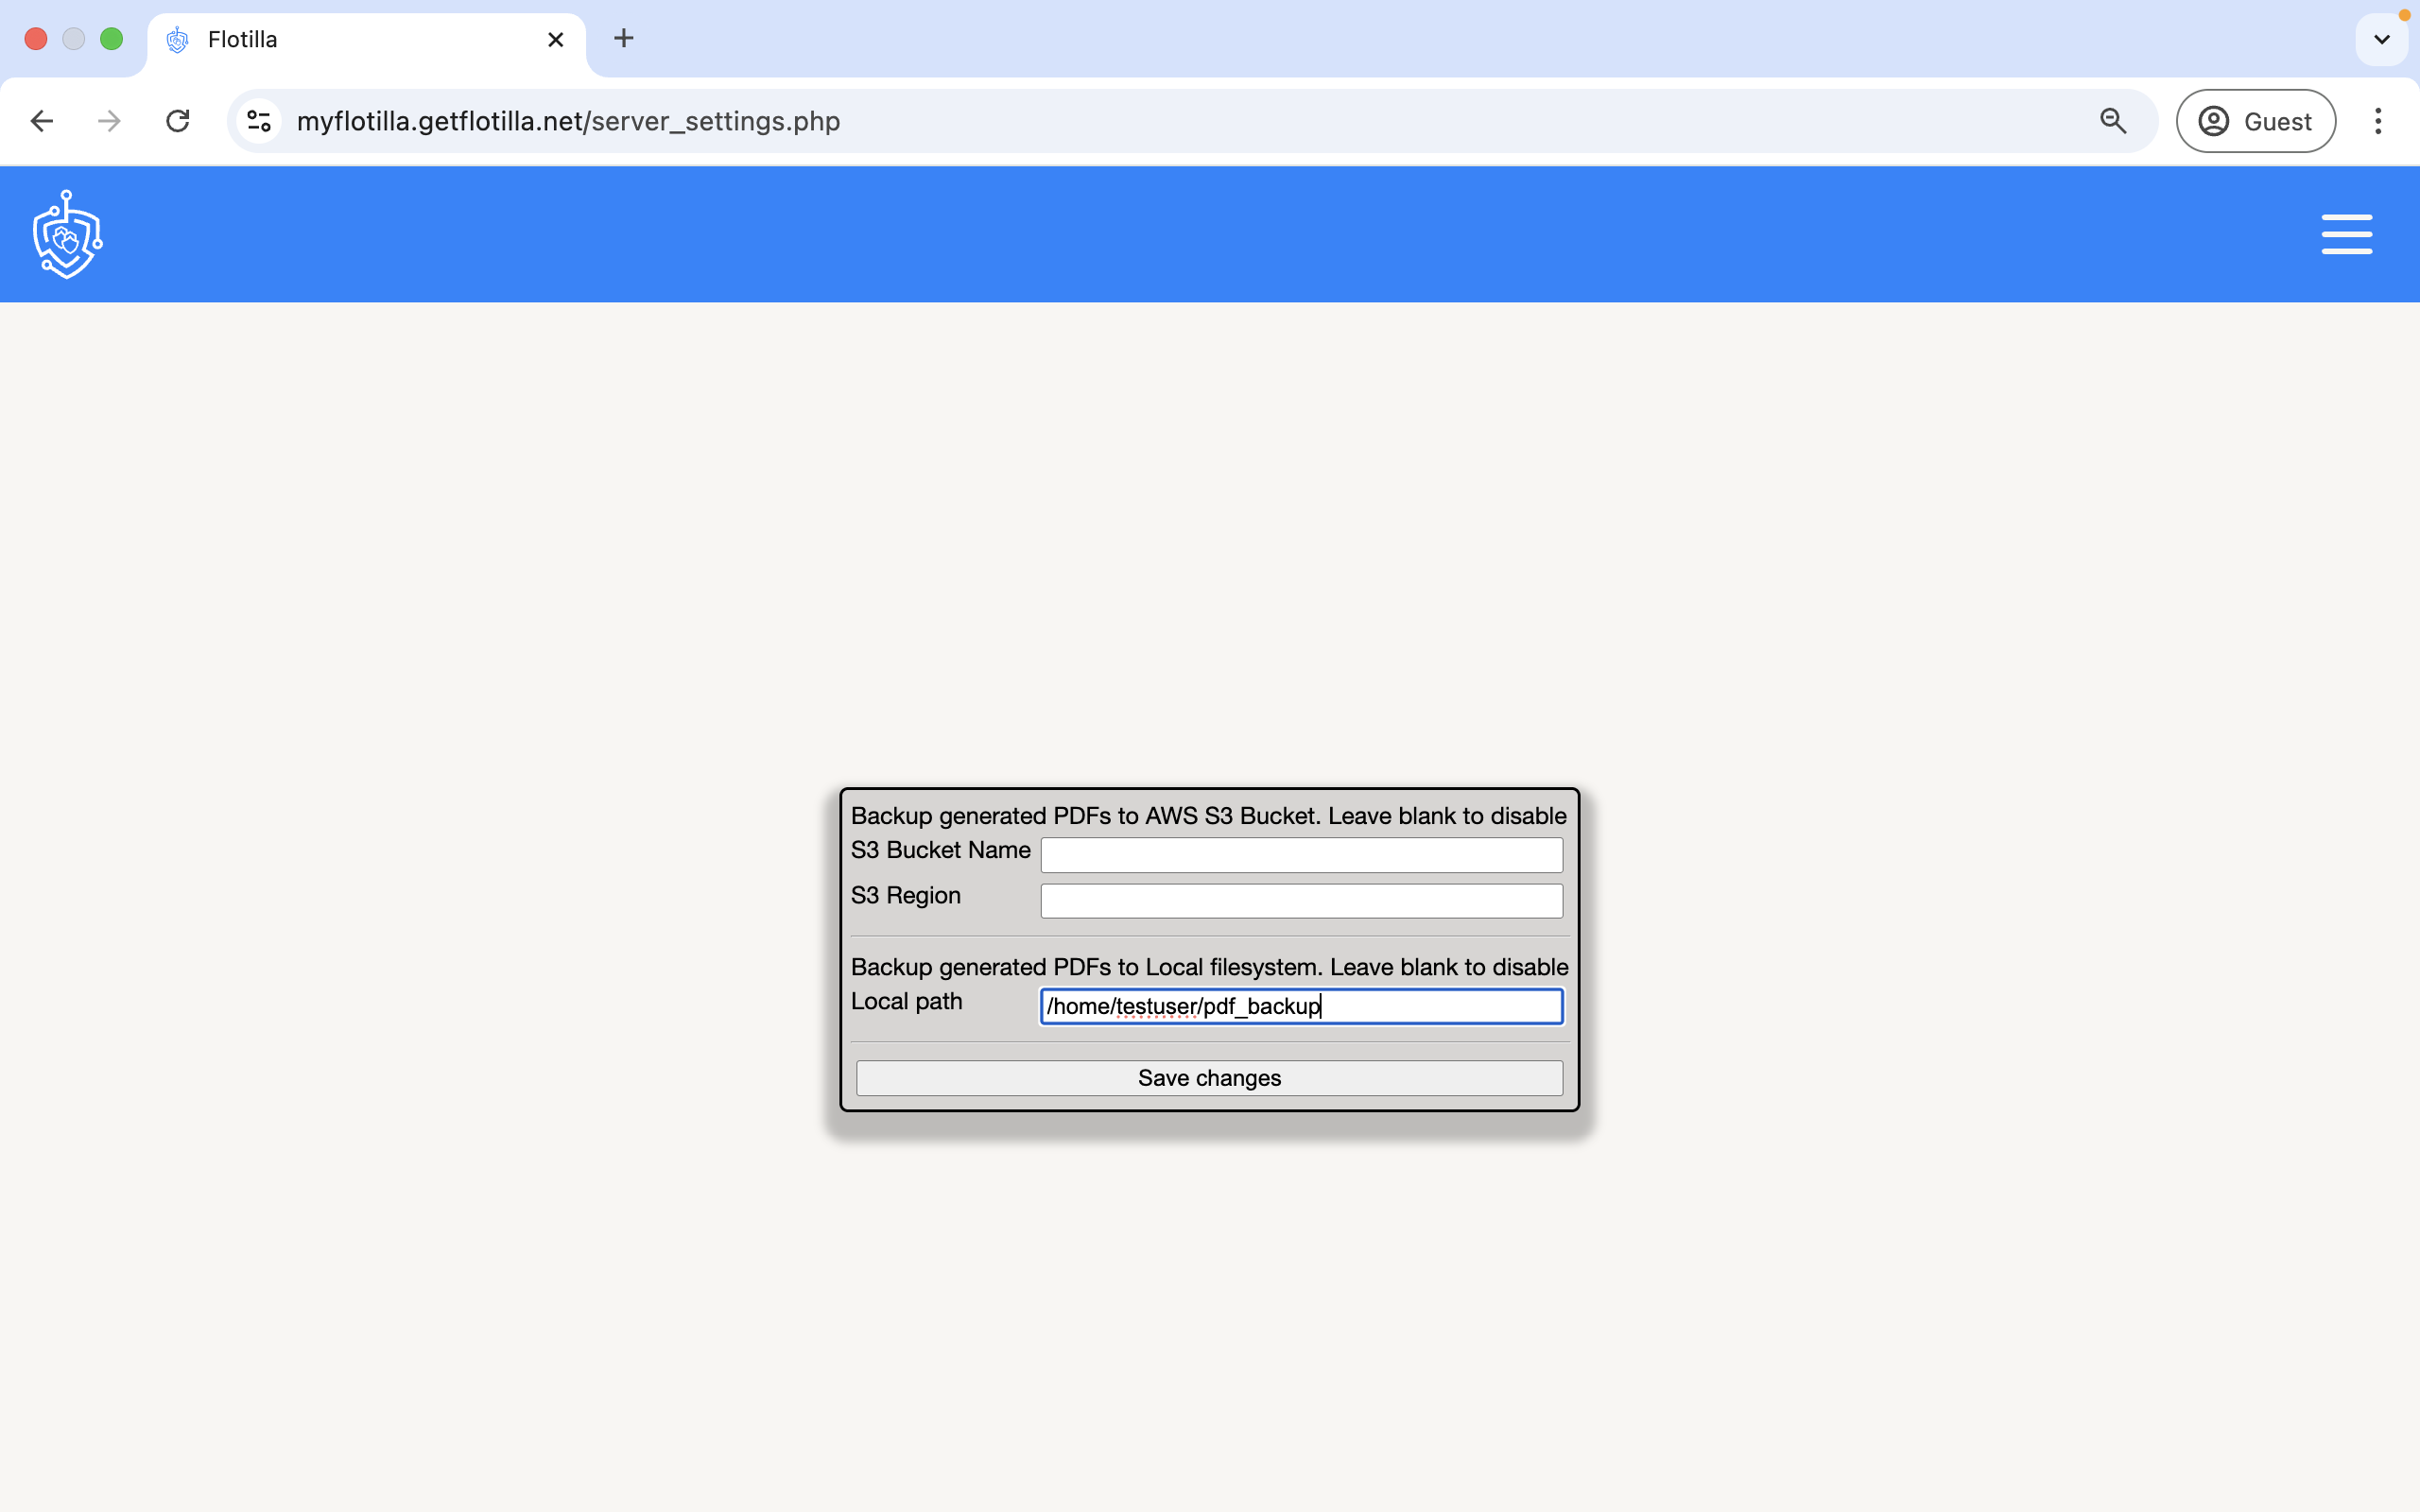
Email backups can be stored both in the AWS cloud in a S3 bucket and in a local folder:
Support, upgrades
To request support please send an email to support@getflotilla.com to create a Jira account. You will then be able to log a ticket via the support portal. The initial response SLA to a support issue being raised is one business day. Please note that Flotilla support is currently one tier only. There are currently no software upgrades or patches although these may be made available in the future.
Licencing, costs and billing
Licencing for Flotilla is solely within AWS Marketplace and there are no licence requirements for other products. Flotilla requires the following billable services each of which is mandatory.
-
EC2 Instance (currently only one, but may be multiple in later iterations) - At least one mandatory
-
Load balancer - mandatory
-
ElastiCache - mandatory
-
RDS MySQL - mandatory
-
Secret in SecretManager - mandatory
AWS Resources required to run Flotilla are provisioned for you by the AWS Cloudformation template. Customers are responsible for the costs incurred and they are not included in the price of Flotilla. Details of AWS pricing are provided in the table below:
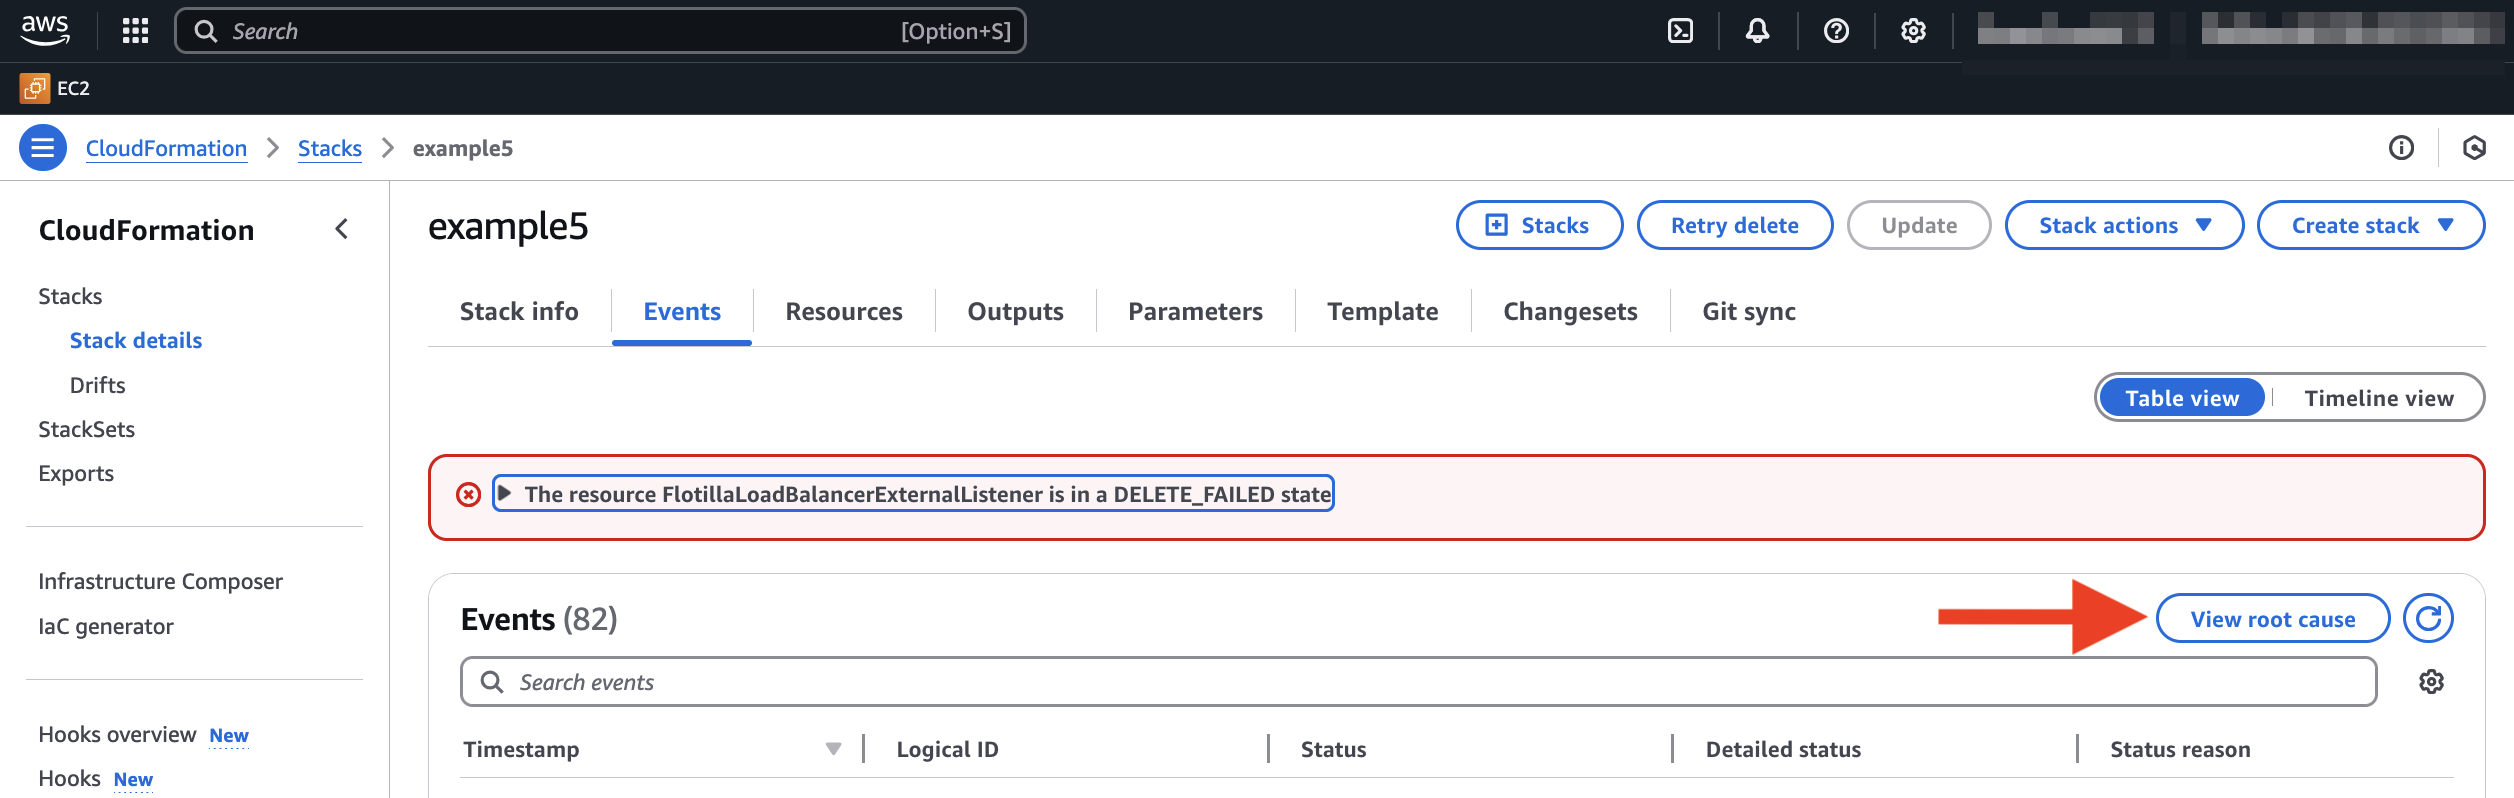
Troubleshooting
Errors encountered during the launching of flotilla: E.g. stack creation failure:
AWS provide a ‘detect root cause’ option which aids in the diagnosis of errors. The example below displays a DNS error:
The error below is a user permissions error, ensure that the user has all the permissions as listed in the json file here

Attempting to open the Flotilla login page returns ‘Loading’ and eventually times out
Most likely your flotilla-lb-sg security group is configured such that you are no longer allowed to access the loadbalancer on port 443, or your IP address has changed and you are no longer allowed access.
You could redeploy with altered parameters or find a way to return to the working IP range (like reconnecting to a VPN, or other access point).
Flotilla login page shows a red error box with one of the following errors:
Unable to access database
The RDS server is down, or the credentials have changed. Check for any Cloudformation stack drift, if that fails restart the EC2 instance.
Unable to find database credentials
Unable to read database credentials
Invalid database credentials
The credentials are missing, or damaged. Try restarting the EC2 instance as shown below:
Forbidden
Too many failed requests have originated from your IP, and it has been temporarily banned. If this happens without having failed log in attempts then someone else using your IP has failed to log in. Bans lift after 2 hours.
Security, Keys and Encryption
Security of customer data
User data is stored in the EC2 instance, RDS MySQL instance and ElastiCache instance.
Keys
The RDS key automatically rotates on a schedule, however this can be manually rotated early if necessary by accessing Secrets Manager and clicking ‘Edit rotation’ here:
.png?cb=05f5dbaffad922ea69c2a019bf35ab4b)
The user is not instructed to create any keys for this product although the customer must have a SSH key pair as part of the deployment procedure. One secret is created and used. It auto-rotates and does not require user maintainance, however, it may be viewed and forcibly rotated.
Encryption
The EC2 Instance and RDS instance are both encrypted at rest using the customers default KMS key.
Maintenance/Miscellaneous
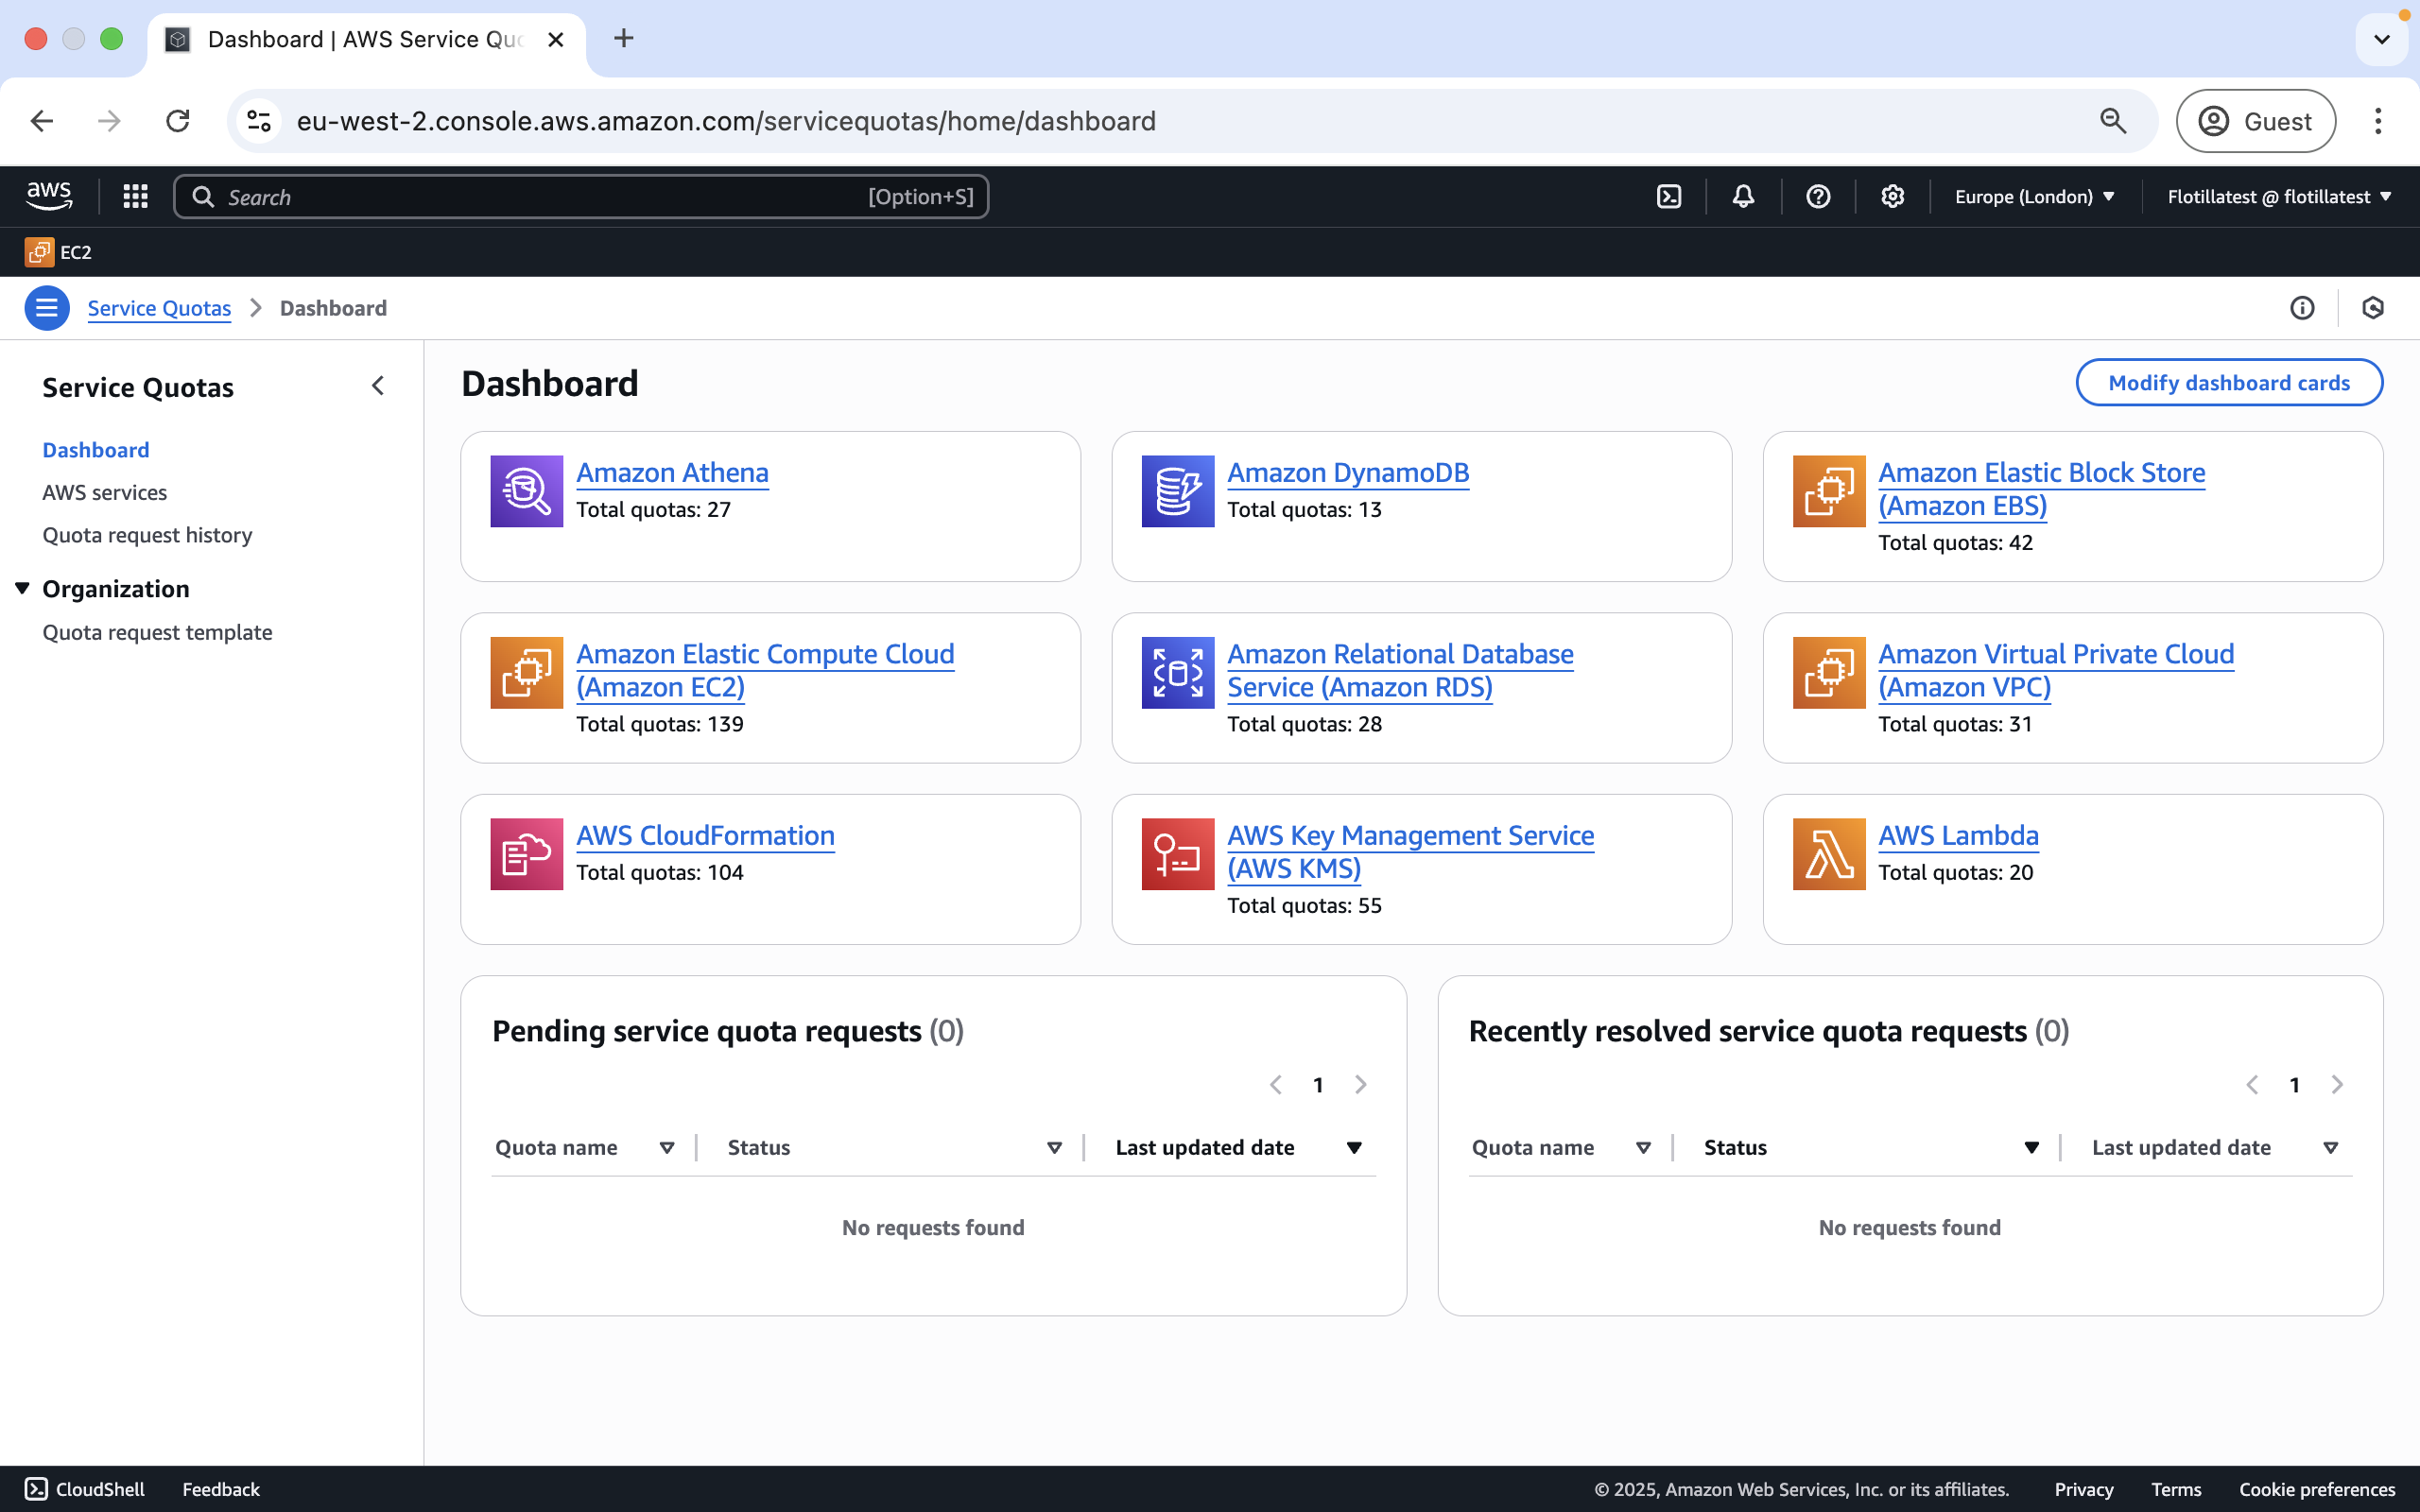
Service limits
These are accessed via the Services Tab of the Management Console. These are quotas applied to various AWS services:
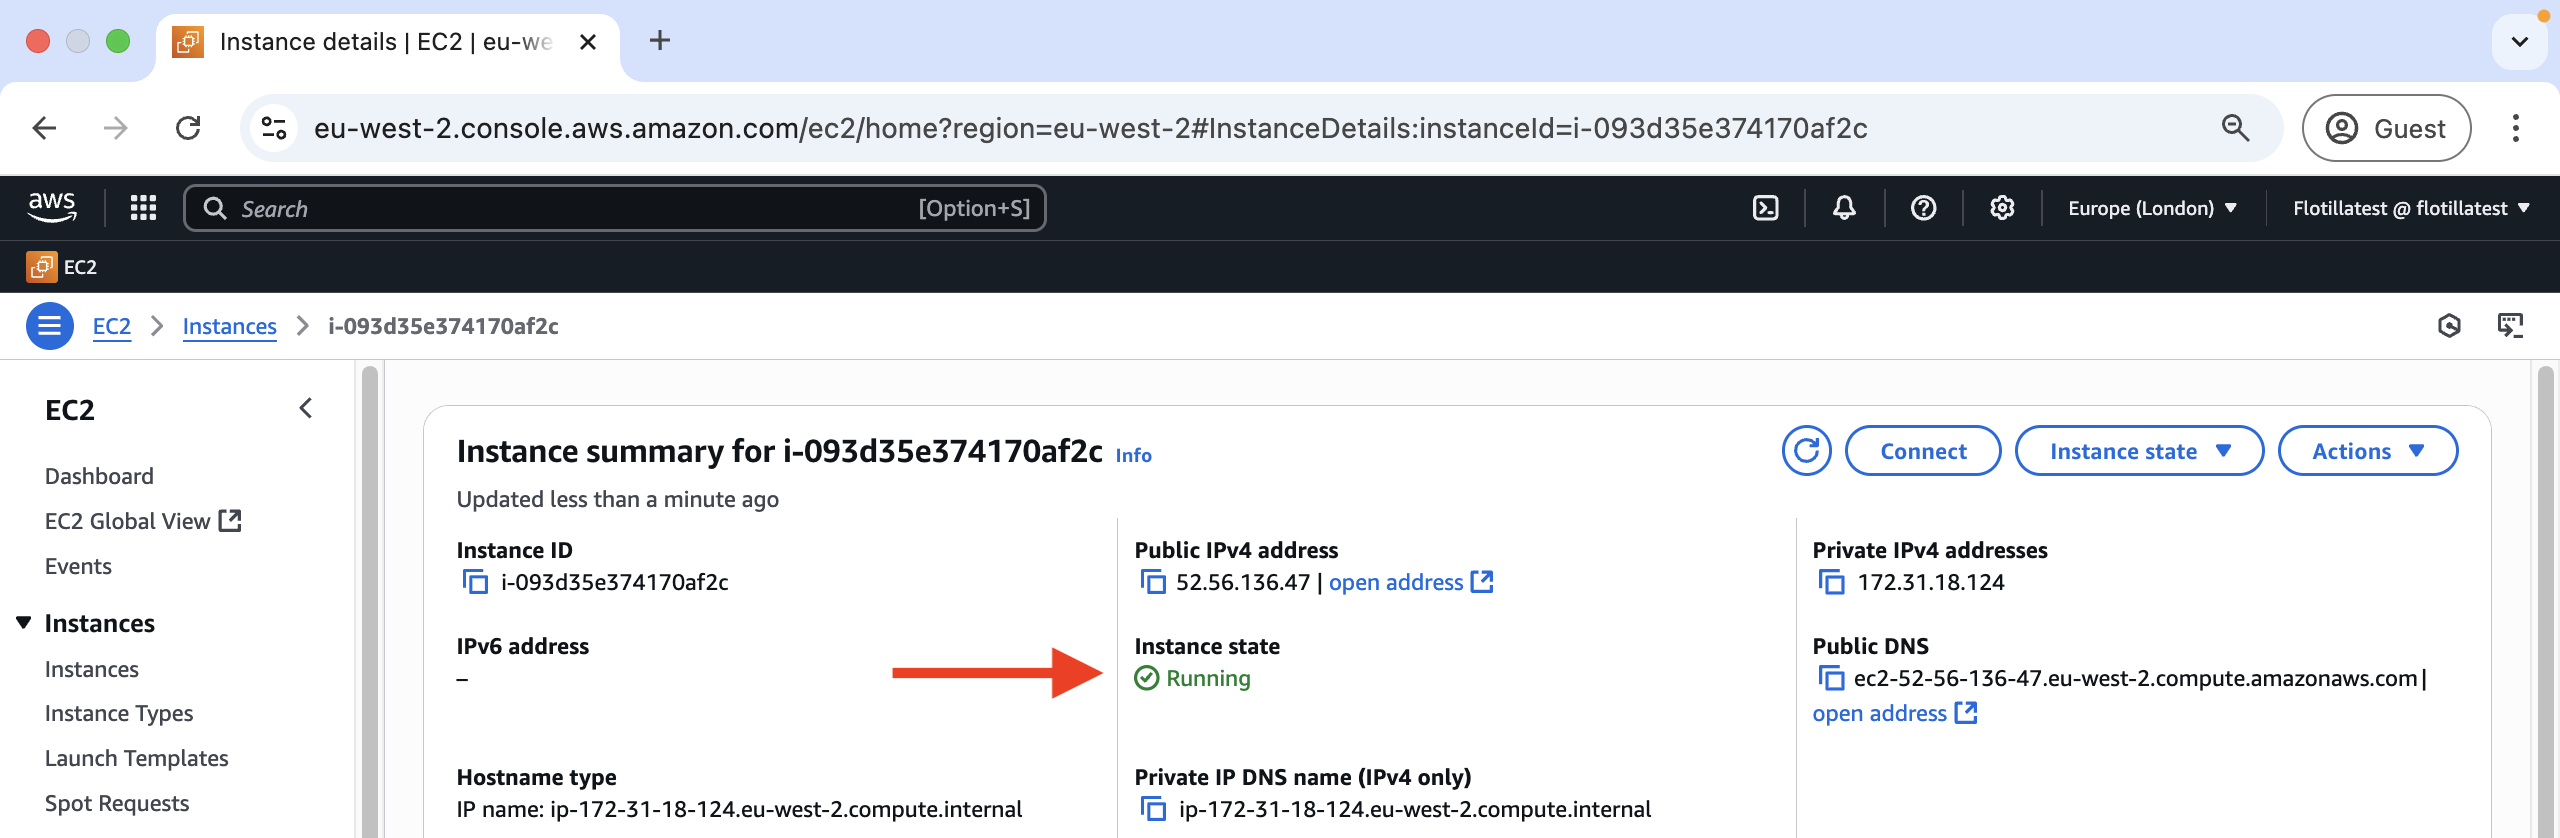
Checking the health status of EC2 instances
The health status of an EC2 instance is displayed under the instance state metric here:
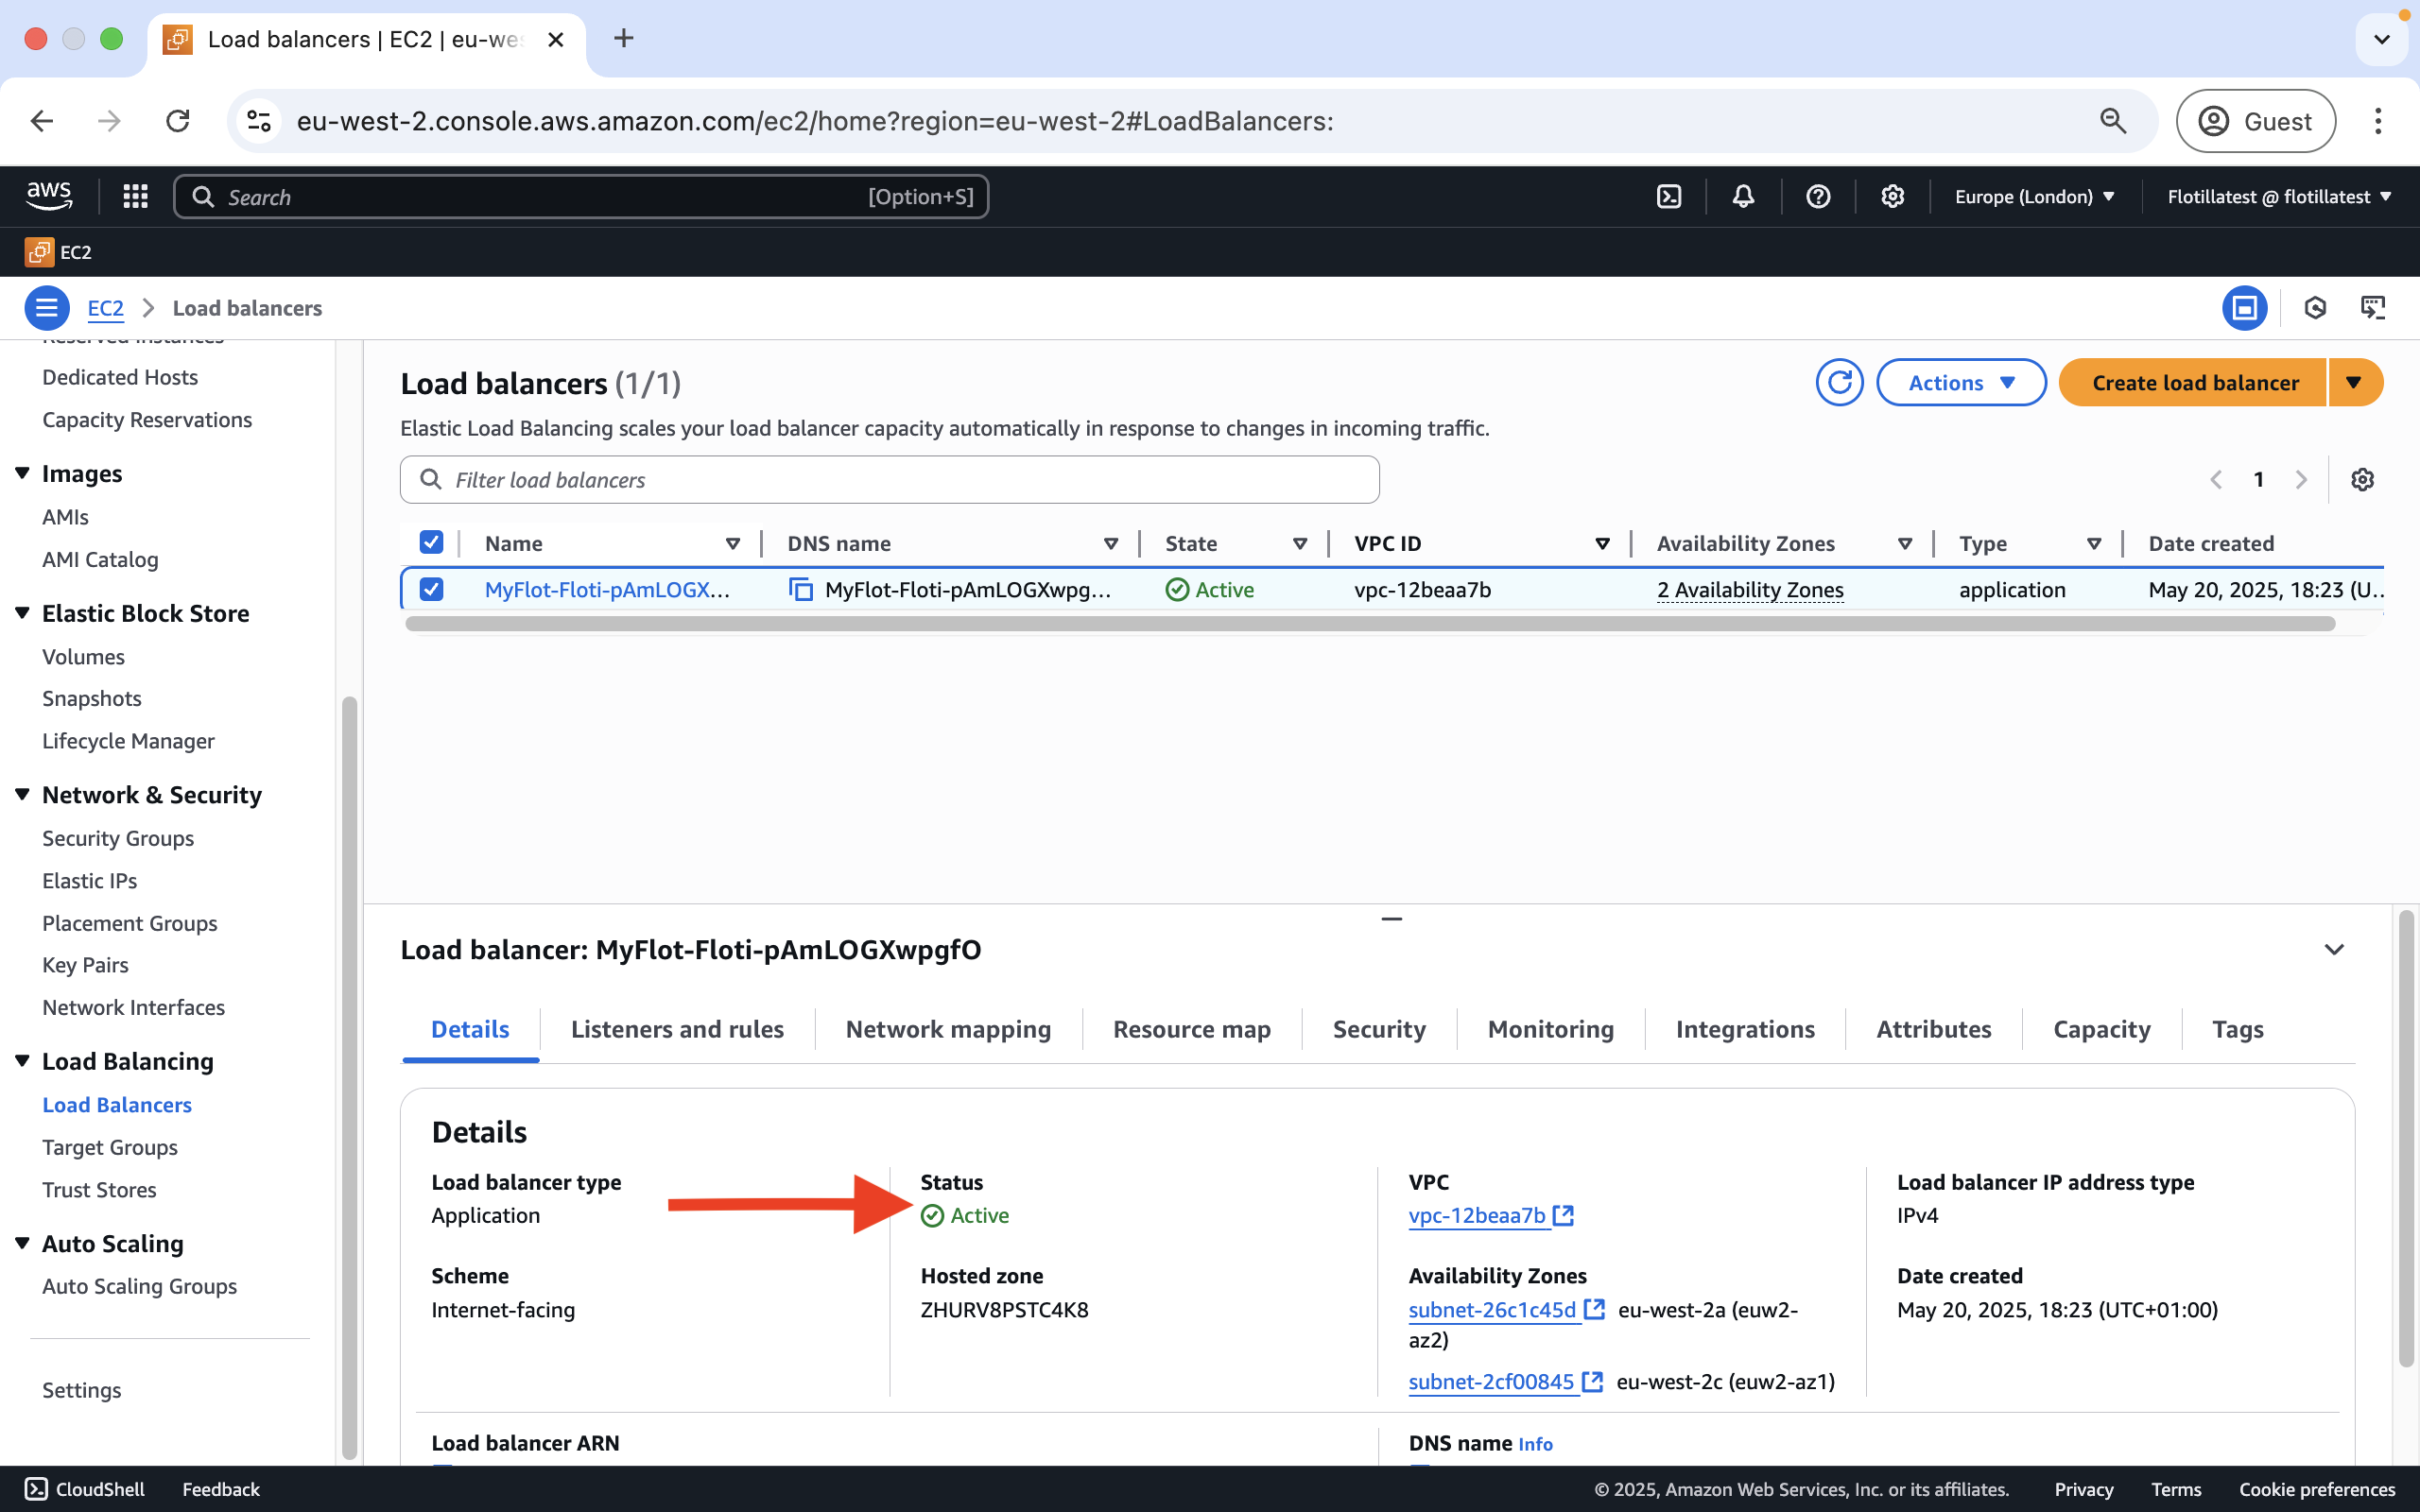
Checking the health of an Elastic Load Balancer
This can be viewed here under the status metric:
Backup and Recovery
AWS backups of database instances are enabled by default. Step by step instructions on how to restore a database from a backup are available here
Appendices
Appendix 1: Table of resources created following a successful deployment
|
Type of Resource |
Name |
Reason |
|---|---|---|
|
EC2 Instance |
FlotillaInstance |
Runs the server software. Available in the following sizes: t2.micro t2.small t2.medium t2.large t3.micro t3.small t3.medium t3.large |
|
EC2 Launch Template |
FlotillaLaunchTemplate |
Applies an Instance profile to FlotillaInstance |
|
IAM Instance Profile |
FlotillaInstanceProfile |
Applies FlotillaRoleSecret to FlotillaLaunchTemplate |
|
Route53 Record |
FlotillaDNS |
A CNAME DNS record to allow access to the server via the loadbalancer |
|
LoadBalancer Target Group |
FlotillaTargetGroup |
Points the LoadBalancer at the EC2 instance |
|
LoadBalancer |
FlotillaLoadBalancer |
An EC2 Application LoadBalancer. Allows redirecting |
|
LoadBalancer Listener |
FlotillaLoadBalancerListener |
Listens to port 443. |
|
LoadBalancer Listener |
FlotillaLoadBalancerListenerExternal |
Listens to port 65500 |
|
Elastic IP |
FlotillaEIP |
Assigned a publicly accessible IP address to the Instance |
|
IAM Policy |
FlotillaRolePolicy |
A Policy which, with Flotilla Role Secret, allows the EC2 Instance to read the RDS Secret and to send SES messages. |
|
IAM Role |
FlotillaRoleSecret |
Used in conjunction with the IAM Policy above to allow the EC2 Instance to read the RDS Secret and to send SES messages. |
|
RDS Database |
FlotillaDatabase |
Holds the long-term storage for flotilla. Available in the following sizes: db.t3.micro db.t3.small db.t3.medium db.t3.large db.t2.small db.t2.medium db.t2.large |
|
Security Group |
FlotillaLBSecurityGroup |
Allow HTTPS/443 access to Flotilla to a specific CIDR block |
|
Security Group |
FlotillaLBExternalSecurityGroup |
Allow RPC/65500 access to Flotilla to a specific CIDR block |
|
Security Group |
FlotillaSecurityGroup |
Allow SSH/22 access to Flotilla to a specific CIDR block |
|
Security Group |
FlotillaCacheSecurityGroup |
Allow Memcache/11211 access to Memcached from EC2 Instance |
|
Security Group |
FlotillaDBSecurityGroup |
Allow MySQL/3306 access to RDS from EC2 Instance |
|
Security Group |
FlotillaSecurityGroupLB |
Allow HTTP/80 access from Loadbalancer to Flotilla |
|
Certificate |
FlotillaCertificate |
Assigned to loadbalancer to allow HTTPS access to Flotilla |
|
ElastiCache Cluster |
FlotillaCache |
Session storage for Flotilla |
|
ElastiCache Subnet Group |
CacheSubnetGroupName |
Assigns the subnets in which the cache should exist |
|
ElastiCache ParameterGroup |
CacheParameterGroupName |
Required for the ElastiCache setup |
Note: Public resources created during deployment may include HTTPS, SSH and RPC ports. The customer must configure these so they are exactly as public or private as their needs require.
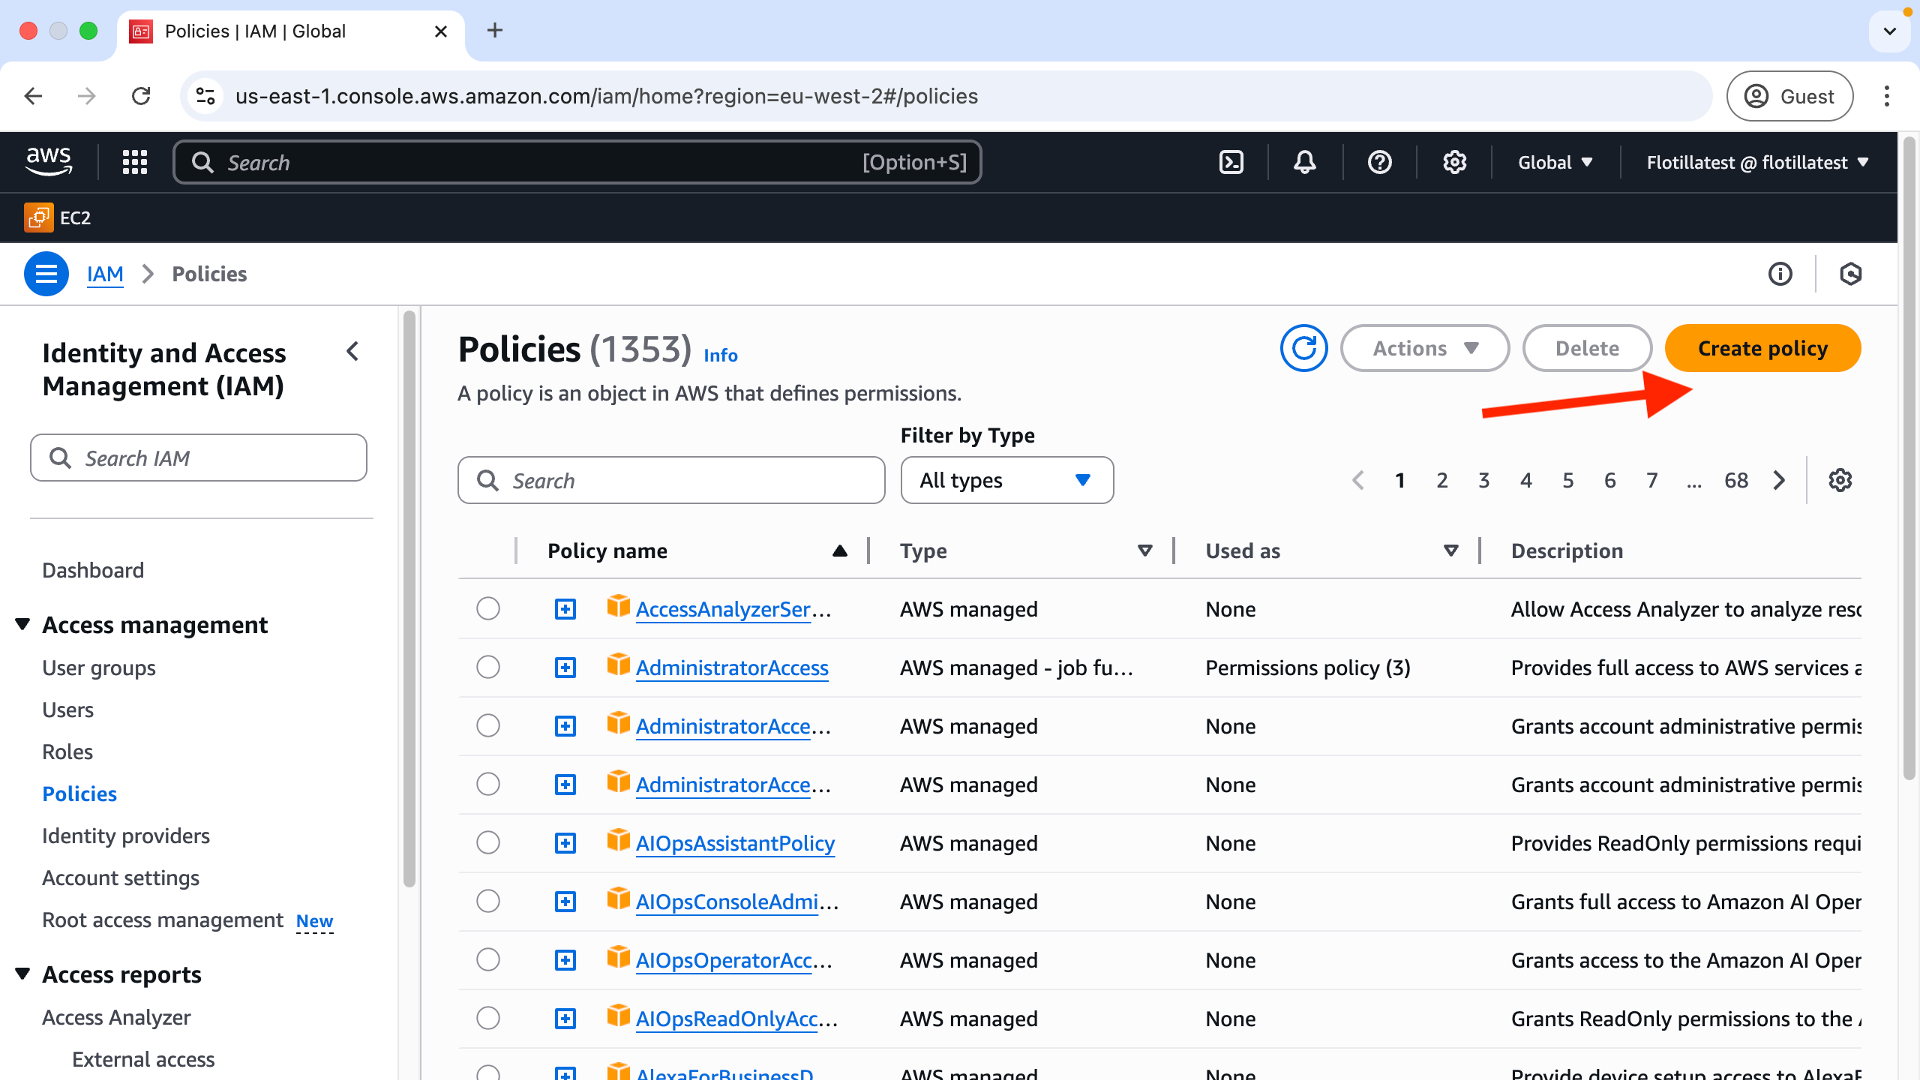
Appendix 2: Creating an IAM policy in AWS
Step 1: Go to the IAM page in AWS and select ‘Create Policy’:
Step 2: Select json policy:
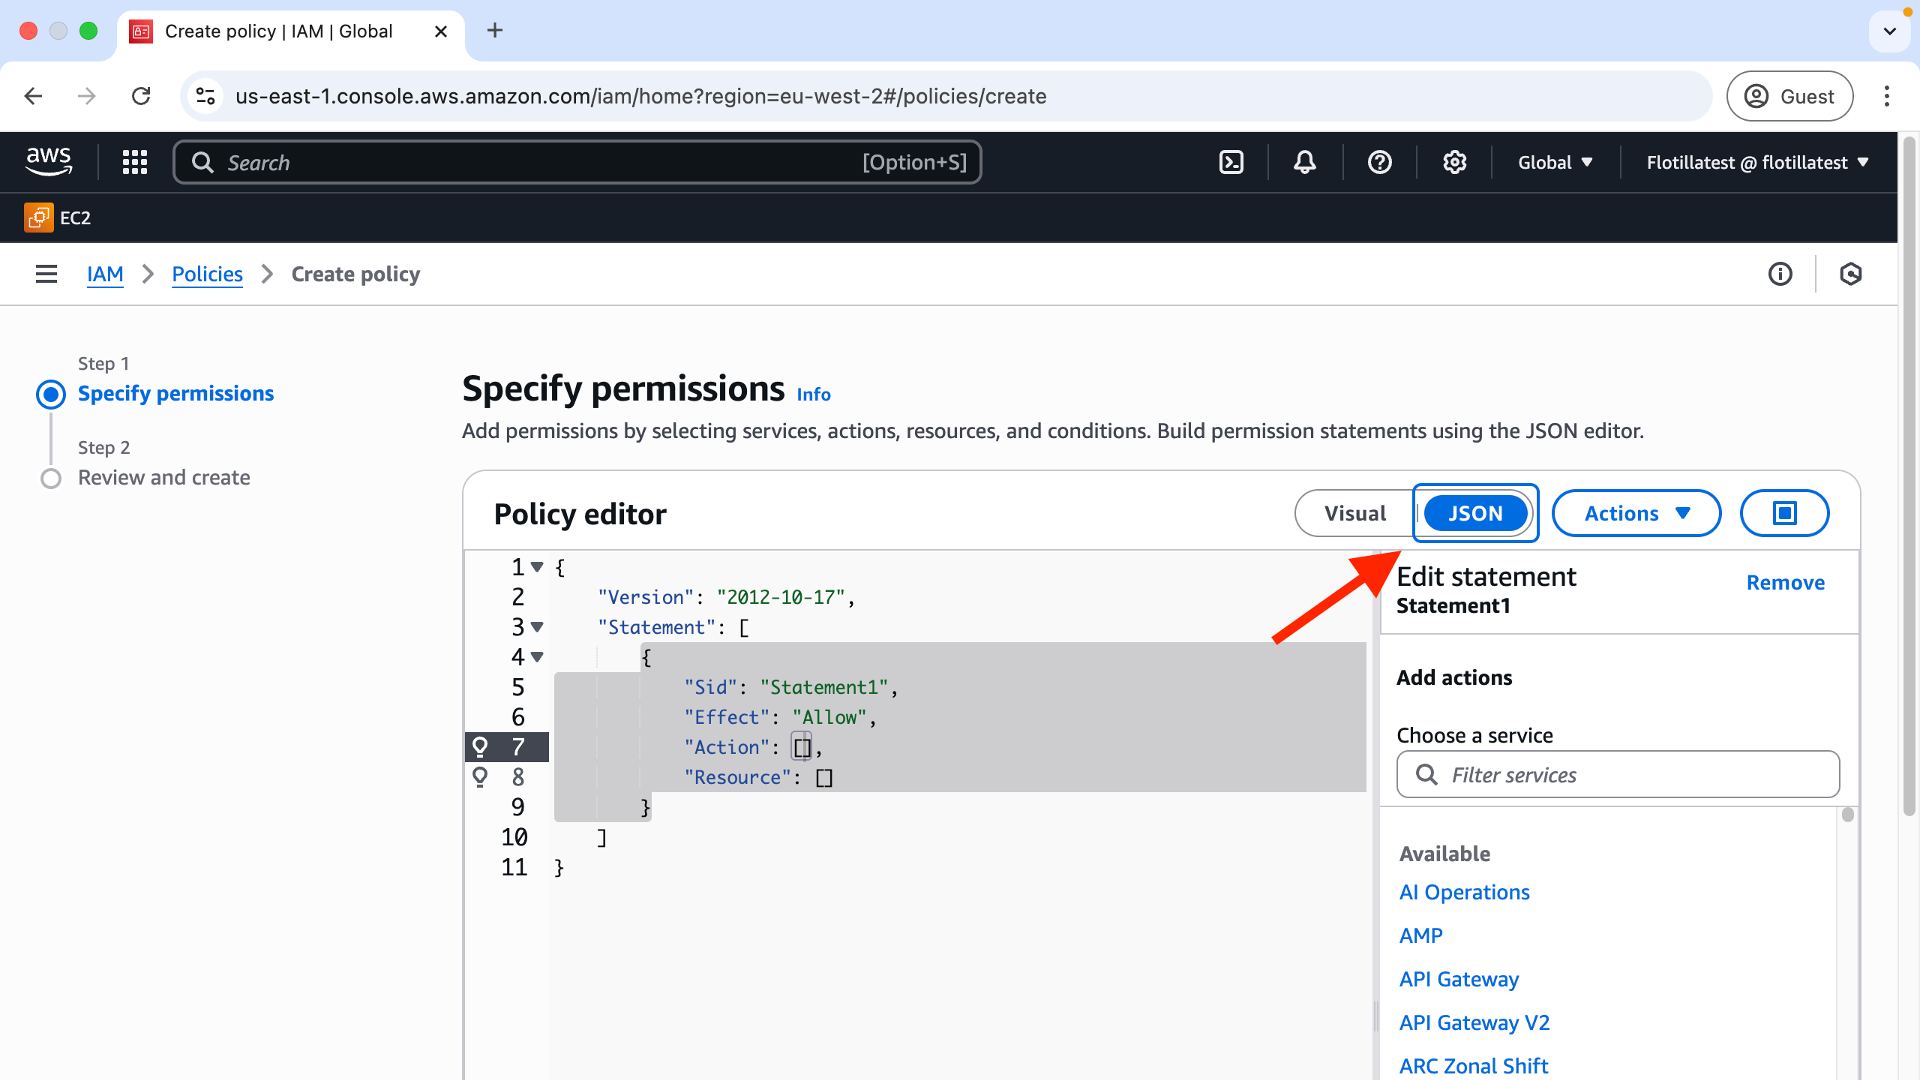
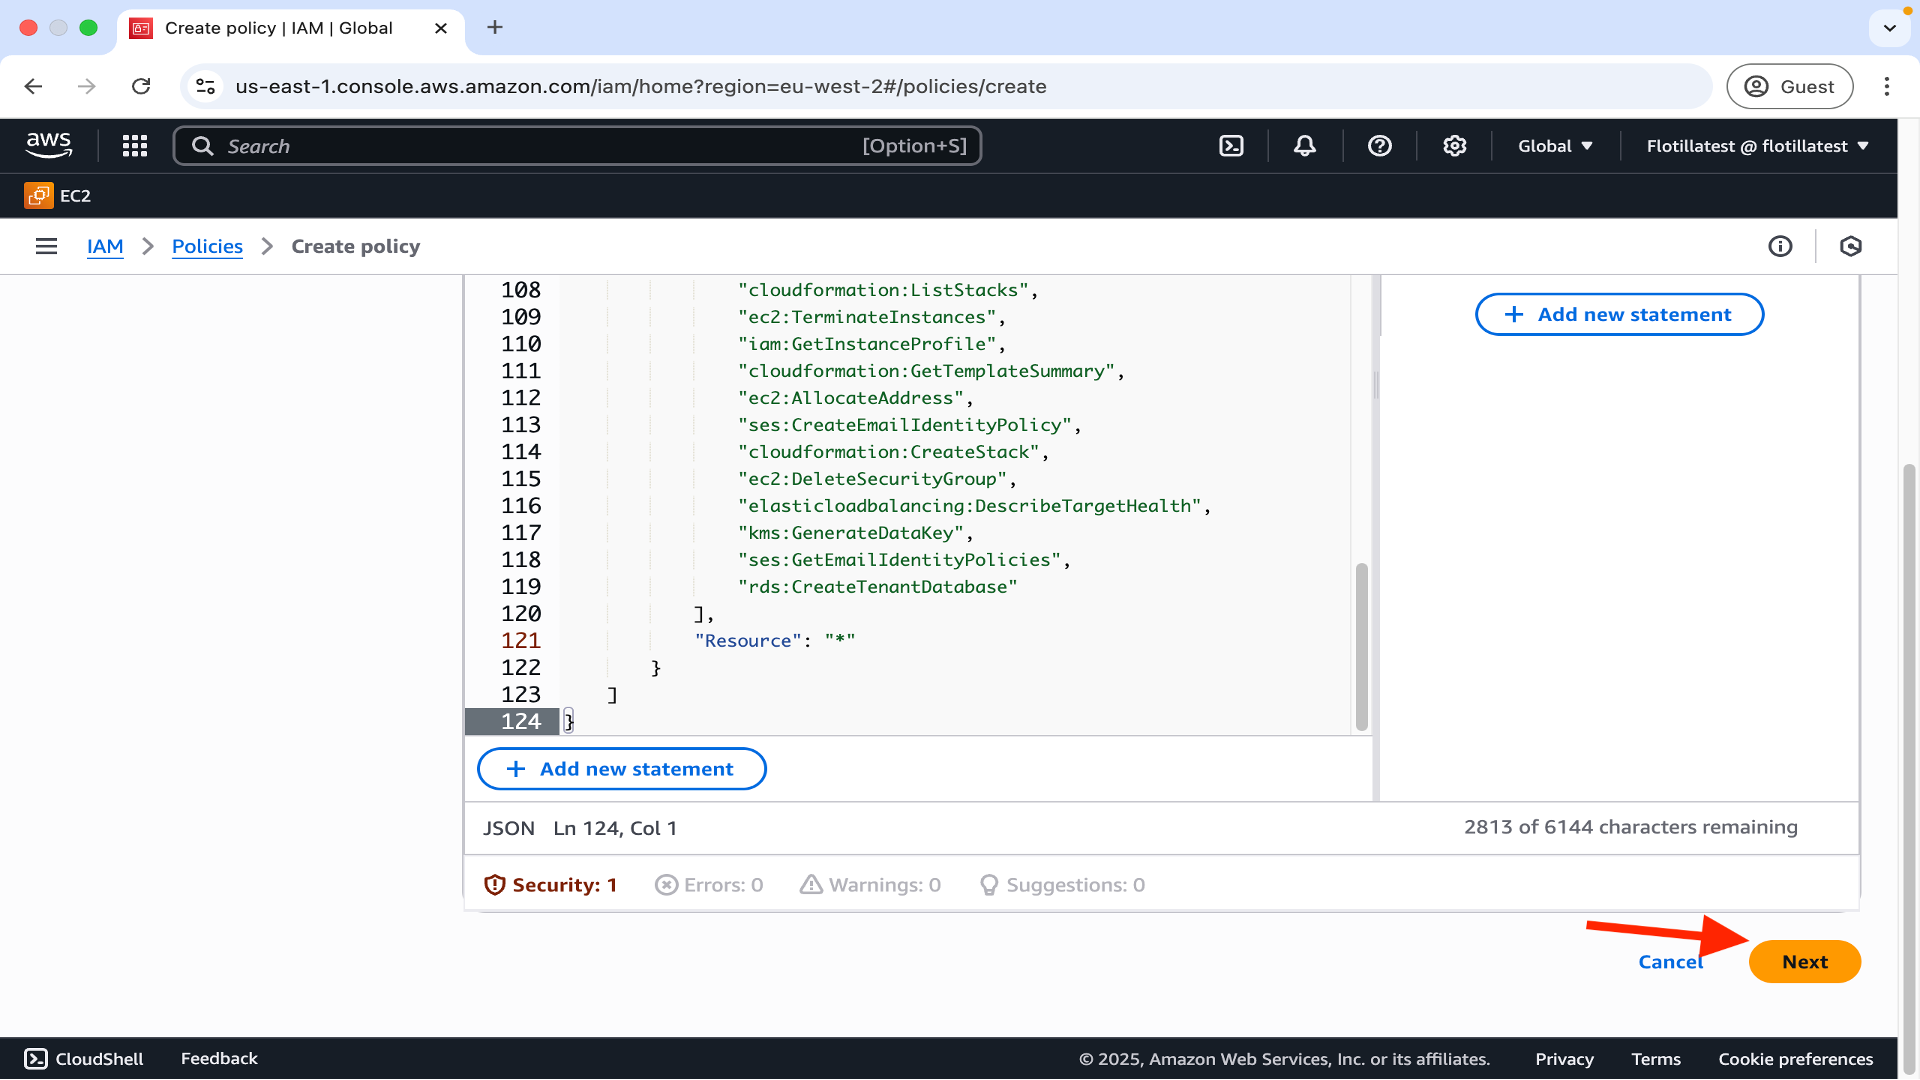
Step 3: In the main policy editor field delete the default code and replace with the code provided here. Click ‘next’ on the bottom right:
Step 4: Now apply your newly created policy to a group which contains your user.
Appendix 3: Adding additional email addresses
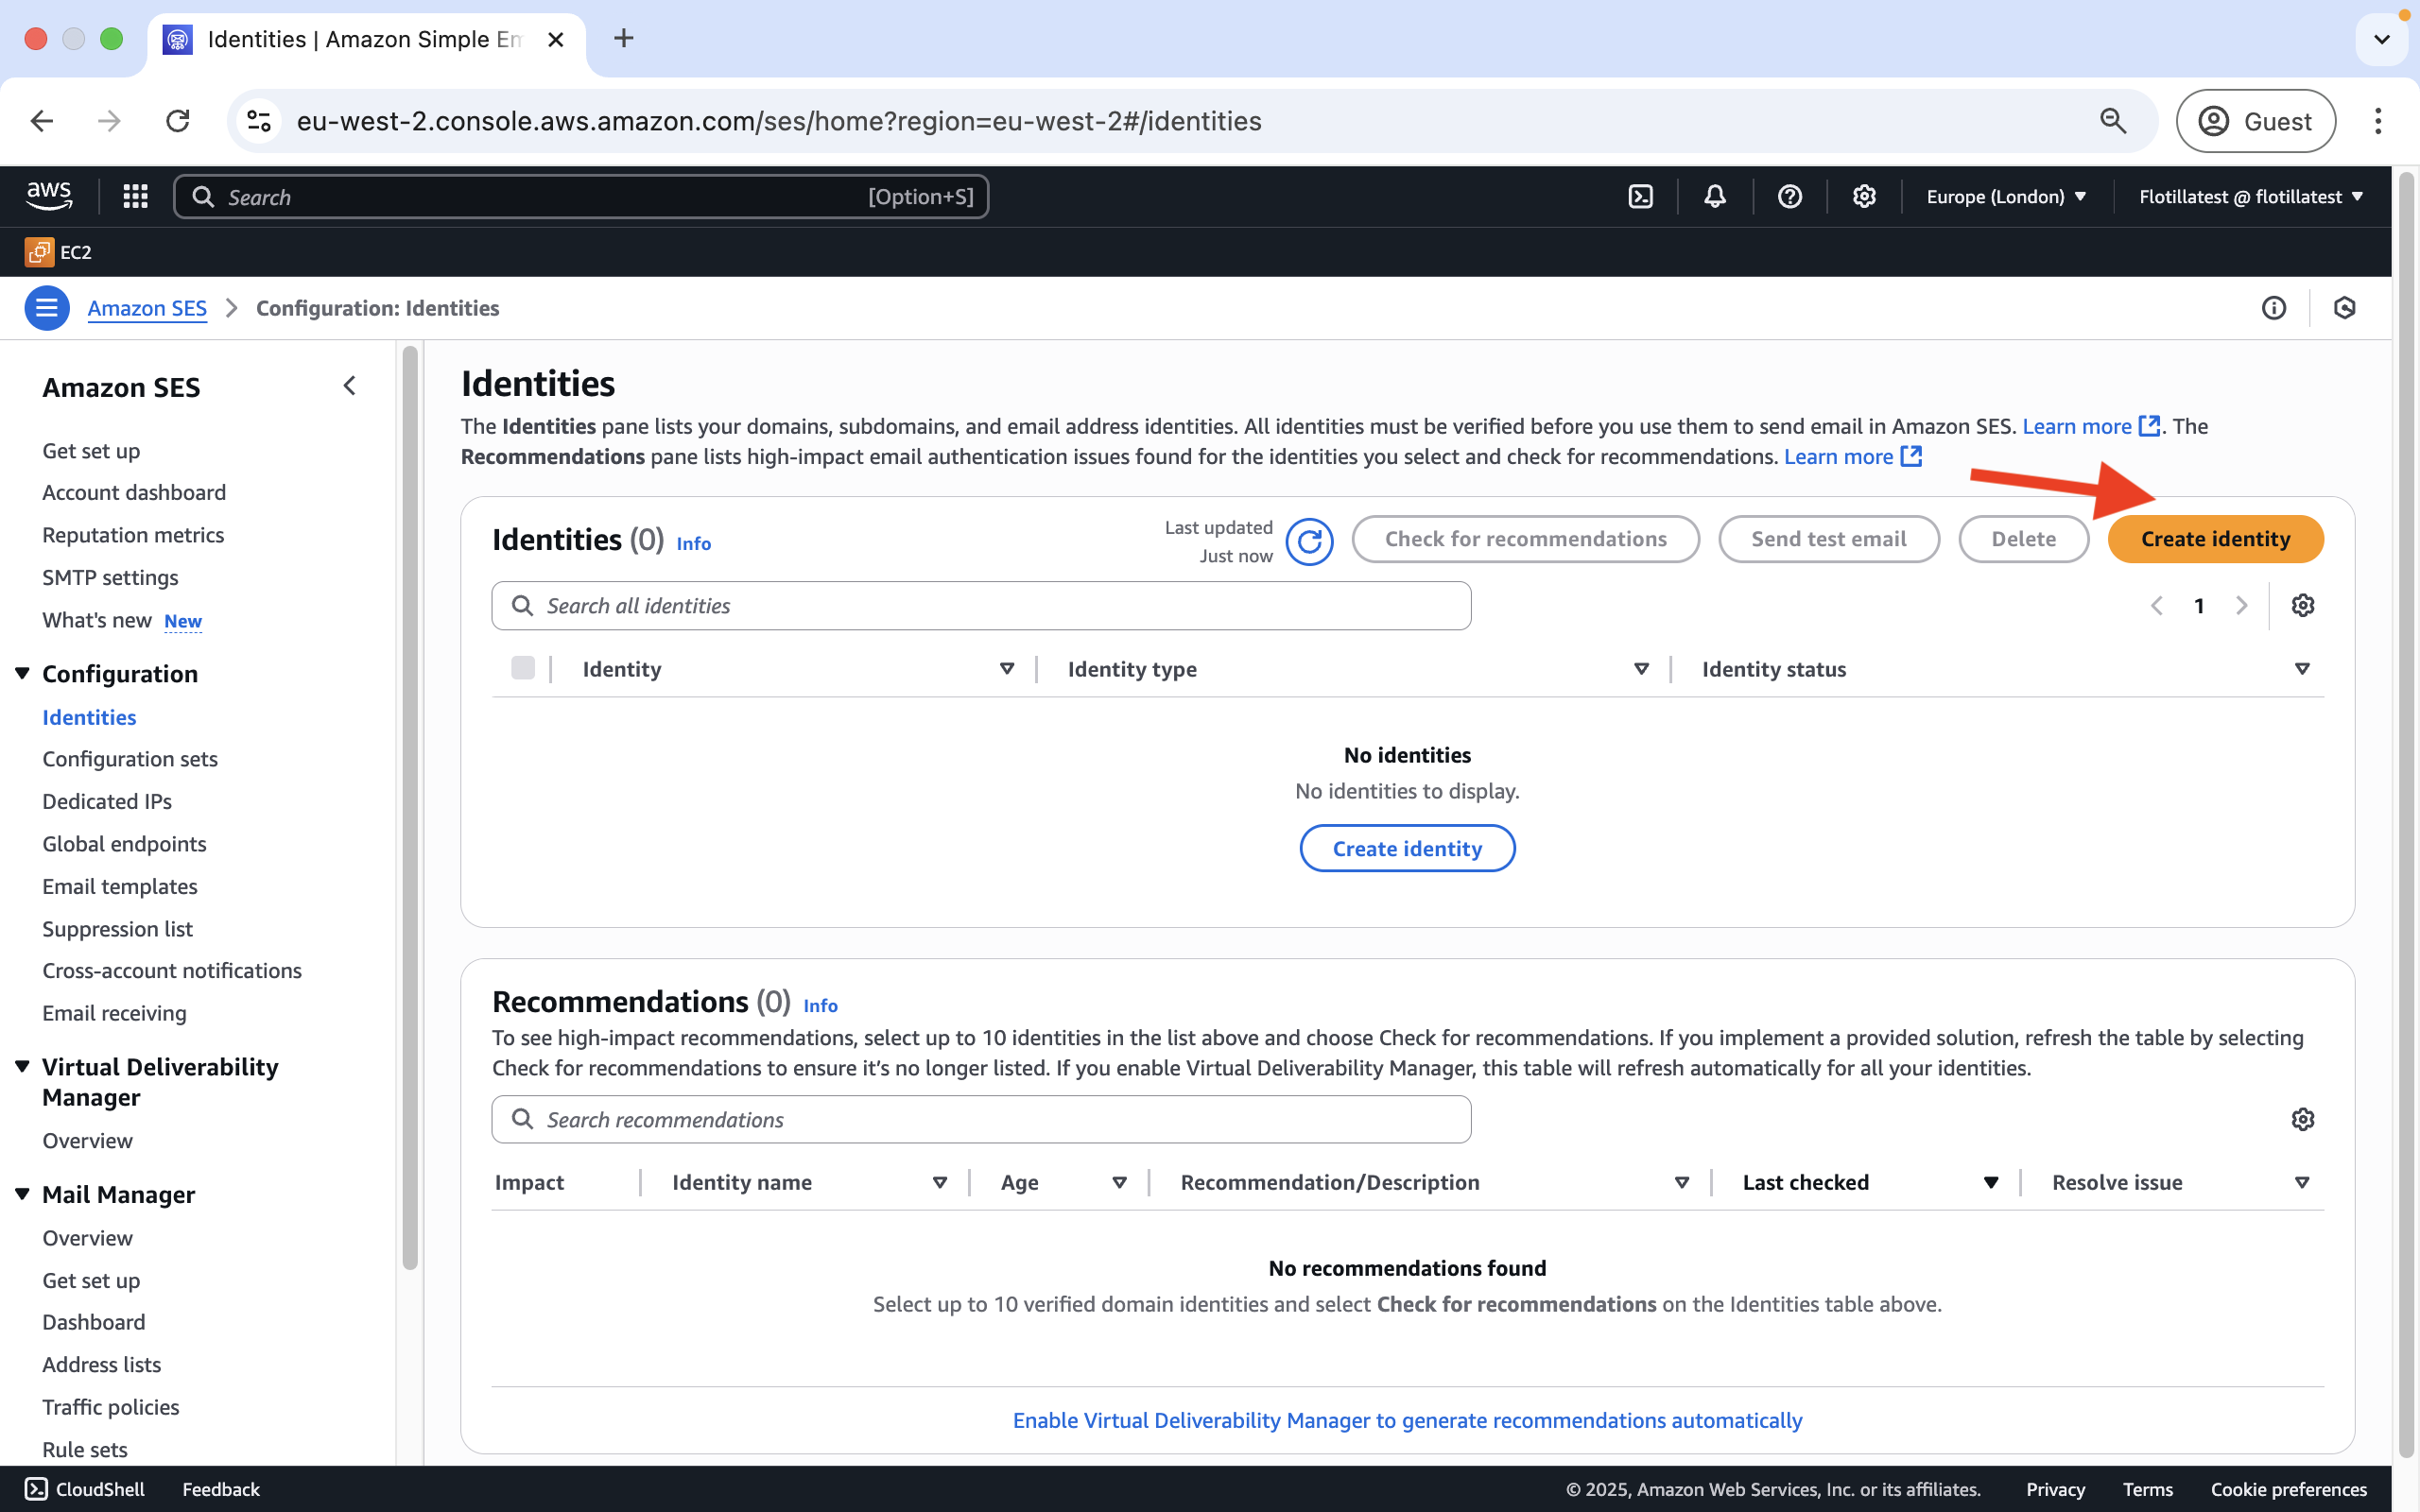
Step 1: Under Amazon SES>Configuration Identities click on Create Identity:
-
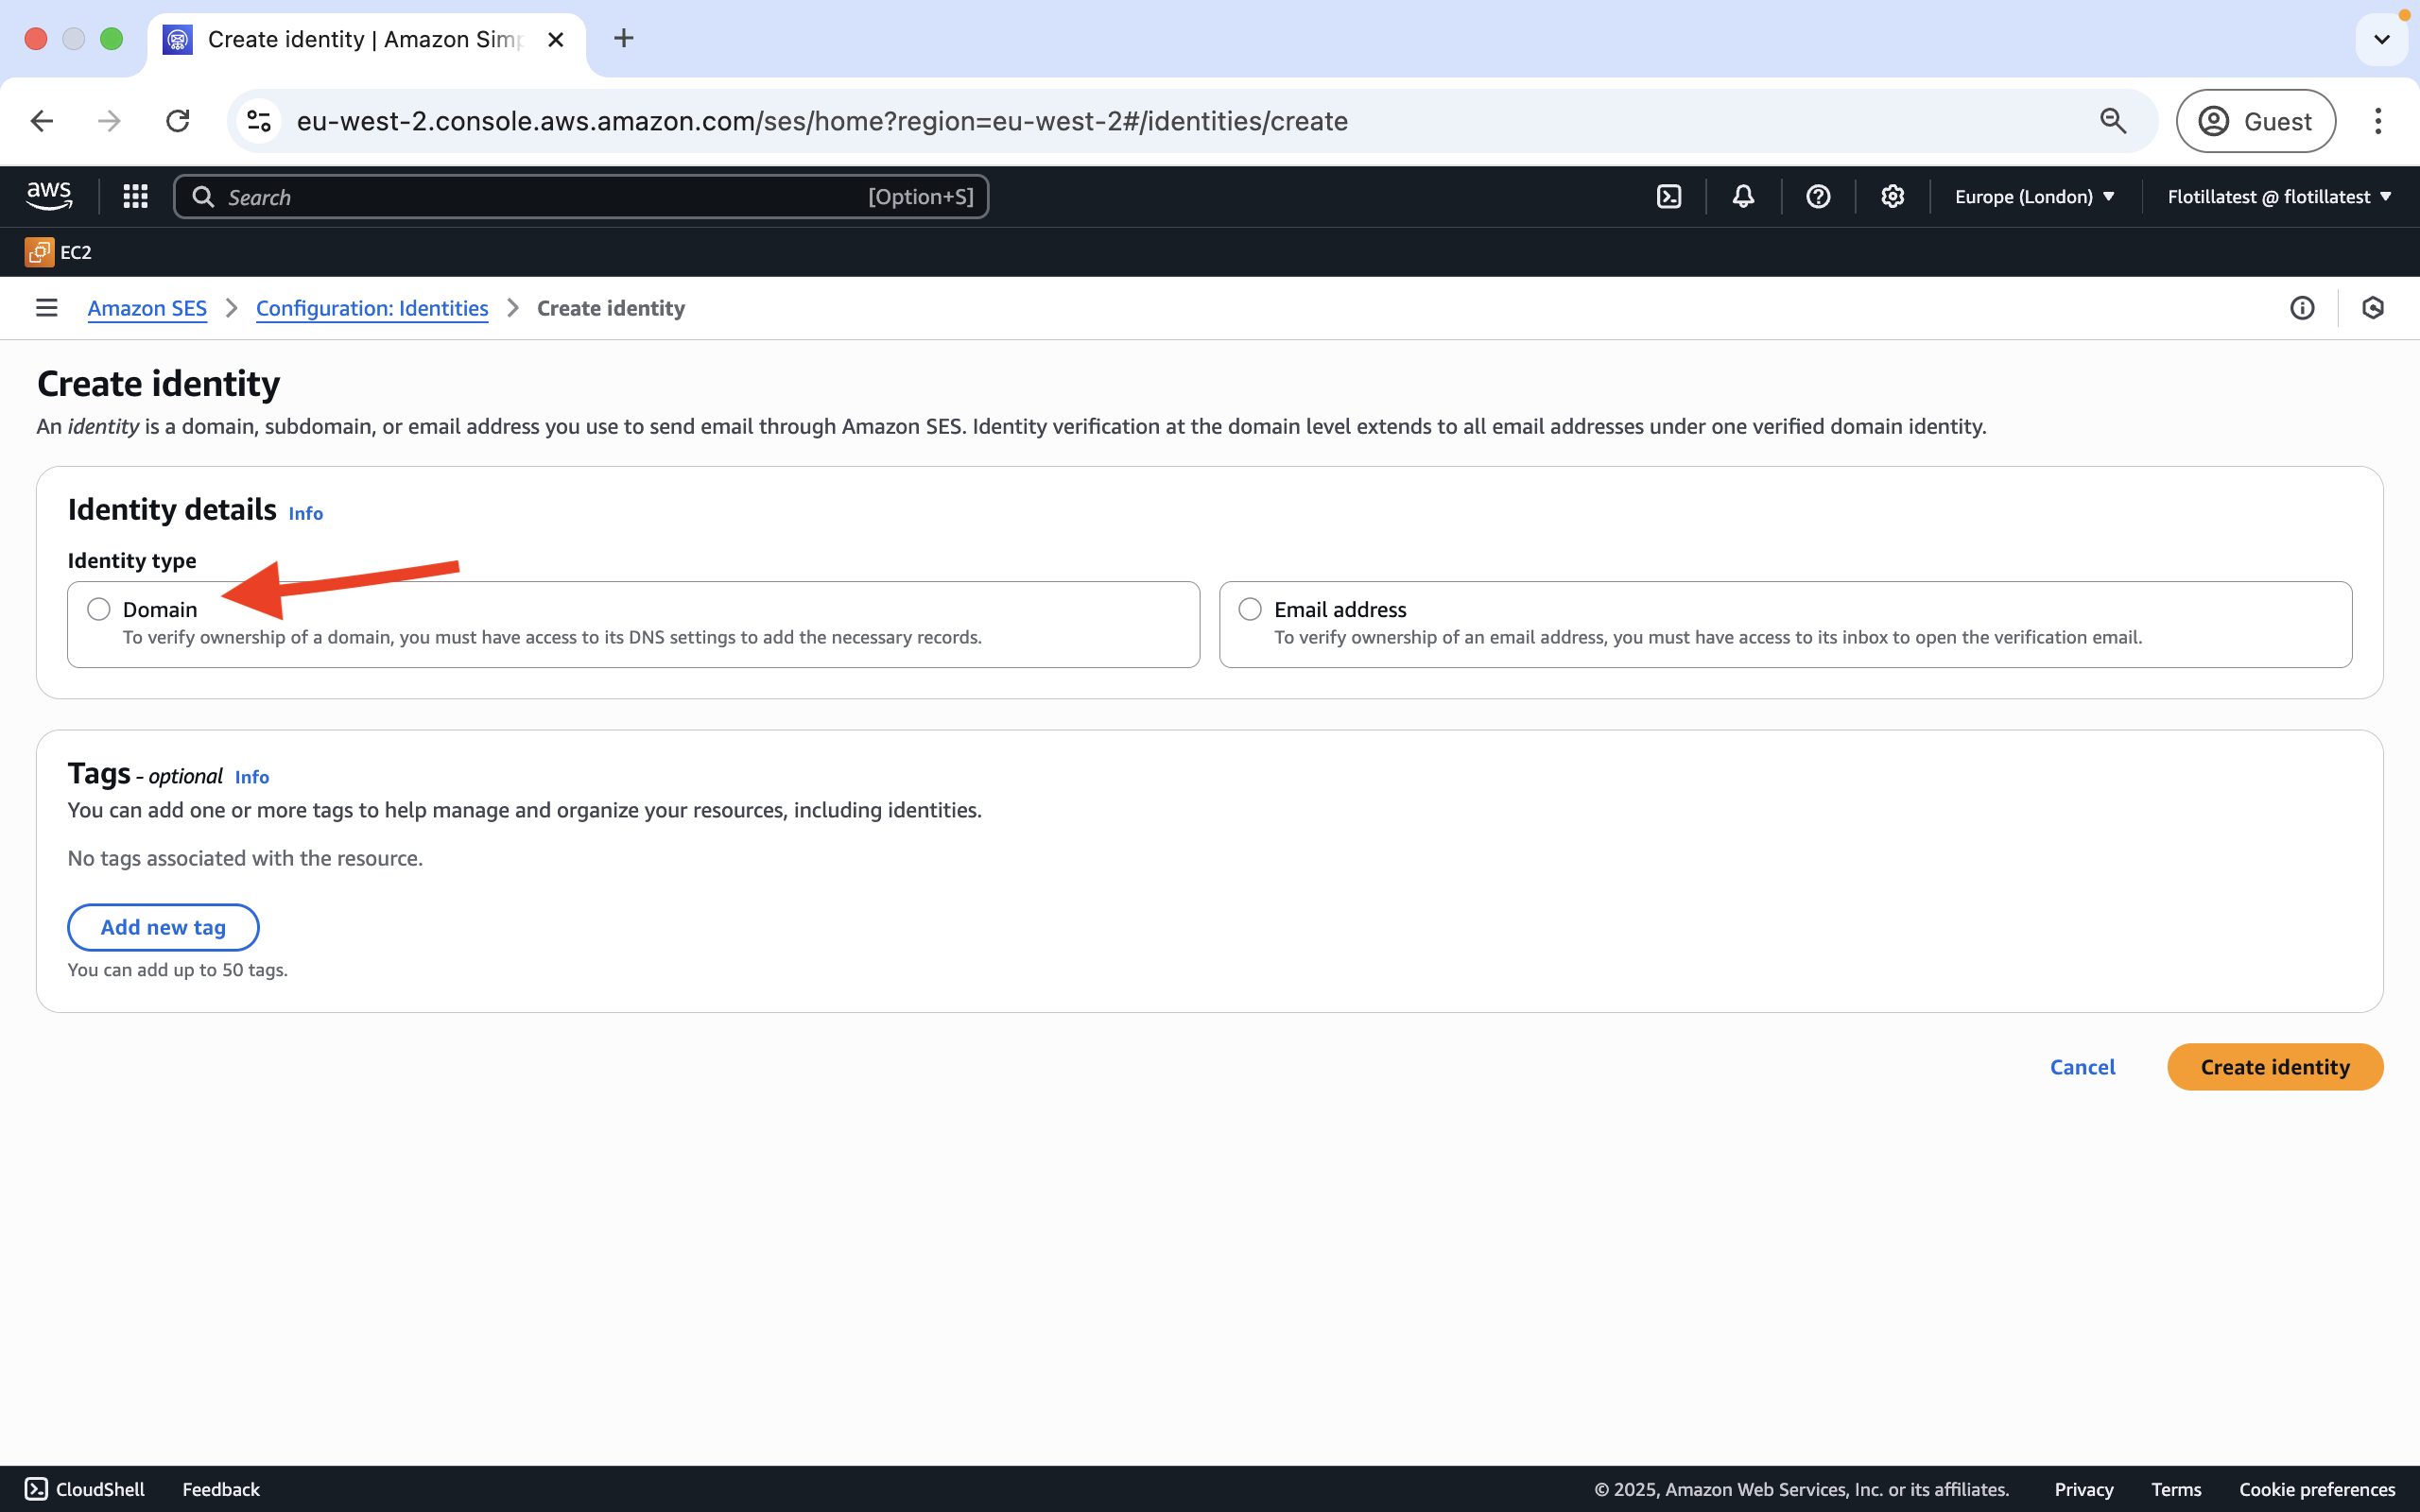
Choose
Domaintype and then click on Create Identity:
-
Accept the DKIM defaults and advised signing length and click on Create Identity. Lastly AWS will ask you to verify ownership of this identity by configuring DKIM in the domain's DNS settings using the CNAME records provided.
Appendix 4: Recommended instance sizes
We suggest the current instance sizes for deployments, depending on the number of clients expected to be checking in.
|
Number of Clients |
EC2 Instance Size |
RDS Instance Size |
|---|---|---|
|
< 10 |
t3.micro |
db.t3.micro |
|
< 100 |
t3.small |
db.t3.small |
|
< 1000 |
t3.large |
db.t3.large |
Appendix 5: Regions supported
Currently Flotilla is available in Europe, North America and Australia. Please note that support tickets logged from North America and Australia will receive an initial response within one (UK) business day.